Page is loading ...


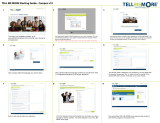
Tips for using this guide
l
Use this guide anytime, anywhere, and on any device.
l
Try one page at a time with your class. Learn, try, and reflect.
l
Make existing content more interactive.
l
Review a page a week with your teaching team. Share and reflect.
l
Are you campus leadership? Email a page a week as a challenge. Prizes help!
l
Collaborate with other teachers online @SMARTpln
l
Connect and share on social media #SMARTchampion
© 2019SMARTTechnologiesULC. All rights reserved. SMARTBoard, smarttech, the SMART logo and all SMART taglines are trademarks or registered trademarks of SMARTTechnologiesULC in the U.S. and/or other countries. All third-party product and company names
may be trademarks of their respective owners. Contents are subject to change without notice. July 30, 2019.
smarttech.com/kb/171534 2

smarttech.com/kb/171534 3
The SMART Learning Suite
Display software
Exclusive to SMART Board interactive displays,
SMART Ink® software enables teachers to write
over videos and websites, and into PDFs and
Microsoft Office® files, and save notes right in
the file.
SMART Ink 4
SMART Ink Document Viewer 5
Online software
With SMART Learning Suite (SLS) Online, you
can create lessons, activities, and assessments
anywhere, add interactive features to static
lessons, and share to student devices.
Sign in to and set up SLS Online 6
Get your students signed in 7
Create a game-based activity 8
Create a formative assessment 9
Create a multi-page lesson 10
Import a PDF and add interactivity 11
Import a PowerPoint and add interactivity 12
Import Google Slides, Docs, and Sheets 13
Send a SMART Notebook lesson to
SLSOnline 23
Add an blank page 24
Add an Instant Shout It Out! activity 25
Make a page a Handout activity 26
Create a collaborative Workspace activity 27
Share student access link to lesson 28
Desktop software
SMART Notebook® software for Windows and
Mac comes with lesson-creation tools, subject-
specific features, and endless ways to wow
students of any grade level.
Build and save a SMART Notebook lesson 14
Share a SMART Notebook lesson 15
Create a game-based activity 16
Create a formative assessment 17
Insert a YouTube video 18
Use SMART Notebook’s pen tools 19
Use widgets to add interactivity 20
Working with images 21
Use the infinite cloner 22

SMART Ink
Steps
1
Pick up and write
When you pick up one of the
display’s pens, SMART Ink’s
dynamic toolbar appears. Start
writing, even on the desktop.
2
Customize your pen style
Tap the dynamic toolbar and
choose the pen. A window
opens in which you to select a
pen or highlighter, the ink
color, and line thickness.
3
Use the Toolbox
Tap the dynamic toolbar and
choose the toolbox. Spotlight
or magnify an area or use the
Screen Shade to slowly
reveal the screen in any
application. Easily navigate to
any website using the ink-to-
text tool.
4
Capture and save
In the toolbox, tap Capture to
take a screen capture of any notes.
Save it to your desktop or add it
directly to SMART Notebook.
Instructional ideas
l
Open a piece of writing (for example, a poem), and use the toolbox’s Screen Shade tool to cover
your screen. Lower the shade, one line at a time, and students can highlight figurative language
examples, circle rhyming patterns, and so on.
l
On an image of a map, use the toolbox’s Spotlight tool to shine a light on certain areas. Use the
magnifier to zoom in on other areas of the map.
l
Find an article online for students to read and annotate. Identify details that support the big idea
of the article, highlight important vocabulary words, or identify inference evidence.
l
Search the internet for an image of a graphic organizer. Zoom in. As a class or in small groups,
ask students to complete the graphic organizer.
l
Use the toolbox’s Capture tool to grab a screen capture of student work.
l
Teachers and students can make notes on Microsoft PowerPoint and Word documents–a
perfect way to use lesson material you've already created!
NOTE
SMART Ink is available only on SMART Board interactive displays with SMART software installed.
smarttech.com/kb/171534 4

smarttech.com/kb/171534 5
SMART Ink Document Viewer
Steps
1
Open SMART Ink Document Viewer
Open SMART Ink Document Viewer on your
computer from the Start menu (Windows) or
from Finder (Mac).
2
Open a PDF
Tap the open icon and browse to
and open the PDF you would like
to use in your lesson. Tap Zoom
In or Zoom Out to fill the
screen.
3
Write with SMART Ink
Pick up a pen and
makes notes on the
PDF. Tap SMART Ink’s
dynamic toolbar and
change the pen's
style (type, color, and
thickness) to focus
attention on learning.
4
Save your work
Save your work by tapping Save.
Instructional ideas
l
Students can use SMART Ink Document Viewer in centers and group collaboration to work on
PDFs on the SMART Board.
l
Annotate over text and passages. Identify details, big ideas, facts and opinions, vocabulary,
examples of figurative language, editing and revising, and so on.
l
Students can add ink and collaborate on a graphic organizer, such as a Venn diagram, Frayer
Model, T-Chart, or time line.
l
Write or draw on PDF curriculum resources, such as worksheets, charts, and textbook materials.
l
Find an article and have students work in teams to create a piece of Blackout Poetry by leaving
only some of the words visible.
l
Download a Google Doc or Google Slide as a PDF and open it in SMART Ink Document Viewer.
Teachers and students can now write or draw over the PDF.
l
Create a divided workspace for students to work in rotations.
NOTE
SMART Document Viewer is available only on SMART Board interactive displays with SMART
software installed.

Sign in to and set up SLS Online
Steps
1
Create an account
Go to hellosmart.com, scroll
down, click Are you a
teacher?, and then click
SIGNIN.
If this is your first time signing
in, you’ll need to set up a
SMART account first.
2
Sign in
Select your school Google or
Microsoft account and click
Next.
Enter your account email and
password to sign in.
3
Customize your library
Click Edit Class to personalize
your SLS Online lesson library
by adding a fun banner. You
can also reset your Class ID
and change your class name.
4
Begin building
After you've signed in and
customized your library,
you're ready to import or
create lessons.
Instructional ideas
l
In the lesson library, navigate to Edit Class. Watch video.
l
Rename your class
You can change the name that appears at the top of the lesson library when students join your
class in SLS Online.
o
Capture students' attention when studying a book by naming the class after an important
character, such as the protagonist or antagonist.
o
To build relationships, name the class after a student when it’s a student’s birthday.
o
Introduce a unit of study by naming the class after a related person, place, or topic. Students
can try to guess what they will be studying.
l
Add a class banner
You can also add and change the class banner (the background that appears behind the name).
o
Change the class banner according to the unit of study.
o
Build relationships by using a student's artwork as the banner.
smarttech.com/kb/171534 6

smarttech.com/kb/171534 7
Get your students signed in
Steps
1
Open SLSOnline
Go to hellosmart.com,
scroll down, click Are
you a teacher?, and
then click SIGNIN.
If this is your first time
signing in, you’ll need to
set up a SMART account first.
2
Have students sign in or join as
guests
Students can connect to your
class by signing in with their
Google or Microsoft student
accounts, or they can join as
guests. Then they type their
names.
3
Students enter the class ID
Students enter the class ID, or, if
they've connected to the class
before, select the class’s name.
4
Students join the lesson or wait in the
lobby
If your lesson is running, it
appears automatically on
student devices. If you haven’t
started the lesson, students are
taken to the class lobby until you start the
lesson.
Instructional ideas
Sign In: There are number of instructional uses when students sign in to SLS Online with their Google
or Microsoft account ID.
l Signing in fills in students' names automatically instead of allowing the student to type any name
(great for accountability on assessments).
l Signing in enables you to share a link to the lesson so students access it after class.
l When students are signed in, you can assign them to a collaborative Workspace during the
class, and they can continue working on group projects virtually.
Join as a Guest: Students can join as guests by using only the teacher code.
l Ideal for younger students who don't have a Microsoft or Google account
l Requires only the class ID (great for quick access to content and activities)
l Ideal for multiple students sharing a device
Group Work: SLS Online is useful even for students who don't have a device. Be creative!
l Use one device per table, small group, or center rotation (groups can join using a team name)
l Have partners share a device
l Bring Your Own Device models

Create a game-based activity
Steps
1
Sign in to SLS Online
Go to suite.smarttech.com and sign
in, and then click the Add Content
button.
2
Open the creation wizard
Scroll down and click Start with an
activity to start the SMART activities
creation wizard.
3
Choose an activity and start creating
For a preview of how an
activity works, click the
magnifying glass beside it.
Select the activity you want
and follow the steps to
build it.
4
Name the activity and start playing
Add a title to your activity
and click Finish Editing.
Start the activity by
clicking it in your lesson
library.
Instructional ideas
l
Use SMART activities to get students’ attention, spark curiosity, or introduce vocabulary for the
lesson. Details and ideas: https://goo.gl/V2Hqcx. Example: The Fill In the Blanks activity works
great as a hook. Choose a quote, poem, or definition that connects to your lesson topic. Students
organize the words and reflect on possible meanings. Discuss and share.
l
SMART activities are terrific as learning experiences, practice, and review. Examples: Use Match
‘Em Up for vocabulary or math practice. Try Game Show for a fun review. Super Sort is also great
for reinforcing learning.
l
SMART activities can also be useful for giving students choice in assignments. Flip Out: Give
students a variety of learning experiences and let them choose which they would like to do.
Label Reveal: Give different tasks for parts of an image.
l
Formative assessment and checking for understanding is vital for students and teachers in
providing real-time feedback. Example: Monster Quiz gives instant feedback. The class can
review and dispel misconceptions at the end. In addition, it's just plain fun!
smarttech.com/kb/171534 8

smarttech.com/kb/171534 9
Create a formative assessment
Steps
1
Sign in to SLS Online
Go to suite.smarttech.com and sign
in, and then click the Add Content
button.
2
Open the creation wizard
Scroll down and click Start with an
assessment to start the assessment
creation wizard.
3
Add questions
Create your question set.
Choose from a variety of
question types. Use images
and text.
TIP: Use the menu on the
right to add or edit questions.
4
Finish and launch the assessment
When you’re done, click
Next. Add a title and click
Finish Editing. Start the quiz
by clicking it in your lesson
library.
Instructional ideas
l
The assessments tool is great for formative assessment, as you can get instant data and meet
with students to give them personal and immediate feedback.
l
Create a two-question pre-test. Use the short answer question type so students cannot guess.
Look at the data. Students missed both? Need intervention. Got them all right? Ready for a
challenge. One right, one wrong? Ready for instruction.
l
Teachers can also give a pre-test that allows students to test out of material they've mastered
and work on a passion project or a leveled-up assignment.
l
Create a poll or a survey. This can set the stage for a great Socratic Dialogue or debate with
students. Polls and surveys are also fantastic for building relationships with students and getting
to know who's in your class.
l
Assessments allow you to export student data as an Excel spreadsheet with a click of a button—
this is a powerful feature when giving a summative assessment for a grade.
TIP
Have students enter their last name or sign in with Microsoft or Google so the spreadsheet
matches your gradebook.

Create a multi-page lesson
Steps
1
Sign in to SLSOnline
Go to suite.smarttech.com and sign
in, and then click the Add Content
button.
2
Choose your path
Choose Start with an
Activity or Start with an
Assessment, depending on
how you'd like to begin
your lesson.
3
Add more pages
Follow the on-screen
steps to build the activity
or assessment. Continue
developing your lesson
by adding activities and
assessments .
4
Finish and launch the lesson
Edit the title and click Finish
Editing. Start your lesson by
clicking it in your lesson
library.
Instructional ideas
Add several activities or assessments to create a multi-page lesson.
l
Begin with an activity that reviews important vocabulary.
l
Use an assessment as a pre-test.
l
Add a Shout it Out! activity to gather student connections.
l
Create two leveled activities (based on results of the assessment, have students work on the
activity at their level, either review or extend). Use the Student Pacing feature to allow students
to work at their own pace.
l
Add a Flip Out or Label Reveal activity as a choice board for higher level tasks. This is great for
testing review. Assign the review task only to students who need them. The others can extend to
making higher level connections and applying their knowledge.
Provide several options for students to work with the same type of material. Based on how the
student learns best, they can choose how to work.
smarttech.com/kb/171534 10

smarttech.com/kb/171534 11
Import a PDF and add interactivity
Steps
1
Sign in to SLS Online
Go to suite.smarttech.com and sign
in, then click the Add Content
button.
2
Choose your PDF
Click Start with a File you have and browse
to and select the PDF file to upload.
3
Increasing interactivity
Add SMART activities and
assessments to the PDF.
Convert PDF pages to
Handout or Workspace
activities.
4
Get ready to share
When you’re done, click
Finish Editing in the upper
left-hand corner. Your interactive lesson is
ready to share with students.
Instructional ideas
l
Import a PDF of a graphic organizer, such as a Frayer Model, and turn it into a collaborative
Workspace activity. Allow students to fill in the graphic organizer in teams and present their work.
Add an activity, such as Match ‘Em Up, to help students review the vocabulary words.
l
Add a PDF of an image connected to material you'll share in class. Turn it into a Workspace. Have
students share things they notice, questions they have, and predictions. Add a Shout It Out!
activity at the end and ask students to share their thoughts or conclusions.
l
Find a PDF of a historical document and or speech. Upload it and add an assessment. Ask
students to summarize the document in six words using the short answer question type. Add
additional questions based on the document.
l
Import a PDF of a perplexing math problem. Turn it into a Workspace and divide students into
teams. Have students work to solve the problem four different ways. Have the teams present
their solutions.

Import a PowerPoint and add interactivity
Steps
1
Sign in to SLS Online
Go to suite.smarttech.com and sign
in, then click the Add Content
button.
2
Choose your PowerPoint
Click Start with a file you
have and browse to and
select the PowerPoint file
to upload.
3
Increasing interactivity
Add SMART activities and
assessments to the PPT
presentation.
Convert presentation slides
to independent Handout or
collaborative Workspace activities.
4
Get ready to share
When you’re done, click
Finish Editing in the upper
left-hand corner. Your interactive lesson is
ready to share with students.
TIP:If part of your PPT presentation
formatting isn’t right, try converting it to a PDF
and then uploading.
Instructional ideas
l
Create an engaging lesson for students by importing a PPT file into SLS Online and adding
interactivity. In Editing mode, you can browse through the PPT and delete unneeded pages,
rearrange pages for a better lesson flow, make static pages interactive, and add SMART
activities and assessments.
l
Add a SMART activity to a PPT file to spark curiosity and grab student attention. Begin with a
SMART activity, such as Shout It Out!, to tap into students’ prior knowledge of the subject, which
helps gauge where a student’s entry point of learning begins. Discuss and share. Add other
activities throughout the PPT for formative assessment and real-time checks for understanding.
See Create game based activities.
l
Add an assessment to get instant feedback or to use as a summative assessment. Export results
for grades See Formative Assessment Ideas.
l
Convert a page into an individual Handout activity. This allows for students to add their own
knowledge and understanding on an independent page and learn at their own pace.
l
Convert a page into a collaborative Workspace activity. Students can contribute to the
workspace with pen, text, and images and collaborate in real time. They can also add links to
reference sources. Teachers can enter each workspace and add comments and suggestions.
smarttech.com/kb/171534 12

smarttech.com/kb/171534 13
Import Google Slides, Docs, and Sheets
Steps
1
Import PDF, PPT, Notebook, Slides,
Docs, Sheets
After you’ve connected
Google Drive to
SLSOnline, go to Google
Drive and select New >
More > SMART Learning Suite.
2
Add lessons to G Drive
Click Import from Google Drive to
import resources from your Drive
into SLSOnline, or Import from your
Device to load resources stored on
your computer.
3
Add activities
Add SMART activities and
assessments to the lessons
in your Drive.
Convert a Google Slides,
Docs, or Sheets page to an
Independent Handouts or Collaborative
Workspace.
4
Get ready to share
Click Finish Editing in the
upper left-hand corner when
you’re done modifying the file. Your
interactive lesson is ready to share with
students.
Instructional ideas
l
Create an engaging lesson for students by adding interactivity to a Google file (Slides, Docs, or
Sheets). In Editing mode, you can browse through the file and delete unneeded pages,
rearrange pages for a better lesson flow, make static pages interactive, and add SMART
activities and assessments.
l
Add a SMART activity to a the file to spark curiosity and grab student attention. Begin with a
SMART activity, such as Shout It Out!, to tap into students’ prior knowledge of the subject, which
helps gauge where a student’s entry point of learning begins. Discuss and share. Add other
activities throughout the PPT for formative assessment and real-time checks for understanding.
See Create game based activities.
l
Add an assessment to get instant feedback or to use as a summative assessment. Export results
for grades See Formative Assessment Ideas.
l
Convert a page to a Handout activity so students can add text, images, and drawings to show
their thinking and learning. They can submit their handout to the teacher when they've finished.
l
Convert a page into a Workspace activity. In a collaborative workspace, students can contribute
text, images and draw. They can also add links to reference sources. Teachers can enter each
workspace and add comments and suggestions.

Build and save a SMART Notebook lesson
Steps
1
Open SMART Notebook
From your computer, open
SMART Notebook.
2
Build your lesson
Create a new lesson from
scratch or import a PowerPoint
(Windows only) or PDF file. The
page sorter on the side shows
you the different parts of your
lesson.
3
Make it interactive
Use tools such as the infinite cloner, the
Gallery’s interactive tools, activities, and
assessments to build engaging lessons. Click
the icons below to learn about these tools.
4
Save your work
Click Save to save your
SMART Notebook file.
Instructional ideas
l
Create a three-page SMART Notebook file with a hook, learning experience, and a check for
understanding:
o
Page 1: The hook–Spark curiosity and grab students’ attention.
o
Page 2: Learning Experience–Layer an engaging activity to help your students work with
the subject matter.
o
Page 3: Check for understanding–Use activities or assessments.
l
Introduce your lesson, the hook, by adding a YouTube video or an activity like Fill in the Blanks
to spark curiosity in your students.
l
Create a SMART Notebook file for use in centers or stations.
o
Use infinite cloner to build math stations, or create a variety of activities to reinforce
learning.
o
Use the timer to help students know when to rotate to their next station.
l
Check for understanding: Use Shout It Out!, assessments, or writing on a blank Notebook page
as students leave for an exit ticket or as they arrive for an entrance ticket.
l
Add a quote, a picture, a short poem, or line from a song to a blank page. Have students
participate in a Chalk Talk.
smarttech.com/kb/171534 14

smarttech.com/kb/171534 15
Share a SMART Notebook lesson
Steps
1
Save and share
Click Save to save your work.
Click File > Share. SMART
Notebook provides two
sharing options: Share with a
SMART Board and Share
using a link.
2
Share to a SMART Board
If your classroom has a
SMART Board with iQ, you
can wirelessly share to the
board and present. Click
Share with a SMART Board, choose your
board, and click Share Now.
3
Share with colleagues
Click Share with a link to
share your work with
colleagues or to add a link
to lesson plans.
4
Find the shared lesson in SLS Online
Sign in to SLS Online and
you’ll see your lesson there
too. Now you can use SLS
Online’s tools to deliver the
lesson.
Instructional ideas
l
Share a SMART Notebook file with your colleagues. They can click the link to download the file
and modify it to meet the varied needs of their students. This allows you and other teachers to
work smarter by sharing work.
l
Use the Share feature to send a SMART Notebook file directly to a SMART Board interactive
display with iQ. This is great for creating substitute plans, building centers, reviewing, or small
group work.
l
Share with teachers at another campus. Students can work on the same material and participate
in a shared Shout It Out! or Monster Quiz. Break down the classroom walls!
l
Sharing a file also adds it to your SMART Learning Suite Online account, allowing you to send the
file to student devices.
l Put links to Shared files directly into your lesson plan for easy access during class and to
achieve.

Create a game-based activity
Steps
1
Start the activity wizard in SMART
Notebook
Click in the SMART Notebook
toolbar to start the activity wizard.
The activity wizard provides
templates for building a variety of
activities.
2
Build the activity
Select an activity and follow the
instructions to add lesson
material. Some activities let you
add images or choose fun
themes.
Note: If it’s your first time, you're prompted to
make an account using Google or Microsoft.
3
Add game elements
Make an activity more interesting
and engaging for students: tap to
add a timer, buzzer, or randomizer to
activities.
4
Play
Tap START to play games on
the display, or tap to send
them to student devices
through hellosmart.com.
Instructional ideas
l
Use activities to grab students’ attention, spark curiosity, or introduce vocabulary for the lesson.
o
Fill In the Blanks works great as a hook. Choose a quote, poem, or definition that connects to
the learning. Students organize the words and reflect on possible meanings. Discuss and
share. For more activity ideas, visit https://goo.gl/V2Hqcx.
l
Activities are terrific as learning experiences, practice, and review:
o
Use Match ‘Em Up for vocabulary or math practice.
o
Try Game Show for a fun review.
o
Use Super Sort as a great way to reinforce learning.
l
Formative assessments and checking for understanding is vital for students and teachers to
provide real time feedback. Monster Quiz is a great formative assessment. Students get instant
feedback, and the class can review the lesson and dispel misconceptions at the end. It's also just
plain fun!
smarttech.com/kb/171534 16

smarttech.com/kb/171534 17
Create a formative assessment
Steps
1
Get started
Open SMART Notebook on your
computer and click the response 2
icon in the SMART Notebook
toolbar.
2
Make your question set
Create your question set using a
variety of question types, such
as multiple choice, true/false,
multiple answer, and short
answer. Add images and text to questions.
3
Start your assessment
Click on the assessment
page. Ask your students to go
to hellosmart.com and enter
the teacher code shown on the
assessment. Click Start.
Students use their device to answer
questions.
4
Review and export results
After all students have
submitted their answers,
tap End to start the review.
Students get instant
feedback on their devices.
You can also export your students’ results by
tapping Export Results in the bottom-right
corner.
Instructional ideas
l
Use formative assessments give you instant data so you can then meet with students and give
them personal and immediate feedback.
l
Create a two-question pre-test. Use the short answer question type, rather than multiple choice,
so students can't just guess. Look at the data. Missed both? Needs intervention. Got them all
right? Ready for a challenge. One right, one wrong? Ready for instruction.
l
Give a pre-test allowing students to test out of the current lesson and work on a passion project.
l
Build relationships using a poll or a survey. This can set the stage for a great Socratic Dialogues
or debates with students.
l
Export student responses so you can use them as a summative assessment for a grade.
TIP
Make sure students enter their last name so the spreadsheet matches your grade book.

Insert a YouTube video
Steps
1
Get started
Open SMART Notebook on
your computer, click the Add-
ons tab in the sidebar, and
select YouTube.
2
Search safely
Select YouTube Safe Search.
Use the search to find the
perfect video for your lesson.
3
Find the right video
Preview the videos by
clicking the play button.
When you find a video you
like, click its title and click
Add video.
4
Movie time
A clean version of the
video—free of ads,
comments, and suggested
videos—is added to the
Notebook page. You're
ready to hit play and share the video!
Instructional ideas
l
Find a YouTube video that will build wonder and curiosity among your students. For example,
share a video that shows a microscopic view of cells. Turn off the sound and allow students to
watch what's happening. Encourage students to share questions, thoughts, and predictions.
l
Use YouTube and Shout It Out! together: Start a Shout It Out! activity that students will use as a
back channel as they watch the video. After the video is over, go back to the Shout It Out! to sort,
discuss, and label student contributions.
l
Make a video available for students to watch if they're stuck on a lesson. There are great tutorials
available on YouTube for a variety of subjects.
l
Find a video that brings the lesson together and watch it as a class to close the lesson. Have
students create six-word summaries based on the lesson and video.
l
While the video plays, you and your students can annotate over the video itself or students can
take notes on the side as they watch.
smarttech.com/kb/171534 18

smarttech.com/kb/171534 19
Use SMART Notebook’s pen tools
Steps
1
Get started
Open SMART Notebook and tap the
pen icon in the Notebook menu.
Choose the Pen to see all available
pen options. Pick a pen type and
choose a color.
2
Use some fun pen examples
Convert hand-drawn shapes into
clean digital shapes.
Draw a circle to shine a spotlight or a
rectangle to magnify, or use
disappearing ink.
Convert handwritten text to typed text
and edit it with a variety of editing
features.
3
Save your favorite pen style
Save a custom pen so your
favorite pen is easily available.
Select the pen tool and choose
your settings. Open the
Properties tab, select Line Style
then Save Tool Properties.
4
Make it accessible for everyone
Click the arrows in the top-right side
of the toolbar to move it to the
bottom.
Instructional ideas
l
Add or open a blank SMART Notebook page. Students can use the Creative pen to write their
high frequency or vocabulary words in rainbow ink.
l
Use the Text pen to help students practice editing and revising. Write sentences with the text
pen and have a student come to the display to edit the sentences.
l
Have students partner up and use the Magic pen. One student writes a vocabulary word using
the Magic pen and their partner then writes the word or definition using the regular pen. Students
can take turns.
l
Use the Shape pen to draw a quick Venn Diagram.
l
Encourage students to use the artistic style pens (Creative, Magic, or a custom pen style) for
mind mapping, illustration, and creative responses.
l
Use the Magic pen to draw a circle over part of a map to spotlight that place, or draw a rectangle
over a factor detail in an article to zoom in and focus attention.

Use widgets to add interactivity
Steps
1
Get started
Open SMART Notebook on your
computer and then open the
Gallery tab. The Gallery includes a
wide variety of searchable
content, such as hundreds charts,
graph and handwriting paper, 3D shapes, and
more.
2
Find interactive widgets
Type Widgets in the search bar and click to
search for the available interactive tools.
3
Select your tool
Click and drag the tool you want
to use into the SMART Notebook
page.
4
Customize your tool
Click to personalize the
interactive tool.
Instructional ideas
l
Dice: The interactive dice are customizable: add words, letters, numbers, and even images.
o
Have questions on each face, roll the die to see which question the students will answer.
This tool works well with Shout It Out!.
o
Add numbers to make a math game, 3 die on top of 3 die and students practice subtraction
with regrouping for centers.
o
Add letters and have students roll the die to build and record the words they make.
l
Spinner: Add words and new sections to customize the spinner. Use to add choice to an
assignment or station.
l
Clock: Choose analog, digital, or both. Students can move the clock hands to practice telling
time and to work on elapsed time problems.
l
Timer: Use the timer to help students know when to rotate between stations.
l
Pull tab: Use the interactive tab to hide directions, answers, or challenge questions.
NOTE
These tools are not compatible with SLS Online. If you upload this lesson to SLS Online, these
tools won’t be available.
smarttech.com/kb/171534 20
/