Page is loading ...

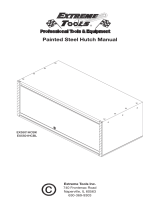
DX Series
19” Painted Steel Side Locker
with 4 Shelves
Model: DX192100SL
Extreme Tools, Inc.
740 Frontenac Road
Naperville, Illinois 60563
630.369.9303
www.ExtremeTools.net
©2019

ITEM NO. PART NUMBER DESCRIPTION QTY
1 DX192104SL-02 SIDE PANEL ASSEMBLY 2
2 DX192104SL-06 TOP/BOTTOM PANEL 2
3 DX192104SL-01 BACK PANEL 1
5 DX192104SL-07 ADJUSTABLE SHELF 4
6 Z-SCLIP-METAL SHELF CLIP 8
7 DX192104SL-18 SUPPORT MOUNTING BRACKET 1
8 DX192104SL-08 DOOR ASSEMBLY 1
9 914201218 M4-.07 X 8mm FLAT HEAD SCREWS
11
10
Z-M8X16HBS M8 X 16mm HEX BOLT 6
11 Z-M4X6MS M4 X 6 MACHINE SCREW 36
12
2
1
8
5
7
10
9
3
DX192100SL Parts List
Z-FWM8
M8 FLAT WASHER
6

Step1:
Place packing material or other soft surface down and lay back
panel on soft surface.
Step 2:
Position one side panel assembly perpendicular to the back panel.

Step 3: Align holes and secure side panel using the pre-drilled holes and
(8) M4 machine screws.
SLOTS ON BOTH ENDS
OF TOP/BOTTOM PANEL
GUSSET
Step 4:
Slide top/bottom panels through the slots
and onto the gussets of the side panel.
ATTACH USING M4 SCREWS

Step 5:
Secure top panel to side and back panels using (4) M4 screws
through pre-drilled holes and into gussets.
Step 6:
Repeat Step 5 to add the other top/bottom panel.
M4 SCREWSM4 SCREWSM4 SCREWSM4 SCREWS
INSTALL USING
(4) M4 SCREWS.

Step 7:
Add the other side panel assembly by inserting the attached gussets
through the slots of the top and bottom panels. Secure the side panel to
back panel and top and bottom panels using M4 screws as shown.
A
REINFORCING CHANNEL
.
.
.
INSTALL M4 SCREWS
Step 8:
Locate the two Reinforcing Channels. Place a Reinforcing Channel into
the Gusset in the top panel. Secure with (2) M4 screws at each end of the
Reinforcing Channel. Repeat procedure for the bottom panel.
GUSSET
Slide Reinforcing Channel
into Gusset and secure.

Step 9: CAUTION! ENGAGE BRAKES ON CASTERS BEFORE
PROCEEDING WITH THIS STEP!
Set the assembled side locker body upright on the oor.
Attach the mounting bracket on the bottom support channel of the
roller cabinet with (2) M8 x 16 Bolt & Washers.
SUPPORT MOUNTING BRACKET
M8-
16 BOLT & WASHERS (2)
.

Step 10: SIDE LOCKER IS HEAVY! AND REQUIRES ASSISTANCE TO
LIFT INTO PLACE!
Locate the slots on the bottom panel of the side locker. With assistance,
lift and position the assembled side locker body onto the tabs of the
support bracket. Make sure the slots on the bottom of side locker are fully
engaged with the tabs of the support mounting bracket.
CONTINUE HOLDING THE SIDE CABINET IN PLACE WHILE GOING
TO THE NEXT STEP!
M8x16 BOLT & WASHERS
SLOTS ON BOTTOM OF UNIT
TABS FOR
MOUNTING
SIDE
LOCKER

M8
SCREWS
TABS OF SUPPORT BRACKET
OPENINGS ON
LOCKER BOTTOM
Step 11:
With the assistance of another person holding the side locker in place,
secure side locker body to the roller cabinet and hutch (or chest) with
(4) M8x20mm Hex Bolts.

Step 11:
Install shelves in the desired positions by inserting the rear edge of each
shelf into the slots of the back panel. While holding the front end of the
shelf, insert the shelf clips into the slots on the side panels that are the
same height as the back slots. Rest shelf on shelf clips.
With the help of another adult, install the side locker door using (6) M4 at
head screws.
Attach side locker door to side locker body
using M4 at head screws.

DX192100SL DX Series 19”W x 21”D Side Locker
with 4 Adjustable Shelves
shown on DX722117RC 72”W x 21”D 17 Drawer Roller Cabinet &
DX722101HC 72”W x 21”D Extreme Power Workstation® Hutch
/