Page is loading ...

To activate 5 year limited warranty, register within 10 days of purchase at
www.thewaterwarden.com
or return completed warranty form on back page to:
Water Warden
TM
Pool Safety Products
4794 NE 10th Ave
Fort Lauderdale, Fl 33334

2
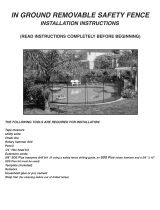
BASIC INSTALLATION INSTRUCTIONS FOR YOUR NEW
WATER WARDEN
TM
SAFETY POOL FENCE
FOR IN-GROUND, STRAIGHT-EDGED INSTALLATION.
Detailed instructions for curved or free-form installation can be found on Page 4.
Read through these instructions carefully and completely before you begin drilling.
List of Components:
• Drilling Template “A” (printed on inside of carton)
• Water Warden
TM
safety fence section (Fig. 1)
• Plastic Feet (Fig. 2)
• Plastic Caps (Fig. 3)
• Safety Latch (Fig. 4)
• Rubber Heads for poles (Fig. 5)
List of Tools Needed for Installation:
• Utility knife or box cutter
• Rotary hammer drill
•
5
/
8
” SDS masonry drill bit [If using a drilling guide, a
5
/
8
” x 18” masonry drill bit is needed]
• ¼” phillips head bit
• Extension cord (if necessary)
• Measuring tape
• Chalk line or white chalk
• Pencil or white chalk
• Hammer or rubber mallet
• Square and level or drilling guide (available for rental from dealer where fence was purchased)
• PVC glue
1. Locate Drilling Template “A” on inside flap of the Pool Fence carton (“A”). Carefully cut out the Drilling
Template with utility knife or box cutter. Puncture spots marked “B”, “C” and “D” .
2. Snap a chalk line around the perimeter of the pool, 24” from pool edge.
3. Decide where the opening of your pool fence will be. Mark “X” on the pool deck with chalk for
placement of initial pole. See (Fig. 1).
4. If you have purchased a separate Gate for your pool fence, that must be installed first. Please see special
instructions included with the Gate, for Gate installation. If you will be using the join of two sections as
the opening for your Water Warden
TM
safety fence, continue with the following.
5. Place Drilling Template on pool surround, carefully aligning spot “D” with the chalk mark “X”. Check to
make sure that the template is straight and aligned with the chalk line, and that spots marked “B” and “C”
are also 24” from pool edge. Insuring that template does not move, drill through spots marked “B”, “C”
and “D”. All holes should be drilled to a depth of 4”, and at a direct 90º angle to the deck. (Please
note, the spots marked “C” and “D” is where the opening of your pool fence will be. The two poles that
fit into these holes will be joined with a “Safety Latch”.)

3
6. Continue around the entire pool, drilling holes while using the Drilling Template for guidance. Place spot
marked “B” over the hole on the far right (last hole drilled). Drill through spot marked “C”. Proceed
around the perimeter of the entire pool, always placing the spot marked “B” over the last hole drilled,
and ensuring that spot marked “C” is 24” from pool edge. Keep drilling the new hole through the spot
marked “C”. Every 12 feet (or at the end of each section), you must also drill through spot marked “D”, to
accommodate the pole of the new section.
7. When you come to a corner of the pool, it is not recommended that you design 90º corners within one
fence section. Always use two smaller sections to meet at the corner (see #8 below for instructions on
cutting down a fence section). Drill the two corner holes at a 5º angle away from each other (use a square
and level to measure the angles before drilling, or use the drilling guide available for rent from dealer
where the fence was purchased.)
8. To cut down a fence section to create a smaller panel, follow the steps below:
• IMPORTANT: Lay out mesh on flat surface, ensuring that mesh is tight and straight in all
directions.
• Decide the width of the custom panel. Add four inches to your measurement prior to cutting.
• Using scissors or utility knife, cut mesh of panel to determined width.
• Using any extra pole, detach trim with ¼” phillips head bit.
• Mark desired length on mesh with a chalk line. Fold extra fabric back and under, leaving fabric
½” longer than marked chalk line. Reattach trim to pole along marked line, ensuring that the
fabric is sandwiched in between the pole and the trim, and that the screws are directly on the chalk
line. Trim away excess fabric from pole edge with scissors or utility knife. Use a heat source to
melt the cut edge of the mesh to prevent fraying.
9. When you have completed all the holes, clear the holes of any drilling dust. Insert the plastic “feet” into
the holes. Always insert the feet with care, so as not to damage them. Confirm that plastic feet fit snugly
into the holes. If you are having trouble getting the feet to fit into the holes, tap them gently into place
with a hammer or rubber mallet. If using hammer, protect the plastic feet with a piece of wood before
hammering, so as not to break them. Complete this step for all the plastic feet.
10. Attach Safety Latch to end of each fence section, using the pre-drilled holes in the pole.
11. Begin inserting your Water Warden
TM
safety fence into the plastic feet. Fasten each section to the next
with the “Safety Latch”.
12. Place a Rubber Head onto the top of each pole.
13. If desired, you may drill one additional hole near the fence opening. Insert plastic foot into hole as
described above. Roll up open section of fence, and place pole into new hole, when continuous access to
pool is wanted. This will hold the fence section open.
14. Hose down pool deck to rinse away any chalk marks or drilling dust.
15. If Water Warden
TM
safety fence will be removed for an extended period of time, use enclosed plastic caps
to seal holes in the ground. This will insure that the holes with the plastic feet inside do not fill up with
any dirt or debris. Simply remove fence from holes, taking care to leave plastic feet in the holes. Insert the
caps into the feet.
Congratulations! You have completed your Water Warden
TM
safety pool fence
installation!

4
INSTALLATION INSTRUCTIONS FOR A CURVED OR FREE-FORM POOL:
Read through Basic Installation instructions to understand the general method
used to install your safety pool fence. Mark with chalk all the holes for each
section before you drill.
1. Measure and drill initial hole as described in Basic Installation instructions. Continue to measure and
mark the spots for drilling, allowing 36” from center of hole to center of hole. At the end of each
fence section, measure 2” from center of last hole for beginning hole of new section. When marking
the holes around a curved run of fencing, the holes should be drilled ¼” closer on the outside curve,
and ¼” further apart on the inside curve, to ensure there will be no slack in the fence and that the fence
material is pulled tightly.
2. Angle the drilling of the holes in the following manner. Use a square and level or drilling guide
(available for rental from dealer where fence was purchased) to drill the holes that have been marked.
(This method of drilling ensures that the fence will be pulled tight when inserted into the feet.)
• Holes for a straight run of fencing should be drilled at a 90º angle to the deck
• Holes for an outside curve should be angled 2º to 3º away from the pool. Very tight curves may
require an angle of up to 4º.
• Holes on the inside curve of the pool should be angled 2º to 3º toward the pool. Very tight curves
may require an angle of up to 4º. See (Fig. 6) below.
3. Repeat steps 1 and 2 around perimeter of pool. Always check to make sure your marks are 24”
from pool edge, and that you have correctly angled the drill, before drilling.
4. To avoid this measuring of angles and distances, you may consider surrounding your curved pool
with a rectangular installation design.
Illustration of Pole Angles for Curved or Free Form Pools:
(Fig. 6)

5
ILLUSTRATIONS:
(Fig. 1)
(Fig. 2) (Fig. 3) (Fig. 4) (Fig. 5)

6
SAFETY REMINDERS:
WARNING
:
THERE IS NO SUBSTITUTE FOR COMPETENT ADULT SUPERVISION AROUND
A SWIMMING POOL. THE WATER WARDEN
TM
SAFETY FENCE IS NOT
DESIGNED TO BE A SUBSTITUTE FOR ADULT SUPERVISION, NOR IS IT A
GUARANTEE AGAINST ACCESS TO THE POOL.
• Any pool safety product is only effective as a level of protection against unauthorized pool access if used
correctly.
• The Water Warden
TM
safety fence must isolate the pool from all exits of the home.
• All sides of the pool should be surrounded by the safety pool fence, or by another permanent obstruction,
such as a concrete wall, iron fence, brick wall etc.
• If the safety pool fence is not being used as a complete structure, and it will adjoin some sort of permanent
structure, you must ensure that the permanent structure is solid and sturdy. Also make sure that a child cannot
climb over, under or through the permanent structure.
• Make sure not to install safety pool fence near another structure that a child can climb on (such as raised
walls, seating or decorative objects.)
• Check local building codes before installation to be sure you are in compliance with fencing laws.

7
Water Warden
TM
Safety Pool Fence
Five Year Limited Warranty/One Year Full
1. The Manufacturer warrants that the Water Warden
TM
Safety Pool Fence is free from defects in workmanship and
materials for a period of five (5) years.
2. This warranty extends to the original purchaser of the Water Warden
TM
Safety Pool Fence only.
3. This warranty covers mesh fabric, poles, anchors and fasteners, but does not cover incidental or consequential
damages, metal finishes or installation of the Water Warden
TM
Safety Pool Fence. Installation is warranted by the
installer only, and only to the extent of express warraties provided by the installer.
4. In the event of a defect or other failure of the Water Warden
TM
Safety Pool Fence not caused by any misuse, abuse,
neglect, improper maintenance or damage to the Water Warden
TM
Safety Pool Fence while in possession of consumer,
manufacturer will remedy the failure or defect, without charge to the consumer. The remedy will consist of repair or
replacement of the product, at the warrantor’s option.
5. If manufacturer is unable to provide replacement or repair, a refund will apply as follows: manufacturer will refund
what is unserviceable during the first year; after the first year the Water Warden
TM
Safety Pool Fence will be refunded at
a rate of 1/84 of MSRP for each month remaining of the 84 months from the original purchase date.
6. If the Water Warden
TM
Safety Pool Fence is reported to be unserviceable, the Water Warden
TM
Safety Pool Fence
must be made availavle to manufacturer’s representative to determine its serviceability.
7. We reserve the right to inspect the Water Warden
TM
Safety Pool Fence for any claim against this warranty, to
determine the cause of failure or loss of serviceability.
CUSTOMER HAS THE SOLE RESPONSIBILITY FOR PERIODICALLY INSPECTING PRODUCT AND
REPORTING DEFECTS OR FAILURES. MANUFACTURER DOES NOT WANT TO CREATE A FALSE SENSE
OF SECURITY. THE WATER WARDEN
TM
IS NOT INTENDED TO BE A SUBSTITUTE FOR PROPER ADULT
SUPERVISION NOT IS IT A GUARANTEE AGAINST ACCESS TO THE
POOL.
WARNING!
THERE IS NO SUBSTITUTE FOR
COMPETENT ADULT SUPERVISION
IN A SWIMMING POOL
ENVIRONMENT! NO POOL SAFETY
PRODUCT IS A GUARANTEE
AGAINST UNAUTHORIZED ACCESS
TO A POOL.
Water Warden
TM
Safety Pool Fence
Five Year Limited Warranty/One Year Full
Register your warranty at www.thewaterwarden.com or return this
completed warranty registration and copy of purchase receipt, within ten days of purchase to:
Water Warden
TM
Pool Safety Products
4794 NE 10th Ave
Fort Lauderdale, Fl 33334
Purchaser’s Name: (please print)___________________________________Purchase Date:_________________________
Address:___________________________________________________________________________________________
Phone Number:_____________________________________________________Size of Pool:______________________
Dealer’s Name:______________________________________________________________________________________
Dealer’s Address:____________________________________________________________________________________
Dealer’s Phone Number:_____________________________Dealer’s Email:_____________________________________
Purchaser’s Signature:________________________________________________________________________________
To file a claim:
Please call 1-877-402-SAFE (7233)
Monday – Friday
8:00 AM – 5:00 PM Eastern Time
Please allow 2-4 weeks for
warranty claims to be processed.
/