Page is loading ...

1 | P a g e
Message from our president…
Congratulations! You’re in the club. You’ve seen the light. You own the best solar attic fan sold
in the United States. While we look forward to cooling your attic, thus saving you on utility bills,
there are other advantages to the Remington Solar attic fan as well. Do you have any idea how
much wear and tear on your furnace happens in a hot harsh environment? Do you know what
your expensive insulation does in 150+ degree heat over the years? You made a great decision in
your purchase, so please don’t hesitate to contact us if you need help in any way.
Murray Smith
President – Remington Solar
214-257-8300
.
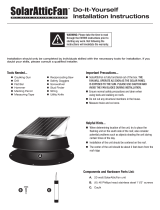
SF-WF40-BLK
Before You Start
http://remingtonsolar.com/product-manuals/
Handy Tips
1. Choose the location carefully to ensure optimal sun exposure through the day. Check for any
shade on the roof created by trees, chimney, or satellite dish.
2. Measure twice and cut once. Take a minute to create a template that will create the correct
dimensions for your cut.
Tools Required
Reciprocating Saw Marking Pen
Measuring Tape String
Razor Knife Drill (for screws) Caulking
Gun (Silicone sealant)
6, 6# 1½ Phillips Head Screwdriver
NOTE: Please go to
http://remingtonsolar.com/how-to-install-
your-remington-solar-attic-fan/ (or go to
RemingtonSolar.com and look for the link
How To Install Your Remington Solar Attic
Fan) to watch a brief video of an actual
installation.

2 | P a g e
3. NOTE: using Remington Solar attic fans with ridge vents are fine. We recommend
putting your fan 5 feet down from your ridge vent. Also, close any vent within 8-10 feet of
your solar fan. (Cardboard underneath is an easy solution)
4. Before you begin, gently clean any oil residue from flashing.
5. Use a high quality silicone sealant to ensure a good waterproof seal
INSTALLATION
Step1
Choose a location for your Remington Solar Attic Fan on the south of the roof, considering
potential problems like tree, chimney etc. They may shade the solar panel during certain
times of the day, reducing run time.
If a southern or western exposure is not possible, the fan can be installed on any other
exposure and the solar panel can be adjusted to capture maximum sunlight. Note: The Solar
Attic Fan must be installed between roof rafters. However, if you want to retrofit an existing
turbine (Whirlybird) or electric fan, you may do so. Just enlarge the hole if necessary, being
careful not to cut through a rafter.
Step 2
Using either a string or template, create a 14 1/2 inch diameter circle onto the roof
shingles.
Note: Roof rafters are generally 16” or 24” on center. (Stick a nail from underneath out to
the roof, then find the nail, so you can see the center.)
Step 3
The Solar Attic Fan must be installed between roof rafters. Do not cut through any framing
member. With a reciprocating saw, cut the diameter of the hole.
Step 4
Remove any roofing nails in the area where the base will be slid under the shingles.
Step 5
Lay a bead of Silicone Sealant around the base of the flashing.
Step 6
Slide the flashing underneath the tar paper and shingles. Adjust the flashing up until the
shingles come into contact with the raised portion of the flashing. The bottom side of the
flashing will be on top of the shingles.

3 | P a g e
Step 7
Position the four screws around the flashing. Two screws go on either side, and the
remaining two go on the top and bottom.
Step 8
Lay a bead of Silicone Sealant along the edge of the shaft base to insure a waterproof seal
Step 9
Use the screws and nuts to fasten the angle of the panel (South or south west is typically the
optimal angle, however, we prefer flat to the earth since you will need more power in
summer months.
110V Hybrid Adapter Installation (For running the fan when the sun sets and it’s still hot)
NOTE: The 110V Hybrid Adapter can easily be installed any time after fan installation.
Video installation guide at https://remingtonsolar.com/product-manuals/
1. Look underneath your fan and you’ll see the thick power cord that is plugged into itself.
2. Unscrew that wire, and you will see two plug ends
3. Plug the two “plug ends” of your adapter into these new wires you just unscrewed. (They only
plug in one way)
4. Attach your 110V adapter box to the nearest rafter using wood screws
5. Plug your 110V plug into an outlet in your attic (you may need an extension cord)
CURB MOUNT ADAPTER
Curb mounts are good for flat roofs or tile roofs.
NOTE: Curb mounts are NOT necessary for your
typical composition shingle roof. You can build a frame
out of 2x4’s, then flash over the 2x4’s. Then put the
Remington Solar curb mount adapter on top of the
flashed frame. Then mount your Remington Solar attic
fan on top of the curb mount adapter. Then you have a
waterproof seal.
You may not simply remove the thermostat or it will stop
running. (Wiring diagram

4 | P a g e
WI-FI THERMOSTAT INSTALLATION INSTRUCTIONS
OPTIONAL ON ALL REMINGTON SOLAR ATTIC FANS
(STANDARD ON SF-WF40-BLK)
How to Install the Remington Solar Smart Wi-Fi Thermostat / Humidistat
They will connect as shown below:
Fig. A Fig. B
.
Now you need the app to drive it all and make it work
YOUTUBE HELP: If you need video instructions, go to https://youtu.be/Ou6aYfCsfLw and
watch the video.
(Note: all this looks a little complicated, but we just want to take you step-by-step. Don’t worry,
it’s simple…and totally worth it.)
Fig. B is the Wi-Fi hub
and components. It will
connect to the Wi-Fi
router you use at home for
all your household
Internet connections.
Simply plug it in to one of
the router ports on the
back. It will also need
power, so plug it into a
110V power source using
the plug provided.
Fig. A is the Wi-Fi thermostat/humidistat.
Simply plug in the new Wi-Fi thermostat
into the plug end on your solar attic fan.
The wire with the plug end will be
dangling from the bottom of your fan
coming from the junction box. You may
attach the white box to a stud or frame in
your attic. Make sure the antenna is
connected.

5 | P a g e
To set up the network.
Start with connecting the
Hub to your internet router
using the provided cable and
power. When it is propertly
connected, power indicator
light and internet connection
light should stay steady
bright blue. If one of them is
flashing red, unplug the
power of your router and
controller, wait for 10
seconds and plug them back
in to help bypass the
firewall.
Download the APP on your
smartphone from either
iTune, or Google Play.
Search for “SolaCom”
After you download the app,

6 | P a g e
the first time you open it,
“register” your account first.
To register, you will need to
enter your email address
and then click “Sent”.
You will get an
authentication code sent to
the email you put in. Type in
the code and click “Next”
Set your password and
“Confirm”. You will see
this screen.

7 | P a g e
Click “OK” to activate the
QR scanner in the app.
This the next screen you
will see, click “Add
device”, a scanner view
window will open, scan
the QR code on the back
of your hub.
You can add the hub by
either scan the QR code,
or, select “New GPRS
Hub” then type in the
serial number below QR
code.

8 | P a g e
Now you need to pair the
Hub to the thermostat.
Once the Hub is added, a
new window will let you
add a device, select
“scan QR code or
barcode” to scan in the
QR code on the
thermostat, which is
located on the side of the
thermostat.
Now you are ready to adjust your humidity and thermostat settings on your Remington Solar
attic fan. Your app should now show the Smart Thermostat icon.
Once you’re in the app, you’ll see the following screens to which will allow you to adjust your
temperature and humidity settings. You’ll also be able to turn your fan on or off. It will also
show your temperature and humidity conditions in your attic.
It is now simple to adjust when you want your fan on or off.
Contact support@remingtonsolar.com with any questions.
If you need video instructions, go to https://youtu.be/Ou6aYfCsfLw and watch the video.

9 | P a g e
WARRANTY
Solar panel Life time limited warranty*
Housing: Life time limited warranty*
Motor : Life time limited warranty*
*The limited warranty from date of original purchase for manufacturing defects under normal
and reasonable use, and subject to the maintenance requirements and installation guidelines
set forth in the product instruction manual. This warranty is non-transferable. You must register
your warranty online within 30 days from purchase.
What is Covered: Dealer warrants its product to be free from defects in material and
workmanship when leaving the factory. Remington Solar will provide replacement of
parts (not labor) for any defective component.
What is not Covered: Any type of damage to the product due to improper installation,
maintenance, or failure to provide necessary and reasonable maintenance; any damage or
injury caused by misuse and/or unreasonable use of the product; storage or Acts of God;
Dealer will not honor any claims for damage to any products. Note: Hail damage is covered
by your homeowners policy.
You must register your Remington Solar product within 30 days to activate warranty:
https://remingtonsolar.com/register-your-product/
Remington Solar, Inc – Corporate Mailing Address
5706 E. Mockingbird Ln, Suite 115-189
Dallas, TX 75206
Trouble Shooting Guide
Fan won’t run
1. Check the temperature. Is it 80 degrees or hotter? Is it in the sun?
Cup the blue thermostat in your hands and warm it up by breathing on it. (Don’t use a hair dryer!)
2. Check all the wiring in the junction box as per diagram above. (This step is often overlooked, but
wires in the junction box can come loose over time through vibration.)
3. If fan is not turning at all, it’s a hot day, and full sun. Faulty thermostat. Contact
support@remingtonsolar.com for replacement.
Fan blades vibrate or rock, but doesn’t run fast
1. The fan is working, but getting less than 7 watts of power. It’s either early in the morning or dusk.
Fan blades turn but slowly
1. Is it full sun? Or cloudy?
2. If the fan is making a noise from the motor, then may be defective motor Contact
support@remingtonsolar.com for replacement.
/