Page is loading ...

DOC022.53.80058
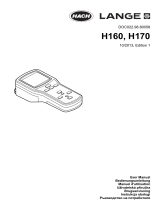
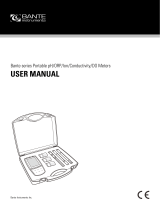
Waterproof Handheld
H160 and H170
USER MANUAL
September 2009, Edition 1
© Hach Company, 2009. All rights reserved. Printed in The U.S.A


1
Table of Contents
Section 1 Specifications .................................................................................. 3
Section 2 General information ....................................................................... 5
2.1 Safety information ....................................................................................... 5
2.1.1 Use of hazard information ................................................................ 5
2.1.2 Precautionary labels ......................................................................... 6
2.2 Overview ..................................................................................................... 6
Section 3 Installation ........................................................................................ 7
3.1 Probe connections ...................................................................................... 7
3.2 Probe connection installation ...................................................................... 8
3.2.1 Connect the glass pH or ORP .......................................................... 8
3.2.2 Connect the ISFET pH probe ........................................................... 8
3.2.3 Connect the conductivity probe ........................................................ 9
3.2.4 Phono jack for BNC probe temperature sensors .............................. 9
Section 4 Operation ........................................................................................ 11
4.1 Keypad description ................................................................................... 11
4.2 Display description .................................................................................... 13
4.3 Meter setup functions ............................................................................... 14
4.3.1 Set stabilization lock ON or OFF .................................................... 14
4.3.2 Set the temperature display ............................................................ 15
4.3.3 Turn the sound ON/OFF ................................................................. 16
4.3.4 Meter automatic shutoff time .......................................................... 17
4.3.5 Clearing calibration points .............................................................. 18
4.4 ERROR CODES ....................................................................................... 20
Section 5 pH Operations ............................................................................... 21
5.1 Set the pH options .................................................................................... 21
5.1.1 Set the pH resolution: 0.1 pH or 0.01 pH ........................................ 21
5.1.2 Set the 2 and 3 point pH calibration ............................................... 21
5.1.3 Set the pH calibration method ........................................................ 22
5.2 Set the manual temperature compensation for glass pH electrodes ........ 24
5.3 pH calibration ............................................................................................ 25
Section 6 Conductivity & TDS Operations .............................................. 29
6.1 Set the Conductivity options ..................................................................... 29
6.1.1 Set the conductivity calibration points ............................................. 29
6.1.2 Set the conductivity temperature .................................................... 29
6.1.3 Set the conductivity probe cell constant ......................................... 30
6.2 Set the TDS options .................................................................................. 31
6.2.1 Set the TDS conversion factor ........................................................ 31
6.2.2 Set TDS units ................................................................................. 32
6.2.3 Set salinity units: ppm (ppt) or % .................................................... 33
6.3 Conductivity and TDS calibration ............................................................. 33
Section 7 Maintenance .................................................................................. 37
7.1 ISFET pH probes maintenance ................................................................. 37
7.1.1 Calibrate and verify ......................................................................... 38

Table of Contents
2
7.2 ISFET non-glass probe maintenance ........................................................38
7.3 BNC electrode maintenance ......................................................................38
7.4 Probe cleaning ..........................................................................................39
7.4.1 ISFET non-glass probe cleaning and reconditioning .......................39
7.4.1.1 Cleaning the ISFET non-glass probes ..................................39
7.4.1.2 Recondition the ISFET non-glass probes ............................40
Section 8 Troubleshooting ............................................................................41
8.1 Error codes ................................................................................................41
8.1.1 Low battery indicator .......................................................................43
Section 9 Replacement parts and accessories ......................................45
9.1 Replacement parts ....................................................................................45
9.2 Accessories ...............................................................................................46
Section 10 Contact Information ...................................................................47

3
Section 1 Specifications
Specifications are subject to change without notice.
Meter specification Details
Dimensions 3.5” W x 8” H x 2” D (90mm x 204mm x 50mm)
Weight 3.0 lbs (1.3 Kg)
Battery requirements 4-ANSI -ISA or IEC-LR6 (AA Alkaline)
Power consumptions 1W backlight on
Battery life Up to 200 continuous 10 hour advance of low battery warning
Storage temperature -20 to +60 °C (4 to 140 °F)
Operating temperature Maximum range between +45 to + 60°C (115 to 140 °F)
Input connectors
All models have built-in temperature connectors for sensors.
The handheld series have ISFET (8-pin) connectors, BNC with
phone jack temperature connectors, 12 pin conductivity
connectors
Languages English
Temperature correction Off, automatic and manual (parameter dependent)
Measurement Continuous measurement
Protection rating IP67
pH
Calibration
Up to five points with automatic buffer recognition 1.68, 4.01,
6.86, 7.00, 9.18, 10.01, 12.45
Accuracy ±0.01 pH
Resolution 0.01 pH
Range 0.00 to 14.00
mV
Calibration None
Accuracy 0.1 mV
Resolution Auto ranging 0.1 and 1
Range Auto ranging ± 199.9 mV to ± 1999 mV
Temperature
Calibration None
Accuracy ±0.5 °C
Resolution 0.1 °C 0.1 °F
Range -0 to 100 °C (Display °C or °F)

Specifications
4
Conductivity
Calibration Up to five points
Accuracy ± 1% full scale or ±1st digit
Resolution 0.01 ìS, 0.1 ìS ,1 ìS, 0.01 mS, 0.1 mS
Range
Autoranging 0.00 to 19.99 ìS, 20.0 to 199.9 ìS, 200 to 1999 ìS,
2.00 to 19.99 mS, 20.0 to 199.9 mS
TDS
Calibration Up to five points
Accuracy ± 1% full scale or ±1 digit
Resolution
0.01 ppm, 0.1 ppm, 1 ppm, 0.01 ppt, 0.1 ppt, 1 ptt, 0.1 mg/l, 1
mg/l,0.01 g/l,0.1 g/l
Range
Autoranging: 0.00-9.99 ppm, 10.0-99.9 pm, 100-999
ppm,1.00-9.99 ppt,10.0-99.9 ppt, 100-200 ppt the meter will
also display in mg/l: 0.00-199.9 mg/l, 200-1999 mg/l, 2.00-19.99
g/l, 20.0-50 g/l
Salinity
Calibration None (derived from conductivity)
Accuracy ± 0.1 ppt (-2 to+35 °C)
Resolution 0.1 ppt 1%
Range 0-42 ppt

5
Section 2 General information
In no event will the manufacturer be liable for direct, indirect, special, incidental or
consequential damages resulting from any defect or omission in this manual. The
manufacturer reserves the right to make changes in this manual and the products it
describes at any time, without notices or obligation. Revised editions are found on
the manufacturers website.
2.1 Safety information
Please read this entire manual before unpacking, setting up, or operating this
equipment. Pay attention to all danger and caution statements. Failure to do so
could result in serious injury to the operator or damage to the equipment.
Make sure that the protection provided by this equipment is not impaired, do not
use or install this equipment in any manner other than that specified in this manual.
2.1.1 Use of hazard information
DANGER
Indicates a potentially or imminently hazardous situation which, if not avoided, will result in
death or serious injury.
WARNING
Indicates a potentially or imminently hazardous situation which, if not avoided, could result
in death or serious injury.
CAUTION
Indicates a potentially hazardous situation which, if not avoided, could result in minor or
moderate injury.
NOTICE
Indicates a situation that is not related to personal injury.

General information
6
2.1.2 Precautionary labels
Read all labels and tags attached to the instrument. Personal injury or damage to
the instrument could occur if not observed.
2.2 Overview
The Waterproof Handheld meters are available in 2 models:
• Waterproof handheld H160 and H170
• The meter automatically identifies which type of electrode is attached when the
meter is turned on
The H160 and H170 meters accept both traditional style glass pH with BNC
connectors and non-glass pH probes with ISFET (Ion Sensitive Field Effect
Transistor) silicon chip sensors. The meters are designed to use only one pH
electrode (either a BNC pH electrode or an ISFET pH probe) at a time.
The H170 multi-parameter meter accepts conductivity probes with different cell
constants. The constant is automatically detected by the meter.
Both pH and conductivity probes can be attached simultaneously to the H170
model meters.
This is the safety alert symbol. Obey all safety messages that follow this symbol
to avoid potential injury. If on the instrument, refer to the instruction manual for
operation or safety information.
This symbol indicates that a risk of electrical shock and/or electrocution exists.
Electrical equipment marked with this symbol may not be disposed of in European
public disposal systems after 12 August of 2005. In conformity with European
local and national regulations (EU Directive 2002/96/EC), European electrical
equipment users must now return old or end-of life equipment to the Producer for
disposal at no charge to the user.
Note: For return for recycling, please contact the equipment producer or supplier
for instructions on how to return end-of-life equipment, producer-supplied electrical
accessories, and all auxiliary items for proper disposal.
NOTICE
Always turn off the meter when changing electrodes. If the meter is used in a
manner other than as described, the performance of the meter can be impaired.

7
Section 3 Installation
3.1 Probe connections
Figure 1 Probe connection for the H160
1 BNC connector 3 ISFET pH probe connector
2 3.5 mm phono jack 4 Connector dust cap
Figure 2 Probe connections for the H170 meter
1 Conductivity probe connector 4 ISFET pH probe connector
2 BNC connector 5 Connector dust cap
3 3.5 mm phono jack connector

Installation
8
3.2 Probe connection installation
3.2.1 Connect the glass pH or ORP
The meters accept glass pH, ORP, or with BNC connector. To connect the glass pH
or ORP probe:
1. Always turn off the meter when the probe is changed.
2. Connect the pH glass probe to the BNC connector.
3. Connect a stand-alone temperature probe or an integrated temperature sensor
from a glass pH electrode with the 3.5 mm phono jack connector and a BNC
connector.
4. Refer to and to view the connections.
5. Turn the meter on. The meter will automatically identify the probe that is
connected.
3.2.2 Connect the ISFET pH probe
These meters accept two different types of pH sensor technologies, ISFET pH
probes and glass electrodes. The meters automatically identify whether a glass or
ISFET pH probe is attached when it is first turned on. Be sure that both the
receptacle on the meter and the connector on the probe are clean and dry; wet or
dirty connections may cause unstable indications.
The meter is designed to use only one type of pH probe at a time.
1. Make sure the meter power is off.
2. Connect the ISFET probe to the ISFET pH probe connector
3. Refer to view the connectors.
4. Refer to view the connectors.
5. Power the meter on. The meter will automatically identify the probe that is
connected. If the meter does not detect the presence of an ISFET probe, the
meter defaults to a glass pH electrode mode and reads pH from the BNC
connector. Refer to for error messages related to probe detection.
NOTICE
The ISFET probe connector and conductivity probe connector are keyed
differently to prevent attachment of a probe to the wrong connector. The meters
are designed to use only one type of pH probe at a time.
If the meter is submerged, and the rubber plug is not installed on the 3.5 mm
phono jack, the interior of the jack may fill with water although the interior of the
meter itself remains sealed. If the 3.5 mm phono jack is flooded, it must be dried
immediately. It is best to invert the meter to allow any water to run out of the
connector.

Installation
9
3.2.3 Connect the conductivity probe
1. Make sure the meter power is off.
2. Connect the conductivity probe to the meter.
3. Refer to view the connectors.
4. Power the meter on. The meter will automatically detect conductivity probe and
cell constant of that probe.
3.2.4 Phono jack for BNC probe temperature sensors
The temperature sensor for a BNC probe uses a 3.5 mm phono jack. When a
temperature sensor is connected, the meter will Automatically Temperature
Compensate (ATC) pH electrode indications.
To connect the temperature sensor:
1. Always turn off the meter when a probe is changed.
2. Connect the BNC probe temperature sensor to the 3.5 mm phono jack or BNC
connection
3. Both the H160 and H170 use a 3.5 mm phono jack connector and a BNC
connector. Refer to Section 3 Installation on page 7 to view the connections.
4. Power the meter on. The meter will automatically identify the probe that is
connected.

Installation
10

11
Section 4 Operation
4.1 Keypad description
Refer to Figure 3 for keypad and key descriptions and functions.
Figure 3 Model H170 shown
Key Action H160 H170
Turn meter on and off
••
Display pH
••
Display mV
••
Turns light on for two minutes
••
Display TDS. If a conductivity probe is not attached, TDS
mode is inactive.
•
Display conductivity. If a conductivity probe is not attached,
conductivity mode is inactive
•
Display salinity. If a conductivity probe is not attached,
salinity mode is inactive
•

Operation
12
HOLD mode. Readings are frozen until HOLD key is
pressed again to release the display. Only operates in
measurement modes. •
••
Used to confirm values and begin calibration
••
Scroll values when in calibration mode: View setup screens
and set numeric values during setup
••
Enter setup mode
••
Confirm values to begin calibration and HOLD
measurement indication
Key Action H160 H170

Operation
13
4.2 Display description
The H160 and H170 Waterproof Handheld meters each display features in an LCD
display as follows:
Figure 4 LCD display and features
Item
No
Description H160 H170
1
ISFET pH probe indicator
••
2
The meter is in the pH measurement mode
••
3
The meter is in the conductivity measurement mode
•
4
The meter is in the salinity measurement mode
•
5
The meter is in the TDS measurement mode
•

Operation
14
4.3 Meter setup functions
4.3.1 Set stabilization lock ON or OFF
pH, conductivity, TDS can be displayed with a stabilization lock mode. When a
stable indication is reached, the display locks on the value and the meter ignores
very slight changes in the measurement. The READY icon turns on when an
endpoint is reached and the stabilization lock is active. The display automatically
unlocks after a significant measurement change is detected. When performing
titrations or attempting to detect very slight changes, the stabilization lock should be
OFF.
6
TDS or salinity mode value is in mg/L or g/L
•
7
TDS or salinity value is ppm
•
8
TDS or salinity value is in ppt
•
9
The displayed value is a mV value
••
10
The displayed value is a pH value
••
11
the conductivity value is in mS
•
12
The conductivity value is in µS
•
13
The salinity value is in %
•
14
The pH, Conductivity, TDS or Salinity value is automatically
temperature compensated.
•
15
The meter is in a calibration mode and when calibrating it
indicates the point of a multiple point calibration
••
16
The Temperature value is in °F
••
17
The Temperature value is in °C
••
18
Low power indicator
••
19
Meter is in setup mode
••
20
Temperature value
••
21
Main display value
••
22
Stable indication (endpoint) in pH, Conductivity, TDS or Salinity
•
23
The display is in HOLD mode
••
Item
No
Description H160 H170

Operation
15
To set the stabilization lock:
1. Push the SETUP key to put in the setup mode.
2. Push ENTER. The display will show the stabilization lock status.
3. Use the arrows keys to set the stabilization lock mode to off or on.
4. Push ENTER to save changes and return to setup mode.
5. Push SETUP to return to setup mode without saving changes.
4.3.2 Set the temperature display
Temperature can be displayed in ºC or ºF. The default mode is ºC.
To select temperature units:
1. Push the SETUP key to put in the setup mode.

Operation
16
2. Push the arrow keys until the temperature units setup screen is displayed.
3. Push ENTER. The display will show the current units.
4. Use the arrow keys to set the temperature units.
5. Push ENTER to save changes and return to setup mode or push SETUP to
cancel any changes and return to the setup mode.
4.3.3 Turn the sound ON/OFF
Sounds will occur to alert the user.
• Three short beeps: Any time measurement stability is reached during calibration
mode, regardless of the stabilization lock setting.
• One short beep: Stabilization is reached in stabilization lock ON mode.
• Two long beeps: An error condition occurs. An error code will be displayed.
To turn the sound on or off:
1. Push the SETUP key to put in the setup mode.

Operation
17
2. Push the arrow keys until the sound icon is displayed.
3. Push ENTER. The display will show the sound status (ON or OFF).
4. Use the arrow keys to display ON or OFF.
5. Push ENTER to save changes and return to setup mode. Push SETUP to
return to setup mode without saving changes.
Note: Pushing the arrow keys will display ON and OFF.
4.3.4 Meter automatic shutoff time
The meter will shutoff automatically to conserve battery power after a
predetermined period of time (default is 20 minutes). The meter will beep
intermittently for one minute prior to shutdown. Auto power off is user selectable
from one minute automatic shut down to always on.
User must power cycle for the automatic shutoff to take effect.

Operation
18
To change or set the meter shutoff time:
1. Push the SETUP key to put in the setup mode.
2. Push the arrow keys until the meter automatic shutoff time screen is displayed.
3. Push ENTER. The display will show the number of minutes until the meter
automatically shuts off.
4. Use the numeric keypad or the arrow keys to set the shutoff time in minutes.
Set to 000 for continuously on.
5. Push ENTER to save changes and return to setup mode.
6. Push SETUP to return to setup mode without saving changes.
4.3.5 Clearing calibration points
It is possible to clear all stored calibration points for all parameters. It is important to
recalibrate the meter prior to use after clearing all calibration points.
To clear calibration points in the meter:
1. Push the SETUP key to put in the setup mode.
/