Page is loading ...

54650-23
and
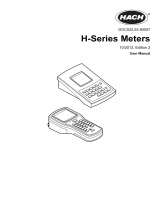
Multiparameter Meters

2
pH Menu Options
Table 1 How to Change pH Menu Options
Setup How to Get There
Setup 1
Time
From any reading mode, press SETUP.
Press
ENTER.
Use the number keys to change the time.
Press ENTER to accept the time.
Setup 2
Date
From any reading mode, press
SETUP.
Press the
UP ARROW until the Setup number is 2.
Press
ENTER.
Press the
UP ARROW or DOWN ARROW to toggle the date format between d/M
(day/month) and m/d (month/day).
Use the number keys to change the date.
Press
ENTER to accept the date.
Setup 3
Year
From any reading mode, press
SETUP.
Press the
UP ARROW until the Setup number is 3.
Press
ENTER.
Use the number keys to change the year.
Press
ENTER to accept the year.
Setup 4
Temperature
Units
From any reading mode, press
SETUP.
Press the
UP ARROW until the Setup number is 4.
Press
ENTER to toggle between °C and °F. The default is °C.
When the desired option is selected, press
EXIT to return to the reading mode.
Setup 5
Display Lock
From pH reading mode, press
SETUP.
Press the
UP ARROW until the Setup number is 5.
Press
ENTER to toggle display lock off and on.
When the desired option is selected, press exit to return to the reading mode.
Setup 6
Measurement
Resolution
From pH reading mode, press
SETUP.
Press the
UP ARROW until the Setup number is 6.
Press
ENTER to toggle between the three resolution options.
When the desired option is selected, press
EXIT to return to the reading mode.
Setup 7
Mid-range Auto
Buffer
Recognition
From pH reading mode, press
SETUP.
Press the
UP ARROW until the Setup number is 7.
Press
ENTER to toggle between the buffer value of 6.86 and 7.00.
When the desired option is selected, press
EXIT to return to the reading mode.
Setup 8
Auto Print
Intervals
From pH reading mode, press
SETUP.
Press the
UP ARROW until the Setup number is 8.
Press
ENTER.
Change the print interval by pressing the
UP ARROW or DOWN ARROW keys.
Press
ENTER to accept the print interval.

3
pH Calibration Using Automatically Recognized Buffers
Note: Use a 6.86 or
7.0 pH buffer for the
mid-range buffer.
Choose the pH setup
option in Table 1.
1. Prepare two or three pH buffers according to the electrode
instruction manual. Choose from 1.68, 4.01, 7.00 (or 6.86), 10.01,
and 12.45 pH buffers.
2. Turn the instrument on. From the pH reading mode, press
CAL.
CAL and flashing ? will appear in the upper display area, along
with
Standard and 1.
3. Place the pH electrode into one of the buffers.
4. Press
READ. The instrument will automatically recognize the
calibration buffer value. The temperature and pH values will be
updated until a stable reading is reached.
Note: The pH values for the buffers are given for 25 °C. If the calibration buffer
temperature is not 25 °C, the pH values displayed for the buffers will reflect
the correct pH value for the calibration buffer temperature.
Note: If the meter is measuring in pH mode, it automatically moves to the next
calibration step when stabilization is reached (indicated by three beeps). If
measuring in mV mode, the three beeps will still sound when the
stabilization occurs, but ENTER must be pressed to accept the reading. This
lets the operator control the acceptance point of the buffer.
5. When the reading has stabilized or been accepted, the standard
number will change to
2.
6. Remove the probe from the first buffer and rinse with deionized
water. Place the probe into the second buffer.
7. Press READ. The temperature and pH values will be updated until a
stable reading is reached.
8. When the reading has stabilized or been accepted, the standard
number will change to
3. (To accept this calibration after two
points, press
EXIT.PressENTER to accept the calibration or EXIT to
cancel the calibration without saving it.)
9. Remove the probe from the second buffer and rinse with deionized
water. Place the probe in the third buffer.
10. Press
READ. The temperature and pH values will be updated until a
stable reading is reached.
11. When the reading has stabilized or been accepted, the slope value
and the
Store and ? icons will appear.
12. To save the calibration and return to the reading mode, press
ENTER. To exit the calibration without saving it and return to the
reading mode, press
EXIT.

4
Conductivity Menu Options
Table 2 How to Change Conductivity Menu Options
Setup How to Get There
Setup 5
Display Lock
From conductivity reading mode, press SETUP.
Press the
UP ARROW until the Setup number is 5.
Press
ENTER to toggle the display lock off and on.
When the desired option is selected, press EXIT to return to the reading mode.
Setup 6
Temperature
Correction Value
From conductivity reading mode, press
SETUP.
Press the
UP ARROW until the Setup number is 6.
Press
ENTER.
To select the non-linear function, press the
UP ARROW or DOWN ARROW until the
display shows NaCl.Press
ENTER to accept the setting.
To select a linear conversion, scroll until the correction coefficient appears
(e.g., 2.000%).
Enter the desired value using the numeric keypad. Press
ENTER to accept the
value. If a number entry error occurs, start over by pressing
CE.
Note: If the compensation factor is set to 0.00%, the conductivity readings will not be
corrected for temperature.
When the desired option is selected, press EXIT to return to the reading mode.
Setup 7
TDS Correction
Factor
From conductivity reading mode, press
SETUP.
Press the
UP ARROW until the Setup number is 7.
Press
ENTER.
Press the
UP or DOWN ARROW keys to switch between linear and non-linear
correction functions.
To choose a non-linear conversion, scroll until a flashing NaCl appears, then
press
ENTER.
To select a linear conversion, scroll until the conversion coefficient appears. Use
the numeric keypad to set the value of the coefficient, then press ENTER.Ifan
number entry error occurs, start over by pressing
CE.
When the desired option is selected, press
EXIT to return to the reading mode.
Setup 8
Auto Print
Intervals
From conductivity reading mode, press
SETUP.
Press the
UP ARROW until the Setup number is 8.
Press
ENTER.
Change the print interval by pressing the
UP ARROW or DOWN ARROW.
Press
ENTER to accept the print interval.
Setup 9
Cond. Standard
Reference
Temperature
From conductivity reading mode, press
SETUP.
Press the
UP ARROW until the Setup number is 9.
Press
ENTER to toggle between 20° C and 25° C. The default is 25° C.
Press
EXIT to return to the reading mode.
Setup 10
Temperature
Correction
Off and On
From conductivity reading mode, press
SETUP.
Press the
UP ARROW until the Setup number is 10.
Press
ENTER to toggle between off and on.
Press
EXIT to return to the reading mode.

5
Conductivity Calibration with a Known Standard
1. Make sure the meter is in Conductivity reading mode.
2. Make sure that the reference temperature in Conductivity Setup 9
matches the reference temperature of the sample.
3. Place the probe in a conductivity standard that is in the expected
range of the samples. Agitate the probe to dislodge bubbles in the
cell. Avoid resting the probe on the bottom or side of the container.
4. Press
CAL. The meter will recall the most recent type of calibration.
5. Look at the units field to see what kind of calibration is active.
Scroll to the preferred units using the
UP or DOWN ARROWS.
6. Use the number keys to change the numeric value, if desired. It is
not necessary to fill up the numeric entry screen before moving on.
To clear the numeric display, press
CE.
7. When the value and units are correct, press
ENTER to calibrate on
the standard. The meter automatically corrects the calibration
measurement to the selected reference temperature using the NaCl-
based, non-linear temperature coefficient.
8. The meter will return to Conductivity reading mode when the
calibration is finished.

6
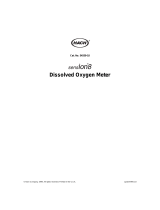
Dissolved Oxygen Menu Options
Table 3 How to Change Dissolved Oxygen Menu Options
Setup How to Get There
Setup 5
Display Lock
From dissolved oxygen reading mode, press SETUP.
Press the
UP ARROW until the Setup number is 5.
Press
ENTER to toggle display lock off and on.
When the desired option is selected, press
EXIT to return to the reading mode.
Setup 6
Measurement
Resolution
From dissolved oxygen reading mode, press
SETUP.
Press the
UP ARROW until the Setup number is 6.
Press
ENTER to toggle between 0.0 or 0.00 mg/L.
When the desired option is selected, press
EXIT to return to the reading mode.
Setup 7
Salinity Factor
Determine sample salinity. The units for salinity are parts per thousand (0/00).
From dissolved oxygen reading mode, press
SETUP.
Press the
UP ARROW until the Setup number is 7.
Press
ENTER.
Use the number keys to enter a salinity factor ranging from 0 to 42. Press ENTER to
accept the value, or
EXIT to leave the value unchanged.
When the desired value is accepted, press
EXIT to return to the reading mode.
Setup 8
Auto Print
Interval
From dissolved oxygen reading mode, press
SETUP.
Press the
UP ARROW until the Setup number is 8.
Press
ENTER.
Change the print interval by pressing the
UP ARROW or DOWN ARROW. To turn this
feature off, select
off.
Press
ENTER to accept the print interval.
Press the
EXIT key.

7
Dissolved Oxygen Calibration in Water Saturated Air
1. Plug in the DO probe at least 30 minutes before calibrating to
polarize the probe.
2. Secure the calibration and storage chamber to the probe cable.
3. Prepare the calibration and storage chamber by holding it under
water and squeezing it a couple of times to pull a small amount of
water into the lower chamber through the inlet. Alternately, open
the bottom of the chamber and insert a water-soaked sponge.
Note: Avoid completely filling the lower chamber with water.
4. Insert the DO probe into the calibration and storage chamber. The
tip of the probe must not be flooded with water or be holding a drop
of water on the membrane.
5. Allow at least ten minutes for the atmosphere in the chamber to
reach a steady state.
Note: Gently squeezing the lower chamber a couple of times to force water
saturated air into the probe chamber will speed up stabilization.
Note: Keep the DO probe at a uniform temperature. When holding the probe,
do not touch the metallic button on the side of the probe. The button is a
thermistor that senses temperature. An inaccurate calibration will result if
the temperature of the thermistor is different from the probe membrane.
6. Press the DO key to put the meter in DO reading mode.
7. Press the
CAL key located in the lower left corner of the keypad.
8. The display will show
100%. Press the ENTER key. The stabilizing
icon will appear while the meter completes the calibration.
9. When the calibration is complete, the meter will return to reading
mode. Press the
EXIT key during the calibration sequence to back
out of the calibration routine, one screen at a time, without
completing a calibration.

HACH COMPANY
WORLD HEADQUARTERS
P.O. Box 389
Loveland, Colorado 80539-0389
Telephone: (970) 669-3050
FAX: (970) 669-2932
FOR TECHNICAL ASSISTANCE, PRICE INFORMATION AND ORDERING:
Call 800-227-4224
Contact the HACH office or distributor serving you.
www.hach.com [email protected]
In the U.S.A. -
Outside the U.S.A. -
On the Worldwide Web - ; E-mail -
toll-free
Measuring Tips
• Turn the meter on and off with the I/O/EXIT key.
• To review a calibration, press the REVIEW key.
• When using the dissolved oxygen probe, polarize the probe by
plugging it into the meter before attempting a calibration or
measurement. The length of time required for polarization depends
on how long the electrode has been unplugged. It can vary from 60
minutes (for a new probe) to a few seconds (if you momentarily
disconnect the probe). If the
CAL and ? icons flash after calibrating
the DO probe, the probe is not polarized.
• Connect the pH electrode to the black connector, and the DO or
conductivity electrodes to the blue connector.
• If the meter is not in reading mode, it may take a few key presses to
turn the meter off.
• If the readings do not change when you move an electrode to a new
sample, the meter probably has the Display Lock set to
ON for the
parameter you are reading. If the
Lock Icon appears in the lower left
portion of the display, the setting is on. To change the setting, use
setup number 5. Or, press
READ to initiate a new reading.
• When calibrating pH or dissolved oxygen, make sure that the
instrument is displaying readings to the correct number of decimal
places for your needs. This will assure that your calibration is
sufficiently precise. To change the setting, use setup number 6.
© Hach Company, 2000. All rights reserved. Printed in the U.S.A. ap/dk 1/00 1ed
/