Page is loading ...

INSTRUCTION MANUAL
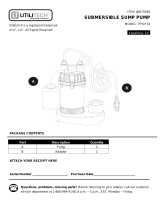
CAST IRON SUMP PUMP
WARRANTY: PRODUCT DEFECTS COVERED 1 YEAR FROM DATE OF PURCHASE.
RECEIPT AND PRODUCT DATE CODE REQUIRED FOR WARRANTY CLAIM.
This pump is controlled by the attached float switch. The proper application is for use as a
sump pump in a basement. By using in a sump pit, the rising water will activate the float
switch, turning the pump on.
Questions? Problems? Missing parts? Please call our pump experts before returning to the
store! 1-800-346-7611, 8 a.m. – 4:30 p.m. EST, Monday-Friday.
WSSPC5V – 1/2 HP

WATER SOURCE LLC
2
WWW.WATERSOURCEUSA.COM
SAFETY INFORMATION
Please read and understand this entire manual before attempting to assemble, operate, or
install the product. If you have any questions, please call our pump experts at
1-800-346-7611, 8 a.m. – 4:30 p.m. EST, Monday-Friday.
CHECKLIST BEFORE INSTALLATION:
1. Inspect your pump. If the unit has been damaged in shipment, contact your retailer before installing.
2. Carefully read all literature to familiarize yourself with details regarding installation and use. Retain
materials for future reference.
SPECIFICATIONS:
MODEL
HP
MAX. FLOW
(GPM)
GPM FLOW @ HEAD
MAX. HEAD
(Ft)
10’
15’
20’
25’
30’
WSSPC3(V)
1/3
48
30
18
9
3
--
26
WSSPC5 (V)
1/2
66
50
37
26
13
3
31
REMARKS: MODEL WITH “V” IS EQUIPPED WITH VERTICAL SWITCH
MATERIAL REQUIRED FOR PUMP INSTALLATION:
Materials Required:
1-1/2" ABS or PVC Pipe and adapter
Inline sump check valve with clamps to connect
discharge pipe to drain line exiting house
PVC Primer and Solvent to connect pipe to
adapter threaded into pump discharge
Thread tape
Tools Required:
Screwdriver
Hacksaw to cut pipe
Knife to assist in pipe cutting
File to smooth pipe ends
Adjustable wrench to tighten fittings
SAFETY INSTRUCTIONS:
This is a SAFETY ALERT SYMBOL.
When you see this symbol on the pump or in the manual, look for one of the following signal
words and be alert to the potential for personal injury or property damage.
Warns of hazards that WILL cause serious personal injury, death or major property
damage if ignored.
SEE BELOW FOR LIST OF DANGERS
1. Do not pump flammable or explosive liquids such as oil, gasoline, kerosene, ethanol, etc. Do not use in
the presence of flammable or explosive vapors. Using this pump with or near flammable liquids can
cause explosion or fire, resulting in serious personal injury and/or property damage.
2. Always disconnect the pump from its power source before installing, inspecting, maintaining, or repairing.
3. Do not stand in water when the pump is connected.
4. Do not touch the pump while it is operating, as the pump may be HOT and can cause serious burns.
5. Do not disassemble the motor housing. The motor has NO repairable internal parts, and disassembling may
cause oil leakage or dangerous electrical wiring issues, and voids warranty.

WATER SOURCE LLC
3
WWW.WATERSOURCEUSA.COM
Warns of hazards that CAN cause serious personal injury, death or major property
damage if ignored.
SEE BELOW FOR LIST OF WARNINGS
1. This pump is designed for home sump applications.
2. This pump will provide years of trouble-free service when properly installed, maintained, and used.
However, inadequate electrical power to the pump, dirt, or blockage by ice or debris may cause the pump to
fail, eventually bringing about additional water damage. To minimize the potential for water damage due to
pump failure, please carefully read the manual and follow the instructions regarding common pump
problems and remedies or call 1-800-346-7611.
3. For safety, the pump motor has an automatic resetting thermal protector that automatically will turn off the
pump if it becomes too hot. Overuse of this feature will damage the pump and will void the warranty.
4. Once the thermal protector detects that the pump has cooled to a safe temperature, it will allow the pump
to operate normally. If the pump is plugged in, it may restart unexpectedly.
Additional Safety Precautions
1. Know the pump applications, limitations, and potential hazards.
2. Make certain the electrical power source is adequate for the requirements of the pump.
3. ALWAYS disconnect the power to the pump before servicing.
4. Release all pressure (drain all water) within system before servicing any component.
5. Secure discharge line before starting pump. An unsecured discharge line will whip, possibly causing personal
injury and/or property damage.
6. Secure the pump on a solid base to keep the pump vertical and above mud and sand during operation to
maximize pumping efficiency and prevent clogging and premature pump failure.
7. Check that all pipe connections are tight to minimize leaks.
8. Connect the pump DIRECTLY to a grounded, GFCI outlet on a 15-Amp or larger dedicated circuit breaker.
9. Extension cords should not be used.
10. Periodically inspect the pump and system components to be sure the pump inlet is free of mud, sand, and
debris. DISCONNECT THE PUMP FROM THE POWER SUPPLY BEFORE INSPECTING.
11. Wear safety glasses at all times when working on the pump.
12. Follow all electrical and safety codes, particularly the National Electrical Code (NEC) and in the workplace,
the Occupational Safety and Health Act (OSHA).
13. This unit is designed only for use on 115 volts (single phase), 60 Hz, and is equipped with an approved
3-conductor cord and 3-prong grounded plug. DO NOT REMOVE THE GROUND PIN UNDER ANY
CIRCUMSTANCES. The 3-prong plug must be directly inserted into a properly installed and grounded
3-prong, grounding-type receptacle. Do not use this pump with a 2-prong wall outlet. Replace the 2-prong
outlet with a properly grounded 3-prong receptacle (a GFCI outlet) installed in accordance with the National
Electrical Code and local codes and ordinances. All wiring should be performed by a qualified electrician.
14. Protect the electrical cord from sharp objects, hot surfaces, oil, and chemicals. Avoid kinking the cord. Do
not use damaged or worn cords.

WATER SOURCE LLC
4
WWW.WATERSOURCEUSA.COM
GENERAL INFORMATION:
1. Water Source pumps are equipped with either a wide-angle float switch or vertical float switch. The
pump will automatically turn on when the water level in the sump pit reaches the float switch "on"
level and automatically turn off when the water is pumped down to the float switch "off" level.
Approximate height of float switch above base of pump
Float Switch Type
On Level
Off Level
Wide-angle (tethered)
13 in.
5 in.
Vertical
5 in.
1 ¼ in.
2. Make sure the wide-angle float switch will swing freely from the bottom to top without coming in
contact with the side of the sump pit. Contact with the side of the sump pit may cause the switch to
malfunction. Make sure the vertical float switch does not become bent and can rise and fall without
coming into contact with side of pump or side of sump pit. If the float switch cannot come down
properly, the pump will not turn off, which will burn out the pump motor and flood your basement!
3. The sump pit must be a minimum of 12" diameter by 10" depth for vertical float switch models; 18"
diameter by 18" depth for wide-angle float switch models to prevent excessive pump cycling.
4. Based on the float switch operation, this pump will not remove all the water in the sump pit.
5. Set your new pump in the bottom of the sump pit off to one side. The pump MUST be placed on a solid
foundation, such as a brick, stone paver, or other flat heavy surface. Do not place the pump directly on
the ground in sandy or rocky surfaces. Clay, earth, sand, or gravel that enters the pump could damage
the impeller of the pump and cause flooding. Keep the pump inlet screen clear.
Do not set pump directly on sand, dirt or mud. Sand or mud-choked pumps can be
back-flushed clean.
Do not handle or carry the pump by the power cord. Use the handle.
The shaft seal depends on water for lubrication. Do not operate the pump unless it is
submerged in water; running it dry may damage the seal, and will void the warranty.
Extended usage of the pump in a partially submerged or non-submerged situation may
cause the pump to overheat due to lack of heat dissipation from the water. If this
occurs, the pump’s thermal overload protector will shut itself off until the motor cools
to its normal temperature. Repeated overheating may cause damage to the pump. If
the overload protector repeatedly trips, unplug the pump and inspect it for clogs, low
line voltage, or a plugged/frozen discharge pipe.
The pump is not designed for application involving salt water or brine. Doing so will
void the warranty.

WATER SOURCE LLC
5
WWW.WATERSOURCEUSA.COM
3-1/2"
Tether Length
INSTALLATION:
NOTE BEFORE INSTALLING: If using a sump basin lid or cover, be sure to take note of the location of the
holes in the lid. You will need to install your
pump and piping so that it fits properly
through the lid.
1. For your own safety, turn off the electrical
power at the circuit breaker/fuse box to
avoid any possible electrical shock hazards.
2. On a replacement installation, remove the
existing pump from the sump pit by
unscrewing the clamps and disconnecting
the discharge pipe or hose from the old
pump.
3. After removing the old pump, remove
sediment, debris, and any standing water
from the sump pit.
4. Wrap threads of a PVC adapter (Male x Slip)
with thread tape and screw into the pump
discharge.
5. Prepare a ~3 foot section of PVC pipe (if
not re-using existing discharge pipe). Using
a file, smooth all rough edges of the cut pipe.
6. Drill a 1/8 inch weep hole approximately 3 inches from bottom of
pipe. This will prevent pump from air-locking. NOTE: Make sure
hole is drilled at downward angle so water shoots down towards
pit, not up and out of the pit!
a. Airlock is a condition in which air becomes trapped in the
pump. Sump pumps cannot move air! If your pump
becomes air locked, it will not pump water. To prevent
this situation, the drilled hole in the pipe will allow any
trapped air to escape, and your pump will work as it
should.
7. Apply PVC primer and solvent to PVC adapter and PVC pipe, then
insert pipe into adapter and allow solvent to set.
8. Place your pump in the sump pit on top of a brick, stone paver, or
other solid surface so that pump is not directly on top of the
bottom of base. This will help the pump to not clog. Be sure that
the pump is positioned so that the float switch moves freely without touching the wall of the sump pit
or other obstructions. Ensure incoming water does not interfere with float switch.
9. Install an inline sump check valve onto the end of the section of discharge pipe. Connect to remainder
of discharge pipe exiting through the wall. Tighten all clamps with a screwdriver. Sump check valves
prevent backflow of water into the sump pit, and will allow the pump to run less frequently.
10. Turn the electrical power back on at the circuit breaker or fuse box.
11. To test your installation, fill the sump pit with water using buckets or a hose. When the float switch
moves to the upright “on” position, the pump will turn on. The float switch will turn the pump off when
it reaches the down "off" position.
12. OPTIONAL: Install a sump basin lid/cover. A lid will prevent debris from falling into the sump pit,
prevent odors, and guard against accidental injury.
On ~14”
Off ~5”

WATER SOURCE LLC
6
WWW.WATERSOURCEUSA.COM
TROUBLESHOOTING CHECKLIST: (CAUTION: SHUT OFF POWER TO PUMP)
PROBLEMS
POSSIBLE CAUSES
Pump does
not run and
hums
● Line circuit breaker is off, or fuse is blown.
● Water level in sump pit has not reached turn-on level as indicated in installation
drawing.
● Pump cord is not making contact in receptacle.
● Float is stuck. It should operate freely in basin.
Pump runs
but does not
deliver water
● Check valve is installed backwards. Flapper should open in direction of water flow.
● Discharge shut-off valve (if used) may be closed.
● Impeller or volute openings are fully or partially clogged. Remove pump and clean.
● Pump is air-locked. Start and stop several times by plugging and unplugging cord.
Check for clogged vent hole in pump case.
● Vertical pumping distance (“head”) is too high. Reduce distance or increase
diameter of discharge pipe.
Pump runs
and pumps
out sump pit,
but does not
stop
● Float switch is stuck in up/on position. Be sure float switch operates freely in pit.
● Defective float switch. Replace with new float switch.
Pump runs
but delivers
only a small
amount of
water
● Pump is air-locked. Start and stop several times by plugging and unplugging cord.
Check for clogged vent hole in discharge pipe.
● Vertical pumping distance (“head”) is too high. Reduce distance or increase
diameter of discharge pipe.
● Impeller or volute openings are fully or partially clogged. Remove pump and clean.
Fuse blows or
circuit
breaker trips
when pump
starts
● Pump impeller is partially clogged, causing motor to run slow and overload.
Remove pump and clean.
● Motor stator may be defective.
● Fuse size or circuit breaker may be too small.
● Impeller or volute opening are fully or partially clogged. Remove pump and clean.
Motor runs
for a short
time, then
stops
● Inlet holes in pump base are clogged. Remove pump and clean the openings.
● Motor stator may be defective.
● Impeller or volute openings are fully or partially clogged. Remove pump and clean.

WATER SOURCE LLC
7
WWW.WATERSOURCEUSA.COM
SUMP PUMP SPARE PARTS LIST:
#
Description
Qty
Repair Kit
#
Description
Qty
Repair Kit
1
Pump casing & Motor
1
N/A
8
Impeller
1
WSSPC-IMP
2
Pump base
1
WSSPC-PBG
9
Washer
1
3
Gasket
1
10
Washer
1
4
Vertical Float Switch
1
WSSPCV-RS
11
Nut
1
5
Cable
1
12
Handle
1
N/A
6
Cable fitting
2
13
Screw
8
N/A
7
Bracket
1
16
Cable Gland
2
N/A
14
Screw
2
17
Packing
2
N/A
15
Screw
2
18
ADAPTER
1
BUSH-125-150
19
Tether Float Switch
1
WSSPC-TRS

WATER SOURCE LLC
8
WWW.WATERSOURCEUSA.COM
LIMITED WARRANTY:
This product is warranted against manufacturing defects for a period of 1 year from the date of
purchase. Any misuse, abuse, or modification automatically voids this warranty. Water Source LLC
will repair or replace the pump if, in its sole determination, the pump failed due to defects in
materials or workmanship.
WARRANTY EXCLUSIONS
1. Neither Water Source LLC, nor the store that sold this pump shall in any event be liable for any labor or
similar expenses incurred in removing or repairing this pump.
2. Water Source LLC specifically disclaims any implied warranties of merchantability and fitness for a
particular purpose.
3. In no event shall Water Source LLC be liable for consequential, incidental, or special damages resulting
from or related in any manner to any distributor components or accessories.
4. Water Source LLC disclaims all liability for improper installation or improper use of this product.
Some states do not allow the exclusion or limitation of incidental or consequential damages. The above
limitations and exclusions may not apply to you. In addition to the rights given you by this warranty, you
may also have other rights which vary from state to state.
For warranty claims, DO NOT RETURN PUMP TO THE STORE!
Call our Customer Service Department at: 1-800-346-7611, Monday – Friday, 8:00 a.m. – 4:30 p.m., EST.
Printed in China
/