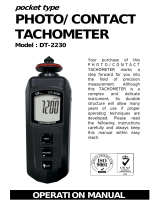
Page is loading ...


TABLE OF CONTENTS
1. FEATURES ..................................................................
.
1
2. SPECIFICATIONS.........................................................
.
1
2-1 General Specifications .......................................... 1
2-2 Electrical Specifications.........................................
.
1
3. FRONT PANEL DESCRIPTION........................................ 1
3-1 Display.................................................................1
3-2 AC/DC Switch.......................................................
.
1
3-3 Power ON/OFF switch ..........................................
.
1
3-4 Function Switch ................................................... 1
3-5 Temperature Probe Socket ................................... 1
3-6 Input Terminal ....................................................
.
1
3-7 Battery compartment............................................
.
1
4. PRECAUTIONS & PREPARATIONS FOR
MEASUREMENT ...........................................................1
5. MEASURING PROCEDURE
5-1
Volta
g
e Measurement ................................................1
5-2
Current Measurement ................................................1
5-3
Resistance Measurement ...........................................
.
1
5-4
T
emperature Measurement ........................................1
5-5
Frequency Measurement ...........................................
.
1
5-6
" RPM (TACH.) " Measurement ................................... 1
5-7
"DWELL ANGLE" Measurement ...................................1
5-8
Continuity Beeper .....................................................
.
1
5-9
Diode Check.............................................................. 1
5-10 OP ADPT./Optional Adapter (External Adapter).......1
6. REPLACEMENT OF BATTERY ........................................ 1
7. OPTIONAL TEMPERATURE PROBE & OTHER
ACCESSORIES .............................................................1

Caution Symbol
Caution :
* Risk of electric shock !
Caution :
* Do not apply the overload
voltage, current to the input
terminal !
* Remove test leads before open
the battery cover !
Environment Conditions
*Installation categories II .
*Pollution Degree 2.
*Altitude up to 2000 meters.
*Indoor use.
*Relative humidity 80% max.

1. FEATURES
* Multi function measurement. DCV, ACV, DCA,
ACA, OHMS, TEMPERATURE, Hz, RPM, DWELL
ANGLE, DIODE, CONTINUITY BEEPER.
* RPM (TACH) measurement by inductive pickup for more
convenient & accurate readings of both conventional and
distributorless ignitions.
* RPM (TACH) used the " Secondary Tach. " measuring
method, no matter what cylinder no is.
* Accurate DCV/ACV, DCA/ACA and resistance
measurement, wide range of automotive electronics tests.
* Duty cycle (%) with Dwell conversion chart for electronic
fuel injection and feedback carburetors.
* Diode test quickly measures the forward bias voltage drop
of alternator rectifiers and other diodes.
* Continuity beeper keeps whenever probes touch a
continuous circuit. Helps find shorts and open wires.
* 10 Mega ohm impedance protects Mega ohm computer ckt.
* Frequency measurements with adjustable trigger point for
testing MAF, MAP & ABS SENSOR.
* Rotary function switch, easy operation.
* Large size LCD display.
* Built-in overload protection for most ranges.
1

2
.
S
PE
C
IFI
C
ATI
O
N
S
2-1 General Specifications
Display 18 mm ( 0.7" ) LCD,
3 1/2 di
g
its, Max. indication 999.
Measurement 36 ran
g
es coverin
g
: DCV, ACV, DCA,
ACA, OHMS, TEMPERATURE, Hz, RPM,
DWELL ANGLE, DIODE, CONTINUITY
BEEPER.
Polarity Automatic Switchin
g
, "-" indicates
ne
g
ative polarity.
Zero Ad
j
ustment Automatic
Over-input Display shows "1" or "-1".
Samplin
g
time Approx. 0.4 second.
Operatin
g
Temp. 0
蚓
to 50
蚓
(32
蚌
to 122
蚌
)
Operatin
g
Less than 80% RH
Humidity
Power Approx. DC 3.6 mA.
Consumption
Dimension 185 x 87 x 39 mm(7.3 x 3.4 x 1.5 inch)
Wei
g
ht 322
g
/0.71 LB (includin
g
battery).
Standard Red and Black Test leads............ 1 pair
Accessories Instruction Manual .....................1 PC
Optional RPM inductive pick up sensor (IP-07)
Accessories
T
emperature probe, carryin
g
case...
2


4. PRECAUTIONS & PREPARATIONS FOR
MEASUREMENT
1)Ensure that the DC 9V battery is connected correctly to
its snap terminal and placed into the battery compartment.
2)Select the correct position of " Function Switch " &
" AC/DC Switch " before making measurements.
3) Place the RED Test Lead into the proper input terminal
before making measurements.
4) When make measurement, selecting the proper
measurement range by starting at the largest anticipated
value and progressively selecting lower ranges the
measurement falls within the proper range.
5) Remove either of the test leads from the circuit under
test when changing the measurement range.
6) Operate the instrument only in the ambient temperature
range of 32 - 122蚌 (0 -50蚓) and less than 80 %
relative humidity.
7) Do not exceed the maximum rated voltage of each range
and input terminal.
8) Slide the " Power ON/OFbF" always to the " OFF" position
when the instrument does not use. Remove the battery if
the instrument intend not be used for a long period of time.
5. MEASURING PROCEDURE
5-1 Voltage Measurement
1)Connect red test lead to "V" input terminal and black test
lead to " COM" input terminal.
2)A. If voltage to be measured is AC, select " AC/DC
Switch" to the "AC" position.
B. If voltage to be measured is DC, select " AC/DC
Switch" to the "DC" position.

3)Determine the highest anticipated voltage (200mV, 2V,
20V, 200V, 600V) on the "Function Switch" and select to
the corresponding position.
4)Connect test lead probes into circuit under test.
5)APPLICATION 1 : to check the " POINTS" condition:
( Used the DC 2V range )
a. Disconnect "HIGH TENSION WIRE" from
distribution cape & ground " HIGH TENSION WIRE"
by laying or taping lug to bare metal surface.
b. Connect RED TEST PROBE to " - " terminal of
ignition coil (or points).
c. Turn ignition switch to ON for a while. Display values
should indicate in LOW voltage value ( should under
1 V ). If not, bump engine until it reach.
d. If the above (c) point voltage display showed lower
than 0.2V, then the contact resistance of " Points " is
normal, or it need to be changed.
6)APPLICATION 2 : to check the " BATTERY
LEAKAGE " condition ( Used the DC 2V range )
a. Connect BLACK TEST PROBE to NEG (-) battery.
Connect RED TEST PROBE to various spots on the
surface of battery.
b. If display indicate some value, then there is Battery
Leakage. Then clean acid or dirt from area around
battery with baking soda and water solution. Wipe dry.
7)APPLICATION 3 : to check the " BATTERY LIGHT
LOAD " ( Used the DC 200V or 20V range )
a. Connect BLACK TEST PROBE to NEG (-) battery,
Connect RED TEST PROBE to POS (+) battery
terminal.

b. Turn headlight switch on.
Turn high beam switch on.
Turn ignition switch on.
Turn heater switch on.
Turn radio on.
c. Do not continue above procedures for more than 2
minutes
d. Check that display reading is greater than 11.7 volts. If
reading is not correct, battery should be charged or
replaced.
8)APPLICATION 4 : to check the " BATTERY
CAPACITY " (Used the DC 200V or 20V range)
a. Disconnect " HIGH TENSION WIRE " from
distribution cap. & ground " HIGH TENSION WIRE "
by laying or taping lug to bare metal surface.
b. Connect BLACK TEST PROBE to NEG (-) battery
terminal, Connect RED TEST PROBE to POS (+)
battery terminal.
c. After cranking engine for about 15 seconds, check the
display reading is greater than 9.1 volts. If reading is
not correct, start motor should be checked or battery
should the charged or replaced.
9)APPLICATION 5 : to check the " BATTERY CABLE " :
(Used the DC 2V range). Measure the across voltage of
" BATTERY CABLE " when cranking the engine to check
the condition of " BATTERY CABLE "
10
)
OTHER DCV RANGE APPLICATION :
a. Check Charging System.
b. Check Voltage Regulator.

5-2 Current Measurement
1)Connect red test lead to "10A" input terminal and black
test lead to " COM " input terminal.
2)A. If current to be measured is AC, select " AC/DC
Switch " to the " AC " position.
B. If current to be measured is DC, select " AC/DC
Switch " to the " DC " position.
3)Select the " Function Switch " to the " 10 A " position.
4)Open the circuit in which current is to be measured. Now
securely connect test leads in series with the load in which
the current is be measured.
5-3 Resistance Measurement
1)Connect red test lead to " OHM " input terminal and black
test lead to " COM " input terminal.
2)Determine the highest anticipated resistance ( 200OHM,
2K, 20K, 200K , 2000K or 20 M ( K = 1000)) on the
" function switch " and select to the corresponding position.
3)If the resistance being measured is connected to a circuit,
turn off power to circuit being tested and discharge all
capacitors.
4)Connect test lead probes into circuit ( resistance ) under test.
5)Read resistance value on digital display.
6)APPLICATION 1 : " 2K, 200K RANGE " to measure the
coil's resistance.
7)APPLICATION 2 : " 2M RANGE" to measure whether
the " CAPACITOR " is good or not.

5-4 Temperature Measurement
1)Insert the plug of the Thermocouple Probe (optional)
into the " Temperature Probe Socket " ( 3-5, fig 1 ) , take
care to observe the correct polarity.
2)Determine the 蚓 or 蚌 on the " Function Switch " and
select to the corresponding position.
3)
Consideration:
When the Thermocouple Probe is first plugged into the
meter, or if the probe is changed, the plug must be
allowed to stabilize at the same temperature of the
socket, which is in thermal contact with the cold junction
compensation device, if greatest accuracy is to be
achieved. This will only take a couple of minutes and
only applies if the plug of probe has previously been
exposed to an ambient temperature different ot that
meter.
5-5 Frequency Measurement
1)Connect black test lead to " COM " terminal and red test
lead into "Hz" terminal.
2)Determine the highest anticipated frequency ( 200 Hz, 2K
Hz 20K Hz) on the " Function Switch " and select to its
corresponding position.
3)Connect test lead probes into circuit under test.
5-6 "RPM (TACH.)" Measurement
1)RPM measurement is with INDUCTIVE PICKUP
SENSOR, IP-07 (Optional).
2)Connect above INDUCTIVE PICK UP Sensor's black
test lead into " COM " terminal and red test lead into
" TACH " terminal.

3)Select the " Function Switch" to the " RPM " position.
4)Connect the RPM INDUCTIVE PICK UP SENSOR to
the HIGH TENSION WIRE of No. 1 SPARK PLUG (or
No. 2, No. 3... SPARK PLUG), ref. Fig 2, then the display
will show RPM reading (x 10 RPM).
NOTE:
a. RPM (TACH) used the "Secondary Tech"
measuring method, no matter what cylinder is
b. If the display reading is unstable, it may be caused
by environment interference. Please readjust the
position of RPM INDUCTIVE PICK UP SENSOR
or changed the direction of INDUCTIVE
CLAMPS.

5-7 "DWELL ANGLE" Measurement
1)Select the "Function Switch" to the % (duty cycle), 3 cyl, 4
cyl, 5 cyl, 6 cyl on the DWELL range.
2)Connect black test lead into " COM" terminal and red test
lead into "DWELL" terminal.
3)Connect red test probe into " BREAKER POINTS" or
"-" terminal of IGNITION COIL.
Connect black test probe into " GROUND" or "-"
terminal of battery.
* The wire connection diagram please ref. fig. 3.
4)Crank engine, the display will show the DWELL ANGLE
of points.
NOTE:
Only traditional ignition system car that built in
BREAKER POINTS needs to test DWELL ANGLE.
If the car in ELECTRONIC IGNITION SYSTEM need not.

5-8 Continuity Beeper
1)Select the " Function Switch " to the" " position.
2)Connect black test lead into " COM " terminal and red test
lead into " OHM " terminal.
3)Connect test probes into circuit under test. If the
resistance value of the circuit is less than approx. 100
OHM, then there will be Beeper sound output from the
meter.
5-9 Diode Check
1)Select the "Function Switch" to the " " position.
2)Connect red test lead to the " V " input terminal and black
test lead into " COM " input terminal.
3)Connect test probes into circuit under test. If the
resistance value to f the circuit is less than approx. 100
OHM, then there will be Beeper sound output from the
meter.
A. When connected with polarity as shown in Fig. 4, a
forward current flow is established and the approx.
DIODE forward voltage(VF) values in volt will display
on the display reading. If the diode under test is
defective, " 000 " or near " .000 " value (short circuit) or
" 1 " ( open circuit ) will be displayed.
B. When connected as shown in Fig. 5, a reverse check on
the diode is made. If the diode under test is good, " 1 "
will be displayed. If the diode under test is defective,
" 000 " or other numbers will displayed. proper diode
testing should include both steps A and B above.

5-10 OP ADPT./Optional Adapter (External Adapter)
A. EXT ADPT. (External adapter):
This range is exactly same as " DC 200 mV " range. it
can match the external adapter (if this adapter is
built-in DC 200 mV output), such as PHOTO TACH.
TACHOMETER, LARGE CURRENT METER,
THERMOMETER....
B. 200A ( 200A DC/AC CURRENT PROBE ):
This range is exactly same as "DC 200mV" range. It can
match the 200 A range of optional " DC/AC
CURRENT PROBE" ( such as CA-501, CA-202 ),
then can get current values on the meter display directly.
C. 2000A (2,000A DC/AC CURRENT PROBE):
This range is exactly same as " DC 2V " range but
without decimal point. It can match the 400 A or 2,000 A
range of optional " DC/AC CURRENT PROBE "
(such as CA-501, CA-202), then can get current
values on the display directly.
D. BATT TEST (Battery tester):
This range is exactly same as " DC 200 V " range. It can
match optional adapter of " BATTERY TESTER (with
a load) ", then can test the battery condition.
6. REPLACEMENT OF BATTERY
1)When the left corner of LCD display show "BAT" or " ", it
indicate a normal battery output of less than 6.5V - 7.5 V
It is necessary to replace the battery. However,
in-spec measurement may still be made for several
hours after LOW BATTERY INDICATOR appears
before the instrument become inaccurate.

2)Loose the Battery Cover Screw (3-7 Fig 1), slide the
battery cover away from the instrument and remove the
battery.
3)Replace with a 9V battery and reinstall the cover.
4)Make sure the battery cover is secured with the screw
after changing battery.
7. OPTIONAL TEMPERATURE PROBE & OTHER
ACCESSORIES
T
emperature Probe Measure Ran
g
e: -40
蚓
to 250
蚓
(Type K) TP-01 (-40
蚌
to 482
蚌
)
Max. short -term operatin
g
temperature: 300
蚓
(572
蚌
)
It is an ultra fast response naked
bead thermocouple suitable for many
g
eneral purpose application.
T
emperature Probe Measure Ran
g
e:-50
蚓
to 900
蚓
(Type K) TP-02A (-50
蚌
to 1700
蚌
)
Dimension: 10cm tube, 3.2mm dia.
T
emperature Probe General purpose application.
Measure Ran
g
e:-50
蚓
to 500
蚓
(Type K) TP-02B (-50
蚌
to 932
蚌
)
Dimension: 10cm tube, 4.2mm dia.
10cm handle.
T
emperature Probe Measure Ran
g
e:-40
蚓
to 1200
蚓
(Type K) TP-03 (-40
蚌
to 2200
蚌
)
Dimension: 10cm tube, 8mm dia.
Carry case, CA - 03 Dimension: 185 x 90 x 60mm
(7.3 x 3.5 x 2.4inch)
Wei
g
ht : 70
g
(0.1 LB)
Plu
g
, PL - 03 Plu
g
available for measurin
g
external
transistor hFE
T
est Lead, TL - 02A Hi
g
h quality and better performance
test lead with silicon rubber wire &
alli
g
ator clip sets.

The address of after service center :
9610-DM-9030-IEC1010
/