Page is loading ...

Automatic System
Flush Button
Portion
Control
Knob
1-1/4"
32mm
1-1/2"
40mm
1/4"
6mm
Activation
Area
© 2020 by Bobrick Washroom Equipment, Inc.
Form No. 848-191 12/16/20 Printed in U.S.A.
Clearances and Mounting Requirements:
• 1-3/8" (35mm) diameter mounting hole required.
• Minimum 18" (457mm) vertical clearance needed below the counter.
• 5" (127mm) diameter clearance needed below the mounting hole to accommodate
bottle and bottom housing.
• Minimum 2-1/4" (57mm) diameter clearance needed for Mounting nut directly below
the counter to clear sink rim.
• Recommend drilling mounting hole 6" to 8" (150 to 205mm) from the wall, and 2-1/2" to
3" (65 to 75mm) from sink rim.
Routine Cleaning and Maintenance:
Using a damp cloth, wipe the chrome-plated exterior of the dispenser daily. Periodically (about 3 to 6 months), it is
recommended to flush the system with lukewarm water for cleaning and maintenance.
1. When minimal amount of soap is left in the bottle, fill dispenser with lukewarm water from top
to dilute soap.
2. Press on Automatic System Flush Button to flush the system.
3. Once unit is flushed, press Automatic System Flush Button again to stop dispensing.
4. Fill unit with fresh foam soap, and dispense as usual.
For Retrot:
1. Remove existing dispenser(s).
2. Clean area.
3. Ensure hole is 1-3/8" (35mm) diameter.
4. If necessary, enlarge opening using appropriate hole saw. For granite/marble counters, recommend using a diamond hole saw
(consult with stone and granite specialist). If needed, mounting hole should be oset to clear the sink rim. The Mounting nut
requires 2-1/4" (57mm) diameter clearance directly below the counter.
To Operate:
Troubleshooting:
1. Soap dispenser does not dispense soap, but you can hear motor running. The green LED turns o when hands are under spout.
a. Press the Automatic System Flush Button until soap comes out
b. Press Automatic System Flush Button again to turn it o
2. Soap dispenser does not dispense soap and you cannot hear motor running. The green LED is not flashing when in standby mode.
a. Be sure power is supplied to unit.
b. Make sure Fiber Optic Nut is tight on Fiber Optic Port.
Warranty:
Designer Series Counter-Mounted Automatic Foam Soap Dispenser is warranted to be free from defects in workmanship
and material under normal usage from the date of purchase for a period of 3 years.
For New Installation:
• Refer to mounting template for drilling locations (Form No. 824-307).
1. Prime Unit – After filling
dispenser, plug in power
to start prime. If unit is
plugged in prior to filling
dispenser, place hand
under spout within sensor
location to start prime.
2. Standard Dispense –
Place hand under spout
within the sensor location
for approximately 1/2
second to dispense
controlled amount of
foam hand soap.
3. Adjusting the foam quality –
Foam quality in terms of
more or less liquid used to
produce the foam can be
adjusted by rotating the
Portion Control Knob
clockwise for more air in the
foam and counterclockwise
for less air in the foam.
4. LED Light Indicators –
When in standby mode,
LED will flash green.
LED will turn o during
dispense. If red light is
flashing, remove hand to
allow unit to reset. Hand
must be removed for a
second activation.
In the U.S.A.: BOBRICK WASHROOM EQUIPMENT, INC.
Los Angeles: 6901 Tujunga Ave., North Hollywood, CA 91605-6213: Tel: (818) 982-9600, FAX: (818) 503-1102
New York: 200 Commerce Drive, Clifton Park, NY 12065-1350; Tel: (518) 877-7444, FAX: (518) 877-5029,
or e-mail: [email protected]
In Canada: BOBRICK WASHROOM EQUIPMENT COMPANY
45 Rolark Drive, Scarborough, Ontario M1R 3B1 • Eastern Canada: T
el: (877) 423-6555 • FAX: (877) 423-8555
• Western Canada: Tel: (877) 423-6444 • FAX: (877) 423-8444
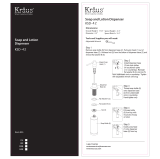
Designer Series Automatic, Counter-Mounted Soap Dispenser
INSTRUCTIONS FOR INSTALLATION, OPERATION & MAINTENANCE
BOBRICK MODELS B-840, B-842, B-845, B-846, B-848 FOAM SOAP DISPENSER
Unit Diagram:
Item Description
1 Top Assembly with Spout, Door and Stem
2 LED Light Pipe
3 Foam Nozzle Tip with Mesh
4 Fiber Optic Insert with Sensor Lenses
5 Rubber Counter Gasket
6 Wave Washer
7 Mounting Nut
8 Stem Locking Nut
9 Foam Mixer Housing
10 Bottom Housing Assembly (includes Soap Bottle)
11 (3) Fiber Optic Cables for Sensor and LED Light Pipe
12 Fiber Optic Connector Tip Assembly
13 Fiber Optic Nut
14 Portion Control Knob
15 Automatic System Flush Button
16 Key Hole
17 BobKey
18 Air Tube Adapter
19 Air Tube
20 A/C Adapter Kit with U.S. Plug, order Part
No. 3974-57.
For outlets not compatible with U.S. plugs, order
Part No. 3974-58
Scan for SureFlo Automatic Foam
Soap Dispenser Installation Video.
1
4

1. Place Counter Gasket
over mounting hole
to align with profile of
dispenser.
2. Insert Stem with tube
and all Fiber Optic Cables
carefully through mounting
hole.
3. Place the Wave Washer
on top of the Mounting
Nut Install Mounting Nut
on Stem and thread
upwards. (Minimum 2-1/4"
(55mm) diameter
clearance needed below
mounting nut).
NOTE: The outer diameter of
the Mounting Nut may need
to be filed down if space
under the counter is tight.
NOTE: Make sure Fiber
Optic Cables and Tubing are
INSIDE Mounting Nut. Do not
tighten completely until end of
installation.
5. Attach the tubing to
the top barb of the
Foam Mixer Housing.
6. The Bottle Cap can only
be placed onto the Stem
in one orientation.
The flat section on the
Stem is to be aligned with
the flat section on the
Bottle Cap.
7. Rotate the Bottle back
and forth to align the flat
section of the Stem to the
flat section on the Bottle.
8. Push the Bottle Assembly
up onto the Stem while
also inserting the Foam
Mixer Housing into the
hole in the post on the
Bottle Cap.
Fully insert the Bottle
Assembly over the Stem
until it stops. Both red
o-rings must be inside the
Bottle Cap.
9. While pushing upwards
on the Bottle, Thread
the Stem Locking Nut
down onto the Bottle
Cap threads
NOTE: After assembly, hold
the Stem and lightly rotate
the Bottle back and forth
and tug down to be sure it is
on tight. If it is loose, repeat
Steps 7 and 8.
NOTE: Tug Tubing on
Foam Mixer Housing down
from under the counter to
straighten out the tubing.
10. Connect the small
diameter tube from the
Foam Mixer Housing
to the air tube adapter
located on the Bottom
Housing.
11. Thread Fiber Optic
Connector Tip into
Bottom Housing. Keyed
feature on Connector
Tip ensures Fiber Optic
Cables are always
located correctly.
13. Align the Top Assembly
above the counter to
the desired position
and tighten the
Mounting Nut against
the bottom of counter
so the Top Assembly
does not easily rotate.
Make sure Fiber Optic
Cables are not between
the underside of the
counter and top of
Mounting Nut. See
Steps 3 and 4.
14. Plug AC Adapter into
wall and other end into
Bottom Housing base.
Installation:
Filling Instructions: (use foam soap only)
Unit will dispense commercially Marketed Bulk Foam Soap.
1. Insert tip of BobKey provided into opening of concealed locking mechanism to disengage door.
2. Door will disengage and rotate clockwise for filling from the top.
3. Fill dispenser with commercially marketed bulk foam hand soap (Do not use liquid or lotion soap).
4. Close door counter-clockwise to lock in place.
Replacement Parts List
Part Name Part No.
- A/C Adapter 3974-57
- International AC Adapter Plug Kit (U. K., Europe, Australia) 3974-58
- Mack Gasket Kit 824-167
(To secure Top Assembly under the counter due to irregular counter surface)
- External A/C Multi Adapter Kit 824-201
- Nozzle Tip Replacement Kit Foam 828-310
- Foam Mixer Housing 828-322
- Installation Hardware Packet with Foam Mixer Housing 828-443
(Includes Wave Washer, Counter Gasket, Mounting Nut, BobKey, Stem Locking Nut)
- Top Housing Assembly Foam, Polished Brass 840-225
TOP FILL ONLY !
4. Thread the Stem Locking
Nut onto the Stem. The
ribs on the Nut are to be
towards the top. Once
it goes past the two
red o-rings, the nut will
automatically stop
threading.
Apply a bead of Silicone
around the base of the
Top Housing above the
counter to prevent
spilled soap from going
through the mounting
hole.
12. Thread Fiber Optic Nut
onto Connector Port
and hand snug only.
Do not over-tighten.
NOTE: DO NOT bend or
kink Fiber Optic Cables.
Part Name Part No.
- Top Housing Assembly Foam, Matte Black 842-225
- Top Housing Assembly Foam, Brushed Nickel 845-225
- Top Housing Assembly Foam, Polished Nickel 846-225
- Top Housing Assembly, Foam, Polished Chrome 848-225
(Top Housing Assemblies include Installation Hardware Packet and
Foam Mixer Housing)
- Bottom Housing Assembly, Foam 848-250
3
2
/