Page is loading ...

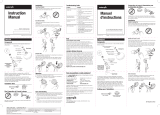
5. Use an adjustable wrench to
tighten pivot ball to pipe until it
is secure. Do not overtighten.
6. Attach arm by hand tightening
the large wing nut to the
threaded back of the arm.
Reminder: The wing nut has
left handed threads.
7. Position shower head to
preferred location.
8. Secure shower arm to desired
position by tightening wing nut.
(Hand tighten only do not use
wrench or pliers).
CLEANING INSTRUCTIONS
• Polishwithmoist,softcloth.
• Forheaviercleaning,submergeinhouseholdvinegar.
• Ifothercleanserscontactproduct,rinseimmediately.
TROUBLESHOOTING GUIDE
Problem Solution
No water flow from
installed shower head:
a Confirm previous shower washer is
not in the j-pipe.
b Confirm there is only one washer in
the pivot ball.
Low water pressure or
missing spray patterns
a Clean shower head in vinegar/water
solution.
b Clean screen.
Leaking at pipe pivot
ball connection:
a Confirm one single washer is seated
on top of the screen.
b Grate bar of soap across the j-pipe
threads to act as a sealant.
For external use only.Thepotentiallydeadlyamoeba,Naegleria
fowleri,maybepresentinsometapwaterorunchlorinatedwell
water.
LIMITED LIFETIME WARRANTY
WaterPik,Inc.warrantstotheoriginalpurchaserofthisproduct
that it is free from defects in material and workmanship for as
longastheoriginalpurchaserownsthisproduct.WaterPik,
Inc.willatourelection,replaceanypartoftheproduct,which
EN FRANÇAIS AU VERSO
inouropinionisdefective,providedthattheproducthasnot
beenabused,misused,alteredordamagedafterpurchase.(This
includesdamageduetouseoftoolsorharshchemicals.)Inthe
event an item has been discontinued we will replace with what we
deemtobetheclosestproduct.WaterPik,Inc.isnotresponsible
forlaborcharges,installation,orotherconsequentialcost.The
responsibilityofWaterPik,Inc.shallnotexceedtheoriginal
purchase price of the product.
This warranty gives you specific legal rights. You may also have
other rights that vary where you reside. Save your receipt as proof
ofpurchaseisrequiredforwarrantyaction.
Have any questions or need assistance?
IntheU.S.,callourtoll-free
CustomerAssistanceLine,
1-800-525-2774
InCanada,callourtoll-free
CustomerAssistanceLine,
1-888-226-3042
OutsidetheU.S.,writeusat:
WaterPik,Inc.
1730 East Prospect Road
FortCollins,CO80553-0001
U.S.A.
www.waterpik.com
Waterpik
®
isatrademarkofWaterPik,Inc.registeredinArgentina,Australia,
Austria,Benelux,Canada,Chile,China,HongKong,India,Japan,Korea,Mexico,
Norway,Poland,RussianFederation,SouthAfrica,Switzerland,Ukraine,and
the United States.
Waterpik
®
(stylized)isatrademarkofWaterPik,Inc.registeredinAustralia,
Canada,China,EU,HongKong,India,Japan,Korea,Mexico,RussianFederation,
Switzerland,andtheUnitedStates.
OptiFlow
®
isatrademarkofWaterPik,Inc.registeredinAustralia,Canada,
China,EU,HongKong,India,Japan,Korea,Mexico,andtheUnitedStates.
The Plus is in the Power
™
isatrademarkofWaterPik,Inc.
MadeinChina ©2013WaterPik,Inc.
WaterPik,Inc.
1730EastProspectRoad,Fort
Collins,CO80553-0001
www.waterpik.com
DATE: April 1, 2013 11:11 AM CLIENT: Water Pik, Inc.
FILENAME:20011008-FAF_RPB173Inst
DESCRIPTION:RPB-173RainfallShowerHeadInstructions FORM:20011008-FAF
FILE TYPE:AdobeInDesignCS5 PREPARED BY:BrianColon
SIZE FLAT: 11" × 8.5" SIZE FOLDED:2.25"×4.25" FOLDS: indicated
DIELINE: N.A. INK:Black
PROFILE: none
ENGLISH
Thank you for purchasing this Waterpik
®
shower head. This
booklet will give you the proper tools and information to
makeinstallationeasyandquick.Youareclosetoenjoyinga
powerfulandinvigoratingshowerexperiencewithyournew
Waterpik
®
shower head.
You can view more information about Waterpik
®
shower head
products at www.waterpik.com.
Note: All pictures and images depicted in the videos and this
manual may not directly illustrate your shower head.
PRIOR TO INSTALLATION
• Removeoldshowerheadandremoveallpipetapeaswell.
• Insurethatthewasherfromtheoldshowerisnot
connected to the pipe. Use a thin utensil to check inside
thepipeforwashers,suchasapencilorscrewdriver.Do
not use your fingers.
FRANÇAIS
Nousvousremercionspourvotreacquisitiondeceproduit
de douchage Waterpik
®
. L’information présentée dans cette
brochurevouspermettrad’exécuterfacilementetrapidement
l’installationduproduit.Vouspourrezdanspeudetemps
bénéficier de la puissance et des effets rafraichissants de
votre nouveau produit de douchage Waterpik
®
.
VouspouveztrouversurnotresiteInternetwww.waterpik.
com de l’information additionnelle.
Note : Les illustrations incluses dans le manuel et les images
desvidéospeuventnepasreprésenterexactementleproduit
acheté (douchette).
AVANT L’INSTALLATION
• Retirerladouchetteexistante;éliminerégalementles
résidus de composé d’étanchéité des tuyauteries.
• Veilleràcequelejointdeladouchetteexistantenereste
pas attaché sur le tube d’alimentation. Utiliser un ustensile
minceteluncrayonouuntournevispourvérifierqu’aucun
jointnesetrouveàl’intérieurdutubed’alimentation.Ne
pas utiliser les doigts.
INSTALLATION
NE PAS INSTALLER EN
RESSERRANT AVEC UN
BRAS RÉGLABLE
INSTALLATION
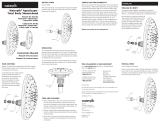
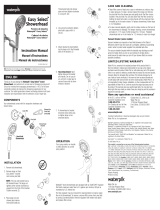
1. Installshowerheadtoarmby
tightening plastic pivot ball on
to threaded end of arm.NOTE:
DO NOT TURN shower head to
tighten pivot ball.
2.Removelargewingnutfrom
Rainfall shower arm. NOTE:
This nut and arm have a left
handed thread. The large nut
tightens when turned clockwise
as viewed from the front.
3. Place large wing nut over
shower pipe (narrow end toward
the wall).
4. Threadpivotballontoshower
pipe and hand tighten clockwise
to a snug fit.
1. Fixezlapommededouche
au bras de douche en
resserrant le raccord articulé
surl’extrémitéfiletéedubras.
REMARQUE: NE FAITES
PAS TOURNER la pomme
de douche pour resserrer le
raccord articulé.
2.Retirezl’écrouàoreillesdu
bras de douche Rainfall.
REMARQUE: L’écrou et le
bras ont un filetage renversé.
L’écrouàoreillesseresserre
lorsqu’ilesttournédans
le sens des aiguilles d’une
montre (en le regardant de
devant).
3.Placezl’écrouàoreillessur
le tuyau d’alimentation de la
douche(l’extrémitéétroite
vers le mur).
4.Vissezleraccordarticulé
au tuyau d’alimentation de
ladoucheetresserrez-leen
tournant dans le sens des
aiguillesd’unemontrejusqu’à
cequ’ilsoitbienajusté.
Rainfall
Rainfall
Pluviosidad
Instruction Manual
Manuel
d’instructions
Manual de
instrucciones
Model Number: RPB-173
FN20011008-FAF
DO NOT INSTALL BY
USING ADJUSTABLE
ARM TO TIGHTEN
1
3
4
5
6
7
8
1
3
4
/


