Page is loading ...

Instruction
Manual
Manuel d’instructions
Manual de
instrucciones
Model Number: YBW-933E / SBW-383ME
FN 20025438-F AC
English
Thank you for purchasing the Waterpik
®
HairWand. This booklet
will give you the proper information to make installation easy
and quick. You are close to enjoying a powerful, invigorating, and
therapeutic shower experience.
You can view more information about Waterpik
®
shower head
products at www.waterpik.com.
Note: All pictures and images depicted in this manual may not
directly illustrate your shower head.
Prior to Installation
• Gather the tools necessary to install your new shower head.
Adjustable Wrench (not included)
• Remove old shower head and remove all pipe tape as well.
• Make sure that the washer from the old shower is not connected
to the pipe. Use a thin utensil to check inside the pipe for
washers, like a pencil or screw driver. Do not use your fingers.
• Pipe tape not required for installation of this shower head.
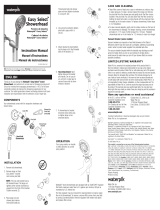
Shower System Components
3-way diverter
control
Washer
Filter screen
Diverter nut
Washer
Hose
connector
Easy Reach
bracket holder
Washer
Pivot ball
Pivot ball nut
Fixed mount
shower
head
HairWand
hand held
Washer
J-pipe
1. Attach diverter by threading
diverter nut clockwise onto the
shower arm with the easy reach
bracket holder on the right side of
the diverter. Using the adjustable
wrench, tighten diverter nut
securely on pipe.
2. Attach fixed mount shower head
by threading pivot ball onto
diverter. Tighten securely by
hand. You may loosen pivot ball
nut before attaching fixed mount
shower head. Re-tighten when
shower head is positioned in
proper orientation.
3. Make sure washers are present
inside each of the hose
connectors. Attach one hose
connector to the bottom of the
diverter and the other to the
HairWand.
4. Place HairWand in the easy reach
bracket. You may need to adjust
Installation
1
2
3
4
Vacuum Breaker Backflow Prevention
Note: Several U.S. state and local municipal plumbing codes require
the use of a backflow prevention device when installing a hand
shower. This device is termed a vacuum breaker. If your hand shower
includes a vacuum breaker it will be located in the hose, and the
hose end with the vacuum breaker will include a sticker that reads
“attach this vacuum breaker end to shower bracket.” If the hose is not
installed in this manner, water will not flow. If your hand shower does
not include a vacuum breaker, and you would like to obtain one free
of charge, please contact us at 1-800-525-2774 (U.S. calls only) and
request part number 20009558.
Operation
HairWand Mode Selector:
Water flow rate on the HairWand is controlled
by the slide control on the handle.
PowerComb
™
A natural water comb
penetrates deep to the roots of the hair for a
thorough rinse and scalp massage. The dual
nozzle stream also helps to relieve muscle
tension and increase range of motion.*
Note: Do not use PowerComb
™
on face.
SoftComb
™
A comforting blanket of sweeping water promotes
relaxation and renewal.
Gentle Pause A soothing facial and body rinse for daily
rejuvenation.
* Individual results may vary based on
consumer usage study.
Fixed Mount Mode Selector:
Water patterns for the fixed mount
shower head are controlled by lever
on outside trim ring of fixed mount
shower head. Rotate lever left or
right.
the easy reach bracket toward
a downward position in order
for the HairWand to fit into the
easy reach bracket correctly.
5. Point both shower heads away
from you and turn on the water
full force. Check for leaks.
Re-tighten all connections if
necessary.
Low water pressure or
missing stream patterns.
a Clean shower head in vinegar/water
solution. (See care & cleaning section).
b Clean filter screen.
Leaking at fixed mount
connection.
a Confirm the washer and the pivot ball are
tightened to the diverter.
Leaking at j-pipe/diverter
connection.
a Confirm washer full seated in diverter nut.
b Tightly secure diverter nut with
recommended tool.
Loose fixed mount
connection
a Tighten pivot ball nut to the base cone.
WARNING:
1 To avoid hot water dangers and conserve even more energy,
make sure your water heater is set at 120°F (48.9°C) or below.
2 Test the tub/shower water with your hand before bathing.
3 For additional safety for Ecoflow
®
or high efficiency shower
heads, it is recommended that all homes have installed a
pressure balance tub and shower valve with the rotational limit
stops properly set by a plumber.
4 For external use only. The potentially deadly amoeba,
Naegleria fowleri, may be present in some tap water or
unchlorinated well water.
Care and Cleaning
Note: When adjusting mode patterns
make sure that only the face of the fixed
mount shower head rotates or you may
loosen shower head from diverter.
3-Way Diverter:
To change water flow between the
HairWand and fixed mount or both at
once, turn the control on the diverter
clockwise or counter clockwise.
Bracket Adjustment:
To adjust HairWand stream angle, place
wand in the easy reach bracket and
pivot forward or backwards for preferred
positioning.
Troubleshooting Guide
Problem Solution
No water flow from the
shower head.
a Confirm previous shower washer is not in
the j-pipe or diverter.
b Check both hose ends to clear any
blockage.
• To maintain proper working conditions cleaning is required when
mineral deposits appear on stream orifices. To clean mineral
deposits, gently rub nozzles on face of shower head to dislodge.
• To clean heavier deposits, remove shower head and soak face
down in 1-2 cups of white vinegar (use white vinegar only) for
about 2-3 hours. Replace shower head and run in each mode to
flush out vinegar.
• Do not clean or rinse any part with harsh chemicals, heavy duty
cleaners, or abrasives; this may damage parts or finish and will
void warranty.
• Clean filter screen by unscrewing from shower arm and rinsing
entrance to diverter. Re-install filter screen and follow steps 1–4
under installation to reinstall shower head / bracket.
Limited Lifetime Warranty
Save your receipt as proof of purchase is required for warranty
action. Water Pik, Inc. warrants to the original purchaser of this
product that it is free from defects in material and workmanship
for as long as the original purchaser owns this product. Water Pik,
Inc. will replace the product, which in our opinion is defective,
provided that the product has not been abused, misused, altered or
damaged after purchase. This includes damage due to use of tools
or harsh chemicals. In the event an item has been discontinued, we
WAIVER OF RIGHT TO PARTICIPATE IN CLASS ACTIONS OR
PURSUE CLAIMS IN A REPRESENTATIVE CAPACITY.
Further, by purchasing, installing, or using this product you
agree that arbitration must be on an individual basis. This means
neither you, nor we, may join or consolidate claims in arbitration
by or against other purchasers or users of Water Pik products or
the general public. Additionally, you may not litigate in court or
arbitrate any claims as a representative or member of a class or in
a purported representative capacity on behalf of the general public,
other purchasers or users of this product, other persons or entities
similarly situated, or in a private attorney general capacity.
If product malfunctions or becomes damaged, stop use and
contact Water Pik, Inc. for assistance.
Have any questions or need assistance?
For quickest service have your model number and receipt ready
prior to calling.
In the U.S., call our toll-free
Customer Assistance Line
1-800-525-2774.
In Canada, call our toll-free
Bilingual Canadian Customer
Assistance Line
1-888-226-3042.
www.waterpik.com
Outside the U.S., write us at
Water Pik, Inc.
1730 East Prospect Road
Fort Collins, CO 80553-0001
U.S.A
will replace with what we deem to be the closest product.
Water Pik, Inc. is not responsible for labor charges, installation,
or other consequential cost. The responsibility of Water Pik, Inc.
shall not exceed the original purchase price of the product. This
warranty gives you specific legal rights. You may also have other
rights that vary depending on where you reside.
BINDING ARBITRATION AND WAIVER OF RIGHT TO ASSERT
MATTERS IN COURT AND RIGHT TO JURY TRIAL
By purchasing, installing, or using this product you agree that any
controversy or claim arising out of or relating to your purchase, use,
modification, installation, or removal of this product shall be settled
by binding arbitration. The arbitrator’s decision will be final and
binding. Judgment on the award rendered by the arbitrator may be
entered in any court having jurisdiction over the matter. Further,
you agree that you will not have the right to litigate any claim
arising out of or in relation to your purchase, use, modification,
installation, or removal of this product in any court or to have a jury
trial on that claim.
Arbitration of any matters shall be administered by the American
arbitration association and conducted by one arbitrator in
accordance with the consumer arbitration rules of the American
Arbitration Association in effect at the time of filing of the
demand. The venue for all such arbitrations shall be Colorado and
any such arbitration shall be subject to the Federal Arbitration Act
and Colorado law.
Waterpik® is a trademark of Water Pik, Inc. registered in Argentina,
Australia, Austria, Benelux, Canada, Chile, China, Czech Republic, EU,
Finland, France, Germany, Hong Kong, Hungary, India, Israel, Italy, Japan,
Kazakhstan, Korea, Mexico, Norway, Poland, Russian Federation, South
Africa, Spain, Sweden, Switzerland, Taiwan, Turkey, Ukraine, the United
States and Vietnam.
Waterpik® (stylized) is a trademark of Water Pik, Inc. registered in Australia,
Canada, China, EU, Hong Kong, India, Israel, Japan, Korea, Mexico, Paraguay,
Russian Federation, Switzerland, Taiwan, United States, and Vietnam.
PowerPulse Massage® is a trademark of Water Pik, Inc. registered in
Canada, EU, Iceland, Mexico, and the United Kingdom.
PowerPulse® (stylized) is a trademark of Water Pik, Inc. registered in
Canada, China, EU, Iceland, United Kingdom, and the United States.
Powerspray
™
, PowerComb
™
, SoftComb
™
and Waterpik. Water for Wellness
™
are trademarks of Water Pik, Inc.
© 2018 Water Pik, Inc.
Printed in China.
Water Pik, Inc. a subsidiary of Church & Dwight Co., Inc.
1730 East Prospect Road
Fort Collins, CO 80553-0001 U.S.A.
www.waterpik.com
Français
Nous vous remercions d’avoir acheté la douchette HairWand de
Waterpik
®
. Ce manuel vous fournira les informations nécessaires
pour une installation facile et rapide. Vous pourrez dans peu de
temps bénéficier de la puissance et des effets revigorants et
thérapeutiques de votre nouvelle douchette.
D’autres informations sur les douchettes Waterpik
®
sont disponibles
sur le site www.waterpik.com.
Remarque: Toutes les illustrations/images de ce manuel peuvent
ne pas représenter fidèlement votre douchette.
Composants du
système de douche
Avant l’installation
• Regrouper les outils nécessaires à l’installation de la nouvelle
douchette.
Clef à molette (pas incluse)
• Retirer l’ancienne douchette et enlever l’adhésif à tuyauteries.
• Veiller à ce que la rondelle de l’ancienne douchette ne soit pas
laissée à l’intérieur du raccord du flexible. Utiliser un ustensile
mince tel qu’un crayon ou un tournevis pour vérifier qu’aucune
rondelle ne se trouve à l’intérieur du flexible. Ne pas utiliser les
doigts.
• L’installation de cette douchette ne nécessite pas d’utiliser
d’adhésif à tuyauteries.
Installation
1
Manette
d’inverseur
(3 voies)
Rondelle
Crépine
Écrou d’inverseur
Rondelle
Raccord de
flexible
Support
Easy Reach
Rondelle
Pivot articulé
Écrou de pivot
articulé
HairWand
manuelle
Rondelle
Tuyau d’alimentation en «J»
1. Installer l’inverseur en vissant
l’écrou de l’inverseur dans le sens
horaire sur le bras de douche,
en s’assurant que le support
Easy Reach se trouve à droite
de l’inverseur. Serrer ensuite
fermement l’écrou de l’inverseur
sur le tuyau à l’aide d’une clé à
molette.
2. Installer la douchette fixe en
vissant le pivot articulé sur
l’inverseur. Serrer fermement à
la main. Vous pouvez desserrer
l’écrou du pivot articulé avant
d’installer la douchette fixe. Une
fois la douchette positionnée pour
une orientation adéquate du jet,
resserrer l’écrou.
3. Vérifier la présence d’une rondelle
à l’intérieur de chacun des raccords
du flexible. Visser un raccord de
flexible sous l’inverseur, et l’autre
raccord sur la douchette HairWand.
Douchette
fixe
4. Placer la douchette HairWand
dans le support Easy Reach. Il
peut être nécessaire d’ajuster
le support Easy Reach dans une
position orientée vers le bas
pour que la douchette HairWand
puisse être convenablement
installée dans ce dernier.
5. Orienter les douchettes dans une direction opposée à soi
pour éviter un arrosage indésirable, puis ouvrir complètement
l’arrivée d’eau. Vérifier qu’il n’y a pas de fuites. Resserrer tous
les raccords au besoin.
2
3
4
Prévention de reflux avec brise-vide :
Remarque : Plusieurs codes de plomberie fédéraux et
municipaux locaux des É.-U. requièrent l’installation d’un
dispositif de prévention de reflux pour l’installation d’une
douchette manuelle. Ce dispositif est connu sous le nom de
brise-vide. Si la douchette manuelle comprend un brise-vide,
celui-ci se situe dans le tuyau et l’extrémité du tuyau avec
le brise-vide comporte un autocollant sur lequel est inscrit «
raccorder cette extrémité du brise-vide au raccord de douche ».
Si le tuyau n’est pas installé de cette manière, l’eau ne coulera
pas. Si la douchette manuelle ne comprend pas de brise-vide et
que vous souhaiteriez en obtenir un sans frais, veuillez nous
contacter au 1-800-525-2774 (uniquement pour les appels
provenant des É.-U.) et demandez la pièce n° 20009558.
Fonctionnement
Sélecteur de mode de la
douchette HairWand :
Sur la douchette HairWand, le débit d’eau est
contrôlé par la commande latérale placée sur
le manche.
PowerComb
MC
- Un jet à effet de peigne
naturel qui pénètre en profondeur jusqu’aux
racines des cheveux pour un rinçage en
profondeur et un massage du cuir chevelu. La technologie à double
jet aide également à soulager les tensions musculaires, tout en
rehaussant la liberté de mouvement.*
Remarque: Ne pas utiliser le PowerComb
MC
sur le visage.
SoftComb
MC
- Une confortable couverture d’eau enveloppante qui
favorise la relaxation, tout en revigorant.
Pause douce - Un rinçage apaisant du visage et du corps pour une
revitalisation quotidienne.
* D’après une étude réalisée sur l’utilisation du produit par les consommateurs,
les résultats obtenus peuvent varier d’une personne à l’autre.
EN FRANÇAIS AU VERSO
Douchette fixe - Sélection
du mode:
Pour la douchette fixe, les modes
d’aspersion sont contrôlés par un
levier placé sur la bague décorative
externe de la douchette fixe. Faire
pivoter le levier vers la gauche ou
vers la droite.
Remarque: Lors du réglage des modes
d’aspersion, s’assurer de ne faire pivoter
que la face de la douchette fixe, sinon
cette dernière pourrait se desserrer de
l’inverseur.
Inverseur à 3 voies:
Pour une permutation entre la douchette
HairWand, la douchette fixe, ou les deux
à la fois, tourner la manette de l’inverseur
dans le sens horaire ou dans le sens
antihoraire.
Réglage du support:
Pour régler l’angle d’aspersion de la
douchette HairWand, placer la douchette
sur le support Easy Reach et faire pivoter le support vers l’avant ou
vers l’arrière pour établir l’angle d’aspersion désiré.
Guide de dépannage
Problème Solution
Aucun débit d’eau par
la pomme de douche
installée:
a Vérifier que le joint d’origine de la douche
n’est pas resté dans le tube d’alimentation
ou dans le module de diversion.
b Rechercher une obstruction à chaque
extrémité du tuyau flexible.
Basse pression de
l’eau, ou absence
de certains modes
d’aspersion.
a Nettoyer la pomme de douche dans une
solution vinaigre/eau (voir la section
Entretien et nettoyage).
b Nettoyer le tamis.
Fuite à la connexion
de la pomme de
douche fixe.
a Vérifier que le tamis de filtration est
correctement placé dans la boule
d’articulation.
Fuite à la connexion
tube d’alimentation/
module de diversion.
a Vérifier que le joint est parfaitement placé
dans l’écrou du module de diversion.
b Bien serrer l’écrou du module de diversion,
avec l’outil recommandé.
AVERTISSEMENT :
1. Afin d’éviter les dangers liés à une eau à forte température et de
conserver davantage d’énergie, vérifier que le chauffe-eau est
réglé à un maximum de 120°F (48,9°C).
2. Tester la température de l’eau de la baignoire/douche avec la
main avant de se baigner.
3. Pour plus de sécurité avec les douchettes Ecoflow
®
ou
douchettes haute efficacité, on recommande l’installation dans
chaque résidence d’un mitigeur à équilibrage des pressions
(pour baignoire/douche), avec butées de limitation de la rotation
adéquatement réglées par un plombier.
4. À usage externe uniquement. L’amibe Naegleria fowleri
potentiellement mortelle peut être présente dans certaines eaux
du robinet ou eaux de puits non chlorées.
Entretien et nettoyage
• Pour le maintien du bon fonctionnement de système, on doit
éliminer les dépôts minéraux dès qu’ils apparaissent dans les
orifices d’aspersion. Pour l’élimination des dépôts minéraux,
frotter délicatement les busettes sur la face de la douchette
pour expulser les dépôts minéraux.
• Pour un nettoyage plus approfondi, démonter la douchette
et placer celle-ci pendant 2 à 3 heures dans un récipient de
vinaigre blanc (utiliser uniquement du vinaigre blanc – 250 à 500
mL). Réinstaller ensuite la douchette et ouvrir l’arrivée d’eau –
laisser l’eau couler à chaque mode d’aspersion pendant 1 à 2
minutes pour éliminer tout résidu de vinaigre.
/


