Page is loading ...

™
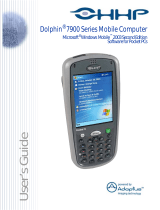
Dolphin® 7900 Series
Mobile Computer
Microsoft
®
Windows Mobile
™
2003
Second Edition Software for Pocket PC
Quick Start Guide

Disclaimer
Hand Held Products, Inc. (“Hand Held Products”) reserves the right to make
changes in specifications and other information contained in this document
without prior notice, and the reader should in all cases consult Hand Held
Products to determine whether any such changes have been made. The
information in this publication does not represent a commitment on the part of
Hand Held Products.
Hand Held Products shall not be liable for technical or editorial errors or
omissions contained herein; nor for incidental or consequential damages
resulting from the furnishing, performance, or use of this material.
This document contains proprietary information that is protected by copyright. All
rights are reserved. No part of this document may be photocopied, reproduced,
or translated into another language without the prior written consent of Hand
Held Products.
© 2005 Hand Held Products, Inc. All rights reserved.
Web Address: www.handheld.com
Trademarks
Dolphin, HomeBase, Mobile Base and QuadCharger are trademarks or
registered trademarks of Hand Held Products.
Windows Mobile, Windows, Windows NT, Windows 2000, Windows XP,
ActiveSync, Outlook, and the Windows logo are trademarks or registered
trademarks of Microsoft Corporation.
The Bluetooth trademarks are owned by Bluetooth SIG, Inc., U.S.A. and licensed
to Hand Held Products, Inc.
Other product names mentioned in this manual may be trademarks or registered
trademarks of their respective companies and are hereby acknowledged.

Dolphin® 7900 Series Mobile Computer Quick Start Guide iii
Table of Contents
Congratulations! ...................................................................... 1
Dolphin 7900 Series Peripherals and Accessories.................. 1
Dolphin 7900 Hardware Overview........................................... 2
Setting Up Dolphin 7900 Series Terminals.............................. 4
Unpack the Carton and Verify its Contents ............................. 4
Install the Main Battery Pack................................................... 4
Charge the Main and Backup Batteries................................... 5
Initialize the Mobile Computer................................................. 7
Using the Stylus....................................................................... 8
Today Screen.......................................................................... 9
Using the Imager................................................................... 10
Verifying Radio Status........................................................... 12
Adjusting the Backlight.......................................................... 13
Using the Keyboards............................................................. 14
Resetting the Terminal .......................................................... 18
Suspend Mode ...................................................................... 18
Communications.................................................................... 18
Troubleshooting..................................................................... 19
Product Service and Repair................................................... 20
Technical Assistance............................................................. 21
Limited Warranty ................................................................... 22
Regulatory and Safety Approvals.......................................... 23
FCC Compliance................................................................... 23

iv
Dolphin® 7900 Series Mobile Computer Quick Start Guide

Dolphin® 7900 Series Mobile Computer Quick Start Guide 1
Dolphin 7900 Series Quick Start Guide
Congratulations!
You have made a wise choice in selecting the Dolphin, a device known
worldwide for the following features:
• Microsoft Windows Mobile 2003 Second Edition Software for Pocket PC
•An Intel
®
X-Scale 400MHz RISC microprocessor for fast processing
• Optional Wireless Full Area Networking
™
(WFAN) configuration for real-time
data and voice communications anytime, anywhere
• 64MB RAM (optional 128MB) and 64MB synchronous Flash memory
configuration for ample and secure data storage
• A mini-Secure Digital (SD) memory interface that enables memory expansion
• Rugged construction that withstands harsh treatment and real world use
• Adaptus Imaging Technology for advanced point-and-shoot bar code
decoding and image capture
• 7.4V, 14.8 watt hour Lithium-ion (Li-ion) batteries
Dolphin 7900 Series Peripherals and Accessories
Dolphin HomeBase
™
Charging/communications cradle with auxiliary battery well.
Data transfers via RS-232 serial or USB ports.
Dolphin Mobile Base
™
Mobile charging/communication cradle. RS-232 serial
transfers data transfers and powers out at 5 volts.
Dolphin QuadCharger
™
Four-slot battery charger that charges four Li-ion batteries
in under four hours. One slot doubles as a battery analyzer.
Dolphin Net Base
Four-slot charging/communication cradle designed for
Ethernet-based communications.
Dolphin ChargeBase
Four-slot charging cradle that stores, powers, and charges
a terminal in each slot.
Dolphin Mobile Charger
Charging cable that plugs into a vehicle cigarette lighter/
power port.
Dolphin Cable Kits
USB or serial cables that charge and communicate with the
terminal directly, without a cradle.

2 Dolphin® 7900 Series Mobile Computer Quick Start Guide
Dolphin 7900 Hardware Overview
Front Panel
Side Panel
Mini-SD Access Door - You can install a mini-SD memory card to expand
storage memory. After memory expansion is complete, this door should be
closed and sealed. The mini-SD memory interface does not support SDIO.
Pocket PC
AL T
SCAN
ESC
OK
VOL
PG
TAB
3
DEF
6
MNO
2
ABC
5
JKL
1
4
GHI
3
PQRS
8
TUV
9
WXYZ
,
@?!
0
*
#
SEND
END
F1 F2
F5
F8
F10
F3
F6
F9
F4
F7
START
BKSP SP
Scan LED Decode LED
IrDa PortAudio/Headset Jack Speaker
SCAN key
Navigation keys
Microphone
Recessed Keyboard
Display
Programmable Side Button
Mini-SD Access Door

Dolphin® 7900 Series Mobile Computer Quick Start Guide 3
Back Panel
Programmable Side Buttons
By default, these buttons activate the image/scan engine as a more ergonomic
alternative to pressing the SCAN key on the keyboard. These buttons can also
be programmed to perform specific functions in the Buttons setting. For details
about programming these buttons, see the Dolphin 7900 Series User’s Guide.
Bottom Panel
Mini SD
Access Door
Battery
Image Engine Window
Programmable
Side Button
Hand Strap Clip
Programmable
Side Button
Stylus (in slot)
17-pin
Industrial-
Grade
Mechanical
Connector

4 Dolphin® 7900 Series Mobile Computer Quick Start Guide
Setting Up Dolphin 7900 Series Terminals
1. Unpack the carton and verify its contents - page 4.
2. Install the main battery pack in the terminal - page 4.
3. Charge the main battery for a minimum of four hours - page 5.
4. Turn the power on and initialize the mobile computer - page 7.
5. Allow Autoinstall to run - page 8.
Unpack the Carton and Verify its Contents
Verify that the carton contains the following items:
• Dolphin 7900 Series mobile computer (the terminal)
• Main battery pack (7.4v Li-ion)
• Microsoft Companion CD-ROM
• Dolphin 7900 Series Quick Start Guide
Be sure to keep the original packaging in the event that the Dolphin terminal
should need to be returned for service - see page 23.
If you ordered peripherals or accessories, verify that they are included in your
order. You may also have received the Dolphin Software Development Kit and
User’s Guide CD with your order.
Install the Main Battery Pack
The Dolphin 7900 terminal ships with the hand strap installed and fastened with
a clip. To install the main battery pack, you must detach the hand strap first.
To detach the hand strap, push the clip up and away from the terminal.
To re-attach the hand strap, slide the clip back into place.
Use only the Li-ion battery packs provided by Hand Held Products. The
use of any battery pack not sold/manufactured by Hand Held Products
in a Dolphin terminal will void your warranty and may result in damage
to the Dolphin terminal or bat
1. Remove the Li-ion battery pack from its package.
Hand StrapClip
!

Dolphin® 7900 Series Mobile Computer Quick Start Guide 5
2. Detach the hand strap.
3. Take the battery and insert the end without the locking tab into the top of the
battery well and push down until the locking tab snaps.
4. Re-attach the hand strap.
Note: Put the terminal in Suspend mode before removing the battery; Suspend
Mode, page 18.
Charge the Main and Backup Batteries
The power supply consists of two types of battery power: the main battery pack
and the backup battery located inside the terminal. The main battery powers the
terminal and charges the internal backup battery.
The internal backup battery maintains the application data stored in RAM and the
system clock for up to 30 minutes when the main battery pack is completely
discharged or removed.
Dolphin terminals ship with both batteries discharged of power. Charge the main
battery pack for a minimum of four hours before initial use in the terminal.
Use a Dolphin 7900 Series peripheral and the power cables provided
by Hand Held Products. Use of peripherals or cables not sold/
manufactured by Hand Held Products will void the warranty and may
damage the terminal.
Using the Dolphin HomeBase
1. Set up the Dolphin HomeBase with the appropriate power supply from Hand
Held Products.
2. Install the Li-ion battery in the Dolphin terminal.
3. Slide the terminal into the terminal well until the Dock LED lights solid green.
4. The battery pack begins charging.
!

6 Dolphin® 7900 Series Mobile Computer Quick Start Guide
Charging a Spare Battery Pack
The back panel of the Dolphin HomeBase
contains an auxiliary battery well that you can
use to charge a spare battery before inserting it
into the terminal.
Insert a spare battery pack into this auxiliary
battery well and it charges in four hours,
independently of the terminal well. The AUX
Battery LED on the front panel indicates the
charging status of the battery in this well.
Using the Dolphin Mobile Base
1. Set up the Dolphin Mobile Base with the appropriate power supply from Hand
Held Products.
2. Install the Li-ion battery in the Dolphin terminal.
3. Slide the terminal into the terminal well until the Dock LED lights solid green.
4. The battery pack begins charging.
Other Charging Options
When the Li-ion battery is installed in the terminal, you can also use a charging/
communication cable kit.
To charge the Li-ion battery pack before inserting it in the terminal, place the
battery pack in the Dolphin QuadCharger and charge it for a minimum of four
hours.

Dolphin® 7900 Series Mobile Computer Quick Start Guide 7
Initialize the Mobile Computer
1. Power on the terminal. The LEDs flash for approximately three seconds.
Do NOT press any keys while the terminal is booting up.
2. The terminal initializes and the splash screen displays for a few seconds.
The Build numbers indicate the software version number.
3. The system performs a hard reset (see page 0-18).
4. When the display activates again, follow the instructions that appear.
5. You are prompted to align the screen by tapping the target five times. Use
the stylus provided by Hand Held Products.
• Alignment should always be performed with a stylus designed for touch
screen applications. The small point is required for accurate calibration.
• Press the stylus firmly into the center of the cross-hair target once and
release. Do not “double-tap” the target.
Build 8.XX 8.XX 8.XX
Bootloader
Kernel
KeyboardKernel

8 Dolphin® 7900 Series Mobile Computer Quick Start Guide
6. When the Location screen appears, select your Time Zone from the drop-
down list and tap Next.
7. Setup is complete. Wait as your terminal begins auto-installing programs.
8. When Autoinstall is complete, the system performs a soft reset that ends on
the Today screen.
Autoinstall
Autoinstall occurs after each hard reset. For each program that loads, a status
bar indicates that the program is loading. Do NOT touch the keyboard or the
screen while programs are loading.
All configurations of the Dolphin 7900 Series install Demos and Utilities. If the
terminal is configured with a wireless radio, then the appropriate radio drivers
and utilities for each radio also install.
After Autoinstall is complete, the terminal performs a soft reset automatically.
When it finishes booting up after the soft reset, the Today screen appears.
Using the Stylus
The stylus functions as a mouse; generally, a tap is the same as a click.
Tap: Tap the touch screen once to open menu items and select options.
Drag: Hold the stylus on the screen and drag across the screen to select
text and images.
Tap & hold: Tap and hold the stylus on an item and a pop-up menu appears.
On the pop-up menu, tap the action of the task you want to perform.
Use the stylus or your finger to select or enter information on the touch
screen. Use of other objects, such as paper clips, pencils, or ink pens
can damage the touch screen and will void the warranty.
!

Dolphin® 7900 Series Mobile Computer Quick Start Guide 9
Today Screen
The Today screen provides the tools you need to navigate the system.
Navigation Bar
Located at the top of the screen, the navigation bar provides access to the date,
time, volume, and Start menu.
Command Bar
Located at the bottom of the screen in most Windows applications, the command
bar offers menus and icons you can use to navigate the open application.

10 Dolphin® 7900 Series Mobile Computer Quick Start Guide
Using the Imager
Dolphin 7900 Series terminals offer four image engine options that instantly read
all popular 1D and 2D bar codes and capture images:
• IMAGETEAM™ 4300 Standard Range (IT4300SR)
• IMAGETEAM™ 4300 Smart Focus (IT4300SF)
Activating the Engine
You can activate the engine in the following ways:
• The SCAN key located in the center of both keyboards; SCAN, page 14.
• The buttons located on both side panels activate the imager by default;
Programmable Side Buttons, page 3.
You must press and hold the key or button until the image or scan is completed
successfully.
All Dolphin 7900 terminals contain demos that enable you to test and verify
performance. To access these demos, go to Start > Demos.
Taking an Image
The terminal saves images in industry-standard file formats such as *.bmp, *.jpg
and *.png. The default file format for images is a grayscale *.jpg.
1. Tap Start > Demos > Image Demo. The image demo opens.
2. Point the terminal at an object and activate the image engine. A preview of
the object appears on the terminal screen. Because this is a live video image
of what the imager is currently viewing, it has a slightly degraded
appearance; this is normal.
3. Release the SCAN key or side button. The image is captured and appears on
the screen. By default, the image saves to the My Device folder as
“imagedemo.jpg.”
4. Press the ESC key to close the demo.
Decoding
1. Tap Start > Demos > Scan Demo.
2. Aim the terminal at a bar code and activate the engine; 4–10 inches (10–25
cm) from the bar code is recommended.
3. The scan LED lights. The aimer projects from the engine; it should be
oriented in line with the bar code to achieve optimal decoding.
4. When a good scan is obtained, the decode LED lights and the terminal
beeps. The bar code readout appears on the screen.
Decode LED
(red)
Scan LED
(green)

Dolphin® 7900 Series Mobile Computer Quick Start Guide 11
5. Press the ESC key to close the demo.
Sample Bar Codes
Omni-Directional Scanning Positions
Dolphin 7900 terminals support omni-directional aiming for 1D and 2D bar codes.
For Dolphin 7900 terminals equipped with an IT4300SF/SR engine:
For more information about imaging and scanning, please see the Dolphin 7900
Series User’s Guide.
Sample 128 Sample PDF417
Text readout: Code 128 Text readout: PDF417 Test Message

12 Dolphin® 7900 Series Mobile Computer Quick Start Guide
Verifying Radio Status
Dolphin 7900 terminals can be configured with a combination of the following
radios: 802.11b, Bluetooth, and GSM/GPRS (MC-45). Radio drivers install
during the autoinstall process after a hard reset (see Autoinstall on page 8). Only
the appropriate drivers for the terminal’s radio configuration install.
All radios and radio drivers are co-located inside the terminal. 802.11b and GSM
radios cannot be enabled at the same time. Bluetooth radios can be enabled and
operating with an 802.11b or GSM radio or both.
Radio Manager
The Radio Manager allows you to enable and disable radios installed in the
terminal after initial bootup. If the Dolphin terminal is configured with an 802.11b
radio, the Radio Manager defaults to the 802.11b radio. If the Dolphin terminal is
configured with a GSM radio, the Radio Manager defaults to the GSM radio.
Accessing the Radio Manager
Tap Start > Settings > Connections tab > Radio Manager. The Radio Manager
appears identifying which radio drivers are installed. The highlighted entry is the
radio mode that is currently enabled; its Status should be Ready.
Radio Modes The Radio Modes section lists the radio drivers currently installed
in the terminal.
Status field The Status field displays the status of the radio driver selected in
the Radio Modes section.
Ready - The selected radio is enabled.
Success - The selected radio has been successfully enabled.
Error message - The radio cannot be enabled. You cannot
successfully enable a radio if its driver is not installed.

Dolphin® 7900 Series Mobile Computer Quick Start Guide 13
Enabling Radios
To successfully enable a radio, both the hardware module and the software
driver must be installed on the terminal.
If multiple radios are installed in your terminal, you must enable the radio
combination and not each individual radio.
To enable a radio or radio combination, select the radio in the Radio Modes list
and tap Apply. The radio drivers are enabled and disabled (if necessary) in the
proper sequence.
Disabling Radios
To disable all radios, select None and tap Apply.
Adjusting the Backlight
The keyboard and the display are backlit for better viewing in low-light conditions.
Keyboard
Both keyboards contain a Backlight key that toggles the keyboard backlight on
and off; Backlight, page 14.
Display
The backlight for the display is user-defined. Go to Start > Settings > System
tab > Backlight. There are two tabs: one for Battery power and one for External
power. The options on each tab are the same.
From the Turn off backlight… drop-
down list, select the number of minutes
you want to elapse before the backlight
automatically turns off.
Select the Turn on backlight… option if
you want the display backlight to turn on
when the a button is pressed or the touch
screen is tapped.
From the Dim backlight if… drop-down
list, select the number of minutes you
want to elapse before the backlight dims.
Move the Backlight Intensity slider to
set the intensity of the backlight.
Tap OK to save settings.

14 Dolphin® 7900 Series Mobile Computer Quick Start Guide
Using the Keyboards
The Dolphin 7900 series features two keyboard options: 25-key numeric
keyboard and 36-key alpha keyboard. Both keyboards are recessed under the
overlay for maximum durability and contain three types of keys: function keys,
navigation keys, and modifier keys.
Using the Function Keys
Function keys are those keys that perform specific functions and usually have the
name of the function they perform.
Name Key Function
Backlight
The Backlight key turns the keyboard backlight on
and off.
Backspace
(BKSP)
The backspace function is performed by pressing
the Red + left arrow keys. This moves the cursor
back one space and deletes each time the key
combination is pressed. If you are typing text, a
character is deleted each time you backspace.
Delete
The delete function is performed by tapping the Blue
+ ESC keys. This function deletes the next character
forward each time the key combination is pressed.
Escape
The Escape key performs a cancel action.
OK
The OK key confirms data entry and acts as an
Enter key.
Power
The suspend/resume function is performed by
pressing the Blue + Backlight keys. Pressing this
key combination puts the terminal in suspend mode
and wakes it from suspend mode.
SCAN
The SCAN key activates the scan and wakes the
terminals from suspend mode. Its position allows
convenient one-handed image-taking and/or bar
code decoding.
Space (SP)
The space function is performed by pressing the
Red + right arrow keys. This moves the cursor one
space forward. If you are typing text, it moves the
text one space forward as well.
Tab
The Tab key moves the cursor to the next tab stop or
the next field (on a form). Blue + Tab performs a
backtab, which moves the cursor back one field.
B K S P
E
E
SC
DE L
E S C
S P

Dolphin® 7900 Series Mobile Computer Quick Start Guide 15
Using the Navigation Keys
Located in the center of each keyboard for easy access with either hand, the
navigation keys enable you to navigate the cursor through an application screen.
The up and down arrows can be used to adjust volume settings when pressed in
combination with the Blue modifier key, or page up and page down commands
when pressed in combination with the Red modifier key. Other functionality
varies according to the application in use.
Using the Modifier Keys
Modifier keys are those keys that modify the next key pressed to perform
functions or type special characters.
Press To …
Move the cursor up one row or line.
Move the cursor down one row or line.
Move the cursor one character to the right.
Move the cursor one character to the left.
Name Key Function
ALT
The function of the ALT key depends on the software
application in use and the keys combination pressed.
Blue
Red
These keys are used in combination with other keys to type
special characters and perform system functions. Each key
modifies only the next key pressed.
The overlay of each keyboard is color-coded to indicate the
character typed or function performed when specific keys are
pressed immediately after the Blue or Red modifier key.

16 Dolphin® 7900 Series Mobile Computer Quick Start Guide
25-Key Numeric Keyboard
Alpha Mode
The 25-key keyboard defaults to numeric mode. Numeric mode is when you type
numbers with the number keys. Alpha mode is when you type letters or
characters with the number keys.
To toggle between numeric and alpha modes, double-tap the Blue modifier key.
There are alpha indicators on the number buttons that specify the letters or
characters that will be typed when you press that key in alpha mode.
Please note that when typing in alpha mode, you must use the same multi-press
method you would use when typing letters on a phone keypad. Each key press
will type the next letter in the sequence as displayed by the alpha indicator.
Caps Lock Key in Alpha Mode
After you double-tap the Blue modifier key to switch the alpha mode and begin
typing, letters appear in upper case by default. To toggle between upper and
lower cases in alpha mode, tap the Caps Lock key once.
E
E
SC
F 1
F 2
F 3
F 4
F 5
F 6
F 7
F 8
F 9
F 10
S T A R T
B K S P S P
S E ND E ND
DE L
OK key
Navigation
keys
Tab key
SCAN key
Escape key
Power key
Microphone
Backlight key
Caps Lock key
ALT key
Red
Blue
/