Page is loading ...

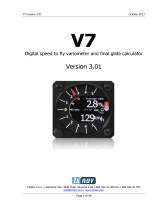
FlarmView and
FlarmView57
Flarm collision avoidance display
Version 2.55
LXNAV d.o.o. • Kidričeva 24a, 3000 Celje, Slovenia • tel +386 592 33 400 fax +386 599 33 522
[email protected] • www.lxnav.com

FlarmView Version 2.55 March 2022
Page 2 of 25
1
Important Notices 4
1.1 Limited Warranty 4
2
Packing Lists 5
3
Basics 6
3.1 LXNAV FlarmView at a Glance 6
3.1.1 Features 6
3.1.1.1 LXNAV FlarmView Features 6
3.1.1.2 LXNAV FlarmView57 Features 6
3.1.2 Interfaces 7
3.1.3 Technical Data 7
4
System Description 8
4.1 Push buttons on FlarmView 8
4.2 Rotary encoder with push button on FlarmView57 8
4.3 Switching on the Unit 8
4.4 User Input 8
4.4.1 Buttons on FlarmView 9
4.4.2 Text Edit Control 9
4.4.3 Selection Control 10
4.4.4 Checkbox and Checkbox List 10
4.4.5 Slider selector 10
4.5 Operating Modes 10
4.6 Main screen 11
4.6.1 Flarm symbols 12
4.6.2 Selecting and switching between targets 12
4.7 Flarm Warning 13
4.8 Traffic list mode 13
4.9 Settings Mode 13
4.9.1 Display 14
4.9.2 Warnings 14
4.9.3 Target 15
4.9.4 Sounds 15
4.9.5 Units 16
4.9.6 Hardware 16
4.9.7 Flarm settings 16
4.9.7.1 Flarm Config 17
4.9.7.2 Aircraft Config 17
4.9.7.3 Flight recorder 17
4.9.7.4 PF IGC readout 18
4.9.7.5 Pilot event 18
4.9.7.6 Flarm info 18
4.9.7.7 ADSB info 18
4.9.7.8 Licenses 18
4.9.8 Files 19
4.9.9 Password 19
4.9.10 About 19
5
Installation 20
5.1 Installing the LXNAV FlarmView 20
5.2 Installing the FlamView57 20
5.3 Connecting LXNAV FlarmView 21
5.4 Installation of options 21
5.4.1 Ports and Wiring 21

FlarmView Version 2.55 March 2022
Page 3 of 25
5.4.1.1 LXNAV FlarmView port (RJ12) 21
5.4.1.2 LXNAV FlarmView wiring 22
6
Flarmnet Update 23
7
Firmware Update 24
7.1 Updating LXNAV FlarmView 24
8
Revision History 25

FlarmView Version 2.55 March 2022
Page 4 of 25
1 Important Notices
The LXNAV FlarmView system is designed for VFR use only as an aid to prudent navigation.
All information is presented for reference only. Traffic data and Collision warnings are
provided only as an aid to situation awareness.
Information in this document is subject to change without notice. LXNAV reserves the right
to change or improve their products and to make changes in the content of this material
without obligation to notify any person or organisation of such changes or improvements.
A Yellow triangle is shown for parts of the manual which should be read carefully
and are important for operating the LXNAV FlarmView system.
Notes with a red triangle describe procedures that are critical and may result in
loss of data or any other critical situation.
A bulb icon is shown when a useful hint is provided to the reader.
1.1 Limited Warranty
This LXNAV FlarmView product is warranted to be free from defects in materials or
workmanship for two years from the date of purchase. Within this period, LXNAV will, at its
sole option, repair or replace any components that fail in normal use. Such repairs or
replacement will be made at no charge to the customer for parts and labour, the customer
shall be responsible for any transportation cost. This warranty does not cover failures due to
abuse, misuse, accident, or unauthorised alterations or repairs.
THE WARRANTIES AND REMEDIES CONTAINED HEREIN ARE EXCLUSIVE AND IN LIEU OF
ALL OTHER WARRANTIES EXPRESSED OR IMPLIED OR STATUTORY, INCLUDING ANY
LIABILITY ARISING UNDER ANY WARRANTY OF MERCHANTABILITY OR FITNESS FOR A
PARTICULAR PURPOSE, STATUTORY OR OTHERWISE. THIS WARRANTY GIVES YOU
SPECIFIC LEGAL RIGHTS, WHICH MAY VARY FROM STATE TO STATE.
IN NO EVENT SHALL LXNAV BE LIABLE FOR ANY INCIDENTAL, SPECIAL, INDIRECT OR
CONSEQUENTIAL DAMAGES, WHETHER RESULTING FROM THE USE, MISUSE, OR
INABILITY TO USE THIS PRODUCT OR FROM DEFECTS IN THE PRODUCT. Some states do
not allow the exclusion of incidental or consequential damages, so the above limitations may
not apply to you. LXNAV retains the exclusive right to repair or replace the unit or software,
or to offer a full refund of the purchase price, at its sole discretion. SUCH REMEDY SHALL
BE YOUR SOLE AND EXCLUSIVE REMEDY FOR ANY BREACH OF WARRANTY.
To obtain warranty service, contact your local LXNAV dealer or contact LXNAV directly.
February 2015 © 2015 LXNAV. All rights reserved.

FlarmView Version 2.55 March 2022
Page 5 of 25
2 Packing Lists
• LXNAV FlarmView
• FlarmView cable

FlarmView Version 2.55 March 2022
Page 6 of 25
3 Basics
3.1 LXNAV FlarmView at a Glance
LXNAV FlarmView is Flarm and ADS-B traffic and collision warning display with preloaded
FlarmNet database. The 2’’ QVGA sunlight readable display has 320*240 RGB pixels
resolution. For simple and quick manipulation four push buttons on FlarmView and rotary
push button on FlarmView57 are used. Flarm View monitors vertical speed and altitude of
each object on the screen.
3.1.1 Features
3.1.1.1 LXNAV FlarmView Features
• Extremely bright 2" (5 cm) colour display readable in all sunlight conditions.
• Four push buttons for user input
• Pre-loaded FlarmNet database on removable SD card.
• Standard Flarm RS232 input
3.1.1.2 LXNAV FlarmView57 Features
• Extremely bright 2" (5 cm) colour display readable in all sunlight conditions.
• Rotary push button
• Pre-loaded FlarmNet database on removable SD card.
• Standard Flarm RS232 input

FlarmView Version 2.55 March 2022
Page 7 of 25
3.1.2 Interfaces
• Flarm / ADS-B port input/output on RS232 level (Standard IGC RJ12 connector)
3.1.3 Technical Data
• Power input 3.3V DC (for FlarmViews serial numbers below 30), all others have 12V-16V
DC input.
In case flarm has no 12V output, we have provided an adapter.
• Consumption of LXNAV FlarmView is (0.84W) 70mA@12V
• Weight FlarmView - 25g, FlarmView57 – 97g

FlarmView Version 2.55 March 2022
Page 8 of 25
4 System Description
4.1 Push buttons on FlarmView
With four push buttons it is possible to zoom, choose between the targets, and adjust
FlarmView settings. In some cases, long press to push buttons have some function. On
picture below is an example. Long press to upper button will move cursor for one position to
the left. Long press to lower button will cancel all changes.
4.2 Rotary encoder with push button on FlarmView57
Using rotary switch is even easier than four buttons. With rotating knob, user can select
between the targets, edit numbers, names… Short press has confirmation function (ENTER
or OK), long press has (CANCEL or ESC) function. Changing between different zoom levels
and pages is possible, if you push and rotate together.
4.3 Switching on the Unit
The unit is switched on immediately after it receives gets power supply from an external
Flarm/ADS-B device.
On the welcome screen information about version and serial number is displayed.
4.4 User Input
The LXNAV FlarmView user interface consists of many dialogues, which have different input
controls. They are designed to make input of names, parameters, etc., as easy as possible.
Input controls can be summarised as:
• Text editor
• Spin controls (Selection control)
• Checkboxes
• Slider control
To move the function from one control to another, use up or down buttons. By pressing the
Edit button access to the control that is displayed is possible.

FlarmView Version 2.55 March 2022
Page 9 of 25
In FlarmView57 up and down means rotating left and right the knob, Short press is same as
Edit, long push is same as Close
4.4.1 Buttons on FlarmView
Buttons have dynamicaly set functions. When you press a button, on the button side, will
appear a blue labels, with the action assigned to that button in that context.
On main screen, top button always performs the function of switching between pages. Short
press will cycle in one direction between pages, long press will cycle in the opposite direction
between pages. A number of pages look similar initiallly as the cycling between them simply
change the zoom level. The screen will momentary will be updated to reflect the new zoom
level. The number in a zoom level icon shows us the outer circle radius (2km – depends on
distance units setting). Inner circle is half of that distance.
Middle buttons help with target selection by cycling through available targets. Lower button
has ZOOM back or EDIT function with long press, where we can edit/view the currently
selected target.
4.4.2 Text Edit Control
The Text Editor is used to input an alphanumeric string; the picture below shows typical
options when editing text. Use the up/down button to change the value at the current cursor
position.
Push button next will move cursor right. Long press on next, will move cursor left. At last
character position, push button will confirm edited value, long press Ok C) will cancel editing
and exit that control. If Long press is available, part of button label is in Gray color. For
example above, top button’s long press >> B has back function. Bottom button’s long press
has Cancel function. Flarm ID field is not editable, because it’s unique flarm identification
number.
On FlarmView57, we can enter in Edit mode with short press, rotating knob we can change
the characters, short press will confirm current character and jump to the next position. Long
press will finish editing that field. With push and rotate, we can move cursor left and right.

FlarmView Version 2.55 March 2022
Page 10 of 25
4.4.3 Selection Control
Selection boxes, also known as combo boxes, are used to select a value from a list of
predefined values. Use the up/down buttons to select the appropriate value.
4.4.4 Checkbox and Checkbox List
A checkbox enables or disables a particular parameter. Press EDIT button to toggle the
value. If an option is enabled a check mark will be shown, otherwise an empty rectangle will
be displayed.
4.4.5 Slider selector
Some values like volume and brightness are displayed as a slider
With Edit you can activate slider control, then up/down buttons you can select the
preferred value and confirm it with the Ok push button.
4.5 Operating Modes
LXNAV FlarmView has four operating pages. Main radar screen with different zoom levels,
Flarm traffic list and Setting Page. The fourth page (Flarm watch) is displayed
automatically if Flarm detects a potential collision situation and issues a warning.

FlarmView Version 2.55 March 2022
Page 11 of 25
• Main radar screen, shows all visible objects and their information (ID, distance,
vertical speed and altitude), status of flarm (TX/2)
• Flarm Traffic list is displayed traffic in textual format.
• Settings, setup of the whole system
• Flarm Watch shows the direction of any threat.
4.6 Main screen
Description of LXNAV FlarmView Main Screen is shown on next picture.
Status of Flarm TX/2, means, that flarm device transmits data, 2 means, that Flarm
receives data from two Flarm devices.
Flarm identification is 6 digit hexadecimal number
GPS status indicates the status of Flarm's GPS receiver, number of painted bars counts
number of satellites that flarm gps receiver receives. Green bars indicates GPS 3D status,
yellow means GPS 2D, red GPS BAD, indication N.C. means that Flarm View does not receive
anything from Flarm.
Zoom level tells us what is the zoom settinig on radar
Status of flarm
Flarm identification
GPS status
Selected object
Relative Alt to
target
Vario of selected
target
Distance to selected
target
Zoom level
Label set in target
menu
Undirected warning
from AC mode
A

FlarmView Version 2.55 March 2022
Page 12 of 25
In case undirected warning is so close, that we cant display as described above, warning
looks like on following picture:
All targets are displayed as a glider symbols. User can change that symbol to another type.
It's alsp possible to change object color, depending on relative altitude to us. All received
targets (Flarm or PCAS) are marked with same type of symbol except undirected targets, for
which we don't know from which direction they are comming from. Flarm targets can be
separated only by their ID.
4.6.1 Flarm symbols
4.6.2 Selecting and switching between targets
Target could be selected ussing Up/Down (middle two) buttons. If target dissapear whe it's
selected, FlarmView will still indicate some information about last selected target.
Information about distance, altitude and vario will dissapear. If target will appear back, we
will trace it again. In case that we have enabled function Lock to nearest target, selection of
tagets will not be possible See Ch.4.9.3)

FlarmView Version 2.55 March 2022
Page 13 of 25
4.7 Flarm Warning
If Flarm warnings are enabled the following is a typical screen display. First two are normal
flarm warnings, third one is is for undirected/PCAS warning, Last one is for obstacle warning.
The screen indicates relative position of threat. In the first image two gliders are
approaching from left side at the same altitude and one from back right, the second screen
one glider is approaching from right side (4’o clock), third screen is an example of undirected
warning (AC mode). Middle number shows horizontal distance to the target, last picture
indicates obstacle warning.
4.8 Traffic list mode
On this page all traffic is displayed in list form. Buttons have similar functionality as on Main
page. In this list we can also see inactive targets, this are targets, which we lost their
signals. They will remain on list for time set in setup for target inactive timeout (which is
configurable). If target is included in FlarmNet database or UserDatabase, it will appear on
list under user friendly name (eg. Competition Sign (CD, AL)). If the target is not on the
FlarmNet or UserDatabase, it will be displayed with its FlarmId code.
4.9 Settings Mode
In the setup menu users can configure the LXNAV FlarmView. Use up/down to select the
appropriate setup item and press the Select button to enter a menu. A dialogue or sub-
menu will open.

FlarmView Version 2.55 March 2022
Page 14 of 25
4.9.1 Display
The display menu controls colour scheme and what is displayed on the screen as well as
button behaviour.
• For better readability, the background can be set to Black or White
• If you want to have the buttons on left side the complete screen can be rotated.
• If “always hidden” is checked then the button labels are not displayed on main screens.
4.9.2 Warnings
Warnings can be enabled for three different levels (low, important and urgent), separately
A/C (undirected warnings can be enabled), also a distance of A/C warning, where will be
displayed flarm watch. If Alert on A/C mode is disabled, A/C mode distance is not applicable.
Please keep in mind, that bad A/C receiver or false A/C information can be
distracting on FlarmView. To avoid such situation, you can, at any time, uncheck
alerts on A/C mode.
First 3 minutes there won’t be any warnings.

FlarmView Version 2.55 March 2022
Page 15 of 25
The warnings are classified into three levels (See Flarm manual for details on
www.flarm.com)
• First level (Low) approximately 18 seconds before predicted collision
• Second level (Important) approximately 13 seconds before predicted collision
• Third level (Urgent) approximately 8 seconds before predicted collision.
4.9.3 Target
Active timeout adjusts, remaining time of glider on map after last seen.
Inactive timeout adjusts, remaining time of inactive gliders on the list. Inactive gliders are
gliders, where we lost a signal of them, after Active timeout, they became inactive and
remains only on the list.
If glider vertical distance is less than 100m (330ft), then glider will be painted with near
glider color. Gliders with vertical distances above that, will be painted with above setting
and below 100m (330ft) will be painted with below setting.
Zoom mode can be set to automatic (zoom to the target) or manual.
If Target label is active, near glider will be displayed chosen value.
Show A/C range Shows A/C ring on flarm radar screen
Lock on nearest automatically selects nearest target and displays its data. In case, that
you want to select another target, it’s possible. After 10 seconds, Flarmview will switch back
to nearest target.
If none targets is selected Auto select will select to new coming target. Lock on nearest
has higher priority.
4.9.4 Sounds
In the Sounds setup menu volume settings for the LXNAV FlarmView and alarms settings can
be modified.
• Volume The sounds slider changes the alarm volume.

FlarmView Version 2.55 March 2022
Page 16 of 25
• Beep on traffic FlarmView will notify with short beep a presence of a new Flarm
object
• Beep on low alarm FlarmView will beep on low level alarms triggered by Flarm
• Beep on important alarm FlarmView will beep on important level alarms triggered
by Flarm
• Beep on urgent alarm FlarmView will beep on critical level alarms (collision)
triggered by Flarm
4.9.5 Units
Use this menu to specify units.
4.9.6 Hardware
On this page we can configure baudrate of serial interface. If we use more than one
FlarmView connected to Flarm, Communication setting must be set to Rx –Slave. That will
allow to Master FlarmVier to communicate with Flarm in both directions.
4.9.7 Flarm settings
On this page, we can see information about flarm device and do some configuration about
flight recorder, flarm and aircraft.

FlarmView Version 2.55 March 2022
Page 17 of 25
Those settings will work only if FlarmView is the only one device which
communicates with flarm. If other devices are connected (Oudie), there will be a
conflict between transmit lines of RS232 from Oudie and FlarmVeiew and
communication will not work.
4.9.7.1 Flarm Config
In this menu are all range setups for flarm device.
4.9.7.2 Aircraft Config
In Aircraft config menu, user can change the type of aircraft and ICAO Address.
4.9.7.3 Flight recorder
If Flarm has flight recorder, FlarmView can send to flarm all information about pilot and
aircraft. This data will be included in the header of IGC file from flarm.

FlarmView Version 2.55 March 2022
Page 18 of 25
4.9.7.4 PF IGC readout
Pressing to this menu, FlarmView will send command to PowerFlarm, to copy IGC file to USB
stick that is plugged in PowerFlarm.
This function works only with PowerFlarm connected.
4.9.7.5 Pilot event
Pressing to this item, the PEV message will be sent to the flarm. PEV will be recoredin the
IGC file on the flarm unit.
4.9.7.6 Flarm info
4.9.7.7 ADSB info
If FlarmView is connected to flarm or powerflarm device with LXNAV ADSB module, it will
display information and status of ADSB receiver.
4.9.7.8 Licenses
In this page user can see all options that are active or available for connected Flarm device.
Value
Description
AUD
Audio output connection
AZN
Alert Zone Generator
BARO
Barometric sensor
BAT
Battery compartmen
t or built in batteries
DP2
Second Data Port
ENL
Engine noise level sensor

FlarmView Version 2.55 March 2022
Page 19 of 25
IGC
Device can be IGC approved
OBST
Device can give obstacle warnings if database
is installed and license is valid
TIS
Interface for Garmin TIS
SD
Slot for SD car
ds
UI
Built
-
in UI (display, possibly button/knob)
USB
Slot for USB sticks
XPDR
SSR/ADS
-
B receiver
RFB
Second radio channel for antenna diversity
GND
Device can operate as receive
-
only ground
station
4.9.8 Files
In this menu user can download IGC files from Flarm (DL flight data), convert
downloaded files to KML file format (for viewing in Google Earth), convert FLN file to
FlarmView readable format.
Downloading flight data works only with Flarm devices. PowerFlarm is not able to
send flight to FlarmView.
4.9.9 Password
There are several passwords which run specific procedures as listed below:
• 00666 Resets all settings on FlarmView to factory default
• 99999 Will erase all data on Flarm device
• 30000 Will delete Flarmnet user file on FlarmView
4.9.10 About
In about page is information about firmware versions, hardware versions, serial numbers,
status of flarm net database.

FlarmView Version 2.55 March 2022
Page 20 of 25
5 Installation
5.1 Installing the LXNAV FlarmView
The LXNAV FlarmView cutout is very simple. A square hole with dimensions 14mm x 15mm,
need to be cut.
Peel off protection film and stick FlarmView to the instrument panel.
5.2 Installing the FlamView57
The FlarmView57 is installed in one standard 57mm (2,5’’) cutout. If there is none, prepare it
according to the picture below.
The length of the M4 screws is limited to 6mm!!!!
2
1/4
“
φ
φφ
φ
57mmh11
φ
φφ
φ
66.0mm
4
,5
mm
6mm
/