Page is loading ...

www.TrailFX.com
Page 1 of 6 Rev 091818
TO AVOID BEING SCRATCHED, PLEASE PROTECT THE SURFACE OF
THE FENDER FLARE CAREFULLY.
REMOVE CONTENTS FROM BOX. VERIFY ALL PARTS ARE PRESENT.
READ INSTRUCTIONS CAREFULLY BEFORE STARTING INSTALLATION.
60-180 min
support@trailfx.com
1 866 638 4870
Limited Lifetime Warranty
Cutting Not
Required
PLEASE USE SAFETY GLASSES & ENSURE TO BLOCK VEHICLE
MOVEMENT DURING INSTALLATION PROCESS
IMPORTANT: DO NOT OVER-TIGHTEN THE MOUNTING SCREWS.
OVER-TIGHTENING THE SCREWS WILL RESULT IN STRESS FRACTURES.
KEY TO COMPONENTS
Qty
Part Description
Qty
Part Description
2 ea.
Front Fender Flares (1 Driver 1 Passenger) (A)
1 ea.
Rubber Edge Trim (30 ft.) (E)
2 ea.
Rear Fender Flares ( 1 Driver 1 Passenger) (B)
40 ea.
Button head stainless steel bolts (F)
4 ea.
Speed clip (C)
40 ea.
Nylon Jam Nut (G)
12 ea.
Philips screws (D)
8 ea.
Long clips (H)
TOOLS NEEDED
2 mm Phillips head screw driver
7mm Socket
13 mm socket with extension
Ratchet Drive
4.5mm Hex key
Fender Flare
PFFC3001T / PFFC3001S
2007 - 2013: Chevrolet Silverado 1500 /2500 HD/2500 HD
Drilling Not
Required

www.TrailFX.com
Page 2 of 6 Rev 091818
PRIOR TO INSTALLATION
Read these instructions before beginning the installation.
Ensure you have the correct TrailFX fender flares for your vehicle before beginning the installation process.
NOTE: The flares are embossed with either a D or P indicating Passenger or Driver. Make sure you match the correct flare to
the side of the vehicle you are installing.
If you plan on painting your fender flares it must be done prior to installation. All surfaces must be cleaned and prepped following
the specifications outlined by the paint manufacturer.
PLEASE NOTE: Painted flares cannot be returned.
INSTALLING RUBBER TRIM ON NEW FENDER FLARES
Install the rubber edge trim on the outer edge of the fender flare. The outer edge is the side that comes into contact with the
vehicle’s fender. It DOES NOT get installed on the inner edge of the fender flare.
Step 2
Continue pressing the rubber trim onto the flare in 6”
increments.
Step 1
Locate the supplied rubber edge trim (E). Peel
back approx. 2” of the red lining. Starting at one
end of the flare, push the trim onto the edge of
the flare. Make sure the red liner sits inside the
flare.
Step 3
Peel back 6 inches of the red liner.
Step 4
Firmly press the trim to bond to the flare. Repeat
steps 1-4 until you reach the other end of the
flare. Repeat this process for the remaining flares.

www.TrailFX.com
Page 3 of 6 Rev 091818
INSTALLTION OF BUTTON HEAD STAINLESS STEEL BOLTS
Step 1
Locate the supplied Button head stainless steel bolts (F) and nylon jam nuts (G). Install one Button head stainless steel bolts (F)
in one of the holes in the recess of the flares as shown above in the two images.
Step 2
Proceed to the inside of the flare. Place a nylon jam nut (G) on the threads of the Button head stainless steel bolts and tighten.
Use a 13mm socket with an extension and a 4.5mm Hex key as shown in the above two images to complete the task.
Note: These bolts are decorative only and are not intended for securing the fender flares

www.TrailFX.com
Page 4 of 6 Rev 091818
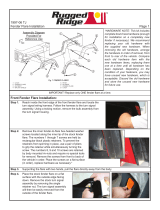
INSTALLING FRONT FENDER FLARES
INSTALLING REAR FENDER FLARES
Step 1
Using a 7mm socket, remove four factory screws from
wheel well and save for reinstallation.
Step 2
Position supplied flares (A) on fender. Verify fit and
reinstall the four factory screws removed in step 1. Verify
fit and tighten all screws. Repeat steps 1-2 for other side
front fender flare.
Step 2
Slide a supplied speed clip (C) over top center two factory
holes. Ensure the hole in the speed clip is centered over
the factory hole.
Step 1
Holding supplied flare (B) onto vehicle fender, use the pilot
holes in the flares as a guide to place a mark on the lip of
the wheel well in 4 places.
.

www.TrailFX.com
Page 5 of 6 Rev 091818
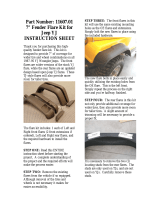
INSTALLING REAR FENDER FLARES
NOTE: Rear flares must be oriented correctly. Look behind the flare to find a D or P embossed on the flare. Be sure to
install the one marked with a D on the driver side of the vehicle and the one marked P on the passenger side of the vehicle.
Step 3
Slide a supplied long clip (H) over the marked areas you
made.
Step 4
Reposition flare (B) on fender. Firmly push the flare
against the fender and install a supplied Phillips head
screw (D) through upper two hole locations onto speed
clips (C) NOTE: Adjust speed clip as needed to ensure
holes line up.
Step 5
Start a supplied Philips head screw (D) through each of
the remaining holes and into each long clip (H). TIP: Insert
a punch into the holes in the flare to help center the long
clips. Repeat steps 1-5 for other side of vehicle.

www.TrailFX.com
Page 6 of 6 Rev 091818
PRODUCT CARE
1. Periodically check the product to ensure all fasteners are tight and components are intact.
2. Regular waxing is recommended to protect the finish of the product.
Check out these other TrailFX Products!! www.TrailFX.com
FAQ’s
1. Fender flares are loose after installation.
Please ensure that all required mounting brackets / hardware’s are installed & tighten correctly.
2. Missing / Excess Hardware.
Re-check hardware count as per the part list.
Keystone Automotive Operations Inc. (KAO) warrants this product to be free of defects in material and workmanship at the time of
purchase by the original retail consumer. KAO disclaims any other warranties, express or implied, including the warranty of fitness
for a particular purpose or an intended use. If the product is found to be defective, KAO may replace or repair the product at our
option, when the product is returned prepaid, with proof of purchase. Alteration to, improper installation, or misuse of this product
voids the warranty. KAO’s liability is limited to repair or replacement of products found to be defective, and specifically excludes
liability for any incidental or consequential loss or damage.
/