1
INSTALLATION & USER
MANUAL
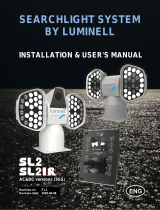
SEARCHLIGHTS HALOGEN R60

2
Technical Manual for
Halogen Searchlight
□ SH 310 R60 1000W
□ SH 470 R60 2000W
□ SH 480 R60 3000W
□ 1 x 230 VAC 50/60 Hz
□ 1 x 115 VAC 50/60 Hz
This manual refers to product:
Serial no.: ____________________
Controlled by: ____________________
Date: ____________________

3
Table of contents:
Page
Introduction 4
1.0 General description 5
1.1 Options 6
2.0 Technical data and dimensions 7
2.1 Overall Searchlight dimensions & electrical cable dimensions 8
2.2 Cut / out main/slave panel 9
3.0 Electrical Installation 10
3.1 R60 SH310- SH480 System Layout 10
____ 3.2 Panel R60, remote integrated PSU 100-240V;50/60Hz 11
3.3 Installation, software setttings 12
3.4 Hardware settings 13
3.5 Slave panel 14
3.6 Settings / Joystick 15
4.0 Software userguide 16
4.1 Home menu 17
4.2 Settings / Sector limits / Sweep / Home 18
4.3 Searchlight help and information 19
4.4 Alarm handling 21
5.0 Maintenance 22
5.1 Spare Parts List 23
5.2 Lamp replacement 24
5.3 Troubleshooting 25
5.4 Battery (2008190) error and repplacement 25
5.5 Battery replacement in the searchlight 26
6.0 Warranty 26
7.0 Drawings 26
7.1 R60 Searchlight PLC B2 Motorhouse 27
7.2 R60 Searchlight PLC Output - B2 Motorhouse 28
7.3 Panel R60, remote 29
7.4 R60 Motorhouse B2 30
7.5 R60 Drum / Gear B2 31
7.6 R60 Slave panel B6 32
8.0 Network / IP addresses 33

4
Introduction:
For more than 90 years, Norselight have designed and manufactured lighting products for marine
vessels.
Through ongoing customer focused product development, Norselight continue
to deliver quality products as demanded both at sea and on the rugged coastlines of Norway.
This commitment to quality and expertise provides the foundation for Norselight to be possibly the
world’s leading supplier of maritime lighting.
However, in order to stay in front, Norselight would very much appreciate all comments that you
may have regarding our quality products or services.
Customer Service:
The Customer Service department of GLAMOX Production GmbH & Co. KG will be pleased to
help you when ordering spare parts, for maintenance and repair work as well as in case of
problems and questions.
Manufacturer: Service contact:
GLAMOX Production GmbH & Co. KG GLAMOX Production GmbH & Co. KG
Glasower Weg 5 Tel. : +49 421 48 93-0
Germany Internet: www.glamox.com/gmo
We would also like to use this opportunity to thank you for choosing Norselight.

5
1.0 General description:
Searchlight
The R60 searchlights SH 310, SH 470 and SH 480:
are made from seawater resistant aluminium, welded and fi nished with white powder coat.
The forks are made of stainless steel.
• The lamp housing contains one lamp, ignitor, silverplated glass-refl ector ,hardened frontglass,
and a focus-motor for adjustment of the light beam.
• The motor housing contains a complete gear with motors for
horizontal and vertical movement, a thermostat driven heating
element and the electronic control system.
Control Panel
Main Operation Panel
It contains the following functions:
· BUS communication
· Lamp On / Off
· Joystick for horizontal and vertical movement
· Speed regulator for horizontal and vertical movement
· Focus +/- (light beam adjustment)
· Horizontal indicator for searchlight position 360 deg.and vertical +/-30 deg.
· Backlight intensity adjustable on Main Panel
· Adjustable limits for horizontal and vertical sectors
· Alarm menu
· Trouble shooting menu
· Help menu
· Hardware installation settings menu
· Designed for console or bulkhead mounting
· User defi ned sweep and two home functions
Slave Operation Panel
It contains:
Joystick and a button for lamp On / Off
Designed for console or bulkhead mounting
Wireless Operation Panel
It contains:
· Power On / Off Button
· Lamp On / Off
· Touch buttons for horizontal and vertical movement
· Speed regulator for horizontal and vertical movement
· Focus +/- (light beam adjustment)
· LED Indication for searchlight position 16 positions for 360 deg.
· Display for searchlight ID-number
· End position indication
· Battery charger

6
1.1 Options
Software:
-Focus indicator
-Panel built in box or cabinet
Hardware:
-Other RAL colours
-Upside down mounting
-Pedestal standard and custom sizes
-Special cable glands on request

7
2.0 Technical data and dimensions
General specifi cations searchlight unit:
Technical data – all SH models:
IP classifi cation 56
Maximum ambient temperature (°C) 50
Minimum ambient temperature (°C) -50
Horizontal movement 360º
Vertical movement -27° / +25º
Colour RAL 9016
Forks stainless steel
Article no: Model Watt Voltage Main body material
600106938
600106938 SH 310 R60 230V 1000 230 VAC Seawater resistant aluminium
600107438 SH 470 R60 230V 2000 230 VAC Seawater resistant aluminium
600112358 SH 480 R60 230V 3000 230 VAC Seawater resistant aluminium
Specifi cations Main Panel:
Specifi cations Slave Panel:
Specifi cations Wireless Panel:
Specifi cations LAN switch:
IP classifi cation IP65 (front)
Connection signals 6x max. 4mm²
Dimensions 96 x 96 x 44mm
Weight 40g
IP classifi cation IP67
IP classifi cation IP66
Input Voltage 9,6 - 60 VDC
18 - 30 VAC
(redundant dual inputs)
IP classifi cation IP65 (front)
Ambient temperature (°C) 0 - 50º
Input Voltage 24 VDC (20,4 to 27,6 VDC)
Connection 24V 2x max. 2,5 mm²
Connection Bus LAN RJ45
Dimensions 230 x 230 x 54mm
Weight 1,6 kg
Power consumption 15W

8
2.1 Overall Searchlight dimensions & electrical cable dimensions
Product A B C D
SH 310 R60 BUS 1000W 890 420 330 470
SH 470 R60 BUS 2000W 1040 525 700 615
SH 480 R60 BUS 3000W 1040 525 700 615
Measurments in mm

9
2.2 Cut / out main / slave panel
Hole dimensions for installing joystick main panel:
Hole dimensions for installing slave panel:

10
3.0 Electrical Installation / 3.1 R60 SH 310-SH 480 System Layout

11
2SWLRQDOUHPRWHVLJQDOWRUHFWLILHU
; (5%(5-3%%
; (5%(5-3$$
)LOWHU
'RZQ
1212
6
;
;
9
9
&20
&20
&20
2XWSXW
&20
/$1
%$/$1
GUZ(5
%3DQHO
$
6:,7&+
/$1
6&
%$3DQHO3/&,QSXW
$7RXFKSDQHO
/HIW
5LJKW
83
12 12
1
/
3(
1
/
3(
;
3RZHUVXSSO\
(5
6KHHW
6K
9LHZ
*ODPR[3URGXFWLRQ*PE+&R.*
*ODVRZHU:HJ7HWHURZ
KWWSJODPR[FRPJPR
'HVFULSWLRQ
'DWH
1DPH
'UQ
$SYG
5OVH
'DWH
1DPH
.OHLQHERUJPDQQ
6FDOH0DVWDE
6RXUFH8UVSUXQJ
6XEIRU(UVIU
6XEE\(UVGXUFK
VO
'UDZLQJ1R=HLFKQJV1U
6FDOH6NDODPP
6FKXW]YHUPHUN',1,62
7KHFRS\LQJGLVWULEXWLRQDQGXWLOL]DWLRQRIWKLVGRFXPHQWDVZHOO
DVWKHFRPPXQLFDWLRQRILWVFRQWHQWVWRRWKHUVZLWKRXWH[SUHVVHG
DXWKRUL]DWLRQLVSURKLELWHG2IIHQGHUVZLOOEHKHOGOLDEOHIRUWKH
SD\PHQWRIGDPDJHV$OOULJKWVUHVHUYHGLQWKHHYHQWRIWKH
JUDQWRIDSDWHQWXWLOLW\PRGHORURUQDPHQWDOGHVLJQUHJLVWUDWLRQ
:HLWHUJDEHVRZLH9HUYLHOIlOWLJXQJGLHVHV'RNXPHQWV9HUZHUWXQJ
XQG0LWWHLOXQJVHLQHV,QKDOWHVVLQGYHUERWHQVRZHLWQLFKWDXV
GUFNOLFKJHVWDWWHW=XZLGHUKDQGOXQJHQYHUSIOLFKWHQ]X6FKDGHQ
HUVDW]$OOH5HFKWHIUGHQ)DOOGHU3DWHQW*HEUDXFKVPXVWHU
RGHU*HVFKPDFNVPXVWHUHLQWUDJXQJYRUEHKDOWHQ
3DQHO5UHPRWH
LQWHJULHUWHV1HW]WHLO
9+]
3DQHO5UHPRWH
LQWHJUDWHG368
9+]
$
$
%
'
(
)
(
'
&
%
$
5HY
8.
&
8.
3.2 Panel R60, remote integrated PSU 100-240V;50/60Hz

12
3.3 Installation, software settings
First start-up and after power loss
When all cabling and mechanical
installation is done turn on the power.
With every power loss of the searchlight,
always starts an inifi alization.
Be sure the searchlight can move 360°
horizontal and +/-30 ° vertical.
The searchlight will now run all motors to
calibrate its position.
Do the same procedure for all searchlights
in the system.
The reset do also have to be done after
power loss.
1.
2.
3.
Select all searchlights in the system.
The searchlight is labeled with ID.number on
the motorhouse and on the inside of the back
cover to the motorhouse.
5.
123
4.
6.
Continue with hardware settings on page 13

13
3.4 Hardware settings
Start in Home menu
1.
Select all wanted searchligts in the system
3. 6.
5.
2.
4.
Select each searchlight in the home menu
Select how the searchlight is installed with
reference of the 0-point of the installation
Example. The front of the motorhouse is in
the same direction as the bow of a ship.
123
After selection

14
1.
Connect the wires according to drawing
E-R60-027
It is possible to connect unlimited slave pan-
els.
3.
2.
3.Settings for the slave panel can be
selected:
Reverse direction for both horizontal
and vertic
al direction
Speed for horizontal and vertical
movement
Enable panel on/off
3.5 Slave panel

15
3.6 Settings / Joystick
The searchlight can be operated from 4 different
types joysticks.
1. Software joystick in the touch-screen main menu.
Settings for the joystick described in pos. 5
2. Hardware joystick on the main panel.
The joystick controls the selected searchlight in the main menu
Settings for the joystick described in pos. 5
3. Hardware joystick on the slave panel.
Settings for the joystick described in pos. 6
4. Analog proportional joystick. (Optional)
Function described in separate manual.
5. Main panel
The movement of the searchlight
from the joystick can be reversed.
Settings affect both software and
hardware joystick on the main
panel
6. Slave panel
The movement of the searchlight from
the joystick can be reversed.
Settings affect all slaves connected to
the searchlight.
Default speed can be set for Horizontal
and Vertical speed.
Troubleshooting see page 25
More information is also available in the help menu
Settings for joystick is found
in Settings/Hardware Installa-
tion for each searchlight

16
4.0 Software userguide
Menu for controlling all basic searchlight functions and position feedback.
1. Help menu page 19
2. Information about searchlight signals,
3. Settings for the searchlight
4. Home menu page 17
5. Move the SL to Home1 position settings, page 18
6. Sweep the SL, settings, page 18
7. Limits for sweep, page 18
8. Lamp On / Off
9. Focus position indicator 0-100 (Option)
10,11. Focus In / Out
12. Indicator for vertical angle, settings on page 14
13. Vertical speed, see pop-up
14. Choosen searchlight
15. Horizontal speed, see pop-up
16. Horizontal position indicator, settings on page 14
17. Symbol for ship as referance
18. Joystick, settings on page 15
19. Indicator for mechanical stop, settings on page 18
1. 2. 3. 4.
5.
6.
7.
8.
9.
10.
11.12.13.14.
15.
16.
17.
18.
19.

17
4.1 Home menu
Press the Home button for Home menu
Searchlight selector.
Up to 9 searchlights
can be controlled
See page
13
See page
21
The panel can be
dimmed in 32 levels
in the pop-up menu
Input/Output information on
panel PLC. Yellow colour
indicates logic On.
08=Joystick Left
09=Joystick Down
10=Joystick Right
11=Joystick Up

18
4.2 Settings / Sector limits / Sweep / Home
The searchlight movements can be limited by setting a sector for horizontal and vertical
movements.
The settings will have the same function as a mechanical stop unless for the reset/init-
tializing routine.
Do not exceed -180 and 180 degrees.
Do not set the limit lower than the sweep sector.
Main menu / Settings / Hardware Installation / Searchlight limits
Main menu/ Searchlight limits /
1. Start sweep horizontal, this is the same button as in main menu
Set the min/max sweep degrees in pop-up menu
2. Start sweep vertical, can be operated at the same time as for horizontal
Set the min/max sweep degrees in pop-up menu
3. Home position 1, same as button in main menu
Set the position for horizontal and vertical parking in pop-up menu
4. Home position 2
Set the position for horizontal and vertical parking in pop-up menu
1
3
2
4
Min and max degrees/position is limited by sector limits, described above.

19
4.3 Searchlight help and information
Help menu
In most of the menues Help is available

20
Page is loading ...
Page is loading ...
Page is loading ...
Page is loading ...
Page is loading ...
Page is loading ...
Page is loading ...
Page is loading ...
Page is loading ...
Page is loading ...
Page is loading ...
Page is loading ...
Page is loading ...
Page is loading ...
/


