
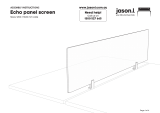
Lean perspex or
Lean Echo screens
Sizes: 800 / 1500 mm wide
Need help!
Call us on
1300 527 665
www.jasonl.com.au
Page 1 of 4
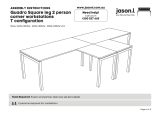
ASSEMBLY INSTRUCTIONS

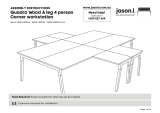
STEP 01
Please leave 25mm gap between table tops (A) so we can install pincer clamp brackets between the two table tops.
Pincer brackets can be installed around 250mm-300mm from the end of the screen (or can be any desired distance).
Lean perspex or
Lean Echo screens
Sizes: 800 / 1500 mm wide
Need help!
Call us on
1300 527 665
www.jasonl.com.au
Page 2 of 4
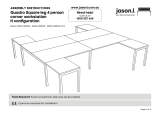
ASSEMBLY INSTRUCTIONS
A

Lean perspex or
Lean Echo screens
Sizes: 800 / 1500 mm wide
Need help!
Call us on
1300 527 665
www.jasonl.com.au
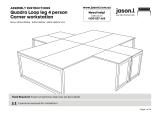
STEP 02 STEP 03
Page 3 of 4
Step 2: Once desired location is set, please tighten the first pincer clamp bracket bottom screw using an allen key.
Step 3: Repeat step 2 and assemble the second pincer clamp bracket.
ASSEMBLY INSTRUCTIONS

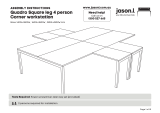
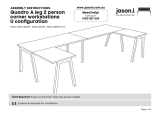
STEP 04
ASSEMBLY INSTRUCTIONS
Lean perspex or
Lean Echo screens
Sizes: 800 / 1500 mm wide
Need help!
Call us on
1300 527 665
www.jasonl.com.au
Step 4: Please put the plastic spacer in between the clamp brackets.
Hint: Lean Perspex use 2x thicker plastic spacers. Lean Echo screen use 1x thin plastic spacer only.
Step 5: Please slide down Lean Perspex or Lean Echo screens down until it fully rest over the brackets, standing between the pincer clamp
brackets. Please use both plastic spacer to clamp the screen and tighten it using an allen key.
Page 4 of 4
STEP 05
-
 1
1
-
 2
2
-
 3
3
-
 4
4


Ask a question and I''ll find the answer in the document
Finding information in a document is now easier with AI
Related papers
-
 JasonL EP3512LGW Operating instructions
-
 JasonL QDWB2836.B.WT2 Operating instructions
-
 JasonL QDB2836.B.WT2 Operating instructions
-
 JasonL QDLB2836.B.WT2 Operating instructions
-
 JasonL QDSB3236.B.WT2 Operating instructions
-
 JasonL QDSR3618.W.WT Operating instructions
-
 JasonL QDSB3636.B.WT Operating instructions
-
 JasonL QDPR2818.B.WT2 Operating instructions
-
 JasonL HQAB4127.W.WT.GS Operating instructions
-
 JasonL HQSB4128.W.WT.GS Operating instructions


