Page is loading ...

Wingspan 37.00 in. (940mm)
Wing Chord 7.50 in. (190.5mm)
Wing Area 254 sq. in.
Length 30.6 in (775mm)
Flying Weight 18 oz. (510 grams)
Baery 3S 1000mAh w/HCT
Motor 1250Kv Brushless
ESC 20A Brushless w/BEC
Prop 8 x 4
Instruction Manual

2
TABLE OF CONTENTS
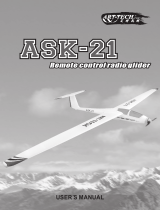
Offering a perfect combination of stability and durability, while also delivering powerful ight
performance, the Ares Gamma Pro V2 is not only a great choice for rst-time pilots but also an
exceptional model for experienced sport yers, too. Like the popular Gamma 370 V2, the Pro starts
with an advanced EPO airframe that’s lightweight, tough, and comes practically ready to y, right out
of the box. The Gamma Pro V2 also has the same great ying characteristics of the Gamma 370 V2,
but adds aileron control and brushless power. With these added features, the Gamma Pro V2 has
the capability to take you from tentative rst circuits to accomplished aerobatics.
If you want to learn to y on the Gamma Pro V2, the technology in the pre-installed Aegis NFP
(Natural Flight Progression) system gives you the helping hand you need to be successful. It offers
three different ying modes (Beginner, Intermediate, and Unassisted) you can progress through
as your ying skills advance. In Beginner mode, the bank angle is restricted to help you make
coordinated turns, while Intermediate mode allows a greater bank angle and introduces you to how
the rudder can help with handling. If you feel you’ve lost control of the plane in either mode, just
let go of the sticks and it quickly returns to level ight. Plus, when you’re ready to y in Unassisted
mode and branch into aerobatics, the technology is still there to “rescue” the model if you get into
trouble – just ip the NFP switch to Beginner or Intermediate and you’re back in controlled level
ight. The NFP system in the Pro V2 even helps you show off to your ying buddies when you use
the Auto-Roll and Stabilized Inverted-Flight features. And for even more ying fun, just add one of
the aftermarket ‘plug-in’ options for the Gamma Pro V2; either a oat kit that enables the Pro V2 to
quickly and easily be converted into a powerful seaplane, or a HD camera (AZSZ2544) that allows
you to take aerial photos and videos from the plane.
In addition to that great list of features, the Gamma Pro V2 incorporates the reliable new Hitec Red
2.4GHz radio protocol that’s compatible with most Hitec systems already on the market. The Gamma
V2 can be purchased in two convenient forms, both incorporating the Hitec Red protocol: either
Ready-To-Fly (including a Hitec Red-enabled transmitter and receiver) or Pair-To-Fly (packaged with
a Hitec Red receiver that’s compatible with your existing Hitec air transmitter).
INTRODUCTION
TABLE OF CONTENTS .....................................................................................................................2
INTRODUCTION ...............................................................................................................................2
GENERAL PRECAUTIONS ..............................................................................................................3
SAFETY PRECAUTIONS ..................................................................................................................3
GAMMA PRO V2 RTF CONTENTS ..................................................................................................4
REQUIRED TO COMPLETE PTF .....................................................................................................4
LiPo BATTERY WARNING ................................................................................................................5
LiPo BATTERY CHARGING ..............................................................................................................6
AIRPLANE ASSEMBLY .....................................................................................................................7
INSTALLING FLIGHT BATTERY .......................................................................................................9
FLIGHT CONTROLS .......................................................................................................................10
NFP SETUP .................................................................................................................................... 11
ESC (ELECTRONIC SPEED CONTROL) .......................................................................................12
TRANSMITTER DETAILS ...............................................................................................................12
FIRST FLIGHT CHECKLIST ...........................................................................................................13
CENTER OF GRAVITY ...................................................................................................................13
FLYING ............................................................................................................................................13
GAMMA PRO V2 REPLACEMENT PARTS ....................................................................................14
WARRANTY ....................................................................................................................................15

3
SAFETY PRECAUTIONS
Failure to use this product in the intended manner as described in the following instruction can result
in damage and/or personal injury. A Radio Controlled (RC) airplane/helicopter/quadcopter is not a toy!
If misused it can cause serious bodily harm and damage to property.
Keep items that could become entangled away from the propeller, including loose clothing, tools, etc.
Be especially sure to keep your hands, face and other parts of your body away from the propeller.
As the user of this product you are solely and wholly responsible for operating it in a manner that does
not endanger yourself and others or result in damage to the product or the property of others.
This model is controlled by a radio signal that is subject to possible interference from a variety
of sources outside your control. This interference can cause momentary loss of control so it is
advisable to always keep a safe distance from objects and people in all directions around your model
as this will help to avoid collisions and/or injury.
GENERAL PRECAUTIONS
• Never operate your model if the voltage of the batteries in the
transmitter is too low.
• Always operate your model in an open area away from obstacles,
people, vehicles, buildings, etc.
• Carefully follow the directions and warnings for this and any optional
support equipment. (chargers, rechargeable batteries, etc.).
• Keep all chemicals, small parts and all electronic components out of
the reach of children.
• Moisture causes damage to electronic components. Avoid water
exposure to all electronic components, parts, etc. not specically
designed and protected for use in water.
This device complies with part 15 of the FCC rules. Operation is subject to the
following two conditions:
(1) This device may not cause harmful interference, and
(2) this device must accept any interference received, including interference that may
cause undesired operation.
Caution: Changes or modications not expressly approved by the party responsible for
compliance could void the user’s authority to operate the equipment.
This product contains a radio transmitter with wireless technology which has been
tested and found to be compliant with the applicable regulations governing a radio
transmitter in the 2.400GHz to 2.4835GHz frequency range.
The associated regulatory agencies of the following countries recognize the noted
certications for this product as authorized for sale and use: USA, UK, AU
FCC INFORMATION

4
Item Descripon
Not Available Separately .........Gamma Pro V2 RTF Airframe
KNNA1003 ........................6-Channel Airplane Transmier w/NFP, 2.4GHz, Mode 2
Not Available Separately ..........AA Baeries (8pcs)
AZSB10003S20D.......................1000mAh 3-Cell/2S 11.1V 20C LiPo Baery, T-Connector
AZSC308C .................................3-Cell/3S 11.1V LiPo, 0.8 DC Balancing Charger
AZSC1308PS ..............................100-120V AC to 13V DC Adapter, 0.8A Power Supply
GAMMA PRO V2 RTF CONTENTS
Gamma PRO V2 PTF CONTENTS
Item Descripon
Not Available Separately .........Gamma Pro V2 PTF Airframe W/Hitec Red Receiver
REQUIRED TO COMPLETE PTF
Item Descripon
Hitec 2.4GHz Transmier ....... 6 channel minimum

5
LiPo BATTERY WARNING
IMPORTANT NOTE: Lithium Polymer batteries are signicantly more volatile than the
alkaline, NiCd or NiMH batteries also used in RC applications. All instructions and
warnings must be followed exactly to prevent property damage and/or personal injury
as mishandling of LiPo batteries can result in re. By handling, charging or using the
included LiPo battery you assume all risks associated with LiPo batteries. If you do
not agree with these conditions please return the complete product in new, unused
condition to the place of purchase immediately.
You MUST charge the LiPo baery in a safe area away from
ammable materials.
NEVER charge the LiPo baery unaended at any me. When
charging the baery you should A LWAY S remain in constant
observaon to monitor the charging process and react immediately
to any potenal problems that may occur.
Aer ying/discharging the baery you must allow it to cool to
ambient/room temperature before recharging.
To charge the LiPo baery you MUST use only the included 305C
balance charger or suitable LiPo baery charger. Failure to do
so may result in a re causing property damage and/or personal
injury. DO NOT use a NiCd or NiMH charger.
If at any me during the charge or discharge process the baery
begins to balloon or swell, disconnue charging or discharging
immediately. Quickly and safely disconnect the baery, then place
it in a safe, open area away from ammable materials to observe
for at least 15 minutes. Connuing to charge or discharge a baery
that has begun to balloon or swell can result in a re. A baery that
has ballooned or swollen even a small amount must be removed
from service completely.
Store the baery at room temperature, approximately 68–77°
Fahrenheit (F), and in a dry area for best results.
•
•
•
•
•
•
When transporng or temporarily storing the baery, the
temperature range should be from approximately 40–100°F. Do not
store the baery or model in a hot garage, car or direct sunlight
whenever possible. Ifstoredinahotgarageorcarthebaerycan
bedamagedorevencatchre!
Do not over-discharge the LiPo baery. Discharging the LiPo baery
too low can cause damage to the baery resulng in reduced
power, ight duraon or failure of the baery enrely.
•
•

6
6
LiPo cells should not be discharged to below 3.0V each under load.
In the case of the 3-Cell/2S 11.1V LiPo baery used to power the
Gamma Pro V2, you will not want to allow the baery to fall below
9.0V during ight.
The electronic speed control (ESC) has low voltage cuto (LVC)
protecon. When the ight baery voltage drops below a set point
the throle gradually is reduced. At this point the airplane will need
to be landed and the baery recharged.
LiPo BATTERY CHARGING
PLACE THE 308C CHARGER ON A FLAT, SMOOTH AND HEAT-RESISTANT SURFACE.
It’s important that air is able to circulate through the charger during the charging process in order to
keep it from over-heating. It’s especially important that the vent openings on the
bottom and sides of the charger are not blocked. DO NOT place the charger on carpeted or other
similar surfaces that may block the vent openings. Also, DO NOT place the charger in direct sunlight
before, during or after use.
It will take approximately 1 to 1-1/2 hours to fully charge a mostly discharged ight battery.
For faster charging see the Radient Ascend AC-DC charger available at your local Hobby Town store.
Plug power supply into 308C charger. Plug
power supply into main AC power.
Maintain correct polarity when plugging in
4-pin balance connector.
Plug 4-pin balance connector of ight
battery into 308C charger.
Both red and green LED’s will light during
charge. Only green LED will remain lit
when charge is complete.
Important Charging Notes

7
AIRPLANE ASSEMBLY
Assemble the vertical tail to the horizontal
tail.
Place the tail assembly into position on the
fuselage.
Insert the two 5/16” (8mm) long screws
from the tail screw bag into the holes on
fuselage bottom and tighten.
Connect the plastic clevis to the rudder
control horn in the outermost hole and
snap closed. Repeat for elevator clevis.
Photo shows clevis connected to the eleva-
tor control horn in the outermost hole. The
clevis keeper is in correct position.
Install the tail wheel bracket with two small
screws.
Slip plastic clevis keeper onto clevis. This
is to prohibit the clevis from popping open
during ight.
Photo shows clevis connected to the rud-
der control horn in the outermost hole. The
clevis keeper is in correct position.

8
Locate the landing gear assembly and
insert into slot at the rear of the battery box.
Locate the main wing halves.
Peel the backing from the double stick tape
on the plastic reinforcements.
Locate the LED wiring Y-connector and plug
in the wing LEDs, making sure to maintain
correct orientation of the plugs.
Using two washer head screws, secure the
landing gear to the fuselage.
Slide the two halves partially together.
Make sure that the LED and servo wires
are not pinched between the wing halves.
Slide the wing halves completely together
and press the plastic parts rmly to the wing
surface.
Plug the aileron into the aileron channel
on the NFP board. Tuck the wires into the
fuselage while tting the wing into position.
See page 11 for NFP
Board Layout and
Orientation

9
Install 4 of the rubber bands to secure the
wing as shown in the photo above.
Slip collet adapter onto motor shaft followed
by spinner backplate,propeller and prop nut.
Tighten nut and install spinner nose piece.
The photo above shows the correct order
of installation for the propeller. Install collet
back plate on collet adapter.
Completed installation should look like
photo above.
NOTE: DO NOT install prop until after
initial aircraft setup and testing.
INSTALLING FLIGHT BATTERY
The included 1000mAh 3-cell 11.1V LiPo battery
is a perfect t for the battery box located on the
bottom of the fuselage. The ight battery installs
w i t h t h e b a s e o f t h e b a t t e r y f a c i n g f o r w a r d .
Plug the balance connector wires into the LED
Y-connector to light the LEDs. Plug the female
HCT connector from the ight battery into the
male HCT connector from the ESC. Once
correctly plugged in, the wires can be tucked into
the battery box and the battery hatch door can be
re-installed and snapped into place. The servos
are active at this point and the motor is armed.

10
FLIGHT CONTROLS
Before your rst ight it is important to mechanically center all your control surfaces to their neutral
positions. This is done with the NFP switched OFF. Turn the transmitter ON with the throttle stick
in the lowest (OFF) position and the NFP switch in the OFF (away) position.Plug in the ight
battery. This will initialize the servos and arm the motor. Center the 4 trim sliders, they emit a
longer beep when reaching the center position. The control surfaces for the aileron, elevator and
rudder should be in their neutral position and not deected in any direction. If they are not in their
neutral position you will need to adjust the length of the pushrod by screwing the clevis in or out.
To open, gently pry the clevis arms apart using a at blade screwdriver. Disengage the clevis from
the control horn and screw in or out as appropriate so that when re-attached to the control horn
the control surface is in its neutral position. When satised that they are correct, snap the clevis’s
shut and slide the clevis keepers back into position to keep them secure. When the mechanical
centering is complete it will be necessary to check the centering and movement of the control
surfaces when the NFP (Natural Flight Progression) is switched ON. This is covered in the next
section.
Center all on the trim sliders on the
transmitter to their neutral positions and
lower the throttle stick to off.
Check that the control surface movement is
in the correct direction. When the elevator
stick is down the elevator moves up. When
the elevator stick is moved up, the elevator
moves down.
Adjust the clevis in or out by screwing until
the control surface is at neutral when clevis
is attached.
When the rudder stick is moved to the right,
the rudder moves to the right. When the
rudder stick is moved left the rudder moves
left.
When the aileron stick is moved to the
right, the right aileron moves up while the
left one moves down. When the aileron
stick is moved to the left, the left aileron
moves up while the right one moves down.

11
A
u
x
/
P
ai
r
Rud
d
er
A
i
leron
E
l
evat
o
r
Throttle
Clockwise increases
gain
Gain POT
To Receiver
NFP
Control
Unit
Front of Airplane
Aircraft Yaws Left
ACTION
Rudder Moves Left
REACTION
5-3/4” (146mm)
from underside of
elevator to ground
Aircraft Rolls Right
Right Aileron Down
REACTION
ACTION
Release the NFP button and see if the
elevator is in neutral. Repeat these steps
with aileron and rudder until all control
surfaces are neutral both in and out of
NFP mode.
Check the reaction of the control surfaces
when NFP is active. The following 3 steps
show the aircraft action and the correct
reaction that the NFP system will initiate.
Elevator Moves Up
REACTION
Tail Pitches Up
ACTION
The NFP Control Unit is pre-installed in
your Gamma Pro V2. Refer to the photo
above for channel assignments.
With the aircraft powered on and initialized,
ip the NFP switch into Beg or Intermediate.
Did the elevator move up or down?
Hold the aircraft by the nose and swing the
tail left or right, the rudder should deect in
the same direction as the tail is moving.
You need to check the NFP centering, prop
the tail of the airplane up to ying position,
about 5-3/4” to underside of stabilizer.
If the elevator moved down, press and hold
the NFP Button and move the elevator stick
from center to down several times.
Hold the aircraft level and then roll it to the
right quickly. The right aileron should go
down to raise the wing back to level.
Hold the aircraft by the nose and swing the
tail up, the elevator should deect up. Swing
the tail down the elevator moves down.
NFP SETUP

TRANSMITTER DETAILS
NFP Mode Switch
Elevator/Aileron
Control Stick
Elevator Trim
Aileron Trim
ON/OFF Switch
Delta/Elevon Mix
Switch
Servo Reversing
Switches
Rudder Trim
Throttle/Rudder
Control Stick
Throttle Trim
NFP Trim Button and
Auto Roll Button
Power LED
Mode 1/Mode2
Switch
The Gamma Pro V2 RTF version includes a KA-6 NFP 6-Channel Airplane Transmitter equipped
with 2.4GHz Hitec Red technology, trim levers, servo reversing switches and optional use “delta/
elevon” mixing. The PTF (Pair-to-Fly) version requires a 6+ channel Hitec transmitter. The trans-
mitter is also equipped with a 3-position switch and a push button that are part of the NFP (Natu-
ral Flight Progression) technology that is included in the Decathlon 350.
ESC (ELECTRONIC SPEED CONTROL)
The factory installed 20A brushless motor ESC arms the servos when the ight battery is
plugged in and the ESC receives a valid low throttle signal from the receiver. If the throttle is
not in its lowest position the ESC will not arm. When the ight battery is plugged in you will hear
3 tones (3 cell battery) followed by a double tone indicating that the motor is armed. Once the
throttle is activated please make sure that you keep clear of the prop as a spinning prop can
cause serious injury.
The ESC includes a Battery Eliminator Circuit (BEC) that provides electrical power to the re-
ceiver and servos. This power is from the ight batteries and no additional receiver batteries are
required.
The ESC also has a Low Voltage Cutoff (LVC). When the voltage in the ight batteries reaches
a level that is approaching 3V/cell the LVC will reduce the power to the motor gradually. If you
feel that the airplane is beginning to lose power, land immediately and change or recharge your
ight battery.
Spare ight batteries are available at Ares-RC.com
Mode 2 Shown

13
CENTER OF GRAVITY
65mm
+ or - 5mm
The RTF Gamma Pro V2 CG is set just by installing the supplied 1000mAh battery. If you are
using a different battery or other components check to see that you have maintained the correct
CG. Measured from the leading edge of the wing the CG is 65mm +/- 5mm.
FIRST FLIGHT CHECKLIST
• Airplane assembled and mechanically trimmed.
• Flight baery fully charged
• Control surfaces move in correct direcon when control sck is moved.
• Airplane is facing into the wind
• The ying site is free of people and obstrucons and is of suitable size
Congratulations you are now ready for ight!
FLYING
We recommend ying your Gamma Pro V2 in a large enough space for relaxed ying. The area
required should be about the size of a ball eld and be free of obstructions. We suggest that initial
ights be carried out when the wind conditions are light. Once you are familiar with the Gamma Pro V2
you will easily be able to y in less favorable conditions.
We recommend that your rst ight be with the NFP (Natural Flight Progression) switch in the off
postition. From a smooth surface with the nose of the airplane into the wind, smoothly advance the
throttle.
Ease back on the elevator stick and the Gamma Pro V2 will smoothly climb out. Use the aileron stick to
initiate a turn and continue to climb to a comfortable altitude. Once airborne you can reduce the throttle
to 1/2 for a good cruising speed. The rst steps are to gain some condence in controling the ight of
the airplane without having the NFP active. Smooth stick movement will yield the best results. With the
plane ying at an altitude of 100-150 feet it is time to check the NFP trim, switch the NFP mode switch
from off to intermediate and observe the reaction of the airplane. If trimmed properly there should be
only a minor change in ight attitude. If the airplane begins to climb or dive more than a few degrees,
switch off the NFP and return to land and adjust the NFP trim as described on page 11. When properly
trimmed the NFP modes will help you to easily y the airplane and return it to straight and level ight by
just releasing the sticks.

14
GAMMA PRO V2 REPLACEMENT PARTS
Item Number Description
AZSA1615 Fuselage w/o decal: Gamma V2, Gamma Pro V2
AZSA1616 Main Landing Gear: Gamma V2, Gamma Pro V2
AZSA1617 Landing Gear Mount/Battery Hatch Set: Gamma 370 V2, Pro V2
AZSA1618 Tail Wheel Set: Gamma V2, Pro V2
AZSA1621 Painted Cowl: Gamma V2, Gamma Pro V2
AZSA1623P Spinner: Gamma Pro V2
AZSA1624P Decal Set: Gamma Pro V2
AZSA1626 Aileron Wing Set: Gamma V2, Pro V2
AZSA1629 1250KV, 370 Brushless Motor: Gamma Pro V2
AZSA1629S Prop Shaft Adapter w/ nut: Gamma Pro V2
AZSA1630 Aegis NFP Control Board: Gamma Pro V2
AZSA1640 Float Set: Gamma V2, Pro V2
AZSAP8040HS 8 x 4 High Speed Propeller (2): Gamma Pro, Pro V2
KNNA1001 KA-6 6-Channel Radio System: NFP version
KNNA1001M1 KA-6 6-Channel Radio System: NFP version: Mode 1
KNNA1003 KA-6 6-Channel Transmitter Only: NFP version
KNNA1003M1 KA-6 6-Channel Transmitter Only: NFP version: Mode 1
KNNA1004 AR-6 6-Channel Aircraft Receiver
AZS1207 9-Gram Sub-Micro Servo: Gamma 370, Pro, Gamma V2, Pro V2
AZS1207GS 9-Gram Sub-Micro Servo Gear Set: Gamma 370, Pro, Gamma V2, Pro V2
AZS1214 Tail Set w/o decal: Gamma 370, Pro, V2, Pro V2
AZS1218 Tail Wheel Set: Gamma 370, Gamma Pro
AZS1219 Pushrod Set: Gamma 370, Pro, V2, Pro V2
AZS1220 Control Horn Set: Gamma 370, Pro, V2, V2 Pro
AZS1225 Rubber Bands: Gamma, V2, Gamma Pro, Pro V2
AZS1230 20-Amp Brushless Motor ESC w/T-connecter: Gamma 370 Pro, Pro V2
AZSB10003S20D 1000mAh 3-Cell/3S 11.1V 20C LiPo Battery, T-connector: Gamma Pro, Pro V2
AZSC308C 308C 3-Cell/3S 11.1V LiPo, 0.8A DC Balancing Charger: Gamma Pro V2
AZSC1308PS 100-120V AC to 13V DC Adapter, 0.8-Amp Power Supply: Gamma Pro V2
Ares Gamma Pro V2 Complete Item List
Beginner Mode: when switched into this mode the NFP software will restrict the bank angle of the
wings while mixing in rudder to coordinate the turns. This mode is great for take off and landing as it
helps maintain a smooth and straight ight path.
Intermediate Mode: when switched into this mode the NFP software will allow greater bank angles
during ight but does not mix in any rudder. This allows the pilot to learn how to add rudder on his own
to coordinate turns. As in beginner mode, releasing the sticks will immediately return the airplane to
level ight.
Auto Roll Function: Your Gamma Pro V2 incorporates a unique auto roll function. When ying in
either one of the NFP modes you can roll 180° to stabilized inverted ight by pressing and holding
the NFP button and deecting the aileron stick in either direction and returning it to neutral and then
releasing the NFP button. The Gamma Pro V2 will roll in the direction desired and stop inverted. The
NFP stabilization will still be in effect. You may need to add a little down elevator to hold the nose up.
This will help you get familiar with inverted ying while greatly reducing some of the work load. To
return to upright simply repeat the steps of pushing and holding the NFP button and moving the aileron
stick in either direction and back to neutral and then releasing the NFP button. If you press and hold
the NFP button and hold the aileron stick at either the left or right extreme and your Gamma Pro V2
will perform a series of rolls across the sky. Release the NFP button to again stabilize in either upright
or invertes ight.
Many aerobatic maneuvers can be performed with the NFP turned off but remember that if you get in
trouble, just switch on one of the NFP modes to immediately recover to level stabilized ight. We hope
that you enjoy learning to y the Gamma Pro V2 and have many enjoyable ights.

WARRANTY + CONFORMITY
Item Number Description
AZSA1615 Fuselage w/o decal: Gamma V2, Gamma Pro V2
AZSA1616 Main Landing Gear: Gamma V2, Gamma Pro V2
AZSA1617 Landing Gear Mount/Battery Hatch Set: Gamma 370 V2, Pro V2
AZSA1618 Tail Wheel Set: Gamma V2, Pro V2
AZSA1621 Painted Cowl: Gamma V2, Gamma Pro V2
AZSA1623P Spinner: Gamma Pro V2
AZSA1624P Decal Set: Gamma Pro V2
AZSA1626 Aileron Wing Set: Gamma V2, Pro V2
AZSA1629 1250KV, 370 Brushless Motor: Gamma Pro V2
AZSA1629S Prop Shaft Adapter w/ nut: Gamma Pro V2
AZSA1630 Aegis NFP Control Board: Gamma Pro V2
AZSA1640 Float Set: Gamma V2, Pro V2
AZSAP8040HS 8 x 4 High Speed Propeller (2): Gamma Pro, Pro V2
KNNA1001 KA-6 6-Channel Radio System: NFP version
KNNA1001M1 KA-6 6-Channel Radio System: NFP version: Mode 1
KNNA1003 KA-6 6-Channel Transmitter Only: NFP version
KNNA1003M1 KA-6 6-Channel Transmitter Only: NFP version: Mode 1
KNNA1004 AR-6 6-Channel Aircraft Receiver
AZS1207 9-Gram Sub-Micro Servo: Gamma 370, Pro, Gamma V2, Pro V2
AZS1207GS 9-Gram Sub-Micro Servo Gear Set: Gamma 370, Pro, Gamma V2, Pro V2
AZS1214 Tail Set w/o decal: Gamma 370, Pro, V2, Pro V2
AZS1218 Tail Wheel Set: Gamma 370, Gamma Pro
AZS1219 Pushrod Set: Gamma 370, Pro, V2, Pro V2
AZS1220 Control Horn Set: Gamma 370, Pro, V2, V2 Pro
AZS1225 Rubber Bands: Gamma, V2, Gamma Pro, Pro V2
AZS1230 20-Amp Brushless Motor ESC w/T-connecter: Gamma 370 Pro, Pro V2
AZSB10003S20D 1000mAh 3-Cell/3S 11.1V 20C LiPo Battery, T-connector: Gamma Pro, Pro V2
AZSC308C 308C 3-Cell/3S 11.1V LiPo, 0.8A DC Balancing Charger: Gamma Pro V2
AZSC1308PS 100-120V AC to 13V DC Adapter, 0.8-Amp Power Supply: Gamma Pro V2
Ares Gamma Pro V2 Complete Item List
WARRANTY + CONFORMITY
Limited Warranty
Ares products are covered by the currently valid statutory warranty regulaons. If you wish
to make a claim under the limited warranty, please contact the model shop where you
originally purchased the unit.
The limited warranty does not cover:
Damage due to commercial use, negligence, misuse, abuse, accident, or acts of God;
Damage due to improper installaon, operaon or maintenance;
Normal wear and tear;
Cosmec damage;
Modicaons or repairs not carried out by Ares or by an authorised Ares Service Centre;
Product not purchased from an authorized Ares dealer;
The use of accessories other than original Ares items;
Use of the unit outside the stated specicaon;
Ares and its authorised representaves accept no liability for loss, damage or costs which are
caused by the incorrect or incompetent use of the product.
UK Distribuon
Ares is distributed in the UK by:
J Perkins Distribuon Ltd. Lenham, Kent, ME17 2DL www.jperkins.com
CE Conformity
J Perkins (Distribuon) conrms this product is in compliance with the relevant
harmonised European direcves relang to its safe operaon.
To see a copy of the relevant Declaraon of Conformity visit:
hp://www.ares-rc.com/support
WEEE
This appliance is labelled in accordance with European Direcve 2012/19/EU
concerning Waste Electrical and Electronic Equipment (WEEE).
The WEEE Direcve came into force to reduce the disposal of domesc waste and promote
recycling. Any electrical item that carries the crossed out wheelie bin logo must not be
disposed of in domesc waste but should be taken to a designated collecon facility.
J Perkins (Distribuon) are a member of an approved compliance scheme to encourage
consumers to recycle unwanted items. Your local authority will be able to provide details of
your nearest approved waste disposal site.

www.Ares-RC.com
©2015
Rev. 1.0
2/1/16
/