Hangzhou Zt Model XA08801-08802 User manual
- Category
- Toys & accessories
- Type
- User manual
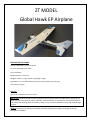
Hangzhou Zt Model XA08801-08802 is a versatile and durable aircraft suitable for both beginners and experienced pilots. It features a powerful 2830-1300kv motor with a 30A ESC, providing excellent speed and maneuverability. The durable EPP foam construction ensures the aircraft can withstand minor crashes and rough landings. With its 1220mm wingspan and 1000g flying weight, the XA08801-08802 is stable and easy to control, making it ideal for learning to fly.
Hangzhou Zt Model XA08801-08802 is a versatile and durable aircraft suitable for both beginners and experienced pilots. It features a powerful 2830-1300kv motor with a 30A ESC, providing excellent speed and maneuverability. The durable EPP foam construction ensures the aircraft can withstand minor crashes and rough landings. With its 1220mm wingspan and 1000g flying weight, the XA08801-08802 is stable and easy to control, making it ideal for learning to fly.


-
 1
1
-
 2
2
-
 3
3
-
 4
4
-
 5
5
-
 6
6
-
 7
7
-
 8
8
-
 9
9
-
 10
10
-
 11
11
-
 12
12


Hangzhou Zt Model XA08801-08802 User manual
- Category
- Toys & accessories
- Type
- User manual
Hangzhou Zt Model XA08801-08802 is a versatile and durable aircraft suitable for both beginners and experienced pilots. It features a powerful 2830-1300kv motor with a 30A ESC, providing excellent speed and maneuverability. The durable EPP foam construction ensures the aircraft can withstand minor crashes and rough landings. With its 1220mm wingspan and 1000g flying weight, the XA08801-08802 is stable and easy to control, making it ideal for learning to fly.
Ask a question and I''ll find the answer in the document
Finding information in a document is now easier with AI
Other documents
-
Ares Gamma Pro V2 User manual
-
E-flite Apprentice Assembly Manual
-
GREAT PLAINS EXTRA 300SP User manual
-
-
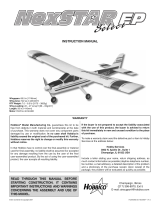 Hobbico NexSTAR EP User manual
-
GREAT PLANES Matt Chapman Cap 580 User manual
-
ParkZone P-51D Mustang User manual
-
Tower Hobbies Slow Ride 3D EP ARF User manual
-
Flyzone Mini Switch User manual
-
E-flite EFL13875 Owner's manual
