Page is loading ...

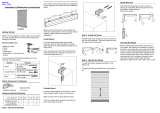
Optional hold down brackets are mounted with the supplied screws. With the shade at its full drop, place the pins on the hold down brackets into the
holes in the bottom rail end cap and mark the mounting location (Fig 17).
Make sure the pins are level and aligned. Raise the shade, then screw the brackets onto the mounting surface.
Position the first two brackets 3'' from the ends for Smooth Lift Control shades and 1 1/2'' from ends for Cordless or Motorized shades.
Evenly space any additional brackets between the two end brackets. Brackets may be mounted to ceiling, or the top or inside of window frame.
Inside or ceiling mount uses the top bracket holes.
To attach the brackets the flat surface of the window casement must be at least 3/4'' deep.
To fully recess the shade the flat surface must be at least 2 3/4'' deep (Fig. 1).
Release tab is at the bottom of the bracket.
Up to 60'' 2
60 1/8'' - 96'' 3
96 1/8'' - 132'' 4
132 1/8'' - 168'' 5
Cellular shades use a system that allows easy leveling of the bottom rail. It is designed to make slight adjustments (less than 1'') to level the moving rails
of your shade. It is not designed to make shade length adjustments. (Fig. 18)
Use a flat head screwdriver to turn the adjustment screw to raise or lower either side of the bottom rail. The adjustment screw is located on the
underside of the rail.
One quarter turn of the screw will move the bottom rail up or down approximately 1/4'''. Over-turning the adjustment screw (more than 1'') can cause
the cord to tangle or get pinched inside the rail.
The screw should turn easily. Do Not Force.
Make adjustment with leveling tool found in the bottom rail behind the right end cap. Remove the endcap and pull out the section labeled TOOL (Fig. 19).
Push in on the adjustment screw with the tool and turn to adjust the rail.
Turning clockwise will move the rail down, counter-clockwise will move the rail up (Fig. 20).
When the rail is level, replace the tool and the endcap.
© 04/19 K2176
An important consideration in any shade installation is child safety. To prevent serious injuries or strangulations, all cords must be kept out of the reach
of children. Cord cleats or other methods of keeping the cords from hanging within reach of a child should be utilized.
Cellular Shades also include breakaway tassels that will separate and prevent the lift cords from traveling backwards through the cordlock.
The tension device reduces the hazards of strangulation and entanglement of young children and pets by limiting access to the control loop.
The tension device must be installed to make the shade fully operational.
Pull tension device down until the chain is taut on both sides. Mark the upper screw hole, and using screws provided, install tension device with upper
hole 3/8'' above mark.
WARNING:
Pull the lift cords straight down to raise and lock the shade into position. Pull the lift cord toward the center of the shade to unlock and lower.
Continuous control loop offers precise shade positioning while the control remains the same length. Come with tension device that must be mounted in
order for the shade to operate.
Raise and lower the shade by gently pulling or pushing on the boom rail.
Operate the shade by pressing a buon in the boom rail and lock in place by releasing the buon.
Control a single shade or a group of shades with one remote. See separate Programming Instrucons for addional set up informaon.
I K2176
1 1/2''
2 3/4''
3/4''
1 1/2''
Up to 60'' 2
60 1/8'' - 96'' 3
96 1/8'' - 132'' 4
132 1/8'' - 168'' 5
Position the first two brackets 2 1/2'' from the ends of the shade. Evenly space any additional brackets between the two end brackets.
Brackets may be mounted to ceiling, or the top or inside of window frame.
To attach the brackets, the flat surface of the window casement must be at least 1'' deep for small rail or 1 5/8’’ deep for large rail. To fully recess the
shade, the flat surface must be at least 1 5/8'' deep for small rail or 2 7/16'' deep for large rail. (Fig. 3)
Position the first two brackets 3’’ from the ends for Smooth Lift Control shades and 1 1/2’’ from ends for Cordless or Motorized shades.
Evenly space any additional brackets between the two end brackets.
The brackets are mounted using the rear bracket holes. (Fig. 2)
Mount the installation brackets on a flat vertical surface at least 3/4’’ high.
If motorized shade has an external battery pack, spacer blocks are required for outside mount application.
Shades should be raised fully on a regular basis to ensure fabric pleat retention.
Cellular Shades can be dusted regularly to keep them looking new. Use a soft, clean cloth, dusting mitt, or chemically treated dust cloth. Shades may also
be cleaned by vacuuming them with the brush attachment of a vacuum cleaner.
Most stains can be blotted with a damp sponge and mild detergent.
Do Not Immerse shade fully in water. Ultrasonic cleaning is not recommended.

3/4''
3''
Extension brackets (Fig. 8) can project the installation brackets up to 2 1/2'' away from the mounting surface. Connect the installation brackets with the
machine screw and speed nut included with each extension bracket.
First, lower the bottom rail (and middle rail if applicable) about an inch to keep the fabric from getting caught between the headrail and the bracket.
With the front side of the fabric facing you, position the headrail with the front lip resting on top of the hook on each bracket. (Fig. 9).
Roll the back of the headrail up and into the brackets until it snaps in place.
Check to make sure the brackets are securely attached to the rail before operating the shade.
Only applies to Cordless Lift shades.
The shade should be installed before installing the cordless handle; the handle is not easily removed.
To avoid damaging your new shades, follow the instructions below carefully. This is especially important when attaching handles to shades with fabric
wrapped rails, and will ensure the fabric wrap does not get damaged.
Shade will come with a slot cut into the bottomrail. Make sure top of handle is facing up.
Insert tapered side of handle into the slot in the bottomrail (Fig. 11). Press in until handle is flush against the bottomrail (Fig. 12). Give the handle a slight
tug to make sure it has locked into place.
If your shade is over 48'' wide it will have two handles instead of one. Repeat process for second handle.
If the shade is a Top Down/Bottom Up, repeat the process for the handle(s) on the middle moving rail.
Position the first two brackets 3'' from the ends of the shade. The top of the bracket should be positioned at the desired height of the shade.
Evenly space any additional brackets between the two end brackets.
The brackets are mounted using the rear bracket holes. (Fig. 7)
Mount the ends of the installation brackets on a flat vertical surface at least 3/4'' high.
Align the bracket top with the desired height of the top of the head rail. Mark holes for screws (Fig. 4). Remove brackets and drill holes. Insert screws for
slots (Fig. 5). Approximately 1/8'' of the screw should be left out.
Pull the endcap out of the headrail and slide the bracket on as shown (Fig. 6). Replace the endcap and slide the bracket all the way into the headrail.
Install the second bracket in the same manner.
Hook one bracket onto the screw in the window frame using the keyhole slot. Bring the other end bracket over the screw at the other side of the frame.
Slide down, flexing bracket inward until the screw engages in the keyhole slot.
Up to 60'' 2
60 1/8'' - 96'' 3
96 1/8'' - 132'' 4
132 1/8'' - 168'' 5
> 168 1/8'' 6
Spacer blocks will project the installation bracket 1/2''. Check that your mounting screws are long enough to securely attach the installation bracket
and the spacer blocks.
Two 1/2'' spacer blocks are required for Rechargeable Motorized shades using the external battery pack.
Unwind the cord from around the shade assembly and let it hang.
With the front side of the fabric facing you, slip the headrail into the installation brackets. The front lip on the bracket fits into the front groove on the
top of the rail. (Fig. 10)
While holding the rail in the front groove of the bracket, make sure no fabric gets caught between the back of the bracket and the rail.
Push the rail back and up into the back of the bracket until you hear it snap in place.
To remove shade, reverse the procedure.
For best results; keep the cord close to the fabric when operating the shade, and do not pull cord away from the shade more than 15°.
To disengage the locking mechanism, move the cord toward the center of the shade approximately 30° from the vertical position. Raise or lower the
shade while holding the cord at this angle.
To engage the locking mechanism, return the cord to the vertical position. (Fig. 13)
Operate the shade by pulling down on one side of the cord loop. The front of the loop raises the shade, the rear lowers the shade.
To lower shade, gently pull bottom rail down slightly beyond desired position and let tension spring pull the bottom rail up very slowly until catch
mechanism engages and locks the bottom rail in position. (Fig. 14)
To raise shade, gently pull down slightly on the bottom rail to release the catch mechanism and allow the tension spring to unwind. Slowly push up on
the bottom rail until desired position is reached. (Fig 15)
Cordless shades operate best by slowly raising or lowering the shade. Pulling or pushing the shade too quickly can cause the shade to “spring”
up or down out of it’s fully raised or lowered position.
Cordless shades can only be raised as high as the person operating the shade can reach. For out-of-reach operations, an optional extension pole
should be used. (Fig. 16)
Operate by depressing the button and raising or lowering the rail while keeping the button pressed.
Lock in place by releasing the button. Locking mechanism keeps shade securely in position.
Ability to fully raise or lower the shade depends on the reach of the operator.
Please see separate Programming Instructions for operation information.
/