FlexRadio FLEX-6300 Installation guide

Type
Installation guide

FlexRadio FLEX-6300 is a versatile device that allows you to explore the world of amateur radio. With its advanced capabilities, you can enjoy crystal-clear audio, superior signal reception, and a wide range of features designed to enhance your communication experience. The FLEX-6300 is perfect for both new and experienced radio enthusiasts, offering an intuitive interface, customizable settings, and the flexibility to adapt to your specific needs.

FlexRadio FLEX-6300 is a versatile device that allows you to explore the world of amateur radio. With its advanced capabilities, you can enjoy crystal-clear audio, superior signal reception, and a wide range of features designed to enhance your communication experience. The FLEX-6300 is perfect for both new and experienced radio enthusiasts, offering an intuitive interface, customizable settings, and the flexibility to adapt to your specific needs.

Page 1 © 2022 FlexRadio, v1.0.1
FLEX-6300 MicroSD Card
Installation Guide
May 4, 2022
The following guide will provide the necessary step-by-step procedure for installing a MicroSD
card in a FLEX-6700 or FLEX-6500.
Table of Contents
GETTING STARTED ......................................................................................................................... 2
Required Tools ......................................................................................................................... 2
Materials needed for Service Procedure .................................................................................. 2
PREPARING TO INSTALL THE MICROSD CARD ....................................................................... 2
Removing the Top Cover ......................................................................................................... 2
REPLACING THE EXISTING MICROSD CARD .................................................................................... 4
Locating and Removing the RF Isolation Cover....................................................................... 4
Remove the existing MicroSD Card ......................................................................................... 5
Remove the existing MicroSD Card ......................................................................................... 6
INSTALLING THE NEW MICROSD CARD ............................................................................................ 7
Installing the New MicroSD Card in the Card Socket .............................................................. 7
Verify the FLEX-6300 will boot properly with the new MicroSD Card .................... 8
Reinstall RF Isolation cover ...................................................................................................... 8
REINSTALLING THE TOP COVER ............................................................................................... 9
Page 2 © 2022 FlexRadio, v1.0.1
Getting Started
Required Tools
A number 1 (#1) Phillips Screwdriver
A small flat blade screwdriver
#8 TORX wrench
Materials needed for Service Procedure
One (1) SmartSDR MicroSD Card
One (1) piece of Kapton tape (attached to the antistatic bag)
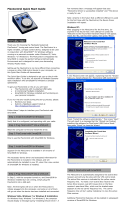
Preparing to Install the MicroSD Card
Removing the Top Cover
Disconnect all cables connected to the FLEX-6300 and locate a flat secure work table to perform
the procedure outlined below
The top chassis cover for the FLEX-6300 must be removed before the MicroSD card can be
installed.
Carefully remove the top cover by removing the four (4) screws on the top cover and the six (6)
screws from each side
Note: Handle the cover with care to avoid accidental scratching or denting.
Using a T8 Torx, remove screws 1,2,3,4,5,6,7,9,11,12,13,and 15 ( Note: screws 1,2,9,15
are longer screws).
Using Philips #1 screwdriver, remove screws 8,10,14, and 16.
Place the screws in a safe location for reassembly.
Page 3 © 2022 FlexRadio, v1.0.1
Once the top cover retaining screws have been removed, gently pull the top cover upwards to
remove it from the FLEX-6000. The image below shows the removal of the top cover.
Page 4 © 2022 FlexRadio, v1.0.1
Replacing the Existing MicroSD Card
Once the top cover has been removed, the RF Isolation cover must be removed to access the
MicroSD card slot.
Locating and Removing the RF Isolation Cover
The RF Isolation cover is located at the top of the radio. You will see a large silver "RF can" (with
vent holes) that has a removable top. There may be a metalized plastic security label that
indicates your warranty will be voided if the tag is broken. This procedure will not void your
warranty since FlexRadio is instructing you to do it. Using a sharp-pointed knife or razor
blade, cut through the label so that the removable top can be easily lifted and removed.
If an ATU board is installed, you will have to remove three (3) screws and move it slightly out of
the way to remove the RF shield cover.
Using a Philips #1 screwdriver: remove screws 17and 18. Lift the RF can top off by gently prying
up on it between the metal "fingers" that hold the top of the RF shield in place around the edges
with a small flat blade screwdriver. It is best to do this at several locations so that the cover does
not twist and separate the retaining tabs.
Page 5 © 2022 FlexRadio, v1.0.1
Remove the existing MicroSD Card
The next step is to remove the MicroSD card from the FLEX-6300. The MicroSD card is located
adjacent to the FPGA processor/fan assembly.
Locate the MicroSD card in the red box shown in the image below.
There may be a piece of translucent yellow Kapton tape covering the top of the card retaining
clip. If so, carefully remove the Kapton tape as shown in the image below
Page 6 © 2022 FlexRadio, v1.0.1
Gently slide the silver MicroSD card retaining clip away from the FPGA processor/fan assembly
so that it releases and lifts as shown below.
Remove the existing MicroSD Card
The next step is to remove the MicroSD card from the FLEX-6300.
Using a non-metallic object to lift the end of the card nearest to the FPGA processor/fan
assembly, the MicroSD card should easily lift out of the card socket so it can be removed.
Also, you may want to take the opportunity to blow out the dust from the CPU and FPGA fans
while you have the RF can cover removed. Just make sure you do not over spin the small CPU
and FPGA fans when cleaning them by placing a small non-metallic object like a toothpick into
the fan blades to prevent them from spinning freely.
Page 7 © 2022 FlexRadio, v1.0.1
Installing the new MicroSD Card
Once the existing MicroSD card has been removed, install the new MicroSD card that has been
formatted and has the SmartSDR firmware installed. Installing an unformatted MicroSD card
without the SmartSDR firmware installed will result in the radio not booting.
Installing the New MicroSD Card in the Card Socket
Make sure the silver retaining clip is in the unlocked and upright position. Carefully place the new
MicroSD card in the card socket. There is a plastic “key” on the right-hand side of the MicroSD
card that aligns up with a key slot on the card socket. Make certain that the card is properly
seated in the card socket.
Carefully fold down the silver retaining clip so that it is flat against the MicroSD card. Slide the
silver retaining clip towards the FPGA processor/fan assembly making sure that the MicroSD
card does not slip or move in the socket. This will lock the MicroSD card in the card socket as
shown below. Failure to seat the card properly will result in the card not making proper contact
with the card socket’s electrical contacts causing the radio to fail to boot up.
Note: It is possible to get the latch closed without seating the MicroSD card properly.
Ensure the MicroSD card is seated completely flush against the connector and that the
latch closes without being forced.
To prevent the retaining clip from coming unlatched when the radio is shipped, place a strip of
Kapton tape over the top of the MicroSD card socket as shown below.
Page 8 © 2022 FlexRadio, v1.0.1
Verify the FLEX-6300 will boot properly with the new MicroSD Card
Before installing the top cover on the FLEX-6300, verify the radio boots properly.
Connect a 13.8v power supply to the DC input.
Connect an Ethernet cable to the radio and connect it to your LAN
Turn the FLEX-6300 on and verify the radio boots without an error and the Power LED is solid
green.
Note: If the FLEX-6300 does not boot, then power down the radio, remove the DC power cable,
reseat the MicroSD card, power up the FLEX-6300 and reseat the MicroSD card.
Reinstall the RF Isolation cover
Reinstall the RF Isolation cover. Make sure that the RF Isolation cover is inserted properly in the
RF shield housing’s retaining tabs. Starting at one corner ensure that the cover is between the
alternating rows of “teeth” to ensure the cover is aligned properly. Once installed it should like the
image below.
Page 9 © 2022 FlexRadio, v1.0.1
Replace the RF top cover and the 2 screws 17,18 with a Philips #1 screwdriver (Note: make sure
the cage top cover is seated properly on all the 4 corners)
Using a Phillips #1 screwdriver, secure the RF Isolation cover in place by re-installing screws 17
and 18 (see image above for screw locations)
If an ATU board was moved out of the way when you removed the RF Isolation cover, carefully
move the ATU back into place and reinstall the three (3) retaining screws.
Reinstalling the Top Cover
Place the top cover on the FLEX-6300.
In reverse order, re-install the top cover screws.
Using a T8 Torx, remove screws 1,2,3,4,5,6,7,9,11,12,13,and 15 ( Note: screws 1,2,9,15
are longer screws).
Using Philips #1 screwdriver, remove screws 8,10,14, and 16.
  • Page 1 1
  • Page 2 2
  • Page 3 3
  • Page 4 4
  • Page 5 5
  • Page 6 6
  • Page 7 7
  • Page 8 8
  • Page 9 9

FlexRadio FLEX-6300 Installation guide

Type
Installation guide

FlexRadio FLEX-6300 is a versatile device that allows you to explore the world of amateur radio. With its advanced capabilities, you can enjoy crystal-clear audio, superior signal reception, and a wide range of features designed to enhance your communication experience. The FLEX-6300 is perfect for both new and experienced radio enthusiasts, offering an intuitive interface, customizable settings, and the flexibility to adapt to your specific needs.

Ask a question and I''ll find the answer in the document

Finding information in a document is now easier with AI