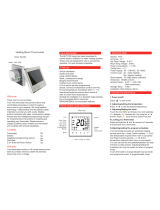
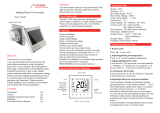
BECA BAC-6000 User guide

Category
Thermostats
Type
User guide

BECA BAC-6000 is a modern round touch screen room thermostat designed to control fan coil units and motorized valves for air conditioning applications. It features precise temperature control, weekly programmability, multiple system modes, fan speed adjustment, and energy-saving functions. With its sleek design and easy-to-use interface, the BECA BAC-6000 offers a comfortable and efficient way to manage your indoor climate.

BECA BAC-6000 is a modern round touch screen room thermostat designed to control fan coil units and motorized valves for air conditioning applications. It features precise temperature control, weekly programmability, multiple system modes, fan speed adjustment, and energy-saving functions. With its sleek design and easy-to-use interface, the BECA BAC-6000 offers a comfortable and efficient way to manage your indoor climate.

Manuals+
User Manuals Simplified.
Beca BAC-6000 Series Round Thermostat User Guide
January 18, 2022February 4, 2022
Home » BECA » Beca BAC-6000 Series Round Thermostat User Guide
Beca BAC-6000 Series Round Thermostat User Guide
Welcome
Thank you for your purchase.
Your new thermostat will provide uniform and comfortable temperature control throughout every room in your
property. We bring together technology, craftsmanship and the highest quality materials to provide you with a safe,
reliable product combined with sleek, contemporary design.
Please read this installation/programming manual for comprehensive instructions on installing and operating your
thermostat. Please also ensure a suitably qualified person installs your thermostat and complies with all local
regulations.
Contents [ hide
1 In the box you will find
2 ABOUT YOUR THERMOSTATS
3 MODEL DEFINITION
4 FEATURES
5 DIMENSION
6 TECHNICAL DATA
7 BEFORE WIRING AND INSTALLING
8 WIRING
9 INSTALLATION
10 HOME SCREEN QUICK REFERENCE
11 OPERATION
12 During power off
13 ABOUT WIFI
14 Network distribution mode
15 APP operation interface description (FCU
thermostat)
16 More settings
17 SIMPLE EXCEPTION HANDLING
18 SERVICE
19 Documents / Resources
19.1 Related Manuals / Resources
In the box you will find
Thermostat 1pc
Screws 2pc
User Guide 1pc
Wall plate 1pc
QC Passed 1pc
ABOUT YOUR THERMOSTATS
BAC-6000 series Modern Round Touch Screen Room Thermostats are designed to on/off control the fans and
valves in air conditioner applications via comparison of the room temperature and setting temp. as reaching the aim
of comfort and saving energy.
MODEL DEFINITION
A: Two pipe; Control Fan Coil Unit and Two Wired Motorized Valve
M : Two pipe; Control Fan Coil Unit and 0-10V Motorized Valve
E : Four pipe; Control Fan Coil Unit and Two Wired Heat Valve and Two Wired Cool Valve.
N: Modbus RTU communication
3 : BACnet communication
W : Wifi connection
K : Keycard
T : Clock
W2 : Window
P : Programmable
E : External Sensor
For example: BAC-6000AW
FEATURES
On Appearance
1. Negative black screen will bring you to a secret world.
2. 51mm round display area helps to protect your eyes.
3. Glass or Acrylic Lens is for your selection.
4. Touch buttons to make simple operation.
5. Amazing Silver Frame opens your modern life.
6. The visible thickens above the wall is only 11mm.
7. Rotation to connect gives you easy installation.
8. 86mm hidden box and European 60mm round box is suitable.
9. White, black or gold housing creates your colorful life.
On Functionality
1. Powerful functions are available such as BACnet/Modbus/WIFI etc,.
2. 0.5°C Accuracy keeps temperature within the level you set.
3. °C & °F is changeable. (Customized Function)
4. Data memory when power is off.
5. 5+2 six periods programmable maximize comfort and economy.
6. Creat thermostat group to Centralized control
7. Interated with amazon echo and google home 8. All setting languages synchronize your time zone, address and
language
DIMENSION
FRONT VIEW
BACK VIEW
SIDE VIEW
TECHNICAL DATA
Power Supply: 95 — 240 VAC, 50 — 60HZ
Fan Relay Amps Resistance: 5A;
Inductive: 3A
Valve Relay Amps Resistance: 3A;
Inductive: 1A
Sensor: NTC3950, 10K
Accuracy: ±0.5 C
Set Temp. Range: 5 -35 C
Display Temp. Range: 5 — 99 C
Ambient Temp.: 0 — 45 C
Ambient Humidity: 5 95 % RH (Non Condensing)
Storage Temp.: -5 — 45 C
Power Consumption: <1.5W
Timing Error: < 1%
Shell Material: PC +ABS ( Fireproof)
Installation Box: 86 * 86mm Square or European 60mm Round Box
Wire Terminals: Wire 2 x 1.5 mm2 or 1 x 2.5 mm2
Protection Class: IP20
Buttons: Capacitive Touch Buttons
BEFORE WIRING AND INSTALLING…
1. Read these instructions carefully. Failure to follow them could damage the product or cause a hazardous
condition.
2. Check the ratings given in the instructions and on the product to make sure the product is suitable for your
application.
3. Installer must be a trained, experienced service technician.
4. After installation is complete, check out product operation as provided in these instructions.
CAUTION
Electrical Shock or Equipment Damage Hazard. Can shock individuals or short equipment circuitry. Disconnect
power supply before installation.
WIRING
INSTALLATION
Your thermostat is suitable for installation within a standard 86mm pattress box or European 60mm pattress box.
1. Keep the electricity off. See Fig 1.
2. Remove the mounting Plate by rotating the LCD part. See Fig 2.
3. Connect power supply, load into the appropriate terminals. (see “Wiring your thermostat” for details and Fig 3).
4. Fix the mounting plate into the wall with screws in the box. See Fig 4.
5. Fasten body of thermostat and the mounting plate through rotating. See Fig 5.
6. Installation complete. See Fig 6.
HOME SCREEN QUICK REFERENCE
1. Monday To Sunday
2. Valve On
3. Room Temp.
4. Set Temp.
5. Wifi
6. Ventilation Mode
7. Energy saving (Keycard Out)
8. Clock
9. Manual
10. Cooling Mode
11. Heating Mode
12. Time Display
13. Timing On/Off
14. Sleeping Mode
15. Humidity
16. C or F
17. Period 1 to Period 6
18. Room Temp. Display
19. Heating On
20. Low/Med/High/Auto Fan Speed
21. Down Button
22. Up Button
23. Fan Speed Adjustment
24. Mode
25. Power On/Off
OPERATION
During Power On
1. Power On/off:
Press to turn the thermostat on/off.
2. Manual & Programmable
Press and hold M, will flash. Press to select manual and press V to select weekly programmable.
3. Setting Temperature In the mode of manual,
press V to set temperature. will display in the left corner of screen.
4. Locking Your Thermostat
Press and hold the for 5 seconds to lock/unlock your thermostat. In item 3 of high senior options,
you can select full lock or half lock.
5. Selecting System Mode
Press M to change the system mode HEATING, COOLING and VENTILATION. In the mode of VENTILATION,
the valve is off but the fan runs.
6. Setting the Fan Speed
Press to select the fan speed AUTO, HIGH, MED, LOW.
7. Restore Manufacturer Defaults
Press the Restore Manufacturer Defaults ,you can reset thermostat (See Fig 9-3).
8. Adjusting/Setting the Clock
Press and hold M , will flash. Press M to set minute, hour and weekday (1 = Monday, 2 = Tuesday etc.)
by using the arrows, after 3 seconds the value will be confirmed automatically.
9. Adjusting the Weekly Programmable
Press M to do the adjustment of weekly programmable. Then press M to change the different items. Press
or to set the relative values.
Your thermostat provides six scheduled heating and cooling periods each day — three Comfort periods – 1, 3 & 5
(the temperature required when room is occupied) and three Economy periods — 2, 4 & 6 (the temperature required
when room is unoccupied).You can set both the time and temperature for each of these six daily periods.
Adjusting/setting the schedules can only be carried out when in program mode; Touch M (mode) to change between
manual mode etc and programme mode. In manual mode, will show in the bottom left of the screen. Touch the
icon M for four times until the weekday schedule settings appear (1 2 3 4 5 will show along the top of the screen).
Use the and arrows to adjust the time for the 1st (Comfort) period Press the icon M and use the
and arrows to set the temp. for the 1st period. Repeat this process for periods 2 — 6. Press the icon M once
more to enter the weekend schedule settings (6 & 7 will show along the top of the screen). Repeat the above process
to set the weekend schedule. Press M once more to confirm and exit.
Default settings for program schedule
Time display
WEEKDAY (MONDAY —
FRIDAY)
(12 3 4 5 shows on screen)
WEEKEND (SATURDAY)
(6 shows on screen)
WEEKEND (SUNDAY) (7
shows on screen)
TIME TEMPERATURE TIME TEMPERATURE TIME TEMPERATURE
Period 1 6:00 20°C 6:00 20°C 6:00 20°C
Period 2 8:00 15°C 8:00 20°C 8:00 20°C
Period 3 11:30 15°C 11:30 20°C 11:30 20°C
Period 4 13:30 15°C 13:30 20°C 13:30 20°C
Period 5 17:00 22°C 17:00 20°C 17:00 20°C
Period 6 22:00 15°C 22:00 15°C 22:00 15°C
In the mode of programmable, set temp., time and timing on/off could not be adjusted.
During power off
Setting the Functions and Options
When power is off, press and hold M and at the same time for 5 sec. in order to reach system function.
Then press M to change the different items.
All the settings will confirm automatically when power is on.
Code Function Setting and options Default
1Temperature
compensation -7 to 7°C -1
2 Fan control
00:When room temp. reaches the set point,the fan will
turn off
01:When room temp. reaches the set point,the fan will
turn to low speed
0
3 Button Locking 00:All buttons are locked except power button 01:All
buttons are locked. 1
4 Heat/cool 00:Cool only 01:Heat/Cool 1
5 Min. Set Temp. 5 to 15°C 5
6 Max. Set Temp. 5 to 35°C 35
7 12/24 hours 00:12h 01:24h 1
8 Display Mode 00: Display both set temp. and room temp.
01: Display set temp. only 0
9 Energy saving Mode 00: Non-energy saving Mode 01: Energy saving
Mode, set Temp. keep economy Temp. 0
AHeating Economy
Temp. 10 to 30°C 20
BCooling Economy
Temp. 10 to 30°C 26
C Dead band Temp, 1 to 5°C 1
DStandby Brightness of
backlight 3-99 bigger value, more brightness 4
ABOUT WIFI
WI-FI CONNECTION
Before using your Wi-Fi thermostat for the first time, you must configure the Wi-Fi signal and settings through your
smartphone or tablet ,This will allow communication between your connected devices
1. Download your APP (Figs-1)
Search for “Smartlife” in Apple Store or Google Play or use a browser to scan the QR code above (Figure 1-2),
and complete account registration and installation according to the guidance of the APP.
2. Connect the thermostat
Check the tutorial below to complete the connection and setup.
1. Scan the QR code to configure the network guide (Fig 2.1-Fig 2.3)
2. Ordinary distribution network guidance (Fig. 2.1 & Fig. 2.3.1)
Network distribution mode
1. EZ Mode
When the thermostat is off, press and hold the ” “until the thermostat screen flashes quickly and displays
the ” ” icon, and then operate according to the following figure (Fig 2.4-Fig 2.7).
2. AP Mode
When the thermostat is off, press and hold the ” “until the thermostat screen flashes slowly and the “
” icon is displayed (if the “ ” icon appears, continue to press the ” ” until the thermostat
screen Flashes slowly and displays the icon), and then operate according to the following figure (Fig
2.8-Fig 2.14).
APP operation interface description (FCU thermostat)
More settings
SIMPLE EXCEPTION HANDLING
beca BHT-6000 Series Round Thermostat User Guide
BHT-6000 Series Round Thermostat BHT-6000 Series Round Thermostat
User Guide 7 . No limitto add rooms and support…
beca BHT-001Series Round Thermostat User Guide
Beca BHT-001Series Round Thermostat User Guide Welcome Thank you
for your purchase. Your new thermostat will provide uniform…
The Round Non-Programmable Thermostat
T8775A1009/U Installation Instructions [pdf]: T8775A-C Digital Round
Installation Instructions [pdf]: The Digital Round Non-programmable
Thermostat Owner’s Guide [pdf]:…
Beca BAC-8000 Series Modern Square Touch Screen Room
Thermostats User Guide
BAC-8000 Series Modern Square Touch Screen Room Thermostats 20
ABOUT WIFI WI-FI CONNECTION Before using your Wi-Fi thermostat…
No. Phenomenon’s Handling
1 Power is on but without display. * Check if the terminals between LCD panel and Power Unit
Box is loosen.
2
3
Without output but display works. * Use a new LCD panel or new Power Unit Box to
replace the old one.
Room Temp. Is a little different from
the actual. * Do temperature calibration in item 1 of high senior options
SERVICE
Your thermostat carries an 24 months warranty from date of purchase. Service out with the warranty period may
incur a charge. More detail please contact with us directly.
Documents / Resources
Beca BAC-6000 Series Round Thermostat [pdf] User Guide
BAC-6000, Series Round Thermostat
Related Manuals / Resources
Manuals+,
home
privacy
  • Page 1 1
  • Page 2 2
  • Page 3 3
  • Page 4 4
  • Page 5 5
  • Page 6 6
  • Page 7 7
  • Page 8 8
  • Page 9 9
  • Page 10 10
  • Page 11 11
  • Page 12 12
  • Page 13 13
  • Page 14 14
  • Page 15 15
  • Page 16 16
  • Page 17 17
  • Page 18 18

BECA BAC-6000 User guide

Category
Thermostats
Type
User guide

BECA BAC-6000 is a modern round touch screen room thermostat designed to control fan coil units and motorized valves for air conditioning applications. It features precise temperature control, weekly programmability, multiple system modes, fan speed adjustment, and energy-saving functions. With its sleek design and easy-to-use interface, the BECA BAC-6000 offers a comfortable and efficient way to manage your indoor climate.

Ask a question and I''ll find the answer in the document

Finding information in a document is now easier with AI