Page is loading ...

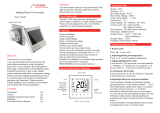
BHT-6000 Series Round Thermostat
User Guide
For Water Heating/Boiler/Electric Heating
Welcome
Thank you for your purchase.
Your new thermostat will provide uniform and comfortable
temperature control throughout every room in your property. We
bring together technology,
materials to provide you with a safe, reliable product combined with
sleek, contemporary design.
programming manual for comprehensive
thermostat. Please also
ensure a suitably qualified person installs your thermostat and
In the box you will find
Thermostat Screws
User Guide
1pc 2pc
1pc
QC Passed 1pc
Floor Sensor (2.5m) 1pc
ABOUT YOUR THERMOSTATS
The BHT-6000 range has been developed to control electric
MODEL DEFINITION
GC: Water/Gas Boiler, 3A
L: Backlight
P: Weekly Programmable
W: Wifi
S2: Both internal sensor and floor external sensor
For example: BHT-6000 GCLP
2
FEATURES
2. 51mm round display area helps to protect your eyes.
5. Amazing Silver Frame opens your modern life.
6. The visiable thickenss above the wall is only 11mm.
8. 86mm hidden box and european 60mm round box is suitable.
9. White, black or gold housing creates your colorful life.
On Appearance
2. 0.5°C Accuracy keeps temperature within the level you set.
3. ℃ & ℉ is changeable.
4. Data memory when power is off.
5. 5+2 six periods programmable maximize comfort and economy.
DIMENSION
50mm
90mm
14mm
Front
Side
Back
Unit: mm
90mm
50mm
24mm
14mm
86mm
86mm
50mm
60±2mm
TECHNICAL DATA
Power Supply: 95 ~ 240 VAC, 50 ~ 60HZ
Sensor: NTC3950, 10K
Accuracy: ±0.5 or ±1
Set Temp. Range: 5 -35
Dispaly Temp. Range: 5 ~ 99
Ambient Temp.: 0 ~ 45
Ambient Humidity: 5 ~ 95 % RH (Non Condensing)
Storage Temp.: -5 ~ 45
Timing Error: < 1%
Shell Material: PC +ABS ( Fireproof)
Wire Terminals: Wire 2 x 1.5 mm2 or 1 x 2.5 mm2
Current Load3A
BEFORE WIRING AND INSTALLING...
3. Installer must be a trained, experienced service technician.
CAUTION
Electrical Shock or Equipment Damage Hazard. Can shock
individuals or short equipment circuitry.
WIRING
AC 95~240V
IP20
NL
1234
M
Close Open 5
6
NTC
GA
L1 N1
LOAD
IP20
NL
1234
NTC
5
6
GB
IP20
NL
1234
5
6
NTC
GC
Dry Contact
A (RED)
Modbus
B (WHITE)
A (RED)
Modbus
B (WHITE)
A (RED)
Modbus
B (WHITE)
AC 95~240V
AC 95~240V
Note:
GA
GC is for water/gas boiler;
INSTALLATION
Step 1. Keep power off. See Fig 1.
Fig 1
Step 3. Connect power supply, load into the appropriate terminals.
(see “Wiring your thermostat” for details and Fig 3).
the box. See Fig 4.
Fig 2
Fig 4
Fig 6
Fig 5
Fig 3
HOME SCREEN QUICK REFERENCE
①
②
③
④
⑤
⑥
⑦
⑧⑨
⑩
⑪
⑫
⑬
⑭⑮
⑯
⑰
⑱
⑲
①
②
③
④
⑤
⑥
⑦
⑧
⑨
⑩
⑪
⑫
⑬
⑭
⑮
⑯
⑰
⑱
⑲
⑳
Monday To Sunday
Room Temp.
Set Temp.
Wifi
Clock
Manual
Time Display
Timing On/Off
Humidity
or
Period 1 to Period 6
Room Temp. Display
Power On/off
Floor Temp.
Mode
During Power On
1. Power On/off: Press to turn the thermostat on/off.
2. Manual & Programmable
Touch M (mode) to change between manual mode and programme
In programmable mode, the period icon will show in the right side.
on/off could not be adjusted. If the user want to change, please go to
manual mode or programmable mode.
In the mode of manual, press to set the desired temperature.
OPERATION
Touch the icon to set minute, hour and weekday (1 = Monday,
2 = Tuesday etc.) by using the arrows. Press once more to
confirm and exit.
Press and hold the M (mode) for 5 seconds to lock/unlock
lock or half lock.
5. Locking your thermostat
7. Checking the temperature of floor sensor
Press and hold the arrow for 5 seconds to display the temp. of floor
sensor.
accept the program schedule made via the APP on your device (see
your thermostat (NOT via your smartphone/tablet) simply follow the
between your thermostat and smartphone/tablet.
Touch M to change between manual mode and programme
In programme mode, touch and hold the icon
Press the icon
(2nd period).
Repeat this process for periods 3 and 4.
Press the icon
(6 will show along the top of the screen).
Press the icon and use the and arrows to set the temp
Repeat the above process to set the period and temp. and Sunday schedule.
Press once more to confirm and exit.
A separate schedule may be set for weekdays (Mon – Fri) and for
weekends (Sat & Sun).
Timedisplay
WEEKDAY(MONDAY – FRIDAY)
(1 2 3 4 5 shows on screen)
WEEKEND (SATURDAY)
(6 shows on screen)
TIME
TEMPERATURE
TIME
TEMPERATURE
Period 1 (Ontime) 08:00
20°C
08:00
Period 2 (Offtime) 12:00
12:00
Period 3 (Ontime) 13:30 13:30
Period 4 (Offtime) 18:00 18:00
Press and hold the icon and then the wifi module will be back to
WEEKEND (SUNDAY)
(7 shows onscreen)
TIME
TEMPERATURE
08:00
12:00
13:30
18:00
20
23
27
26
29
28
Saturday

During Power Off
When power is off, press and hold M
available
Then press M to scroll through
WI-FI CONNECTION
Before using your Wi-Fi thermostat for the first me, you must configure the
Step 1 Download your APP (Fig 1-1)
Fig 1-1
For ANDROID devices, search for BECA ENERGY in Google Play and download.
Fig 1-2 IOS Fig 1-3 Android
QR code here (Fig 1-3)or in the back of manual.
For IOS devices, search for BECA ENERGY in Apple Store and download.
Step 2 Connect your Wi-Fi signal
On your thermostat
With power on, press and hold the and arrows simultaneously
for eight (8) seconds. The icon will flash.
Then, on your smartphone/tablet
SSID USR-WIFI232-S signal being broadcast by your thermostat (see
Fig 2)
(Fig 2)
(see Fig 4-1 & 4-2)
(Fig 3)
(Fig 4-1) (Fig 4-2)
Press the “ +” icon to add your room. You will be taken to the
Click Language Choice and select the one you need. Then press
Then press DONE. You will then be taken to the home page. (Fig 5)
Note 1:
The room details will show: set temp., room temp., room name,
(Fig 5)
Click in the first window to name your room (Emma’s bedroom,
Lounge, Kitchen etc.)
in the drop-down list.
Connect the wireless signal by touching the image to the right of
for and list any available wireless routers. Select your router,
enter the password for your router in the window below and click
“Done”. This may typically take up to 5~90 seconds to complete.
(Fig 6)
Your room name
Fan Coil system
or Heating System
The account of your
wireless router
The password of your
wireless router
Note 2:
with us.
Note 1:
Click on your room from the home screen and begin programming
your thermostat (Fig 7)
choose an image from your photo library as a background image
for your room.
degrees C. This temperature cannot be changed or adjusted.
(Fig 7)
and vice-versa.
*
adjust the temperature, the temperature will show in the centre
*
When in Program mode, click on the schedule logo (next
fig 8) where you can simply click on the working days (Mon-Fri)
*
*
(Fig 8)
We ek en dWorking Days
0 8 :3 0
1 2 :0 0
1 3 :3 0
1 8 :0 0
15℃
25℃
Sa ve
Sc hedul e Setti ng
* Once your schedule has been set, click on SAVE and the App
will send your schedule to your thermostat and confirm the
schedule has been saved.
*
* The unique ID number of your thermostat is displayed on a
7.
the menu logo in the top right of the home page (see Figs 9 & 10 & 4-2).
(Fig 9) (Fig 10)
Code Function Setting and options Default
1Temperature
compensation
-9 to +9 (for internal sensor)-2
2
3Button locking00: All buttons are lockedexcept power button.
01 All buttons are locked. 01
4
5Min. Set Temp.5-15 10
6Max. Set Temp.5-45 35
7 12/24 hours 00:12 hours 01:24 hours 01
8 Display M ode
00 Display both set temp. androomtemp.
01 Display set temp.only 00
9 Sensor types
InInternal Sensor to co ntrolor limit the temp.
Ex External Sensor to controlor limit the temp.
AL Internal/External Sensor Internal senso r to
controlthe temp., external sensor to limit the
temp.
AL
10 Standby Brightness 1-255 10
11 High temperature
protection setting. 25-70 45
12 Deadzone
Temperature
1 ~ 5 1
13 Low temperature
protection setting. 0-15 (Just for water heating and bo iler heating) 0
SIMPLE EXCEPTION HANDLING
No. Phenomenons Handling
1 Power is on but withoutdisplay. *Checkif the terminalsbetween LCD panel and
Power Unit Boxis loosen.
2Without outputbutdisplay works.*Use anew LCD panelor new Power Unit Boxto
replace the old one.
3 RoomTemp. Isa littledifferent from
the actual.
*Do temperature calibration in item 1 of high
senior options
SERVICE
Your thermostat carries an 18 month warranty from date
of purchase. Service outwith the warranty period may
incur a charge. More detail please contact with us directly.
/