Page is loading ...

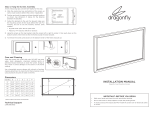
Mounting the screen onto the wall
Care and cleaning
•Yournewscreencanbeeectivelycleanedwithasoftcloth
using mild soap and water. DO NOT use harsh detergents,
chemicals, distilled spirits or petro-chemicals to clean the
screen;doingsomayresultinseveredamagetothescreenor
theframecoating.
•Ifthefeltcovering on the framegetsdusty orcoveredwith
lint,useahouseholdvacuumcleanerwithabrushorfurniture
cleaningattachmenttocleanthefelt.Wedonotrecommend
usingexcessiveamountsofwateronthefelt.
A B C D E F
DF-SL-84-MW / HC 84” 41.14'' 73.19'' 47.48'' 79.53'' 47.36''
DF-SL-92-MW / HC 92” 45.08'' 80.2'' 51.42'' 86.54'' 51.3''
DF-SL-100-MW / HC 100” 49.02'' 87.17'' 55.35'' 93.5'' 55.24''
DF-SL-106-MW / HC 106” 51.93'' 92.36'' 58.27'' 98.7'' 58.15''
DF-SL-110-MW / HC 110” 53.9'' 95.87'' 60.24'' 102.2'' 60.12''
DF-SL-120-MW / HC 120” 58.82'' 104.57'' 65.16'' 110.9'' 65''
DF-SL-133-MW / HC 133” 65.2'' 116'' 71.54'' 122.24'' 71.38''
FixedFilmScreenwithBlackVelvetFrame
Assembly &
Installation
Instructions
4”
4”
Top Bracket
Bottom Bracket
Security Clip
Pre-measured
Tether
•Selectanappropriateareatomountthescreen.Makesurethe
position selected will not interfere with existing features of
yourroom;wallsockets,switches,etc…theseall should be
avoided.
•DONOTinstallthescreenoveranelectricaloutletorswitch.
Doing so poses a serious re hazard.
• For homes with stud-wall construction, use stud nder or
carefullymeasuretodeterminewherethestudsarelocatedin
thewall.ThescreenMUSTbemountedtothestuds-NEVER
rely on gypsum board, drywall, or thin wall materials to
supporttheweightofthescreen!
•Thescreenisequippedwithasetofpre-measuredtethered
mounting brackets. There are security clips in the bottom
bracket. The screen should sit centered on the mounting
bracketwheninstalled.
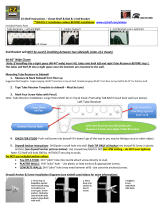
•Drywall/Stud Installation: Using a stud nder, locate studs in
wall. Hang top bracket rst (subtracting 1/2” from top of
screentomarkcorneredgeoftopofbracket)with5X40mm
Philips head screws and washers directly into studs. Pre-
drillingstudswitha5/32”drillbitisrecommended.
•Letthebottombracketdropand,whilepullingtetherstaut,
mark locations for screws. Repeat mounting procedure
used with the top bracket. For best support, 3 screws per
bracketshouldbeused.
•Concrete Installation:Hangtopbracketrst(subtracting1/2”
from top of screen to mark corner edge of top of bracket).
Pre-drill3holesintoconcretewith1/4”concretebitandinsert
concreteanchors.Positiontopbracketoverholesandinsert
5X40mmPhilipsheadscrewsandwashers.
•Letthebottombracketdropand,whilepullingtetherstaut,
mark locations for screws. Repeat mounting procedure
used with the top bracket. For best support, 3 screws per
bracketshouldbeused.
• Start by lifting screen frame onto top bracket, letting the
bottomrestagainstbottombracket.Carefullyliftbottomof
screen onto bottom bracket (Figure A & B). Security clips
willlockbottomofscreeninplace.Installationiscomplete.
•To release, simply push in clips and carefully lift bottom of
screenupandawayfromwall.
Drywall
Concrete
B
A
E
D
B
A
F
C

Pleasefollowtheassemblyandinstallationinstructions
carefully. With proper assembly and installation, your
newscreenwilldeliveryearsoftrouble-freeservice
Preparingyourscreenforinstallation
PartList
•Carefullyopenthepackageandlayoutallthepartsonaclean,
atsurface
•Useextremecautionwhenunpackingthescreen;donotuse
knivesorsharpobjectstoopenthepackingboxes.
•Donotunpackthescreenmaterialatthistime.
AluminumFrameTube
TensioningRod
“L”Bracket
Assemblyx4
SnapLugx34
Washersx8
Top and Bottom Bracket with
Pre-measuredTetherx1each
5x40mmPhillips
Head ScrewsX8
Concrete
Anchorsx8
x2
x2
x2
x2
Installingthesnaplugs
•Slidethesnaplugsintothesectionoftheextrudedaluminum
frameasshowninDiagram1.
a
Snap Lug
b
• The snap lugs line up with the arrow decals on the frame
tubes.Alignmentisnotcriticalatthisstageoftheinstallation.
Notethatthescreenissuppliedwith2extrasnaplugs;should
youloseorbreakasnaplug,oneofthesparesisaconvenient
replacement.
Installingthescreenmaterial
•Placealloftheframetubesfacedownontheworksurfaceand
carefully line up the ends to form shape of the nished
screen.
•The4supplied“L”shapedcornerbracketassembliesareused
tojointheindividualframetubestogether.
• Loosen the 4 screws on the “L” brackets. Next, carefully
slipthebracketsintothealuminumframechannelasshown
indiagram2.
•It willhelptoleavethescrewslooseuntilyougetallofthe
bracketsinplace.
• Carefully line up the frame corners and tighten the screws
slightly;repeatthisstepateachcorner.
• Note that you may have to loosen and adjust the brackets
andframetubesinordertogettheframeperfectlysquare.A
carpenters square is very helpful with this stage of the
assembly.
•Lineupthesnaplugsandthescreenmaterialwiththeframe
and press the snap lug through the corresponding hole in
the material. Some adjustment and re-adjustment is often
necessary;thisisnormal.Notethatthetensioningrodgoesto
theoutsideofthesnaplug(SeeDiagram4).
• Repeat this process all the way around the frame. As you
positionthetensioningrodbehindthesnaplugs,
the screen will become tighter on the frame and any
wrinkles or creases will disappear. It may also be helpful or
necessarytotemporarily“unsnap”orloosenthesnaplugfor
adjustment,especiallyasyouworktothenalcornersofthe
screen.
•Once the screen is in place and the tensioning rods are
seated behind all of the snap lugs, inspect the front
of the screen. Make sure that the screen material is at
and wrinkle-free. Also, check the corners to make sure that
the screen is properly positioned. If there are any wrinkles
or positioning issues, simply lay the screen face down and
adjustaccordingly.
•Notethatsomeverysmallfoldlinesorwrinklesmayexistfora
fewhours;thisisduetothepackingofthescreenandthey
willdisappearwithinashorttime.
•Makesurethathandsandworkareaarecleanbeforeworking
with the screen materials
• Carefully unpack the screen material- Use caution as the 4
tensioningrodsarecontainedinsidethecardboardtube.
• Carefullylay out thescreenmaterial so thatit roughly lines
upwiththeframe-Exactpositionisnotcriticalatthisstageof
theassembly.Itisimportantthatthescreenmaterialisfacing
thecorrectdirection.Itiseasytoidentifythebacksideofthe
screenasitwillhavethestitchedorweldedseamvisible.
•Unpackthe4metaltensioningrods.
•Insertthelongmetaltensioningrodsinto the longer edges
of the screen material, one rod per side. It is easier if the
screen is at on the oor. Use care when installing the rod;
donotforce it or damage to the screenmaterialmayoccur
(SeeDiagram3).
• Insert the shorter tensioning rods into the corresponding
sides of the screen; as with the longer rods, use caution to
avoiddamagetothescreen(SeeDiagram3).
Assemblingtheframe
b
d
c
a
topframe
strip nuts
sideframe
L Bracket
Diagram1
Diagram2
Diagram3
TensionRod
a
c
b
Diagram4
a
b
c
d
e
Top Frame Bar
Side
Frame
Bar
Top Bracket
screen
Front View
Back View
Side View
Top View
Bottom Bracket
screen
screen
screen
/


