Fluval FX6 User manual

Type
User manual

This manual is also suitable for

USER MANUAL
GUIDE DE L’ UTILISATEUR
BENUTZERHANDBUCH
MANUAL DEL USUARIO
GEBRUIKERSHANDLEIDING
MANUAL DO UTILIZADOR
FX
SERIES
EN
3
TABLE OF CONTENTS
Parts Listing/ Replacement Parts ...........................................................................................................................................................EN-5
Safeguard Instructions ..........................................................................................................................................................................EN-6
Installation and Use ..............................................................................................................................................................................EN-7
Specifications ......................................................................................................................................................................................EN-12
Maintenance .......................................................................................................................................................................................EN-13
Maintenance Frequency ......................................................................................................................................................................EN-13
Warranty and Customer Service ..........................................................................................................................................................EN-18
TABLE DES MATIÈRES
Pièces de l’appareil/pièces de rechange .............................................................................................................................................. FR-21
Mesures de sécurité ............................................................................................................................................................................ FR-22
Installation et utilisation ..................................................................................................................................................................... FR-23
Spécifications ...................................................................................................................................................................................... FR-28
Entretien ............................................................................................................................................................................................. FR-29
Fréquence de l’entretien ......................................................................................................................................................................FR-29
Garantie et Service à la clientèle .........................................................................................................................................................FR-34
INHALT
Produktteile/Ersatzteile .......................................................................................................................................................................DE-37
Sicherheitshinweise.............................................................................................................................................................................DE-38
Installation und Verwendung ..............................................................................................................................................................DE-39
Spezifikationen ...................................................................................................................................................................................DE-44
Wartung ..............................................................................................................................................................................................DE-45
Wartungsintervalle .............................................................................................................................................................................. DE-45
Garantie und Kundendienst ................................................................................................................................................................DE-50
TABLA DE CONTENIDOS
Lista de piezas/Piezas de repuesto ...................................................................................................................................................... SP-53
Medidas de seguridad ......................................................................................................................................................................... SP-54
Instalación y uso ................................................................................................................................................................................. SP-55
Especificaciones .................................................................................................................................................................................. SP-60
Mantenimiento ................................................................................................................................................................................... SP-61
Frecuencia de mantenimiento ............................................................................................................................................................. SP-61
Garantía y Servicio a la Clientela ........................................................................................................................................................ SP-66
INHOUD
Onderdelen/vervangstukken................................................................................................................................................................NL-69
Veiligheidsvoorschriften ......................................................................................................................................................................NL-70
Installatie en gebruik ..........................................................................................................................................................................NL-71
Specificaties ........................................................................................................................................................................................NL-76
Onderhoud ..........................................................................................................................................................................................NL-77
Onderhoudstabel ................................................................................................................................................................................NL-77
Garantie en klantendienst ...................................................................................................................................................................NL-82
ÍNDICE
Listagem de Peças/Peças de Substituição ............................................................................................................................................ PT-85
Instruções de Segurança ..................................................................................................................................................................... PT-86
Instalação e Utilização ........................................................................................................................................................................ PT-87
Especificações .................................................................................................................................................................................... PT-92
Manutenção ........................................................................................................................................................................................ PT-93
Frequência de Manutenção ................................................................................................................................................................. PT-93
Garantia e Serviço de Apoio ao Cliente ............................................................................................................................................... PT-98
EN
FR
DE
ES
NL
PT
FLUVAL FX4
22
23
23
25
25
26
B
C
D
A
A
1 1
4
6
5
3
3
E E
15
13
21
17
22
20
16
19
18
14
9
9
2
2
7
1010
8
12
11 11
EN
4 5
FLUVAL FX6
24
24
24
25
25
26
B
B
C
D
A
A
A
1 1
4
6
5
3
3
E E
15
13
21
17
22
22
20
16
19
18
14
9 9
2
2
7
1010
8
12
1111
Part Description Quantity
1 Ribbed Hosing 1
2 Rim connector (1) & Clips (3) 2
3 Rim Connector Suction Cups 8
4 Intake Stem 1
5 Rubber Connector 2
6 Strainer Suction Cup 2
7 Strainer 1
8 Output Assembly (Nozzle) 1
9 Metal Clamp (For hosing) 2
10 AquaStop Valves 2
11 Top cover click-fit O-ring 4
12 O-Ring (Filter lid) 1
13 Lid Fasteners 8
14 Filter Canister 1
15 T-Bar Handles 2
16 Utility Valve 1
17 Magnetic Impeller Assembly 1
18 Motor Seal Ring 1
19 Utility Valve Hosing 1
20 Drain Cap 1
21 Pump Unit (Motor) & Power Cord 1
22 Rubber Feet 6
23 Media baskets- FX4 2
24 Media baskets- FX6 3
25
1
2
Media basket 2
26 Filter Lid 1
FX4 Item Number FX6 Item Number Quantity
Spare Parts
A20236 A20236 1
A20230 A20230 1
A20232 A20232 4
A20225 A20225 1
A20228 A20228 2
A15041 A15041 4
A20221 A20221 1
A20227 A20226 1
A20234 A20234 2
A20216 A20216 1
A20212 A20212 2
A20210 A20210 1
A20215 A20215 1
N/A N/A
A20242 A20241 1
A20219 A20219 1
A20208 A20206 1
A20211 A20207 1
A20237 A20237 1
N/A N/A
A20202 A20201 1
A20121 A20121 4
A20239 N/A 1
N/A A20239 1
A20243 A20243 1
N/A N/A
Part Description FX4 Quantity FX6 Quantity FX4 Item Number FX6 Item Number Quantity
Spare Parts
A Foam 4 6 A228 A228 3
B Bio Foam 1 2 A239 A239 2
C Ceramic Rings (BioMax) 2 2 A1456 A1456 1
D Carbon Pad 1 1 A249 A249 2
E Media Bags 2 2 A1428 A1428 2
PARTS LISTING/REPLACEMENT PARTS
EN
6 7
WARNING - To guard against injury, basic safety precautions should be observed including the following:
1.
READ & FOLLOW ALL SAFETY INSTRUCTIONS and all the
important notices on the appliance before using. Failure to do so may result in the loss of fish life and/or damage to
the appliance.
2. DANGER – To avoid possible electric shock, special care should be taken since water is employed in the use
of aquarium equipment. For each of the following situations, do not attempt repairs yourself, return the
appliance to an authorized service facility for service or discard the appliance.
A. If the appliance falls into the water, DON’T reach for it! First unplug it and then retrieve it. If electrical components
of the appliance get wet, unplug the appliance immediately.
B. If the applicance shows any sign of abnormal water leakage or if RCD (or GFCI –
Ground Fault Current Interrupter) switches off disconnect the power supply cord
from the mains and remove pump from water.
C. Carefully examine the appliance after installation. It should not be plugged if there is
water on parts not intended to be wet.
D. Do not operate any appliance if it has a damaged cord or plug, or if it is malfunc-
tioning or it is dropped or damaged in any manner. The power cord of this appliance
cannot be replaced. If the cord is damaged, the appliance should be discarded. Never
cut the cord.
E. To avoid the possibility of the appliance plug or receptacle getting wet, position the
appliance to one side of a wall mounted receptacle. To prevent water from dripping
onto the receptacle or plug, a “drip loop” (see photo) should be arranged by the
user in the cord connecting appliance to a receptacle. The “drip loop” is that part of the cord below the level of the
receptacle or the connector, to prevent water travelling along the cord and coming in contact with the receptacle.
If the plug or receptacle does get wet, DON’T unplug the cord. Disconnect the fuse or circuit breaker that supplies
power to the appliance. Then unplug and examine for presence of water in receptacle.
3. WARNING – Close supervision is necessary when any appliance is used by or near children.
This appliance can be used by children ages 8 years and above and persons with reduced
physical, sensory or mental capabilities or lack of experience and knowledge if they have been
given supervision or instruction concerning use of the appliance in a safe way and understand
the hazards involved. Children shall not play with the appliance. Cleaning and user mainte
-
nance shall not be made by children without supervision.
4. To avoid injury, do not touch moving parts or hot parts.
5. CAUTION – Always unplug or disconnect all appliances in the aquarium from electricity supply before
placing hands in water, before putting on or taking off parts and while the equipment is being installed,
maintained or handled. Grasp the plug and pull to disconnect. Never yank cord to pull plug from outlet.
Always unplug an appliance from an outlet when not in use.
6. This appliance is not a submersible aquarium filter-pump. It is intended for use in ornamental household aquariums.
It may be used with fresh or salt water. Maximum water temperature 35°C. Do not use this appliance for other than
intended use (ie: DO NOT use in swimming pools, bathrooms, ect.). The use of attachments not recommended or sold
by the appliance manufacturer may cause an unsafe condition and will invalidate your warranty.
7. This is a HOUSEHOLD APPLIANCE INTENDED FOR DOMESTIC USE and it is suitable for INDOOR use only. Do not
install or store this appliance where it will be exposed to the weather or temperatures below freezing.
8. Make sure that this appliance is securely installed before operating it and that the electrical connection is in accor-
dance with the data on the rating label. Do not allow filter pump to run dry.
9. If an extension cord is necessary, a cord with proper rating should be used. A cord rated for less amperes or watts
than the appliance rating may overheat. Care should be taken to arrange the cord so that it will not be tripped over
or pulled. The connection should be carried out by a qualified electrical installer.
10. SAVE THESE INSTRUCTIONS for future reference.
IMPORTANT SAFETY INSTRUCTION
Drip Loop
1. Before beginning
For best results, top off water in aquarium before beginning setup.
Allow 30-45 minutes for setup and installation.
Tools required: Phillips screwdriver and utility knife.
Read all instructions.
DO NOT PLUG IN FILTER UNTIL SETUP IS COMPLETE AND UNIT IS FILLED WITH WATER.
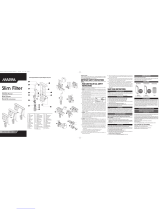
2. Unpack and identify all parts
Use the diagram at the beginning of the manual.
3. Prepare the aquarium
1. Decide on filter placement. Remember, this is a
gravity-fed system. For it to work properly, all of the
Installation Requirements below must be adhered to.
FX4 FX6
a min. 20 cm to 150 cm min. 20 cm to 150 cm
b max. 20 cm max. 20 cm
IMPORTANT:
NEVER install the filter above the water level.
The hosing supplied with the unit is 13.1 ft (4m) long. If longer
hosing is required, intake hosing must not exceed 6.5 ft. (2m)
and the total length of intake and outlet hosing combined
must not exceed 16.4 ft. (5m).
Hosing must follow a straight path from the filter to the
aquarium rim, with no slack and no loops.
For best performance, the filter should be completely beneath the aquarium (as in figure shown).
Position utility valve so that you will be able to attach the supplied hosing without moving the unit.
INSTALLATION AND USE
a
b
EN
8 9
Note: A dropped ledge rim requires purchase of an extra rim
connector. (See “Replacement Parts” for ordering information.)
1. Prepare intake connections
1. Connect the hosing to one of the two valves (marked “IN”):
A. Loosen one of the metal clamps, and slide it onto one end of the hosing (the
rubber part).
B. Push the end of the hosing onto the valve; push it all the way, as far as it
will go.
C. Position the metal clamp over the rubber connector, and tighten.
2. Measure and cut the hosing. You will need a length of hosing that reaches
comfortably from inside the aquarium to the filter canister.
IMPORTANT: Hosing should follow a straight path from the filter to the
aquarium rim, with no slack and no loops. If the hosing is too long, the filter
will not work efficiently (the maximum length of the hosing is 6.5 ft / 2m).
D. Place the valve end of the hosing at the approximate spot where it will
be positioned on the filter lid (once the filter is installed).
E. Stretch out the hosing so it rests over the “intake”rim bracket.
F. At a spot at least 6 in. (15cm) beyond the aquarium rim, use a utility
knife to cut the hosing. Do not cut it too short. Remember, you can
always cut it shorter during final installation, if necessary.
6 in.
(15cm)
INSTALLATION AND USE
Alternate Configurations
1. Place the two rim connectors over the back top edge of the aquarium. Place one just above the spot where you
want to place the intake tube; place the other just over the spot where you want to position the output nozzle. Be
sure that the long end of the bracket is on the inside of the aquarium.
The rubber rings on the connectors are designed to help them adhere to tank glass better.
If the aquarium walls are thinner than 5/8 in. (1.58 cm) replace the rubber ring with the four smaller suction cups
provided.
IMPORTANT: Be sure to position the intake tube away from any air source—an air stone, an aeration device,
protein skimmer or the output valve. Air entering the intake strainer will diminish filter efficiency.
INSTALLATION AND USE
3. Push the cut end of this “intake” hosing into the rubber connector on
the intake tube. Push the hosing in by at least 1 in. (2.5cm) without
twisting it.
4. Place the intake strainer in the tank, making sure it is at least 3 in. (7.5
cm) from the bottom. Adjust the intake tube for the best extension for
your aquarium, respecting the 3 in. (7.5 cm) from the bottom rule. Once
the intake strainer is properly positioned, lock it in place by pressing the
suction cups against the glass.
5. Fasten the intake strainer’s hosing onto the rim connector using the
three rim connector clips.
5. Prepare output connections
1. Connect the hosing to the second valve (Just as for the intake hos-
ing):
A. Loosen the second metal clamp, and slide it onto the factory-finished end
of the hosing (not the cut end).
B. Push the end of the hosing onto the valve; push it all the way, as far as
it will go.
C. Position the metal clamp over the rubber connector, and tighten.
2. Measure and cut the hosing. Again, you will need a length of hosing
that reaches comfortably from inside the aquarium to the filter canister.
IMPORTANT: Hosing should follow a straight path from the filter to the
aquarium rim, with no slack and no loops. If the hose is too long, the
filter will not work efficiently.
D. Place the valve end of the hosing at the approximate spot where it will be
positioned on the filter lid (once the filter is installed).
E. Stretch out the hosing so it rests over the “output”rim bracket.
F. At a spot at least 6 in. (15cm) beyond the aquarium rim, use a utility knife
to cut the hosing. Do not cut it too short. Remember, you can always cut
it shorter during final installation, if necessary
3. Push the cut end of this “output” hosing into the rubber connector of
the output nozzle. Push the hosing in by at least 1 in. (2.5cm) without
twisting it.
4. Place the nozzle in the tank about 1 in. (2.5cm) below the water line.
5. Fasten the hosing to the “output” bracket using the three rim connector
clips.
5
3
4
6 in.
(15cm)
5
3
4
EN
10 11
INSTALLATION AND USE
6. Prepare the filter
1. Loosen and disengage the eight lid fasteners.
2. Remove the filter lid and set it aside. Be careful not to damage the inlet stem connected to the lid.
3. Using the red T-handles, lift the media baskets from the filter canister. The T-handles will fall outward so the
baskets can be handled separately. The images below are referred to FX4; FX6 has an additional basket.
4. Rinse baskets, media trays and media materials under running tap water to remove any dust, and place media back
in their original position. Or, if you prefer, select other media of your own choosing.
IMPORTANT:
To prevent particles from entering the impeller chamber,
blocking and/or damaging the impeller, all loose granule filter material
(Carbon, Zeo-Carb, Ammonia Remover, Peat Granules, etc.) must be
placed in a filter media bag. Please use the bags at the bottom basket for
these filtering media. NEVER overfill baskets. Leave at least 0.5 in. (1cm)
of free space from the top of the baskets to the media, so the baskets will
fit together properly. If the red tray is present, the media at the bottom of
the basket must not exceed the height of the tray supports in the basket.
5. Make certain that each kind of media is positioned at the same level it was
packaged in, unless you are deliberately choosing a different filtration plan
than the recommended setup.
6. Stack the baskets, carefully aligning them, so that all shapes match.
Re-insert the T-handles into their vertical slots, and replace the baskets in the
filter canister. The foam in the upper basket should be just about even with
the top edge of the canister
(the output tube, which is affixed to the inside
of the canister, will be protruding slightly)
.
7. Move the filter canister to its final position.
8. Be certain the utility valve is in the vertical (closed) position.
9. Pour at least 1.6 gallons (6 liters) for FX4 and 2 gallons (8 liters)
for FX6 of water into the filter canister.
IMPORTANT: Correct water volume is necessary for system priming.
10. Place the filter lid back on the canister. Check to make sure the filter
lid seal ring is present and installed properly on the canister lid.
There is only one orientation possible. Gently press the lid down until
the output tube is firmly seated in the OUT connection on the filter lid.
IMPORTANT: If the inlet tube attached to the canister lid has slipped out of its seat, be sure to fully re-insert it
under the IN connection of the lid.
11. Replace and hand-tighten the eight lid fasteners. The lid is properly closed when it is in direct contact with the
canister. DO NOT USE ANY TOOLS, AS DOING SO MAY DAMAGE THE UNIT.
FX4 Shown
>0.5 in. (1 cm)
Media
Basket
Foam
Insert
T-handle
7. Install the Filter
1. Once the filter unit is in its final position, make sure that the aquarium has the appropriate amount
of water.
IMPORTANT:
Before proceeding, check the Installation Requirements at section #3 of “Installation and Use” chapter.
2. Grasp the intake valve (which is at the end of the
hosing attached to the intake tube); slide it onto
the IN connection on the filter lid, and press until it
clicks into place.
3. Grasp the output valve
(which is at the end of the
hosing attached to the output nozzle); slide it onto
the OUT connection on the filter lid, and press until it
clicks into place.
4. Be certain both valves are locked in place before pro-
ceeding.
8. Install the Utility Valve hosing
The utility valve at the base of the unit and its hosing allow to:
Discharge the water inside the filter to make it lighter for
moving it.
Change aquarium water: empty and refill.
Use the FX gravel cleaner kit (sold separately).
To install the utility hosing proceed as follows:
1. Be certain the utility valve is in the closed (vertical) position; turn
the lock nut clockwise to loosen it, then remove the rubber cap.
2. Attach one end of the supplied hose to the utility valve. Turn lock
nut counterclockwise while you are pushing the hose in the valve
direction.
3. Attach the other end of the hose to the clips on the lid.
WARNING: It is important to leave the valve in the OFF position when not in use. An open valve will result
in an immediate water spill.
9. Start the filter
1. Check your installation.
Before turning the filter on, be sure that:
A. The utility valve is in the closed (vertical) position.
B. All top lid fasteners are well tightened.
C. The intake strainer is fully submersed in water.
D. There are at least 1.6 gallons (6 liters) for FX4 and 2 gallons (8 liters) for FX6 of water in the canister.
INSTALLATION AND USE
EN
12 13
INSTALLATION AND USE
VERY IMPORTANT: You need to know that as soon as the unit is plugged in, it will start, and will immediately go
through its automatic priming sequence.
2. Open the IN & OUT valve levers placing them in the
vertical position.
3. Plug the unit into an electrical outlet.
The electronic automatic priming sequence will begin.
This is what will happen:
E. The pump will run for 1 minute to fill the filter
canister with aquarium water.
F. The pump will stop for 2 minutes to evacuate air
from the filter canister.
G. The pump will start again; it will remain on and
will run continuously until it is unplugged.
This sequence will repeat itself every time the unit is
unplugged and plugged back in.
Every 12 hours the pump will stop for 1 minute to
evacuate any air that may have become trapped inside
the unit.
FLUVAL FX SPECIFICATION
FX4 FX6
Aquarium Capacity: 250 gallons 1,000 liters 400 gallons 1,500 liters
Pump Output: 700 g/h 2650 l/h 925 g/h 3,500 l/h
Mechanical Area (Foam) 217 in.
2
1,400 cm
2
325.5 in.
2
2,100 cm
2
Biological Volume: 1 gallon 3.9 l 1.5 gallons 5.9 l
Filtration Volume: 3.7 gallons 14 l 5.28 gallons 20 l
Filter Circulation*: 450 g/h 1,700 l/h 563 g/h 2,130 l/h
Head Height (max.): 6.9ft 2.1 m 10.8ft 3.3 m
Wattages 120V/60Hz: 30W 43W
Wattages 230-240V/50Hz: 30W 41W
*Note: Flow rates were measured with intake and output hoses of the same length and without media.
IMPORTANT
To ensure optimal and proper functioning of your Fluval FX External Filter, regular
maintenance is required. Failure to do so may result in the failure of the filter and
will invalidate your warranty. Additionally, regular cleaning and maintenance will
greatly reduce or completely prevent faults and reduction in performance. Please
refer to the maintenance schedule below.
MAINTENANCE FREQUENCY CHART
COMPONENTS MONTHLY EVERY 3 MONTHS EVERY 6 MONTHS YEARLY
Magnetic impeller Check & Clean Replace
Motor Seal Ring Check & Clean Replace
Intake Stem/Strainer Check & Clean
Ribbed Hosing Check & Clean
Mechanical Foam Check & Clean Replace half quantity
Bio-Foam Check & Clean Replace
BIOMAX Rinse Replace half quantity
Carbon Pad Replace
Canister (inside)* Check & Clean
AQUARIUM MAINTENANCE
FX filters allow you to make an easy and efficient maintenance of your aquarium.
Gravel cleaning
For this operation we recommend you to use the FX gravel cleaning kit. Please refer
to the instructions included with your FX Gravel Cleaning Kit. (Sold Seperately)
Water changing
For this operation please refer to the plastic instruction sheet included with your
filter.
* IMPORTANT: During these operations, air may get trapped inside the canister that
can shake the dirt onto the bottom. If you have not done regular maintenance of
the inside of the canister as recommended by the maintenance frequency chart,
some particles may get flushed back into the aquarium.
CAUTION: Always unplug any appliances from an outlet when not in use, before putting on or taking off
parts, and before cleaning. Never yank cord to pull plug from outlet. Grasp the plug and pull to disconnect.
MAINTENANCE
EN
14 15
CAUTION: Always unplug any appliances from an outlet when not in use, before putting on or taking off
parts, and before cleaning. Never yank cord to pull plug from outlet. Grasp the plug and pull to disconnect.
FILTER MAINTENANCE
Prior to periodic maintenance the canister must be drained.
1. Drain the filter
1. Turn the IN and OUT valves in sequence to the closed (horizontal) position.
2. Unplug the pump from the electrical power supply.
3. Remove the utility hose from the clips on the lid and position its end in an appropriate basin or
discharge drain.
4. Turn the utility valve to the open (horizontal) position by turning it counterclockwise. Then disconnect
the OUT valve.
5. Water will immediately begin to drain from the canister. Since this is a gravity fed method, water will
stop draining once the water level in the canister and drain bucket equalize. Once this happens simply
close the valve and empty the bucket. Repeat the draining process until enough water is removed to
make the canister light enough to carry to your work area.
2. Disassemble the unit
1. Move the filter to an appropriate area convenient for maintenance.
2. Loosen and remove the eight lid fasteners; remove the filter lid and set aside. Be careful not to damage
the inlet stem connected to the lid.
3. Using the red T-handles, lift the media baskets from the filter canister; let the T-handles fall out of their
slots, and separate the baskets.
3. Cleaning or replacing media
1. Remove all foam inserts from the media baskets and trays, rinse using aquarium or de-chlorinated tap
water, or replace with new foam, as required.
2. Rinse biological media with aquarium water, or replace, as
required.
3. Replace chemical media, as needed. Chemical media cannot be
cleaned.
4. Empty and rinse the filter canister. NEVER use soap or
detergents when cleaning the canister or rinsing the baskets
and trays, as remaining traces of cleaning products may damage
sensitive fish tissue.
5. NEVER overfill baskets. Leave at least 0.5 in. (1cm) of free space from the top of the baskets to the media, so
the baskets will fit together properly. If the red tray is present, the media at the bottom of the basket must not
exceed the height of the tray supports in the basket.
>0.5 in. (1 cm)
MAINTENANCE MAINTENANCE
4. Pump care
FX4 IMPELLER MAINTENANCE
The impeller well has an effective self-cleaning feature. However it is recommended that you remove the motor and
inspect the impeller as part of your routine maintenance. Keeping the impeller clean lengthens its life and the life of the
motor. Prior to performing pump care the FX4 Filter must be completely emptied of water, media baskets, and media.
1. To remove the pump unit:
A. Place the filter unit upside down on a secure work area so that the pump screws and screw seats are
visible. Remember that the output tube protrudes slightly from the top rim of the canister. Be sure not to bend
or damage the tube while it is upside down.
B. Unscrew the 3 fixing screws using a Phillips screwdriver (cross headed).
Screws are located around the motor housing.
C. Remove the impeller assembly by grasping the fan and drawing it gently
from the well.
NOTE: There are 4 parts to the impeller:
D. Impeller shaft. The impeller shaft is held on both sides of the impeller well by
two rubber bushings. The shaft can be easily extracted by hand with care.
IMPORTANT: The shaft is made from ceramic, which is resistant to wear and
tear in use, but is fragile. Handle carefully during maintenance.
E. Front rubber bushing. If it remains in the red part of the canister, it’s necessary
to remove it keeping attention to not damage it.
F. Rear rubber bushing. If the rubber bushing remains in its place, it’s not neces-
sary to remove it.
G. Impeller assembly (Magnet + impeller fan)
2. Clean the impeller and the impeller well thoroughly by rinsing with clear
running water.
3. Re-assemble all pump components with care:
H. Replace seal ring if necessary: Remove it from the loophole. Please refer to the
“maintenance frequency chart”. For this operation do not use any tools because
there is a risk of damage to the O-ring.
I. Re-assemble all parts in the following order: Rear rubber bushing at the bottom
of the well (if removed), ceramic shaft (pushing it until it stops); subsequently
the impeller assembly and at the end the front rubber bushing at the top of the
ceramic shaft. The shaft can be easily reinserted by hand; however, pay close
attention and be certain the rubber bushing does not become unseated.
4. Replace the pump unit with care into the canister and affix it using
the 3 fixing screws with a Phillips screwdriver (cross headed). While
re-assembling the pump, the 3 fixing screws should be gently screwed in
until pump motor cover and canister are securely attached.
NOTE: Do not over tighten housing to canister.
IMPORTANT: Be sure that the seal ring does not slip out of its seat.
CAUTION: Always unplug any appliances from an outlet when not in use, before putting on or taking off
parts, and before cleaning. Never yank cord to pull plug from outlet. Grasp the plug and pull to disconnect.
H
I
B
E
G
D
F
EN
16 17
FX6 IMPELLER MAINTENANCE
The impeller well has an effective self-cleaning feature. However it is recommended that you remove the motor and
inspect the impeller as part of your routine maintenance. Keeping the impeller clean lengthens its life and the life of the
motor. Prior to performing pump care the FX6 Filter must be completely emptied of water, media baskets, and media.
1. To remove the pump unit:
A. Place the filter unit upside down on a secure work area so that the pump
screws and screw seats are visible. Remember that the output tube protrudes
slightly from the top rim of the canister. Be sure not to bend or damage the tube
while it is upside down.
B. Unscrew the 4 fixing screws using a Phillips screwdriver (cross headed).
Screws are located around the motor housing.
C. Remove the impeller assembly by grasping its flange (black disc).
2. Clean the impeller and the impeller well thoroughly by rinsing with clear
running water.
3. Re-assemble all pump components with care:
D. Align the two arrows on the impeller assembly. Before inserting the
impeller, gently press the magnet against the flange to be sure that the flange
bushing is fully in its seat.
E. Replace seal ring if necessary. Please refer to the Maintenance Frequen-
cy Chart.
4. Re-attach the pump unit to the canister using the 4 fixing screws with a
Phillips screwdriver (cross headed). While re-assembling the pump, the 4 fixing
screws should be gently screwed until pump motor cover and canister are securely
attached. Note: Do not over tighten housing to canister.
IMPORTANT: Be sure that impeller bearing (bushing and O-Ring) is correctly
placed at the bottom of the impeller well. Though the bushing is made of
very resistant material, it is prone to wearing in certain conditions. For this
reason, it is recommended that you replace it whenever the impeller unit
is replaced. Follow the instructions provided with the replacement parts
package. For any details, please refer to the Maintenance Frequency Chart.
IMPORTANT: Be sure that the seal ring does not slip between the impeller
flange and the motor and that the impeller bearing (bushing and O-Ring) is
correctly placed at the bottom of the impeller well.
MAINTENANCE
CAUTION: Always unplug any appliances from an outlet when not in use, before putting on or taking off
parts, and before cleaning. Never yank cord to pull plug from outlet. Grasp the plug and pull to disconnect.
E
D
B
C
5. Re-assemble the unit
1. Stack the baskets, aligning them so all shapes match. Re-insert the T-handles into their vertical slots, and
lower the baskets into the filter canister. Foam in upper basket should be just about even with the top edge of
the canister.
2. Replace filter lid.
A. Inspect the lid gasket for wear and tear.
B. Place filter lid back on canister. There is only one orientation
possible. Gently press the lid down until the output tube, affixed to
the inside of the filter canister, is firmly seated in the output (OUT)
valve lid opening.
IMPORTANT: If the inlet tube attached to the canister lid has slipped
out of its seat, be sure to fully re-insert it under the IN connection of
the lid.
3. Replace and hand-tighten the eight lid fasteners. The lid is
properly closed when it is in direct contact with the canister. DO
NOT USE ANY TOOLS, AS DOING SO MAY DAMAGE THE UNIT.
4. Place the IN and OUT valves back on the lid connectors and
press firmly until they click into place. Be sure the IN valve is
connected to the hose attached to the intake strainer, and the OUT
valve is connected to the hose attached to the output nozzle.
5. Open the IN valve (turn to vertical position).
6. With the IN valve already open, open the OUT valve. Do not
change this sequence, or the canister will not refill properly. If the
canister is no longer primed, see “Start the Filter”.
7. You will be able to hear water filling the canister. Meanwhile,
air will be forced through the output nozzle, causing bubbling and
agitation in the aquarium. Once the bubbling in the aquarium stops,
plug the power cord back in. The pump will resume its normal stop/
start sequence as described in “Start the Filter.
Any other servicing should be performed by an authorized
service representative.
5
6
MAINTENANCE
CAUTION: Always unplug any appliances from an outlet when not in use, before putting on or taking off
parts, and before cleaning. Never yank cord to pull plug from outlet. Grasp the plug and pull to disconnect.
FR
1918
QUESTIONS? If you have a problem or question about the operation of this product, please let us try to help you before
you return the product to your dealer. Most problems can be handled promptly with a phone call. Or, if you prefer,
you can contact us on our web site at www.fluvalaquatics.com. When you call (or write), please have all relevant
information, such as model number and/or part numbers available.
USA
CALL US ON OUR TOLL-FREE NUMBER:
1-800-724-2436 between 8:30 a.m. and
4:00 p.m. Eastern Standard Time.
Ask for Customer Service.
CANADA
CALL US ON OUR TOLL-FREE NUMBER:
1-800-554-2436 between 9:00 a.m. and
4:00 p.m. Eastern Standard Time.
Ask for Customer Service.
UK
Helpline Number 01977 521015.
Between 9:00 AM and 5:00 PM,
Monday to Thursday and 9:00 AM and
4:00 PM on Friday
(excluding Bank Holidays).
Ask for Customer Service.
FOR AUTHORIZED GUARANTEE REPAIR SERVICE:
Return with dated receipt and $4.00 for postage and
handling to:
Consumer Repairs
Rolf C. Hagen (USA) Corp
305 Forbes Blvd
Mansfield, MA 02048
FOR AUTHORIZED GUARANTEE REPAIR SERVICE:
Return with dated receipt and $4.00 for postage and
handling to:
Rolf C. Hagen Inc.
Service and Repair
20500 Trans Canada Hwy
Baie d’Urfé, Québec H9X 0A2
FOR AUTHORISED WARANTY SERVICE please return
(well packaged and by registered post) to the address below
enclosing dated receipt and reason for return.
Customer Service Department
Rolf C. Hagen (UK) Ltd
California Drive, Whitwood Ind Est., Castleford
West Yorkshire WF10 5QH
ree Year Warranty
The Fluval FX4/FX6 Canister Filter is guaranteed against defects in material and workmanship under normal
aquarium usage and service for 3 years from date of purchase. Non-replaceable and non-serviceable parts
will be repaired or replaced at Hagen’s discretion, free of charge, when the complete filter is returned with all
components along with a valid proof of purchase and postage paid. This warranty does not apply to any filter
that has been subject to misuse, negligence or tampering. It does not apply to filters which have been incorrectly
assembled or unsuitably maintained or where installation and maintenance instructions have not been followed
correctly. The warranty does not apply to wear and tear parts such as the impeller, impeller cover or motor seal.
No liability is assumed with respect to loss or damage to livestock or personal property irrespective of the
cause thereof. Before returning the filter under warranty terms, please ensure that all setup and maintenance
instructions have been followed. If you are in doubt, please contact your local aquatic specialist retailer for
further advice before returning the product. THIS DOES NOT AFFECT YOUR STATUTORY RIGHTS.
RECYCLING: This symbol bears the selective sorting symbol for waste electrical and electronic equipment
(WEEE). This means that this product must be handled pursuant to European Directive 2012/19/EU in order
to be recycled or dismantled to minimize its impact on the environment. Check with your local Environ-
mental Agency for possible disposal instructions or take to an official council registered refuse collection
point. Electronic products not included in the selective sorting process are potentially dangerous for the
environment and human health due to the presence of hazardous substances.
FLUVAL FX4
22
23
23
25
25
26
B
C
D
A
A
1 1
4
6
5
3
3
E E
15
13
21
17
22
20
16
19
18
14
9
9
2
2
7
1010
8
12
11 11
FR
20 21
FLUVAL FX6
24
24
24
25
25
26
B
B
C
D
A
A
A
1 1
4
6
5
3
3
E E
15
13
21
17
22
22
20
16
19
18
14
9 9
2
2
7
1010
8
12
1111
PIÈCES DE L’APPAREIL/PIÈCES DE RECHANGE
Pièce Description Quantité
1 Tuyau strié 1
2 Raccords de tuyaux au cadre (1)
avec pinces (3)
2
3 Ventouses de raccord au cadre 8
4 Tube d’admission 1
5 Raccords en caoutchouc 2
6 Ventouses pour crépine d’ad-
mission
2
7 Crépine d’admission 1
8 Bec de sortie 1
9 Colliers de serrage en métal 2
10 Soupapes AquaStop 2
11 Joint torique autobloquant
du couvercle
4
12 Joint torique pour couvercle 1
13 Verrou pour couvercle 8
14 Boîtier du filtre 1
15 Poignée en T 2
16 Soupape d’évacuation 1
17 Bloc de l’impulseur magnétique 1
18 Joint torique pour moteur 1
19 Tuyau pour soupape d’évacua-
tion
1
20 Bouchon de drainage 1
21 Bloc-moteur et cordon
d’alimentation électrique
1
22 Pieds en caoutchouc 6
23 Panier de filtration - FX4 2
24 Panier de filtration - FX6 3
25 Plateaux empilables pour
masses filtrantes
2
26 Couvercle du filtre 1
Numéro d’article
pour filtre FX4
Numéro d’article
pour filtre FX6
Quantité
des pièces
de rechange
A20236 A20236 1
A20230 A20230 1
A20232 A20232 4
A20225 A20225 1
A20228 A20228 2
A15041 A15041 4
A20221 A20221 1
A20227 A20226 1
A20234 A20234 2
A20216 A20216 1
A20212 A20212 2
A20210 A20210 1
A20215 A20215 1
S.O. S.O.
A20242 A20241 1
A20219 A20219 1
A20208 A20206 1
A20211 A20207 1
A20237 A20237 1
S.O. S.O.
A20202 A20201 1
A20121 A20121 4
A20239 1
A20239 1
A20243 A20243 1
S.O. S.O.
Pièce Description FX4 Quantité FX6 Quantité Numéro d’article
pour filtre FX4
Numéro d’article
pour filtre FX6
Quantité
des pièces
de rechange
A Blocs de mousse 4 6 A228 A228 3
B Masse filtrante
Bio-Foam
1 2 A239 A239 2
C Cylindres de
céramique (BioMax)
2 2 A1456 A1456 1
D Cartouche de charbon 1 1 A249 A249 2
E Sacs de filtration 2 2 A1428 A1428 2
FR
28 29
INSTALLATION ET UTILISATION
TRÈS IMPORTANT : Aussitôt branché, le filtre se mettra en marche et commencera immédiatement son
amorçage automatique.
1. Ouvrir les soupapes IN et OUT en plaçant les leviers
à la verticale.
2. Brancher le filtre à une prise de courant électrique.
L’amorçage automatique électronique s’enclenchera. Voici
ce qui se passera :
E. La pompe fonctionnera pendant 1 minute pour remplir
le boîtier avec de l’eau provenant de l’aquarium.
F. Elle s’arrêtera pendant 2 minutes pour évacuer l’air
contenu dans le boîtier.
G. Elle se mettra de nouveau en marche et fonctionnera
continuellement jusqu’à ce qu’elle soit débranchée.
Le même enchaînement se reproduira chaque fois que le filtre
sera débranché, puis branché de nouveau.
Environ toutes les 12 heures, la pompe s’arrêtera pendant
1 minute pour évacuer l’air pouvant être retenu dans le filtre.
SPÉCIFICATIONS
FX4 FX6
Contenance de l’aquarium 1 000 L 250 gal US 1 500 L 400 gal US
Rendement de la pompe 2650 L/h 700 gal US/h 3 500 L/h 925 gal US/h
Surface de filtration mécanique (mousse) 1 400 cm
2
217 po
2
2 100 cm
2
325,5 po
2
Volume de filtration biologique 3,9 L 1 gal US 5,9 L 1,5 gal US
Volume de filtration 14 L 3,7 gal US/h 20 L 5,28 gal US/h
Rendement du filtre* 1 700 L/h 450 gal US/h 2 130 L/h 563 gal US/h
Hauteur de la colonne (max.) 2,1 m 6,9 pi 3,3 m 10,8 pi
Puissance 120 V/60 Hz 30W 43 W
Puissance 230-240 V/50 Hz 30W 41 W
*Note : Les débits mentionnés ont été mesurés à l’aide de tuyaux d’entrée et de sortie d’eau de la même longueur et sans masses
filtrantes.
IMPORTANT
Pour que les filtres extérieurs fonctionnent de façon adéquate et optimale, il faut
les entretenir régulièrement. En effet, un manque d’entretien risque d’entraîner
un mauvais fonctionnement et invalider la garantie. Nettoyer et entretenir
régulièrement le filtre réduit grandement les risques de défaillance du filtre et
prévient une diminution du rendement. Veuillez consulter le tableau relatif à
l’entretien des pièces du filtre ci-dessous.
TABLEAU DE FRÉQUENCE DE L’ENTRETIEN
PIÈCES TOUS LES MOIS TOUS LES 3 MOIS TOUS LES 6 MOIS TOUS LES ANS
Impulseur magnétique Vérifier et nettoyer Remplacer
Joint torique du moteur Vérifier et nettoyer Remplacer
Tube et crépine d’admission Vérifier et nettoyer
Tuyau strié Vérifier et nettoyer
Mousse de
filtration mécanique
Vérifier et nettoyer Remplacer la moitié
Mousse filtrante Bio-Foam Vérifier et nettoyer Remplacer
Cylindres biologiques
BIOMAX
Rincer Remplacer la moitié
Cartouche de charbon Remplacer
Intérieur du boîtier* Vérifier et nettoyer
ENTRETIEN DE L’AQUARIUM
Les filtres de série FX permettent d’entretenir les aquariums facilement et
efficacement.
Nettoyage du gravier
Nous recommandons l’utilisation de la trousse de nettoyage de gravier FX.
Se référer aux instructions comprises avec la trousse de nettoyage de gravier FX.
Changement de l’eau
Consulter la fiche d’instructions en plastique comprise dans l’emballage du filtre.
* IMPORTANT : Durant ces étapes, il est possible que de l’air emprisonné à l’intérieur du
boîtier remue les saletés dans le fond. Si un entretien régulier de l’intérieur du boîtier
n’a pas été effectué conformément aux recommandations indiquées dans le tableau
de fréquence de l’entretien, des particules peuvent être rejetées dans l’aquarium.
ATTENTION : Toujours débrancher de la prise de courant tous les appareils qui ne sont pas utilisés, ainsi
qu’avant d’insérer ou de retirer des pièces et de procéder au nettoyage. Ne jamais tirer sur le cordon
d’alimentation pour débrancher l’appareil. Prendre plutôt la fiche entre les doigts, puis tirer.
ENTRETIEN
DE
36 37
FLUVAL FX6
24
24
24
25
25
26
B
B
C
D
A
A
A
1 1
4
6
5
3
3
E E
15
13
21
17
22
22
20
16
19
18
14
9 9
2
2
7
1010
8
12
1111
PRODUKTTEILE/ERSATZTEILE
Teil Beschreibung Menge
1 Gerippter Schlauch 1
2 Rahmenbefestigung (1)
und Clips (3)
2
3 Rahmenbefestigungs-
Saugnapf Ø20
8
4 Ansaugrohr 1
5 Gummiverbinder 2
6 Ansaugkorb-Saugnapf 2
7 Ansaugkorb 1
8 Wasseraustrittsverbindung 1
9 Metallklemmen 2
10 AquaStop Ventile 2
11 O-Ring für die obere Abdeckung 4
12 O-Ring (Filterdeckel) 1
13 Deckelschrauben 8
14 Filterbehälter 1
15 T-Griff 2
16 Ablaufventil 1
17 Magnetlaufrad 1
18 Motordichtring 1
19 Schlauch für Ablaufventil 1
20 Abflusskappe 1
21 Pumpeneinheit (Motor) und
Netzkabel
1
22 Gummifüße 6
23 Medienkorb - FX4 2
24 Medienkorb - FX6 3
25 Stapelbare Medienkörbe 2
26 Filterdeckel 1
FX4 Teilenummer FX6 Teilenummer Menge
Ersatzteile
A20236 A20236 1
A20230 A20230 1
A20232 A20232 4
A20225 A20225 1
A20228 A20228 2
A15041 A15041 4
A20221 A20221 1
A20227 A20226 1
A20234 A20234 2
A20216 A20216 1
A20212 A20212 2
A20210 A20210 1
A20215 A20215 1
N/A N/A
A20242 A20241 1
A20219 A20219 1
A20208 A20206 1
A20211 A20207 1
A20237 A20237 1
N/A N/A
A20202 A20201 1
A20121 A20121 4
A20239 1
A20239 1
A20243 A20243 1
N/A N/A
Teil Beschreibung FX4 Menge FX6 Menge FX4 Teilenummer FX6 Teilenummer Menge
Ersatzteile
A
Schaumstoff
4 6 A228 A228 3
B
Bio-Schaumstoff
1 2 A239 A239 2
C
Keramik-Ringe
(BIOMAX)
2 2 A1456 A1456 1
D
Aktivkohleeinsatz
1 1 A249 A249 2
E
Medienbeutel
2 2 A1428 A1428 2
ES
52 53
FLUVAL FX6
24
24
24
25
25
26
B
B
C
D
A
A
A
1 1
4
6
5
3
3
E E
15
13
21
17
22
22
20
16
19
18
14
9 9
2
2
7
1010
8
12
1111
LISTA DE PIEZAS/PIEZAS DE REPUESTO
Pieza Descripción Cantidad
1 Tubos nervados 1
2 Sujetador de mangueras (1)
y presillas (3)
2
3 Ventosas de succión
del salvatubos
8
4 Tubo de entrada 1
5 Conectores de goma 2
6 Ventosa de succión del
filtro de alimentación
2
7 Filtro de alimentación 1
8 Conjunto de salida 1
9 Abrazadera metálica (para tubos) 2
10 Válvulas aquastop 2
11 Junta tórica “Click-fit”
de la tapa superior
4
12 Junta tórica/Tapa del filtro 1
13 Cierres de la tapa 8
14 Cartucho filtrante 1
15 Manija tipo barra en T 2
16 Válvula de vaciado 1
17 Conjunto de impulsor magnético 1
18 Aro sellador del motor 1
19 Tubos de la válvula de vaciado 1
20 Tapa de vaciado 1
21 Unidad de la bomba (motor) y
cable de alimentación
1
22 Pies de goma 6
23 Cesta de los medios filtrantes-
FX4
2
24 Cesta de los medios filtrantes-
FX6
3
25 Bandejas filtrantes apilables 2
26 Filter Lid 1
Número de
artículo FX4
Número de
artículo FX6
Cantidad de
repuestos
A20236 A20236 1
A20230 A20230 1
A20232 A20232 4
A20225 A20225 1
A20228 A20228 2
A15041 A15041 4
A20221 A20221 1
A20227 A20226 1
A20234 A20234 2
A20216 A20216 1
A20212 A20212 2
A20210 A20210 1
A20215 A20215 1
N/A N/A
A20242 A20241 1
A20219 A20219 1
A20208 A20206 1
A20211 A20207 1
A20237 A20237 1
N/A N/A
A20202 A20201 1
A20121 A20121 4
A20239 1
A20239 1
A20243 A20243 1
N/A N/A
Pieza Descripción FX4 Cantidad FX6 Cantidad Número de
artículo FX4
Número de
artículo FX6
Cantidad de
repuestos
A
Espuma
4 6 A228 A228 3
B
Espuma biológica Bio
Foam
1 2 A239 A239 2
C
Anillos de cerámica
(BIOMAX)
2 2 A1456 A1456 1
D
Almohadilla de carbón
1 1 A249 A249 2
E
Bolsas de medios
filtrantes
2 2 A1428 A1428 2
ES
60 61
INSTALACIÓN Y USO
MUY IMPORTANTE: Tenga en cuenta que la unidad arranca apenas se enchufa y que, inmediatamente a continuación,
realiza su secuencia automática de cebado..
1. Abra las palancas de la válvula IN y OUT, y colóquelas
en posición vertical.
2. Enchufe la unidad al tomacorriente.
Comenzará la secuencia automática de cebado electrónico.
Esto es lo que sucederá:
E. La bomba funcionará durante un minuto para llenar el
cartucho del filtro del acuario.
F. La bomba se detendrá durante dos minutos para expul-
sar aire del cartucho del filtro.
G. La bomba volverá a arrancar, continuará encendida y
seguirá funcionando hasta que se desenchufe.
Esta secuencia se repite cada vez que la unidad se desenchufa
y se vuelve a enchufar.
Cada 12 horas, la bomba se detendrá durante un minuto
para expulsar el aire que haya quedado atrapado dentro
del dispositivo.
ESPECIFICACIONES DE FLUVAL FX
FX4 FX6
Capacidad del acuario: 250 galones 1,000 litros 400 galones 1,500 litros
Caudal de la bomba: 700 g/h 2,650 l/h 925 g/h 3,500 l/h
Área mecánica (espuma) 217 pulg
. 2
1,400 cm
2
325,5 pulg
. 2
2,100 cm
2
Volumen biológico: 1 gallone 3.9 l 1,5 galones 5,9 l
Volumen de filtración: 3,7 gallones 14 l 5,28 galones 20 l
Circulación del filtro*: 450 g/h 1,700 l/h 563 g/h 2,130 l/h
Altura de elevación (máx.): 6,9 pies 2,1 m 10,8 pies 3,3 m
Vatajes 120 V/60 Hz: 30W 43 W
Vatajes 230-240 V/50 Hz: 30W 41 W
*Nota: Los caudales se midieron con tubos de entrada y salida de la misma longitud, y sin medios filtrantes.
IMPORTANTE
Para garantizar el funcionamiento óptimo y adecuado de su filtro externo Fluval
FX, es necesario hacer un mantenimiento periódico. De lo contrario, el filtro podría
funcionar incorrectamente y se invalidará su garantía. Asimismo, una limpieza y un
mantenimiento periódicos reducirán significativamente o evitarán por completo
las fallas y la disminución del rendimiento. Consulte el programa de mantenimiento
que figura abajo.
TABLA DE FRECUENCIA DE MANTENIMIENTO
COMPONENTES MENSUALMENTE CADA 3 MESES CADA 6 MESES ANUALMENTE
Impulsor magnético Verificar y limpiar Reemplazar
Aro sellador del motor Verificar y limpiar Reemplazar
Tubo de entrada/alimentación Verificar y limpiar
Tubos nervados Verificar y limpiar
Espuma mecánica Verificar y limpiar Reemplazar la mitad de
la cantidad
Espuma biológica Bio-Foam Verificar y limpiar Replace
BIOMAX Enjuagar Reemplazar la mitad de
la cantidad
Almohadilla de carbón Reemplazar
Cartucho (parte interior)* Verificar y limpiar
MANTENIMIENTO DEL ACUARIO
Los filtros FX le permiten realizar un mantenimiento sencillo y eficiente del acuario.
Limpieza de grava
Para llevar a cabo esta operación, le recomendamos usar el kit de limpieza de grava FX.
Consulte las instrucciones que vienen con el kit de limpieza de grava FX.
Cambios de agua
Para llevar a cabo esta operación, consulte la hoja plástica de instrucciones que viene
con el filtro.
* IMPORTANTE: Durante esta operación, es posible que quede aire atrapado dentro
del cartucho que pueda agitar la tierra hacia el fondo. Si no ha realizado las tareas
de mantenimiento habituales del interior del cartucho como se recomienda en la
tabla de frecuencia de mantenimiento, es posible que algunas partículas vuelvan
a entrar al acuario.
PRECAUCIÓN: Siempre desenchufe el aparato del tomacorriente cuando no esté en funcionamiento, antes
de agregar o quitar piezas, y antes de limpiarlo. Nunca tire con fuerza del cable para quitar el enchufe del
tomacorriente. Tome el cable del enchufe y desconéctelo.
MANTENIMIENTO
NL
68 69
FLUVAL FX6
24
24
24
25
25
26
B
B
C
D
A
A
A
1 1
4
6
5
3
3
E E
15
13
21
17
22
22
20
16
19
18
14
9 9
2
2
7
1010
8
12
1111
ONDERDELEN/VERVANGSTUKKEN
Onderdeel Beschrijving Aantal
1 Geribbelde slang 1
2 Randkoppeling (1) & klemmen
(3)
2
3 Zuignappen randkoppeling 8
4 Inlaatbuis 1
5 Rubber koppelingen 2
6 Zuignap inlaatzeef 2
7 Inlaatzeef 1
8 Uitlaatconstructie 1
9 Metalen klem (voor slang) 2
10 AquaStop kleppen 2
11 Click-fit O-ring bovendeksel 4
12 O-ring (filterdeksel) 1
13 Dekselsluitingen 8
14 Filterbus 1
15 T-staafhendel 2
16 Nutsklep 1
17 Magnetische rotorgroep 1
18 Afdichtring motor 1
19 Slang nutsklep 1
20 Afvoerdop 1
21 Pompeenheid (motor)
en voedingskabel
1
22 Rubber poten 6
23 Filtermandje- FX4 2
24 Filtermandje- FX6 3
25 Stapelbare mediabakjes 2
26 Filter Lid 1
FX4-artikelnummer FX6-artikelnummer Aantal
reserveon-
derdelen
A20236 A20236 1
A20230 A20230 1
A20232 A20232 4
A20225 A20225 1
A20228 A20228 2
A15041 A15041 4
A20221 A20221 1
A20227 A20226 1
A20234 A20234 2
A20216 A20216 1
A20212 A20212 2
A20210 A20210 1
A20215 A20215 1
N/A N/A
A20242 A20241 1
A20219 A20219 1
A20208 A20206 1
A20211 A20207 1
A20237 A20237 1
N/A N/A
A20202 A20201 1
A20121 A20121 4
A20239 1
A20239 1
A20243 A20243 1
N/A N/A
Onderdeel Beschrijving FX4 Aantal FX6
Aantal
FX4-artikel-
nummer
FX6-artikel-
nummer
Aantal
reserveon-
derdelen
A
Schuim
4 6 A228 A228 3
B
Bio Schuim
1 2 A239 A239 2
C
Keramische ringen
(BIOMAX)
2 2 A1456 A1456 1
D
Koolstofkussen
1 1 A249 A249 2
E
Filtermediazak
2 2 A1428 A1428 2
NL
76 77
INSTALLATIE EN GEBRUIK
HEEL BELANGRIJK: u moet weten dat de eenheid na het inschakelen meteen begint te werken en onmiddellijk
haar automatische pompcyclus doorloopt.
1. Open de IN & OUT-klephendels door ze in de verticale
stand te zetten.
2. Steek de stekker van de eenheid in een stopcontact.
De elektronische automatische pompcyclus gaat van start.
Het volgende gebeurt:
E. De pomp werkt 1 minuut om de filterbus met aquarium-
water te vullen.
F. De pomp stopt 2 minuten om lucht uit de filterbus te
laten.
G. De pomp start opnieuw; ze blijft aanstaan en werkt
doorlopend tot ze wordt uitgeschakeld.
Deze cyclus wordt automatisch herhaald telkens als de
eenheid wordt uitgeschakeld en opnieuw ingeschakeld.
Om de 12 uur stopt de pomp 1 minuut om lucht af te laten
die in de eenheid vast kan zitten.
SPECIFICATIES FLUVAL FX
FX4 FX6
Aquariumcapaciteit: 250 gallon 1,000 liter 400 gallon 1 500 liter
Pompopbrengst: 700 g/u 2650 l/h 925 g/u 3 500 l/u
Mechanische zone (schuim) 217 in.
2
1,400 cm
2
325,5 in
. 2
2 100
cm2
Biologisch volume: 1 gallon 3,9 l 1,5 gallon 5,9 l
Filtratievolume: 3,7 gallones 14 l 5,28 gallon 20 l
Filtercirculatie*: 450 g/u 1,700 l/h 563 g/u 2 130 l/u
Opvoerhoogte (max.): 6,9ft 2,1 m 10,8ft 3,3 m
Wattverbruik 120V/60Hz: 30W 43W
Wattverbruik 230-240V/50Hz: 30W 41W
*Opmerking: debiet werd gemeten met in- en uitlaatslangen van dezelfde lengte en zonder media.
BELANGRIJK
Om uw Fluval FX externe filter optimaal te laten werken, is regelmatig onderhoud
vereist. Als u dat nalaat, kan de filter defect raken en zal u de garantie niet kunnen
inroepen. Door regelmatige reiniging en onderhoud zal u bovendien storingen en
prestatieverlies fors zien afnemen of zelfs volledig kunnen voorkomen. Raadpleeg
het volgende onderhoudsschema.
ONDERHOUDSTABEL
ONDERDELEN MAANDELIJKS OM DE 3 MAANDEN OM DE 6 MAANDEN JAARLIJKS
Magnetische rotor Controle & reiniging Vervangen
Afdichtring motor Controle & reiniging Vervangen
Inlaatbuis/zeef Controle & reiniging
Geribbelde slang Controle & reiniging
Mechanisch schuim Controle & reiniging Halve hoeveelheid
vervangen
Bio Schuim Controle & reiniging Vervangen
BIOMAX Spoelen Halve hoeveelheid
vervangen
Koolstofkussen Vervangen
Bus (binnenzijde)* Controle & reiniging
AQUARIUMONDERHOUD
Dankzij FX filters kan u uw aquarium eenvoudig en efficiënt onderhouden.
Kiezelreiniging
Hiervoor raden wij u het gebruik van de FX kiezelreinigingskit aan. Volg de instructies
die bij uw FX kiezelreinigingskit zitten.
Water verversen
Hiervoor verwijzen wij naar het plastic instructieblad dat bij uw filter zit.
* BELANGRIJK: Tijdens deze handelingen kan er in de filterbus lucht vastzitten die het
vuil op de bodem dooreen kan schudden. Als u de binnenkant van de filterbus niet
regelmatig onderhouden hebt volgens de aanbevelingen in de onderhoudstabel,
kunnen sommige deeltjes terug in het aquarium terecht komen.
LET OP: trek de stekker van toestellen altijd uit het stopcontact wanneer ze niet gebruikt worden, vóór het
aanbrengen of verwijderen van onderdelen, en vóór het schoonmaken. Ruk de kabel nooit los om de stekker
uit het stopcontact te trekken. Hou de stekker vast en trek om hem uit het stopcontact te verwijderen.
ONDERHOUD
PT
84 85
FLUVAL FX6
24
24
24
25
25
26
B
B
C
D
A
A
A
1 1
4
6
5
3
3
E E
15
13
21
17
22
22
20
16
19
18
14
9 9
2
2
7
1010
8
12
1111
PEÇAS DO PRODUTO/PEÇAS DE SUBSTITUIÇÃO
Peça Descrição Quanti-
dade
1 Mangueira estriada 1
2 Conector do aro (1) e clipes (3) 2
3 Ventosas do conector do aro 8
4 Tubo de entrada 1
5 Conectores de borracha 2
6 Ventosa do filtro de entrada 2
7 Filtro de entrada 1
8 Unidade de saída 1
9 Grampo de metal (para mangueira) 2
10 Válvulas AquaStop 2
11 O-ring Click-fit da tampa superior 4
12 O-Ring (tampa do filtro) 1
13 Fixadores da tampa 8
14 Caixa do filtro 1
15 Pega com barra em T 2
16 Válvula de conveniência 1
17 Conjunto do rotor magnético 1
18 Anel de vedação do motor 1
19 Mangueira da válvula de conve-
niência
1
20 Tampão de drenagem 1
21 Unidade da bomba (motor)
e cabo de alimentação
1
22 Calços em borracha 6
23 Cesto de meios - FX4 2
24 Cesto de meios - FX6 3
25 Tabuleiros de meios empilhável 2
26 Filter Lid 1
Número do
item FX4
Número do
item FX6
Quantidade
Peças
sobresselentes
A20236 A20236 1
A20230 A20230 1
A20232 A20232 4
A20225 A20225 1
A20228 A20228 2
A15041 A15041 4
A20221 A20221 1
A20227 A20226 1
A20234 A20234 2
A20216 A20216 1
A20212 A20212 2
A20210 A20210 1
A20215 A20215 1
N/A N/A
A20242 A20241 1
A20219 A20219 1
A20208 A20206 1
A20211 A20207 1
A20237 A20237 1
N/A N/A
A20202 A20201 1
A20121 A20121 4
A20239 1
A20239 1
A20243 A20243 1
N/A N/A
Peça Descrição FX4
Quantidade
FX6
Quantidade
Número do
item FX4
Número do
item FX6
Quantidade
Peças
sobresselentes
A
Espuma
4 6 A228 A228 3
B
Bio-Foam
1 2 A239 A239 2
C
Anéis cerâmicos
(BIOMAX)
2 2 A1456 A1456 1
D
Almofada de carbono
1 1 A249 A249 2
E
Embalagens de meios
2 2 A1428 A1428 2
PT
92 93
INSTALAÇÃO E UTILIZAÇÃO
MUITO IMPORTANTE: Tenha em atenção que assim que ligar a unidade, esta irá iniciar e irá passar
imediatamente pela sequência de purga automática.
1. 2. Abra as alavancas da válvula de ENTRADA e SAÍDA
colocando-as na posição vertical.
2. 3. Ligue a unidade a uma tomada elétrica. A
sequência de purga automática eletrónica irá iniciar.
Ocorrerá o seguinte:
E. A bomba funcionará durante 1 minuto para encher a
caixa do filtro com água do aquário.
F. A bomba parará durante 2 minutos para expulsar o ar
da caixa do filtro.
G. A bomba começará a funcionar novamente; perman-
ecerá ligada e funcionará continuamente até ser
desligada.
Esta sequência irá repetir-se sempre que a unidade for
desligada e novamente ligada.
A cada 12 horas, a bomba parará durante 1 minuto para
expulsar todo o ar que possa ter ficado no interior da
unidade.
ESPECIFICAÇÃO DO FLUVAL FX
FX4 FX6
Capacidade do aquário: 250 galões 1,000 litros 400 galões 1.500 litros
Saída da bomba: 700 g/h 2.650 L/h 925 g/h 3.500 L/h
Área mecânica (espuma) 217 pol.
2
1,400 cm
2
325,5 pol.
2
2.100 cm
2
Volume biológico: 1 galõe 3,9 L 1,5 galões 5,9 L
Volume de filtragem: 3,7 galões 14 L 5,28 galões 20 L
Circulação de filtragem*: 450 g/h 1,700 L/h 563 g/h 2.130 L/h
Altura da cabeça (máx.): 6,9 pés 2,1 m 10,8 pés 3,3 m
Potência 120 V/60 Hz: 30W 43 W
Potência 230-240 V/50 Hz: 30W 41 W
*Nota: As taxas de fluxo foram medidas com mangueiras de entrada e de saída com o mesmo comprimento e sem meios.
IMPORTANTE
Para garantir um funcionamento ideal e adequado do seu Filtro Externo Fluval FX é
necessário efetuar uma manutenção regular. Se não seguir estas advertências, tal
poderá avariar o filtro e irá invalidar a sua garantia. Para além disso, a manutenção
e a limpeza regulares irão reduzir bastante ou prevenir totalmente a ocorrência de
avarias e a redução no desempenho. Consulte o plano de manutenção em baixo.
TABELA DE FREQUÊNCIA DE MANUTENÇÃO
COMPONENTES MENSAL TRIMESTRAL SEMESTRAL ANUAL
Rotor magnético Verificar e limpar Substituir
Anel de vedação do motor Verificar e limpar Substituir
Tubo/filtro de entrada Verificar e limpar
Mangueira estriada Verificar e limpar
Espuma mecânica Verificar e limpar Substituir metade da
quantidade
Bio-Foam Verificar e limpar Substituir
BIOMAX Enxaguar Substituir metade da
quantidade
Almofada de carbono Substituir
Caixa (interior)* Verificar e limpar
MANUTENÇÃO DO AQUÁRIO
Os filtros FX permitem-lhe efetuar uma manutenção fácil e eficiente do seu aquário.
Limpeza da gravilha
Para esta operação recomendamos que utilize o kit de limpeza de gravilha FX. Consulte
as instruções incluídas com o seu Kit de Limpeza de Gravilha FX.
Mudar a água
Para esta operação consulte a folha de instruções plástica incluída com o seu filtro.
* IMPORTANTE: Durante estas operações, pode ficar ar no interior da caixa que pode
agitar a sujidade no fundo. Caso não faça a manutenção regular do interior da caixa,
tal como recomendado na tabela de frequência de manutenção, algumas partículas po-
derão entrar novamente no aquário.
CUIDADO: Desligue sempre quaisquer equipamentos de uma tomada quando não estiver a ser utilizada,
antes de instalar ou retirar quaisquer peças e antes de limpar. Nunca puxe um cabo com força para retirar
uma ficha da tomada. Agarre a ficha e puxe-a para retirá-la da tomada.
MANUTENÇÃO
E1354600 21C16
Printed in Italy
CANADA
Rolf C. Hagen Inc.
20500 Trans Canada Hwy
Baie d’Urfé, Québec H9X 0A2
Tel: 514-457-0914
USA
Rolf C. Hagen (USA) Corp.
305 Forbes Blvd.
Manseld, MA 02048
Tel: (800) 724-2436
UK
Customer Service Department
Rolf C. Hagen (UK) Ltd.
California Drive
Whitwood Industrial Estate,
Castleford WF10 5QH,
West Yorkshire
Tel: 01977 521015
FRANCE
Rolf C. Hagen (France) S.A.
Zone Parisud 4
Boulevard Jean Monnet
F-77388 Combs-la-Ville
Tel: +33 1 64 88 14 18
GERMANY
Hagen Deutschland GmbH & Co. KG
Lehmweg 99-105
25488 Holm
Tel: 04103 / 960-0
MALAYSIA
Rolf C. Hagen (Sea) Sdn. Bhd.
Lot 14A, Jalan 3A, Kawasan
Perusahaan Cheras Jaya
Balakong, 43200 Cheras, Selangor
Darul Ehsan
Tel: + 603 9074 2388
SPAIN
Rolf C. Hagen España S.A.
Avda. de Beniparrell, 11 y 13
P.I. L’ Altero 46460 Silla
Valencia, Spain
Tel: +34 96 120 09 45
ARGENTINA
Hagen S.A. Argentina
Ruta Panamericana - Ramal Escobar Km 33,
5 Colectora Oeste Esq. Benjamin Seaver Área
de Promoción El Triángulo
CP: B1615MRC Malvinas Argentinas,
Buenos Aires, Argentina
Tel: (+543327) 411-591
  • Page 1 1
  • Page 2 2
  • Page 3 3
  • Page 4 4
  • Page 5 5
  • Page 6 6
  • Page 7 7
  • Page 8 8
  • Page 9 9
  • Page 10 10
  • Page 11 11
  • Page 12 12
  • Page 13 13
  • Page 14 14
  • Page 15 15
  • Page 16 16
  • Page 17 17
  • Page 18 18
  • Page 19 19
  • Page 20 20
  • Page 21 21
  • Page 22 22
  • Page 23 23
  • Page 24 24
  • Page 25 25
  • Page 26 26
  • Page 27 27
  • Page 28 28
  • Page 29 29
  • Page 30 30
  • Page 31 31
  • Page 32 32
  • Page 33 33
  • Page 34 34
  • Page 35 35
  • Page 36 36
  • Page 37 37
  • Page 38 38
  • Page 39 39
  • Page 40 40
  • Page 41 41
  • Page 42 42
  • Page 43 43
  • Page 44 44
  • Page 45 45
  • Page 46 46
  • Page 47 47
  • Page 48 48
  • Page 49 49
  • Page 50 50
  • Page 51 51

Fluval FX6 User manual

Type
User manual
This manual is also suitable for

Ask a question and I''ll find the answer in the document

Finding information in a document is now easier with AI