Page is loading ...

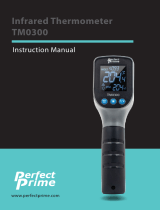
NON-CONTACT
INFRARED THERMOMETER
INSTRUCTIONS
Part #31223
© Copyright 2015 Easthill Group, Inc. 8/15 Instruction Item #31223Q Rev 0
If you have any questions about the use of this product, please contact
The Eastwood Technical Assistance Service Department: 800.544.5118
>>
email: techelp@eastwood.com
PDF version of this manual is available online >> eastwood.com/31223manual
The Eastwood Company 263 Shoemaker Road, Pottstown, PA 19464, USA
US and Canada: 800.345.1178 Outside US: 610.718.8335
Fax: 610.323.6268 eastwood.com

2 Eastwood Technical Assistance: 800.544.5118 >> techelp@eastwood.com To order parts and supplies: 800.345.1178 >> eastwood.com 7
The EASTWOOD NON-CONTACT INFRARED THERMOMETER is compact, rugged and easy to use.
This infrared thermometer safely measures the surface temperatures of hot, hazardous, or hard-to-
reach objects without contact. Simply aim and push the button to read instantaneous temperatures
in less than a second.
The infrared thermometer collects invisible infrared radiation emitted by the object being measured.
This radiation is focused on an optical sensor in the thermometer and converted into an electrical
signal. This signal, along with the emissivity of the material being measured, is used to calculate the
surface temperature at the point of measurement. A red laser pointer helps the user aim the infrared
beam for improved accuracy.
MATERIAL EMISSIVITY (FOR REFERENCE ONLY)
MATERIAL EMISSIVITY MATERIAL EMISSIVITY
Asphalt 0.90 - 0.98 Textile (black) 0.98
Beton Concrete 0.94 Human Skin 0.98
Cement 0.96 Soap Bubble 0.75 - 0.80
Sand 0.90 Charcoal (powder) 0.96
Soil 0.92 - 0.96 Paint 0.80 - 0.95
Water 0.92 - 0.96 Varnish 0.97
Ice 0.96 – 0.98 Rubber (black) 0.94
Snow 0.83 Plastic 0.85 – 0.95
Glass 0.90 – 0.95 Wood 0.90
Ceramic 0.90 – 0.94 Paper 0.70 – 0.94
Marble 0.94 Chromic Oxide 0.81
Gypsum 0.80 – 0.90 Copper Oxide 0.78
Particle Board 0.89 – 0.91 Iron Oxide 0.78 – 0.82
Brick 0.93 – 0.96 Stainless Steel/Aluminum 0.2 – 0.3
SAFETY INFORMATION
In this manual, on the labeling, and all other information provided with this product:
WARNING indicates a hazardous situation which, if not avoided, could result in death or serious injury.
READ INSTRUCTIONS
Thoroughly read and understand this manual before using.
Save for future reference.
LASER RADIATION CAN INJURE EYES
Never point laser directly at eyes or in a direction that may reflect
into someone’s eyes.

6 Eastwood Technical Assistance: 800.544.5118 >> techelp@eastwood.com To order parts and supplies: 800.345.1178 >> eastwood.com 3
SPECIFICATIONS
NOTE:
- Display “AL” indicates ambient temperature is lower than 0˚C (32˚F)
- Display “AH” indicates ambient temperature is higher than 60˚C (140˚F)
- “AL” or “AH” displayed in normal ambient temps may indicate failure
PRECAUTIONS
To maintain accuracy, the thermometer should be protected from the following conditions:
• EMF (electromagnetic fields) from arc welders, induction heaters
and other EMF-emitting devices.
• Thermal shock created by large or sudden changes in ambient temperature.
For best results allow thermometer to stabilize for 1 hour before use.
• Continuous exposure to or storage in extreme temperatures.
• Submersion in water.
PREPARATION
• Objects to be measured should be larger than the diameter of the beam shown in the diagram
below (FIG A).
• As the distance from the object increases, the diameter of the beam increases.
• The smaller the object to be measured, the closer the thermometer must be to the object.
• Most solid surfaces have an emissivity factor (the ability to radiate heat) of ~0.95. Some
shiny surfaces, such as polished metal, may return inaccurate results when measured with an
infrared thermometer. For best results, cover the area to be measured with masking tape or flat
black paint prior to measurement.
D:S=8:1
1.5" @ 12"
3" @ 24"
6" @ 48"
38mm @
304mm
75mm @
600mm
150mm @
1200mm
FIG. A
Temperature range -30˚C to 550˚C (-22˚F to 1022˚F)
Accuracy ±4% or ±4˚C of reading, -30˚C to 0˚C (-22˚F to 32˚F)
±2% or ±2˚C of reading, 0˚C to 100˚C (32˚F to 212˚F)
±4% or ±4˚C of reading, ≥0˚C (212˚F)
Repeatability 1% of reading or 1˚C
Response time 500msec, 95% response
Spectral response 8-14um
Emissivity 0.1-1.0, adjustable
Ambient operating range 0˚C to ~60˚C (32˚F to 140˚F)
Relative humidity 10-95% RH noncondensing
Storage temperature -20˚C to ~60˚C (-4˚F to 140˚F)
Ambient temp range to guarantee accuracy 23˚C to ~28˚C (73˚F to 82˚F)
Weight/dimensions 155g (5.5oz) / 165x72x41mm (6.5”x2.8”x1.6”)
Power 9V battery, 6F22 or NEDA 1604
Distance to spot ratio 8:1

4 Eastwood Technical Assistance: 800.544.5118 >> techelp@eastwood.com To order parts and supplies: 800.345.1178 >> eastwood.com 5
LCD DISPLAY KEY
A. Laser pointer “on” indicator
B. High temperature alert indicator
C. Low temperature alert indicator
D. Data hold indicator
E. Measurement result
F. Emissivity indicator
A B C D
F
INSTRUCTIONS FOR USE
1. Remove the battery cover (8) and install battery, if needed (FIG. B). Pull the trigger and check
LCD reading (FIG C) to confi rm operation. Reading will display for 7 seconds after releasing
the trigger.
2. Aim the thermometer toward the object to be measured.
3. Use the laser pointer for accuracy.
4. Pull the trigger and hold.
5. Slowly move the thermometer back and forth, then up and down, to locate the hottest spot
on the object.
MAINTENANCE
• Lens cleaning – Use compressed air to remove loose particles. Gently wipe away any remain-
ing debris with a damp cotton cloth. Do not use solvents to clean lens.
• Case cleaning – Use a damp cloth and mild soap to clean case.
• Remove battery from thermometer when not in use for extended periods.
E
THERMOMETER FUNCTION KEY
1. TRIGGER – Pull to turn thermometer on. The instantaneous temperature at the measurement
point is displayed on “E” on the LCD display (FIG. C).
2. LASER POINTER BUTTON – Press to toggle between “on” and “off.”
3. BACKLIGHT/UP BUTTON – Press to switch backlighting on and off as needed during use.
In “Alarm Temperature” and “Setting Emissivity” modes, press to increase setting value.
4. MODE BUTTON – Press to change between measurement modes:
MAX – Displays the maximum temperature measured during the duration while the trigger
was depressed. Resets when trigger is pulled again.
MIN – Displays the minimum temperature measured during the duration while the trigger
was depressed. Resets when trigger is pulled again.
AVG – Calculates the average of all temperatures measured during the time while the
trigger was depressed. Resets when trigger is pulled again.
HAL – High temperature alert. Using the UP or DN button, set the desired high alert
temperature. When the temperature exceeds the set temperature, the LCD readout
will display “H”.
LAL – Low temperature alert. Using the UP or DN button, set the desired low alert
temperature. When the temperature drops below the set temperature, the LCD readout
will display “L”.
5. T/DN BUTTON – Press to change between ˚C and ˚F on display. In “Alarm Temperature” and
“Setting Emissivity” modes, press to decrease setting value.
6. SET BUTTON – Press to set emissivity. Use UP or DN buttons to adjust between 0.1 and 1.0,
then press SET again to exit setting mode.
7. LCD READOUT – See display key above
8. BATTERY DOOR – Use fi nger indents
to pry door open.
1
2
3
4
5
6
7
8
FIG. C
FIG. B
✓
✓
✓
✓
✓
✓
✓
✓
✓
✓
✓
✓
✓
✓

6 Eastwood Technical Assistance: 800.544.5118 >> techelp@eastwood.com To order parts and supplies: 800.345.1178 >> eastwood.com 3
SPECIFICATIONS
NOTE:
- Display “AL” indicates ambient temperature is lower than 0˚C (32˚F)
- Display “AH” indicates ambient temperature is higher than 60˚C (140˚F)
- “AL” or “AH” displayed in normal ambient temps may indicate failure
PRECAUTIONS
To maintain accuracy, the thermometer should be protected from the following conditions:
• EMF (electromagnetic fields) from arc welders, induction heaters
and other EMF-emitting devices.
• Thermal shock created by large or sudden changes in ambient temperature.
For best results allow thermometer to stabilize for 1 hour before use.
• Continuous exposure to or storage in extreme temperatures.
• Submersion in water.
PREPARATION
• Objects to be measured should be larger than the diameter of the beam shown in the diagram
below (FIG A).
• As the distance from the object increases, the diameter of the beam increases.
• The smaller the object to be measured, the closer the thermometer must be to the object.
• Most solid surfaces have an emissivity factor (the ability to radiate heat) of ~0.95. Some
shiny surfaces, such as polished metal, may return inaccurate results when measured with an
infrared thermometer. For best results, cover the area to be measured with masking tape or flat
black paint prior to measurement.
D:S=8:1
1.5" @ 12"
3" @ 24"
6" @ 48"
38mm @
304mm
75mm @
600mm
150mm @
1200mm
FIG. A
Temperature range -30˚C to 550˚C (-22˚F to 1022˚F)
Accuracy ±4% or ±4˚C of reading, -30˚C to 0˚C (-22˚F to 32˚F)
±2% or ±2˚C of reading, 0˚C to 100˚C (32˚F to 212˚F)
±4% or ±4˚C of reading, ≥100˚C (212˚F)
Repeatability 1% of reading or 1˚C
Response time 500msec, 95% response
Spectral response 8-14um
Emissivity 0.1-1.0, adjustable
Ambient operating range 0˚C to ~60˚C (32˚F to 140˚F)
Relative humidity 10-95% RH noncondensing
Storage temperature -20˚C to ~60˚C (-4˚F to 140˚F)
Ambient temp range to guarantee accuracy 23˚C to ~28˚C (73˚F to 82˚F)
Weight/dimensions 155g (5.5oz) / 165x72x41mm (6.5”x2.8”x1.6”)
Power 9V battery, 6F22 or NEDA 1604
Distance to spot ratio 8:1

2 Eastwood Technical Assistance: 800.544.5118 >> techelp@eastwood.com To order parts and supplies: 800.345.1178 >> eastwood.com 7
The EASTWOOD NON-CONTACT INFRARED THERMOMETER is compact, rugged and easy to use.
This infrared thermometer safely measures the surface temperatures of hot, hazardous, or hard-to-
reach objects without contact. Simply aim and push the button to read instantaneous temperatures
in less than a second.
The infrared thermometer collects invisible infrared radiation emitted by the object being measured.
This radiation is focused on an optical sensor in the thermometer and converted into an electrical
signal. This signal, along with the emissivity of the material being measured, is used to calculate the
surface temperature at the point of measurement. A red laser pointer helps the user aim the infrared
beam for improved accuracy.
MATERIAL EMISSIVITY (FOR REFERENCE ONLY)
MATERIAL EMISSIVITY MATERIAL EMISSIVITY
Asphalt 0.90 - 0.98 Textile (black) 0.98
Beton Concrete 0.94 Human Skin 0.98
Cement 0.96 Soap Bubble 0.75 - 0.80
Sand 0.90 Charcoal (powder) 0.96
Soil 0.92 - 0.96 Paint 0.80 - 0.95
Water 0.92 - 0.96 Varnish 0.97
Ice 0.96 – 0.98 Rubber (black) 0.94
Snow 0.83 Plastic 0.85 – 0.95
Glass 0.90 – 0.95 Wood 0.90
Ceramic 0.90 – 0.94 Paper 0.70 – 0.94
Marble 0.94 Chromic Oxide 0.81
Gypsum 0.80 – 0.90 Copper Oxide 0.78
Particle Board 0.89 – 0.91 Iron Oxide 0.78 – 0.82
Brick 0.93 – 0.96 Stainless Steel/Aluminum 0.2 – 0.3
SAFETY INFORMATION
In this manual, on the labeling, and all other information provided with this product:
WARNING indicates a hazardous situation which, if not avoided, could result in death or serious injury.
READ INSTRUCTIONS
Thoroughly read and understand this manual before using.
Save for future reference.
LASER RADIATION CAN INJURE EYES
Never point laser directly at eyes or in a direction that may reflect
into someone’s eyes.

NON-CONTACT
INFRARED THERMOMETER
INSTRUCTIONS
Part #31223
© Copyright 2015 Easthill Group, Inc. 8/15 Instruction Item #31223Q Rev 0
If you have any questions about the use of this product, please contact
The Eastwood Technical Assistance Service Department: 800.544.5118
>>
email: techelp@eastwood.com
PDF version of this manual is available online >> eastwood.com/31223manual
The Eastwood Company 263 Shoemaker Road, Pottstown, PA 19464, USA
US and Canada: 800.345.1178 Outside US: 610.718.8335
Fax: 610.323.6268 eastwood.com
/


