Page is loading ...

L6232P
PO Box 1708
Ponca City, OK 74602
1-800-546-3729
For replacement bags or to order additional
tools or accessories,
visit us at
www.vacumaid.com
or give us a call at
1-800-221-1862
To register your product online, go to
www.vacumaid.com/registration
7/2014
OWNERS
MANUAL
READ BEFORE OPERATING YOUR SYSTEM
®

• Do not leave room when hose is
plugged in to the inlet. Disconnect power
before servicing.
• Electric shock could occur if used on wet
surfaces.
• Do not allow to be used as a toy. Close
attention is necessary when used by or
near children.
• Use only as described in this manual.
Use only those attachments that are rec-
ommended.
• Do not use with damaged cord or plug.
If applicance is not working as it should, has
been dropped, damaged, left outdoors, or
dropped into water, return it to a service
center.
• Do not pull or carry by cord, use cord as
a handle, close a door on cord, or pull cord
around sharp edges or corners. Do not run
appliance over cord. Keep cord away from
heated surfaces.
• Do not unplug by pulling on cord. To
unplug, grasp the plug, not the cord.
• Do not handle plug or appliance with
wet hands.
• Do not unplug hose from system by
pulling on vacuum hose. To unplug hose,
grasp the cu , located on the end of the
hose, pull out with a twisting motion.
• Do not put anything into vacuum inlet or
vents. Keep inlet free of things that might
slow air ow, such as lint, dust and hair. Do
not use the vacuum system if something
is blocking an opening.
When using an electrical appliance, basic precautions should always be
followed, including the following:
* Read all instructions before using this appliance.
WARNING: To reduce the risk of re, electric shock or injury:
* Always follow these safety instructions
IMPORTANT SAFETY INSTRUCTIONS
• If equipped with an air turbine power
brush unplug the vacuum hose before
attaching power brush. Keep ngers,
hands and toes away from the base of the
power brush. Failure to do so could result in
injury from moving parts.
• Not intented as a wet pickup. Do not use
to pick up liquids of any kind. Doing so will
void warranty.
• In the event the power unit should
get wet, do not use the vacuum system
until it has been properly serviced and
examined by a serviceman or installer.
• Keep hair, loose clothing, ngers and all
parts of the body away from wand, other
openings and moving parts.
• If so equipped, do not use your vacuum
system without dustbag in place.
• Always disconnect vacuum system before
emptying dirt canister or replacing dustbag.
• Use extra care when cleaning on stairs.
• Do not use to pick up ammable or com-
bustible liquids such as gasoline or use in areas
where such liquids may be present.
• Do not use to pick up dry wall or cement
dust. Doing so will void warranty.
• Do not pick up anything that is burn-
ing or smoking, such as cigarettes,
matches or hot ashes.
• When nished put the vacuum hose and at-
tachments away to prevent tripping accidents.
• For a grounded appliance, connect to a
properly grounded outlet only. See
grounding instructions.
ADD ONS & UPGRADES
Hoses
HS130
HS150
Wands
WO119P
WPO218
W419C
W328R
Tools
CT100
CT530/630
DB530/630
UT530/630
FB215BLK
FT220
PB250
MSLT1
CT6
IUT200
w/ HC111BL
30’ Hose
50’ Hose
Plastic Telescopic Wand
Plastic Curved Wand
Chrome Telescopic Wand
Chrome Curved Wand
Flexible Crevice Tool
Crevice Tool
Dusting Brush
Upholstery Tool
12” Floor Tool with Bristles
Notched Floor Tool (no bristles)
Rug Rat Air Turbine brush
Multi Surface Lint Tool
Mini-Vac Attachment Kit
Upholstery Car Tool with cu
Caddy Bag
Wall Wand Holder
Hose Hanger - for 30’ hose
Hose Hanger - for 50’ hose
Plastic Hose Cu 1-1/4”
Hose to Hose Cu ,
threaded both ends
GV PRO Replacement Motor
GV Replacement Motor
Motor Gasket
Replacement GV lid
Bag Inlet Fitting
Utility Valve with Grommet
2”x1.705 Reducer Coupling
GV Bushing
Exhaust Stem Fitting
Replacement Wall Mount Bracket
HEPA Bag (3 pk)
Tool Storage
CB180
WWH1
H431
H231
Cu s
HV109BL
HV108
Motors & Replacements
MB122264
MB119804
P107B
DC12005AS
BIF125
5584
PF204D
PF125A
EXF16
GVB
HPB2HPK
Great addition to your VacuMaid® Garage Vac
when you have pets in the home. Not only
eliminate unwanted fur from your furnishings
but also your pets. Great for grooming.
PET PACK
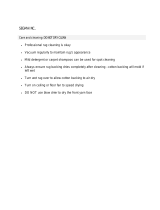
For on the job personnel cleaning, where
they are especially dirty or dusty from their
working environment such as our at baker-
ies, metal shavings at mill, etc For these spe-
cialized cleaning purposes, this tool set will
give you the tools necessary for personnel
cleaning. Use to vacuum o clothing.
PERSONNEL VAC PACK
HS130 1-1/4" X 30' Silver Hose
HV109BL Hose to Inlet Connector
UT530BL Upholstery Tool Only - Black
H431 Plastic Hose Hanger
LARGE ANIMAL
CC206 Curry Comb
HV109SC Plastic Swivel Cu for 1-1/4"
FT220 Notched Floor and Rug Tool
SMALL ANIMAL
PT530 Pet Grooming Tool
HV109SC Plastic Swivel Cu for 1-1/4”
FT220 Notched Floor and Rug Tool

Vacuum cleaner won’t run
• Be sure the unit is plugged in.
• Be sure you turned the system on.
• Check your circuit breaker panel.
Make sure there is not too much on
that circuit causing it to trip.
Blowing function is not working
• Be sure your hose is plugged into the
exhaust hole on the side of the unit.
• Be sure you have the additional cu
inserted in the utility valve on the
front of the unit. If this door is not left
open, the blowing feature will not
work properly.
• Popping & air leakage is normal.
Low suction or no suction
• First, see above.
• Usually low suction is caused by a full
bag. Change your bag. See
Operating Instructions for details.
• Is the dirt canister lid o or loose?
Be sure the lid is replaced squarely on
the top of the canister and that the
gasket has not been pulled loose or it
could allow a vacuum leak. If gasket is
loose, reattach with contact cement
or super glue.
• Is there blockage in the hose or tools?
Disconnect the hose from power unit,
use a blunt item to push the clog out.
If the blockage is in the tools, remove it.
• Is PP101 Protector Plate in place?
Lift the lid. The metal plate should
be located just beneath the HEPA bag
inside the can, laying at with the
smooth side up.
Most problems that develop can be xed easily by following the below suggested solutions:
TROUBLESHOOTING
CAUTION: Do not use when rug (or oor) is wet.
ATTENTION: Ne pas utiliser lorsque le tapis (ou le plancher) est moduille.
SAVE THESE INSTRUCTIONS
-WARNING-
ELECTRIC SHOCK COULD OCCUR IF USED ON WET SURFACES
FOR CORD CONNECTED APPLIANCE
This appliance must be grounded. If it should malfunction or breakdown, grounding
provides a path of least resistance for electric current to reduce the risk of electric
shock. Your vacuum system is supplied with an electrical cord having a grounding
pin. It is recommended that this plug be used only with an appropriate outlet that
is properly installed and grounded in accordance with all local codes and ordinanc-
es. This appliance is for use on a nominal 120-volt circuit (U.S. only) or 230/250 volt
circuits where applicable, and has a grounded plug that looks like the plug shown
in Figure A. A temporary adapter, that looks like the adapter illustrated in Figure
B, may be used to connect this plug to a 2-pole receptacle as shown in Figure B if a
properly grounded outlet is not available.
GROUNDING INSTRUCTIONS
The temporary adapter should be used only until a properly grounded outlet (Fig-
ure A) can be installed by a quali ed electrician. NOTE: Temporary adapters are
not permitted in Canada. The green colored rigid ear, lug or the like, extending
from the adapter, must be connected to a permanent ground such as a properly
grounded outlet box cover. Whenever the adapter is used, it must be held in place
by a metal screw.
DANGER---
GROUNDING
PIN
GROUNDED
OUTLET
Improper connection of the equipment - grounding
conductor can result in a risk of electric shock. Check with a quali ed electrician
or your installer if you are in doubt as to whether the outlet is properly grounded.
Do not modify the plug provided with the appliance - if it will not t the outlet
use a temporary adaptor as shown and have a proper outlet installed by a quali ed
electrician as soon as possible.
ADAPTER
METAL
SCREW
TAB FOR
GROUNDING SCREW
FIGURE A
FIGURE B
Your vacuum does not require any oil. The bearings in the motor are greased
and sealed for life. Do not add lubricant.
* THIS IS NOT A WET VAC *

Cannot be plumbed for use as a central vac.
DO NOT USE AS A WET VAC
Other items included with this system...
Cu
For use when using the
Blowing Feature.
See Pg. 7 for details.
HEPA Bag
Must be installed onto the bag stem before use.
See Pg. 8 for details.
Part # HPB2H
3
Protector Plate (PP101)
This plate should already be
installed in your unit when you
receive it, just below the HEPA bag.
See Pg. 5 for details.
Utility Valve
Use for “Vacuuming”
(Must be held open with
additional cu , when
wanting to use the Blow
feature)
Exhaust
Use for “Blowing”
Lid
HEPA Bag is located inside the
unit, below the lid.
On/O switch
Parts
1. Hose 2. Hose Hanger 3. Dusting
Brush 4. Upholstery Tool 5. Crevice Tool
6. Telescopic Wand 7. Floor Brush
8. Tool Storage Bag
1
2
3
4
5
6
7
8
Additional tools needed for installation:
• Level
• Rubber Mallot
• Electric Drill
• 1/8” drill bit
(If mounting on block or concrete wall,
you will need masonry bit & plastic or
lead anchors - not provided)
WARRANTY
ITEMS COVERED
* The GARAGE VAC by VacuMaid system is warranted
for a period of 5 years. Hoses, oor brushes, and
cleaning tools are warranted for a period of 2 years.
All warranties commence from the original date of
purchase. Any warranted defects will be repaired
or replaced without cost to the customer except for
transportation charges and/or charges associated
with removal and reinstallation. This Warranty is given
only to the original owner and cannot be transferred.
ITEMS NOT COVERED
This Warranty does not cover such conditions as normal
wear to the power unit resulting from normal usage or
from damage caused by accidents, negligence, misuse,
or improper alteration, or from damage by re, ood, or
other acts of God. Motor brush wear is normal and is not
considered to be a defect in material or workmanship.
Further, this Warranty does not apply to vacuum tubing,
ttings, inlets, or to the act of installing the GARAGE VAC
by VacuMaid system, including installation materials,
installation damages, or damage to the power unit
caused by defective or improper installation of the
GARAGE VAC by VACUMAID. This warranty also does
not cover pick up, delivery or house calls.
Picking up liquid of any kind will void warranty.
5 YEAR LIMITED* WARRANTY
Domestic Residential Use only
This Warranty gives you specifi c legal rights, you may also have other rights
which vary from State to State (or Province).
LINDSAY MANUFACTURING, INC. / P.O. BOX 1708 / PONCA CITY, OK 74602
Garage Vac by VacuMaid is the registered trademark of Lindsay Manufacturing, Inc.
DISCLAIMER OF OTHER WARRANTIES
LINDSAY MANUFACTURING, INC., HEREBY DISCLAIMS ALL LIABILITY WHATSOEVER FOR ANY INCIDENTAL OR
CONSEQUENTIAL DAMAGES WHICH OCCUR AS A RESULT OF DEFECTS IN MATERIAL AND WORKMANSHIP IN THE
PRODUCT. LINDSAY MANUFACTURING, INC., ALSO HEREBY DISCLAIMS ALL IMPLIED WARRANTIES, INCLUDING THE
WARRANTIES OF MERCHANTABILITY AND FITNESS FOR A PARTICULAR PURPOSE.
SOME STATES (or provinces) DO NOT ALLOW THE EXCLUSION OR LIMITATION OF INCIDENTAL OR CONSEQUENTIAL
DAMAGES, SO THE ABOVE LIMITATION OR EXCLUSION MAY NOT APPLY TO YOU. SOME STATES (or provinces) DO
NOT ALLOW LIMITATIONS ON HOW LONG AN IMPLIED WARRANTY LASTS, SO THE ABOVE LIMITATIONS MAY NOT
APPLY TO YOU. TO THE EXTENT THAT ANY LAW PROHIBITS, IN WHOLE OR PART, THE LIMITATION OF IMPLIED
WARRANTIES, ANY IMPLIED WARRANTY APPLICABLE TO THE PRODUCT SHALL NOT EXCEED A PERIOD OF 5 YEARS
FOR SINGLE RESIDENTIAL APPLICATIONS OR 90 DAYS FOR COMMERCIAL/INDUSTRIAL AND OTHER APPLICATIONS.
This warranty is exclusive and is in lieu of all other expressed warranties, and in lieu of all other obligations or liabilities on
the part of Lindsay Manufacturing, Inc., for damage to person or property. We do not authorize any person, including any
dealer, agent, supplier, or representative of Lindsay Manufacturing, Inc., to make any other warranty or guarantee on our
behalf, or assume for us any liability on the GARAGE VAC by VACUMAID Vacuum System other than that contained herein.
No oral representations regarding warranty shall be binding upon Lindsay Manufacturing, Inc., whether extended before
or after sale of that product.
TERMS OF WARRANTY AND RESTRICTIONS
*The 5 year/2 year term of this limited Warranty is
e ective for single family residential applications only.
In commercial/industrial and other applications, this
limited warranty is valid for ninety (90) days only from
the date of purchase for all components of the system.
In commercial/industrial and other applications, this
warranty shall be for the bene t only of the original
owner of the GARAGE VAC by VacuMaid system. War-
ranty will be void if service is provided by anyone other
than an authorized VACUMAID dealer using VACUMAID
replacement parts.
HOW TO INVOKE THIS WARRANTY
If it should ever become necessary to invoke the rights
and privileges of this Warranty during the period of
e ectiveness the following procedures should be
followed:
a) Refer to operating maintenance instructions
to ascertain that a malfunction of the vacuum
cleaner has actually occurred.
b) Notify the VACUMAID representative, at
1-800-221-1862, that you have a problem
and describe the nature of your di culty.

This system uses a sealed HEPA type bag. The mass of
dirt and debris is picked up by your vacuum and depos-
ited into the bag inside your dirt canister.
Emptying your Dirt Can
To remove accumulation, follow these steps:
Remove the lid by lifting straight up. There are no
hinges or clamps. (Fig. 1)
Remove the bag by sliding the rubber gasket
that surrounds the hole in the paper bag o the
plastic inlet stem that protrudes through the front
of the canister. (Fig. 2)
Once the bag is o of the inlet stem, seal the bag
by removing the backing from the tab and cover
the hole with the ap. Press the ap so that it
securely seals over the hole (Fig. 3). This will help
prevent dirt and dust from escaping. Now, lift the
paper bag from the dirt canister and place in a
suitable trash container.
Take a new bag and extend it fully (Fig. 4).
Place it in the canister, and slide its rubber gasket
onto the inlet stem until the rubber gasket drops
into place in the ridge that is around the inlet
stem (Fig. 5).
Carefully replace the lid onto the dirt canister to
ensure that it seals properly. Not doing so could
cause a vacuum leak and reduce the cleaning
e ciency of your system.
1
2
3
4
5
If bag breaks...
In the event of a bag breaking while in the unit, it is
necessary to lift the plate located under the bag and
clean the small screen.
The bag should be changed or cleaned when there is 3-6 inches of dirt or
anytime there is a noticeable reduction of air ow at the cleaning
HOW OFTEN SHOULD I CHECK OR EMPTY THE HEPA BAG?
?
tool. Initially, the dirt canister should be checked or emptied weekly until some
idea can be obtained as to how long it takes to half ll the canister under your
normal cleaning routine. All vacuum systems will function more e ectively
if they are emptied frequently. Under no circumstances should you allow your
dirt canister to become more than 3/4 full before emptying.
5
6
MAINTENANCE
Installing a New Bag
7
4
3
2
1
Installation & Mounting
CHOOSE THE MOUNTING LOCATION
• The unit must be mounted within 5 feet of an
electrical outlet. Do not use an extension cord.
• The unit should be mounted so that it is in a dry
location and out of the way, but still accessible for
emptying and accessing the utility valves.
Suggested mounting: Minimum of 12 inches
between unit lid and ceiling or shelving.
• Do not install this unit where ambient temperature
regularly exceeds 120 degrees F.
• Vacuums must breathe...do not enclose. Be sure to
mount 6 inches from sidewalls.
MOUNTING THE WALL BRACKET SHEETROCK *
If installing direct from the factory, you will rst need
to slide the wall bracket out of the unit bracket (packed
this way for shipping purposes). These brackets are
found on the back of the unit.
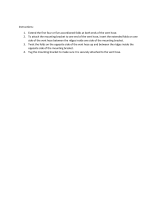
1. Find center of stud and mount the wall bracket.
Note, the bracket mounts in the middle of the unit,
so you will need to mount approx. 3” below your
desired unit height. See g. 1 for more details.
2. Use wall hanger bracket as a template. Use the two
vertical holes (approximately 10” apart). Then, mark
the location on the stud.
3. Use a 1/8” drill bit and drill two pilot holes for these
two vertical holes.
4. Mount the wall hanger bracket with washers and lag
screws provided. (Side grommets are for vibration.
Use the two vertical holes for mounting.)
5. Tighten screws until the washers are snug against
the rubber grommets. (Fig. 2)
ATTACHING UNIT TO MOUNTING BRACKET
Mount the VacuMaid® Garage Vac by sliding the attached
unit bracket onto the wall bracket (Fig. 3) and slide it
down until the unit rests securely into the bracket.
MOUNTING THE HOSE HANGER
Mount high enough so you can loop your hose only
four times and still clear the oor.
Predrill holes with 1/8” drill bit. Mount to the stud using
the two screws provided. (Fig. 4)
Fig. 1 You will need to be able to
remove the bag from the top of
the unit. Be sure to leave enough
room when mounting.
Fig. 2 Mount the wall bracket.
Fig. 3 Slide the unit bracket into
the mounted wall bracket.
*If mounting on a block or concrete wall, drill the holes with masonry bit and insert plastic or lead anchors (not included).
If mounting on plaster, wall board or panel walls, be sure mounting bolts enter studs.
Fig. 4 Mount the hose hanger.
4

FIRST TIME USE
1 Make sure the PP101 Protector Plate is in place. This
is necessary for proper suction.
Upon receiving your vacuum system, lift o the lid.
The protector plate should be located inside the can
just below the HEPA bag.
The protector plate is installed correctly when it lays
at, prong side down, directly under the HEPA bag.
The warning label should be facing up. The plate
provides a barrier between the HEPA bag and mesh
screen. This allows air to circulate preventing the mo-
tor from overheating.
Do not to throw this part away.
PP101
Protector Plate
Protector plate must be
installed properly for the
vacuum to work
Before using your system for the rst time, follow these 3 steps.
2 Install the HEPA bag onto the inlet inside the canister.
First, take the bag and fully expand it.
Then place it in the canister and slide its gasket onto the
inlet stem until it drops into place in the ridge that is
around the inlet stem.
Replace the lid onto the dirt canister and ensure that it
seals properly.
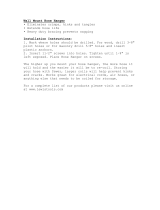
3 You will need to attach the curved wand to the hose.
To do so, you will twist the wand to the LEFT as you
thread it onto the hose. Note: This is the opposite direc-
tion of typical threading.
REMINDER: This is not a wet pickup and cannot be used with liquid.
Doing so will void warranty.
Vacuuming
Inserting the hose
The hose connects to the system through the utility valve
inlet on the front of the unit by lifting the door open and
inserting the hose. (Fig. 1)
See below for using your attachments & cleaning tools.
On/O Switch
Insert the hose before turning the unit on.
The system is turned on and o by ipping
the switch on the side of the unit.
Blowing
The exhaust will operate as a light blower for your shop
or garage. This feature does not replace a leaf blower.
(Popping noise & some air leakage is common.)
To operate the blowing feature:
Attach the hose to the black Exhaust/Blow Stem located
on the side of the unit. (Fig. 2)
For this feature to operate, you must also open the utility
valve on the front of the unit and insert the additional
cu that is included with your system. (Fig. 3) This must
remain inserted to hold the door open for the blow
feature to work.
When nished, turn o the unit rst, then remove both
the hose and cu from the two inlets.
USING YOUR SYSTEM
6
2
1
3
Telescopic Wand
Provides you extra length for oor
cleaning or reaching high areas.
To use: Adjust by pressing down on the
ratcheting mechanism in the middle of the
wand to release and extend.
Floor Brush For
cleaning light dirt
& dust on hard
oor surfaces.
To use: Attach to
telescopic wand and go back and forth over
the area to be cleaned. Do not force the front
of the brush down when moving forward.
Allow the brush to gently glide across the oor
to pick up larger debris.
(
FT220 oor tool is recommended for larger debris.)
USING YOUR ATTACHMENTS & CLEANING TOOLS
c
PREMIUM CLEANING TOOLS
All cleaning tools will attach to either
the hose end or the telescopic wand
by pushing rmly onto the end.
a
b
a) Upholstery Tool
Works well for cleaning
car upholstery & carpet.
b) Crevice Tool
Reach into cracks and
crevices that are hard to
reach.
c) Dusting Brush
Use for dusting shelves,
tables, dashboards, etc.
Hose Hanger Loop hose on hanger
approx. 4-5 times or loop hose on oor
and then pick up and hang on hanger.

This system uses a sealed HEPA type bag. The mass of
dirt and debris is picked up by your vacuum and depos-
ited into the bag inside your dirt canister.
Emptying your Dirt Can
To remove accumulation, follow these steps:
Remove the lid by lifting straight up. There are no
hinges or clamps. (Fig. 1)
Remove the bag by sliding the rubber gasket
that surrounds the hole in the paper bag o the
plastic inlet stem that protrudes through the front
of the canister. (Fig. 2)
Once the bag is o of the inlet stem, seal the bag
by removing the backing from the tab and cover
the hole with the ap. Press the ap so that it
securely seals over the hole (Fig. 3). This will help
prevent dirt and dust from escaping. Now, lift the
paper bag from the dirt canister and place in a
suitable trash container.
Take a new bag and extend it fully (Fig. 4).
Place it in the canister, and slide its rubber gasket
onto the inlet stem until the rubber gasket drops
into place in the ridge that is around the inlet
stem (Fig. 5).
Carefully replace the lid onto the dirt canister to
ensure that it seals properly. Not doing so could
cause a vacuum leak and reduce the cleaning
e ciency of your system.
1
2
3
4
5
If bag breaks...
In the event of a bag breaking while in the unit, it is
necessary to lift the plate located under the bag and
clean the small screen.
The bag should be changed or cleaned when there is 3-6 inches of dirt or
anytime there is a noticeable reduction of air ow at the cleaning
HOW OFTEN SHOULD I CHECK OR EMPTY THE HEPA BAG?
?
tool. Initially, the dirt canister should be checked or emptied weekly until some
idea can be obtained as to how long it takes to half ll the canister under your
normal cleaning routine. All vacuum systems will function more e ectively
if they are emptied frequently. Under no circumstances should you allow your
dirt canister to become more than 3/4 full before emptying.
5
6
MAINTENANCE
Installing a New Bag
7
4
3
2
1
Installation & Mounting
CHOOSE THE MOUNTING LOCATION
• The unit must be mounted within 5 feet of an
electrical outlet. Do not use an extension cord.
• The unit should be mounted so that it is in a dry
location and out of the way, but still accessible for
emptying and accessing the utility valves.
Suggested mounting: Minimum of 12 inches
between unit lid and ceiling or shelving.
• Do not install this unit where ambient temperature
regularly exceeds 120 degrees F.
• Vacuums must breathe...do not enclose. Be sure to
mount 6 inches from sidewalls.
MOUNTING THE WALL BRACKET SHEETROCK *
If installing direct from the factory, you will rst need
to slide the wall bracket out of the unit bracket (packed
this way for shipping purposes). These brackets are
found on the back of the unit.
1. Find center of stud and mount the wall bracket.
Note, the bracket mounts in the middle of the unit,
so you will need to mount approx. 3” below your
desired unit height. See g. 1 for more details.
2. Use wall hanger bracket as a template. Use the two
vertical holes (approximately 10” apart). Then, mark
the location on the stud.
3. Use a 1/8” drill bit and drill two pilot holes for these
two vertical holes.
4. Mount the wall hanger bracket with washers and lag
screws provided. (Side grommets are for vibration.
Use the two vertical holes for mounting.)
5. Tighten screws until the washers are snug against
the rubber grommets. (Fig. 2)
ATTACHING UNIT TO MOUNTING BRACKET
Mount the VacuMaid® Garage Vac by sliding the attached
unit bracket onto the wall bracket (Fig. 3) and slide it
down until the unit rests securely into the bracket.
MOUNTING THE HOSE HANGER
Mount high enough so you can loop your hose only
four times and still clear the oor.
Predrill holes with 1/8” drill bit. Mount to the stud using
the two screws provided. (Fig. 4)
Fig. 1 You will need to be able to
remove the bag from the top of
the unit. Be sure to leave enough
room when mounting.
Fig. 2 Mount the wall bracket.
Fig. 3 Slide the unit bracket into
the mounted wall bracket.
*If mounting on a block or concrete wall, drill the holes with masonry bit and insert plastic or lead anchors (not included).
If mounting on plaster, wall board or panel walls, be sure mounting bolts enter studs.
Fig. 4 Mount the hose hanger.
4

FIRST TIME USE
1 Make sure the PP101 Protector Plate is in place. This
is necessary for proper suction.
Upon receiving your vacuum system, lift o the lid.
The protector plate should be located inside the can
just below the HEPA bag.
The protector plate is installed correctly when it lays
at, prong side down, directly under the HEPA bag.
The warning label should be facing up. The plate
provides a barrier between the HEPA bag and mesh
screen. This allows air to circulate preventing the mo-
tor from overheating.
Do not to throw this part away.
PP101
Protector Plate
Protector plate must be
installed properly for the
vacuum to work
Before using your system for the rst time, follow these 3 steps.
2 Install the HEPA bag onto the inlet inside the canister.
First, take the bag and fully expand it.
Then place it in the canister and slide its gasket onto the
inlet stem until it drops into place in the ridge that is
around the inlet stem.
Replace the lid onto the dirt canister and ensure that it
seals properly.
3 You will need to attach the curved wand to the hose.
To do so, you will twist the wand to the LEFT as you
thread it onto the hose. Note: This is the opposite direc-
tion of typical threading.
REMINDER: This is not a wet pickup and cannot be used with liquid.
Doing so will void warranty.
Vacuuming
Inserting the hose
The hose connects to the system through the utility valve
inlet on the front of the unit by lifting the door open and
inserting the hose. (Fig. 1)
See below for using your attachments & cleaning tools.
On/O Switch
Insert the hose before turning the unit on.
The system is turned on and o by ipping
the switch on the side of the unit.
Blowing
The exhaust will operate as a light blower for your shop
or garage. This feature does not replace a leaf blower.
(Popping noise & some air leakage is common.)
To operate the blowing feature:
Attach the hose to the black Exhaust/Blow Stem located
on the side of the unit. (Fig. 2)
For this feature to operate, you must also open the utility
valve on the front of the unit and insert the additional
cu that is included with your system. (Fig. 3) This must
remain inserted to hold the door open for the blow
feature to work.
When nished, turn o the unit rst, then remove both
the hose and cu from the two inlets.
USING YOUR SYSTEM
6
2
1
3
Telescopic Wand
Provides you extra length for oor
cleaning or reaching high areas.
To use: Adjust by pressing down on the
ratcheting mechanism in the middle of the
wand to release and extend.
Floor Brush For
cleaning light dirt
& dust on hard
oor surfaces.
To use: Attach to
telescopic wand and go back and forth over
the area to be cleaned. Do not force the front
of the brush down when moving forward.
Allow the brush to gently glide across the oor
to pick up larger debris.
(
FT220 oor tool is recommended for larger debris.)
USING YOUR ATTACHMENTS & CLEANING TOOLS
c
PREMIUM CLEANING TOOLS
All cleaning tools will attach to either
the hose end or the telescopic wand
by pushing rmly onto the end.
a
b
a) Upholstery Tool
Works well for cleaning
car upholstery & carpet.
b) Crevice Tool
Reach into cracks and
crevices that are hard to
reach.
c) Dusting Brush
Use for dusting shelves,
tables, dashboards, etc.
Hose Hanger Loop hose on hanger
approx. 4-5 times or loop hose on oor
and then pick up and hang on hanger.

Vacuum cleaner won’t run
• Be sure the unit is plugged in.
• Be sure you turned the system on.
• Check your circuit breaker panel.
Make sure there is not too much on
that circuit causing it to trip.
Blowing function is not working
• Be sure your hose is plugged into the
exhaust hole on the side of the unit.
• Be sure you have the additional cu
inserted in the utility valve on the
front of the unit. If this door is not left
open, the blowing feature will not
work properly.
• Popping & air leakage is normal.
Low suction or no suction
• First, see above.
• Usually low suction is caused by a full
bag. Change your bag. See
Operating Instructions for details.
• Is the dirt canister lid o or loose?
Be sure the lid is replaced squarely on
the top of the canister and that the
gasket has not been pulled loose or it
could allow a vacuum leak. If gasket is
loose, reattach with contact cement
or super glue.
• Is there blockage in the hose or tools?
Disconnect the hose from power unit,
use a blunt item to push the clog out.
If the blockage is in the tools, remove it.
• Is PP101 Protector Plate in place?
Lift the lid. The metal plate should
be located just beneath the HEPA bag
inside the can, laying at with the
smooth side up.
Most problems that develop can be xed easily by following the below suggested solutions:
TROUBLESHOOTING
CAUTION: Do not use when rug (or oor) is wet.
ATTENTION: Ne pas utiliser lorsque le tapis (ou le plancher) est moduille.
SAVE THESE INSTRUCTIONS
-WARNING-
ELECTRIC SHOCK COULD OCCUR IF USED ON WET SURFACES
FOR CORD CONNECTED APPLIANCE
This appliance must be grounded. If it should malfunction or breakdown, grounding
provides a path of least resistance for electric current to reduce the risk of electric
shock. Your vacuum system is supplied with an electrical cord having a grounding
pin. It is recommended that this plug be used only with an appropriate outlet that
is properly installed and grounded in accordance with all local codes and ordinanc-
es. This appliance is for use on a nominal 120-volt circuit (U.S. only) or 230/250 volt
circuits where applicable, and has a grounded plug that looks like the plug shown
in Figure A. A temporary adapter, that looks like the adapter illustrated in Figure
B, may be used to connect this plug to a 2-pole receptacle as shown in Figure B if a
properly grounded outlet is not available.
GROUNDING INSTRUCTIONS
The temporary adapter should be used only until a properly grounded outlet (Fig-
ure A) can be installed by a quali ed electrician. NOTE: Temporary adapters are
not permitted in Canada. The green colored rigid ear, lug or the like, extending
from the adapter, must be connected to a permanent ground such as a properly
grounded outlet box cover. Whenever the adapter is used, it must be held in place
by a metal screw.
DANGER---
GROUNDING
PIN
GROUNDED
OUTLET
Improper connection of the equipment - grounding
conductor can result in a risk of electric shock. Check with a quali ed electrician
or your installer if you are in doubt as to whether the outlet is properly grounded.
Do not modify the plug provided with the appliance - if it will not t the outlet
use a temporary adaptor as shown and have a proper outlet installed by a quali ed
electrician as soon as possible.
ADAPTER
METAL
SCREW
TAB FOR
GROUNDING SCREW
FIGURE A
FIGURE B
Your vacuum does not require any oil. The bearings in the motor are greased
and sealed for life. Do not add lubricant.
* THIS IS NOT A WET VAC *

Cannot be plumbed for use as a central vac.
DO NOT USE AS A WET VAC
Other items included with this system...
Cu
For use when using the
Blowing Feature.
See Pg. 7 for details.
HEPA Bag
Must be installed onto the bag stem before use.
See Pg. 8 for details.
Part # HPB2H
3
Protector Plate (PP101)
This plate should already be
installed in your unit when you
receive it, just below the HEPA bag.
See Pg. 5 for details.
Utility Valve
Use for “Vacuuming”
(Must be held open with
additional cu , when
wanting to use the Blow
feature)
Exhaust
Use for “Blowing”
Lid
HEPA Bag is located inside the
unit, below the lid.
On/O switch
Parts
1. Hose 2. Hose Hanger 3. Dusting
Brush 4. Upholstery Tool 5. Crevice Tool
6. Telescopic Wand 7. Floor Brush
8. Tool Storage Bag
1
2
3
4
5
6
7
8
Additional tools needed for installation:
• Level
• Rubber Mallot
• Electric Drill
• 1/8” drill bit
(If mounting on block or concrete wall,
you will need masonry bit & plastic or
lead anchors - not provided)
WARRANTY
ITEMS COVERED
* The GARAGE VAC by VacuMaid system is warranted
for a period of 5 years. Hoses, oor brushes, and
cleaning tools are warranted for a period of 2 years.
All warranties commence from the original date of
purchase. Any warranted defects will be repaired
or replaced without cost to the customer except for
transportation charges and/or charges associated
with removal and reinstallation. This Warranty is given
only to the original owner and cannot be transferred.
ITEMS NOT COVERED
This Warranty does not cover such conditions as normal
wear to the power unit resulting from normal usage or
from damage caused by accidents, negligence, misuse,
or improper alteration, or from damage by re, ood, or
other acts of God. Motor brush wear is normal and is not
considered to be a defect in material or workmanship.
Further, this Warranty does not apply to vacuum tubing,
ttings, inlets, or to the act of installing the GARAGE VAC
by VacuMaid system, including installation materials,
installation damages, or damage to the power unit
caused by defective or improper installation of the
GARAGE VAC by VACUMAID. This warranty also does
not cover pick up, delivery or house calls.
Picking up liquid of any kind will void warranty.
5 YEAR LIMITED* WARRANTY
Domestic Residential Use only
This Warranty gives you specifi c legal rights, you may also have other rights
which vary from State to State (or Province).
LINDSAY MANUFACTURING, INC. / P.O. BOX 1708 / PONCA CITY, OK 74602
Garage Vac by VacuMaid is the registered trademark of Lindsay Manufacturing, Inc.
DISCLAIMER OF OTHER WARRANTIES
LINDSAY MANUFACTURING, INC., HEREBY DISCLAIMS ALL LIABILITY WHATSOEVER FOR ANY INCIDENTAL OR
CONSEQUENTIAL DAMAGES WHICH OCCUR AS A RESULT OF DEFECTS IN MATERIAL AND WORKMANSHIP IN THE
PRODUCT. LINDSAY MANUFACTURING, INC., ALSO HEREBY DISCLAIMS ALL IMPLIED WARRANTIES, INCLUDING THE
WARRANTIES OF MERCHANTABILITY AND FITNESS FOR A PARTICULAR PURPOSE.
SOME STATES (or provinces) DO NOT ALLOW THE EXCLUSION OR LIMITATION OF INCIDENTAL OR CONSEQUENTIAL
DAMAGES, SO THE ABOVE LIMITATION OR EXCLUSION MAY NOT APPLY TO YOU. SOME STATES (or provinces) DO
NOT ALLOW LIMITATIONS ON HOW LONG AN IMPLIED WARRANTY LASTS, SO THE ABOVE LIMITATIONS MAY NOT
APPLY TO YOU. TO THE EXTENT THAT ANY LAW PROHIBITS, IN WHOLE OR PART, THE LIMITATION OF IMPLIED
WARRANTIES, ANY IMPLIED WARRANTY APPLICABLE TO THE PRODUCT SHALL NOT EXCEED A PERIOD OF 5 YEARS
FOR SINGLE RESIDENTIAL APPLICATIONS OR 90 DAYS FOR COMMERCIAL/INDUSTRIAL AND OTHER APPLICATIONS.
This warranty is exclusive and is in lieu of all other expressed warranties, and in lieu of all other obligations or liabilities on
the part of Lindsay Manufacturing, Inc., for damage to person or property. We do not authorize any person, including any
dealer, agent, supplier, or representative of Lindsay Manufacturing, Inc., to make any other warranty or guarantee on our
behalf, or assume for us any liability on the GARAGE VAC by VACUMAID Vacuum System other than that contained herein.
No oral representations regarding warranty shall be binding upon Lindsay Manufacturing, Inc., whether extended before
or after sale of that product.
TERMS OF WARRANTY AND RESTRICTIONS
*The 5 year/2 year term of this limited Warranty is
e ective for single family residential applications only.
In commercial/industrial and other applications, this
limited warranty is valid for ninety (90) days only from
the date of purchase for all components of the system.
In commercial/industrial and other applications, this
warranty shall be for the bene t only of the original
owner of the GARAGE VAC by VacuMaid system. War-
ranty will be void if service is provided by anyone other
than an authorized VACUMAID dealer using VACUMAID
replacement parts.
HOW TO INVOKE THIS WARRANTY
If it should ever become necessary to invoke the rights
and privileges of this Warranty during the period of
e ectiveness the following procedures should be
followed:
a) Refer to operating maintenance instructions
to ascertain that a malfunction of the vacuum
cleaner has actually occurred.
b) Notify the VACUMAID representative, at
1-800-221-1862, that you have a problem
and describe the nature of your di culty.

• Do not leave room when hose is
plugged in to the inlet. Disconnect power
before servicing.
• Electric shock could occur if used on wet
surfaces.
• Do not allow to be used as a toy. Close
attention is necessary when used by or
near children.
• Use only as described in this manual.
Use only those attachments that are rec-
ommended.
• Do not use with damaged cord or plug.
If applicance is not working as it should, has
been dropped, damaged, left outdoors, or
dropped into water, return it to a service
center.
• Do not pull or carry by cord, use cord as
a handle, close a door on cord, or pull cord
around sharp edges or corners. Do not run
appliance over cord. Keep cord away from
heated surfaces.
• Do not unplug by pulling on cord. To
unplug, grasp the plug, not the cord.
• Do not handle plug or appliance with
wet hands.
• Do not unplug hose from system by
pulling on vacuum hose. To unplug hose,
grasp the cu , located on the end of the
hose, pull out with a twisting motion.
• Do not put anything into vacuum inlet or
vents. Keep inlet free of things that might
slow air ow, such as lint, dust and hair. Do
not use the vacuum system if something
is blocking an opening.
When using an electrical appliance, basic precautions should always be
followed, including the following:
* Read all instructions before using this appliance.
WARNING: To reduce the risk of re, electric shock or injury:
* Always follow these safety instructions
IMPORTANT SAFETY INSTRUCTIONS
• If equipped with an air turbine power
brush unplug the vacuum hose before
attaching power brush. Keep ngers,
hands and toes away from the base of the
power brush. Failure to do so could result in
injury from moving parts.
• Not intented as a wet pickup. Do not use
to pick up liquids of any kind. Doing so will
void warranty.
• In the event the power unit should
get wet, do not use the vacuum system
until it has been properly serviced and
examined by a serviceman or installer.
• Keep hair, loose clothing, ngers and all
parts of the body away from wand, other
openings and moving parts.
• If so equipped, do not use your vacuum
system without dustbag in place.
• Always disconnect vacuum system before
emptying dirt canister or replacing dustbag.
• Use extra care when cleaning on stairs.
• Do not use to pick up ammable or com-
bustible liquids such as gasoline or use in areas
where such liquids may be present.
• Do not use to pick up dry wall or cement
dust. Doing so will void warranty.
• Do not pick up anything that is burn-
ing or smoking, such as cigarettes,
matches or hot ashes.
• When nished put the vacuum hose and at-
tachments away to prevent tripping accidents.
• For a grounded appliance, connect to a
properly grounded outlet only. See
grounding instructions.
ADD ONS & UPGRADES
Hoses
HS130
HS150
Wands
WO119P
WPO218
W419C
W328R
Tools
CT100
CT530/630
DB530/630
UT530/630
FB215BLK
FT220
PB250
MSLT1
CT6
IUT200
w/ HC111BL
30’ Hose
50’ Hose
Plastic Telescopic Wand
Plastic Curved Wand
Chrome Telescopic Wand
Chrome Curved Wand
Flexible Crevice Tool
Crevice Tool
Dusting Brush
Upholstery Tool
12” Floor Tool with Bristles
Notched Floor Tool (no bristles)
Rug Rat Air Turbine brush
Multi Surface Lint Tool
Mini-Vac Attachment Kit
Upholstery Car Tool with cu
Caddy Bag
Wall Wand Holder
Hose Hanger - for 30’ hose
Hose Hanger - for 50’ hose
Plastic Hose Cu 1-1/4”
Hose to Hose Cu ,
threaded both ends
GV PRO Replacement Motor
GV Replacement Motor
Motor Gasket
Replacement GV lid
Bag Inlet Fitting
Utility Valve with Grommet
2”x1.705 Reducer Coupling
GV Bushing
Exhaust Stem Fitting
Replacement Wall Mount Bracket
HEPA Bag (3 pk)
Tool Storage
CB180
WWH1
H431
H231
Cu s
HV109BL
HV108
Motors & Replacements
MB122264
MB119804
P107B
DC12005AS
BIF125
5584
PF204D
PF125A
EXF16
GVB
HPB2HPK
Great addition to your VacuMaid® Garage Vac
when you have pets in the home. Not only
eliminate unwanted fur from your furnishings
but also your pets. Great for grooming.
PET PACK
For on the job personnel cleaning, where
they are especially dirty or dusty from their
working environment such as our at baker-
ies, metal shavings at mill, etc For these spe-
cialized cleaning purposes, this tool set will
give you the tools necessary for personnel
cleaning. Use to vacuum o clothing.
PERSONNEL VAC PACK
HS130 1-1/4" X 30' Silver Hose
HV109BL Hose to Inlet Connector
UT530BL Upholstery Tool Only - Black
H431 Plastic Hose Hanger
LARGE ANIMAL
CC206 Curry Comb
HV109SC Plastic Swivel Cu for 1-1/4"
FT220 Notched Floor and Rug Tool
SMALL ANIMAL
PT530 Pet Grooming Tool
HV109SC Plastic Swivel Cu for 1-1/4”
FT220 Notched Floor and Rug Tool

L6232P
PO Box 1708
Ponca City, OK 74602
1-800-546-3729
For replacement bags or to order additional
tools or accessories,
visit us at
www.vacumaid.com
or give us a call at
1-800-221-1862
To register your product online, go to
www.vacumaid.com/registration
7/2014
OWNERS
MANUAL
READ BEFORE OPERATING YOUR SYSTEM
®
/