Page is loading ...

1
RAMSES 850 top3 OT
8509200
309953 00
22 February 2023
Digital
clock thermostat
EN
1. General information
•Digital clock thermostat for wall mounting or mounting
on ush-mounted box
•The clock thermostat conforms with EN 60730-2-9 if
correctly installed
•Communication with heating and power supply via Open-
Therm bus
•OpenTherm heating control
•External input to connect an external temperature
sensor, oor sensor etc.
•The RAMSES top3 app (for Android, iOS) allows settings
via mobile devices
•Direct Bluetooth Low Energy (BLE) connection between
app and RAMSES top3 devices
•Optional accessories: Floor sensor (9070321),
contact temperature sensor (9070371), temperature
sensor (9070459), immersion sensor (9070379)
2. Safety
Assembly and installation should only be carried
out by a qualied electrician, somebody who has
completed appropriate professional training and
has the knowledge and experience necessary to be
able to recognise and avoid the potential dangers
posed by electricity.
Disconnect the supply voltage before installation/
removal.
Prior to commissioning and using the product, read
and observe all the operating instructions.
3. Proper Use
•Digital clock thermostat for time-dependent monitoring
and control of the room temperature (heating control) in
single-family houses, ofces, etc.
•Only operate the devices in dry indoor rooms (no bath-
rooms, etc.)
•Suitable for modulating gas condensing boiler systems
and modulating heating systems with OpenTherm
interface
4. Installation
You can mount the clock thermostat either on the wall or on a
ush-mounted box.
Mounting the clock thermostat
!Protect the clock thermostat from moisture, dust, direct
sunlight, thermal radiation and draughts.
Position the clock thermostat on an interior wall, at about
eye level (approx. 1.50-1.60 m).
Fix the mounting plate directly to the wall or to a ush-
mounted box using the holes.
Assign and wire the conductors.
Tighten the screws.
Put on the clock thermostat.
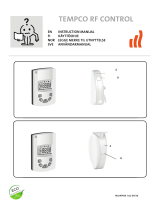
Dismounting the clock thermostat
!When dismounting, open the device according to the
illustration, as it could be destroyed if not done so.
Insert the screwdriver into the opening and push up slightly
to open the device.
5. Connection
•The power supply of the clock thermostat to the boiler is
provided via OpenTherm.
•The two-wire connection (OpenTherm) is not polarised,
i.e. the wires can be connected to the boiler as required.
!Do not feed the thermostat cable through the same cable
duct as the 230 V mains cable.
!Do not lay the thermostat cable parallel to the power
cable.
!The external input is active, therefore do not use external
voltage. The connected contact or Theben sensors must
be oating.
Electrician

2
!Disconnect the boiler from the mains supply before con-
necting the clock thermostat.
!Without interference, the bus line can be extended up to
50 m.
!Faulty connections will damage the device.
LExternal sensors such as a oor sensor (9070321), a tem-
perature sensor (9070459) or oating contacts (e.g. from
presence detectors etc.) can be connected to the external
input (ext. input).
OpenTherm
OpenTherm-
Bus
Ext. input
OpenTherm
Bus
6. Settings at the clock thermostat
Symbols on the display
Operating modes main
menu
Settings submenu
Settings
submenu et sqq.
Week days 1–7
(Monday – Sunday)
< >
+/–
∙ Browsing the display
∙ Conrm selection (>) or go back one step (<)
∙ Set values
∙ Select using +
7. Menu
Operating modes main menu
Weekly programs P1–P3
Comfort temperature
Setbacktemperature (Eco)
Frost protection temperature
Set date and time
Service/Settings
Settings submenu
Change weekly programs P1–P3
Service water control
Chimney sweeping function
Customise display
Set wall compensation (offset)
Select window detection
Select controller
Set the optimisation function
External input
Enter/change PIN
Set summer/winter time
Set pump protection
Fault
Bluetooth
Heating active
Holiday program
How does my clock thermostat work?
Your clock thermostat regulates your room to the desired
temperature at set times. You can set 3 weekly programs (P1 -
P3). In addition, you can dene and activate the temperatures
of the operating modes (comfort, setback and frost protection
function):
•Comfort temperature: is usually used for the day, i.e.
when you are present.
•Setback temperature (Eco or energy saving temperature)
for the night.
•Frost protection temperature: is used for periods of pro-
longed absence (e.g. holidays). The temperature is just
high enough to protect the heating system from frost.
TIP
The easiest and quickest way to
operate the clock thermostat is with
the RAMSES top3 app!
8. Initial operation
LThe summer/winter time rule for Central Europe is preset.
After the RAMSES 850 top3 OT has been mounted and con-
nected, the date/time and - if desired - a different summer/
winter time must be entered.

3
Enter date and time
LThe date and time setting can be skipped when connect-
ing to the app. The clock thermostat then adopts the time
and date of the mobile device.
Use +/- to enter the desired hour.
Conrm with >.
Use +/- to enter the desired minute.
Conrm with >. The year appears.
Conrm the year with >. The two digits for the month on
the right ash.
Enter the month with +/-.
Conrm with >.
Enter the day with +/-.
Conrm with >.
The device is now ready for operation. The display shows the
weekly program P1, the actual temperature, the set tempera-
ture at the bottom left and the current time at the bottom
right.
LDate and time can also be changed in the main menu.
Enter a different summer/winter time
You can change the summer/winter time under Settings
→ (see Page 6).
Change set temperature briey
LThe changed set temperature is not saved in the program
and will be replaced by the next programmed switching
time. This also applies when the programs P1 - P3 are
active.
If the comfort, setback or frost protection temperature is
active, the changed set temperature applies permanently.
Press > to access the main menu.
Press + here. The set temperature ashes.
Use +/- to enter the desired set temperature.
Conrm with >.
1. Main menu: Set/change operating modes
Scroll through the main menu with > (or back with <).
Use + to select the desired function.
Change the value with + or – .
Conrm with >.
Programs P1 – P3
There are 3 preset weekly programs available:
12:00 (21 °C)
20:00 (17 °C)
07:00 (21 °C)
22:00 (17 °C)
Mon Tue Wed Thu Fri Sat
12:00 (21 °C)
20:00 (17 °C)
07:00 (21 °C)
22:00 (17 °C)
12:00 (21 °C)
20:00 (17 °C)
07:00 (21 °C)
22:00 (17 °C)
Select the desired programme with >.
Conrm with +.
If you want to change the program (switching times), you
can do this under Settings → .
Comfort, setback and frost protection temperature
You can select these 3 operating modes and change them if
necessary.
Select the desired preset program with >.
Conrm with +.
Use + or – to set the desired value.
Conrm with >.
2. Submenu: Settings
In the submenu Settings , programs, display, wall compen-
sation, PIN, controller, pump protection, etc. can be set.
Press > 2 x and go to Settings with >.
Conrm with +. The ashing Bluetooth symbol appears.

4
Bluetooth
When the Bluetooth symbol ashes, the clock thermostat
can connect to the RAMSES top3 app on your smartphone or
tablet (see Page 7).
LIf the Bluetooth symbol appears permanently in the dis-
play, the device is connected to the app.
LIf the button – is pressed for 8 s, all connection data will
be deleted.
Or skip Bluetooth and
press >. You can now enter the 4-digit PIN (default:
0000) using + or –.
Conrm each digit with >. You will then be in the Settings
submenu.
LIf you forgot the correct PIN, press + for 30 s (reset). The
PIN is now set to 0000 for 5 min and you can enter your
password. If you do not enter the password during this
period, the old password becomes active again.
Only now you can change the following functions in the
Settings submenu :
1. Change/check/delete weekly programs P1 - P3 (P4)
The preset programs can be changed and deleted.
L42 switching times can be changed.
LIf the domestic water control function is activated, pro-
gram P4 appears.
If you want to change the program or switching times, you
can do this under Settings → .
Use > to go to Settings. The menu ashes.
Use + to select the program P1, P2 or P3.
Conrm with >. The display shows, for example, P1 .
Check/change switching times of P1
By pressing > you can check the switching times that have
been entered.
Use + or – to change the values and conrm with >.
Press + or – 2 x and select the switching time, then enter
the desired value with + or – and conrm with >.
Use < > to change the time, the day of the week or the
temperature.
Carry out the steps as described above for programs P2, P3.
Use < to exit the menu P1.
Delete switching times
Select the switching time to be deleted and go to --:-- with
+ or - (between 23 : xx and 00: xx o'clock).
Conrm with >. The switching time is deleted.
To delete further switching times, carry out the above steps.
2. Chimney sweeping function
This function (under Settings → ) is used to carry out
the legally required emission measurements. For transmission
to the OpenTherm bus, there are two activation levels that
can be switched by commands (full load 100%, partial load
50%, off) (default off).
Use +/– to switch the function on/off for max. 30 min (On,
Off).
▻ After 30 min, it switches off automatically.
Conrm with >.
3. Domestic water control (process water control)
You can enable domestic water control under Settings →
. (default: off)
Use +/- to switch the function on or off (On, Off).
Conrm with >.
▻ If you selected On, P4 appears under Weekly programs.
4. Customise display
You can customise your display (in operating mode) under
Settings → .
Rotate using + or – actual temperature, set temperature
and time to obtain the desired display.
LYou can also adjust the display brightness with + or –
(from - to ---- ) and set the backlight duration (e.g. 0:30
min:sec).
5. Set wall compensation
If the installation location is unfavourable, this may lead to
variations in temperature between the detected and actual
room temperature (e.g. at an outer wall that is too cold or an
inner wall that is too warm). This difference can be corrected
by using the wall compensation.
Under Settings → use + or – to adjust the measured
temperature by – 3 °C to + 3 °C.
Conrm with >.
6. Select window detection
If this function is active, the clock thermostat detects the tem-
perature drop if the window is opened at a cold outside tem-
perature. The heating process is stopped for 15 min to save
energy (it will be regulated to frost protection temperature).
Under Settings → use + or – to switch the function
on or off (On, Off).
Conrm with >.
7. Select controller
This function allows you to select 2 different thermostats
(depending on the set heating):
1 → Room thermostat (PI controller) (with room-guided
control)
2 → Outside temperature controller (with weather-guided
control)
Under Settings → use + or – to select thermostat
type 1 or 2 (default: PI controller).

5
Room thermostat
The heat demand is calculated from the difference between
the room set temperature and the actual room temperature.
It is composed of a P and an I share. The room thermostat
controls directly to the set room temperature, i.e. in relation to
the room temperature.
- P-band: Range for the set/actual temperature; difference in
which the CSP (control setpoint) is calculated proportionally.
- I-share: Time in minutes with which the requested ow
temperature is increased or decreased by 1 °C
within the modulation range.
Example (P-band 1.6 K)
Room temperature
0 °C
10 °C
20 °C
21,8 °C
0,4 °C
23,4 °C
1,6 K
30 °C
}
Heating to 100%
Modulation range 0–100%
Room actual temperature 23 °C
Room set temperature 23.4 °C
Heating off
t/min
Setting ranges:
P-band (0.5 K-2.5 K) control range (default: 1.6 K)
I-share (1-10) Integral share in minutes (default: 10):
– Integral share small → fast regulation of the
control deviation
- Integral share large → slow regulation of the
control deviation
Outside temperature controller
The setting of the base and end point always refers to a
room set temperature of 21 °C. With the shift, a correspond-
ing offset is calculated to the CSP for a different room set
temperature.
Setting ranges:
Base point: 10–40 °C
End point: 25–90 °C
Shift: 2–20 K/°C
Heating off at 10–25 °C
Room inuence: 0–20 K/°C
With the outside temperature controller, the temperature
is determined by a preset heating curve. The base and end
points of this curve can be set.
At the setback temperature level, the curve is shifted in par-
allel by an also adjustable value.
10
20
30
40
50
60
70
80
90
°C 0+10+20 -10 -20
Outside temperature
Flow temperature
Base point
End point
Set the heating curve
With outside temperature guided control, the base point and
end point of the curve are set. For a temporary temperature
change, the values at the base and end point can be adjusted
(see illustration).
Setting range Factory settings
Base point 10–40 ˚C + 25 ˚C
End point 25-90 ˚C + 60 ˚C
P-reduction offset 5–35 K 25 K
Frost limit + 3 °C
Set parameters for the heating system
Heating type Flow/return
temperature
Radiator heating High temperature 90/70
Radiator heating Medium temperature 70/50
Underoor heating Lowest temperature 40/30
Heating
type
Heating
curve base
point
Heating
curve end
point
P -adjust-
ment/
reduction
Frost
line
90/70
system 30 ˚C 85 ˚C 15 ˚C 3 ˚C
70/50
system 25 ˚C 75 ˚C 15 ˚C 3 ˚C
40/30
system 25 ˚C 45 ˚C 15 ˚C 3 ˚C
Change/offset the heating curve temporarily
In case of an offset of the desired room set temperature, a
corresponding offset for the ow set temperature will be cal-
culated. The set offset determines the value by which the ow
set temperature will be shifted per degree of difference from
the room set temperature of 21 °C.
Example
At an outside temperature of – 5 °C, a ow set temperature
of e.g. 50 °C will be calculated for the settings of base point
and end point, in order to reach the room set temperature
(reference temperature) of 21 °C. However, if the desired
room set temperature is at 19 °C, at a set offset of 10 K/°C, a
ow set temperature of
ow set temperature = 50 °C – (21 °C–19 °C) x 10 K/°C =
50 °C – 20 K = 30 °C
will be calculated.

6
Switch off the heating (heating off at ...)
With outside temperature guided control, you can program
the controller so that the heating is switched off at a set
outdoor temperature.
Set the room influence
The ow temperature can be adjusted if there is a large
deviation between the room temperature and the set
temperature.
Offset ow temperature = ∆ Tv
set room inuence = PI
Set point value of room temperature = TR set
Actual value of room temperature = TR act
∆ Tv = PI (TR set – TR act)
E.g.: TR set = 20 °C TR act = 18 °C PI = 3
∆ Tv = 3 x ( 20 °C – 18 °C) = 6 K
→The ow temperature is increased by 6 K.
LThe higher the selected room inuence, the greater
the inuence of the room temperature on the ow
temperature.
8. Set the optimisation function
The optimisation function allows you to achieve a certain
room temperature at a desired switching point. It is indicated
how many minutes earlier the heating starts. This time applies
per K of temperature difference between actual temperature
and desired set temperature.
Example
At 06.00 a.m. in the morning, a change in the bathroom is
programmed from reduction (17 °C) to comfort temperature
(23 °C).
Without optimisation function, the room thermostat enables
the heating request for the bathroom at 06.00 a.m. Depend-
ing on the size of the room and the installed heating system,
the bathroom reaches the desired 23 °C at 6.30 a.m., for
example.
With a set optimisation of 5 min/K, the thermostat sends the
heating request earlier, as follows:
Set temperature at 06.00 a.m. 23 °C
Actual temperature 17 °C
i.e. Delta T = 6 K
6 K * 5 min/K = 30 min
The controller sends the heating start 30 min. earlier and
reaches the setpoint temperature at 06.00 a.m.
LThe optimisation value depends on the spatial and heating
conditions.
Under Settings → use + or – to select the optimisa-
tion function.
Use + or – to set the time from 1 min to 60 min or Off and
conrm with >.
9. External input
The external input can be congured for various external
sensors.
!The external input is active, therefore do not use external
voltage. The connected contact must be oating.
Under Settings → use + or – to select the external
input.
Use + or – to set one of the 6 options and conrm with >.
The following options are available with the individual sen-
sors/contacts:
0 → inactive
1 → oor
2 → external temperature sensor
3 → presence detector
4 → window contact
5 → telephone contact
Floor Temperature
limit
Floor temperature restriction, oor
temperature selection adjustable
between 20 °C and 50 °C; oor sensor
(9070321)
LNo safety temperature limiter, but
device type 1 B in accordance with
EN 60730-1.
External
temperature
sensor
no options The internal temperature sensor will
be switched off; external temperature
sensor (IP 65) (9070459).
Presence
detector
Temperature
selection
This temperature is used for control
if the HVAC output of the presence
detector is switched. If no presence is
detected, the set program is used for
control.
Window
contact
no options As long as the window contact is open,
the thermostat controls to frost protec-
tion temperature.
Telephone
contact
Temperature
selection
Select temperature for the controller if
the telephone contact is switched.
10. PIN
This function can be used to assign a new PIN.
LThe factory setting for the PIN is 0000.
Under Settings → use + or – to select the PIN.
Enter the 4-digit PIN with + or –.
Conrm each digit with >.
11. Change summer/winter time
Here you can set a different summer/winter time.
LThe summer/winter time rule for Central Europe is preset.
Under Settings → use + or – to select the summer/
winter time from 0–3.
You can choose between
0 → Inactive (no summer-winter time changeover)
1 → Central Europe (default):
Changeover from winter time to summer time on the
last Sunday in March at 2 o'clock (at 2 o'clock the
clock is set forward by one hour to 3 o'clock)

7
Changeover from summer time to winter time on the
last Sunday in October at 3 o'clock (at 3 o'clock the
clock is set back one hour to 2 a.m.)
2 → Western Europe:
Changeover from winter time to summer time on the
last Sunday in March at 1 o'clock (at 1 o'clock the
clock is set forward by one hour to 2 o'clock)
Changeover from summer time to winter time on the
last Sunday in October at 2 o'clock (at 2 o'clock the
clock is set back one hour to 1 a.m.)
3 → Eastern Europe:
Changeover from winter time to summer time on the
last Sunday in March at 3 o'clock (at 3 o'clock the
clock is set forward by one hour to 4 o'clock)
Changeover from summer time to winter time on the
last Sunday in October at 4 o'clock (at 4 o'clock the
clock is set back one hour to 3 a.m.)
12. Set pump protection
The pump protection is a function that switches 1 x per week
to protect the pump from seizing up.
LIf pump protection is activated, the heating circuit pump
is switched on for one minute every Wednesday at 11:30
a.m.
Under Settings → use + or – to select On or Off
(default).
13. Holiday program
The holiday program can only be set via the RAMSES top3
app. If the holiday program is set, the display of the clock
thermostat shows the symbol .
Fault
In the event of a fault or error, the error code ashes on the
display. The warning triangle also ashes. All other display
symbols are cleared.
Errors 0 to 255 are boiler-specific error messages from the
boiler via the OT bus. Other errors are:
Error code Explanation
301 Boiler reports general sensor breakage via OT bus
302 Boiler reports sensor breakage of the external tempera-
ture sensor via OT bus
303 Boiler reports "Low water pressure" via OT bus
304 Boiler reports "Gas/ame fault" via OT bus
305 Boiler reports "Air pressure fault" via OT bus
306 Boiler reports "Water over temperature" via OT bus
307 Boiler reports "Lockout" via OT bus
308 Boiler reports bus error via OT bus
401 Error external temperature sensor, sensor breakage
402 Error external temperature sensor, sensor short circuit
403 Error room temperature sensor, sensor breakage
404 Error room temperature sensor, sensor short circuit
405 Error internal temperature sensor, sensor breakage
406 Error internal temperature sensor, sensor short circuit
To clear the error, press the > button. The main menu
appears and the error will be cleared.
Or press the +/- buttons and the error will also be cleared.
LIf the error is not xed, it appears again in the auto-menu.
Display symbol "Heating active"
The symbol appears when RAMSES top3 sends heating
information to the heat generator.
Display symbol "Flame"
This symbol appears when the burner bit is set (heating is
to take place).
Reset
Press + for 30 s. The clock thermostat takes over the last
inputs of P1-P3, comfort, setback and frost protection tem-
perature as well as the device name.
9. Settings via the RAMSES top3 app
Connect the clock thermostat with the mobile end
device and the RAMSES top3 app
The clock thermostat can be controlled via Bluetooth using
the app. The smartphone or tablet will be connected to the
clock thermostat via the integrated Bluetooth module.
Download the RAMSES top3 app from the App Store or
Google Play Store.
Use > to go to the submenu Settings on the clock
thermostat. The ashing Bluetooth symbol appears.
Open the RAMSES top3 app.
The app searches for the available devices; the list of avail-
able devices appears.
Select the desired device and conrm with OK.

8
RAMSES top3 app
Set temperature, adjustable in
increments of 0.2 °C (2 °C
– 30 °C)
Device list
Quick selection
Settings, device management
App info, operating instructions
Info: device type, external input,
serial number, etc.
Quick selection
In the quick selection you can choose between comfort
temperature and setback temperature (Eco).
Programming of
switching times
Operating modes:
– Programs P1 – P3
– Comfort, setback, frost
protection temperature
Quick selection
Comfort mode* – eco mode*
*until the next switching time
Check, change, delete programs P1–P3 (P4)
Under Program you can
•check, change or delete the pre-programmed weekly
programs P1 – P3 and P4 (domestic hot water).
•You can create a new program or
•save a program as a favourite, import it or
•additionally create a holiday program.
LA maximum of 24 switching times can be set per program,
a total of 42.
LDuring programming, selected days are shown like , and
unselected days like .
The created programs are automatically sent to the clock
thermostat.
Create a holiday program
In order to create a holiday program and activate it,
slide the controller to "Activate".

9
After a holiday program has been created via the app, the
clock thermostat receives the following information:
•active/not active
•Start date and end date with time
•Room set temperature during holiday time
LWeekly programs can be stored in the RAMSES top3 app
and recalled.
Domestic hot water program P4
Under Progam, you can also nd and change the Domestic
hot water program. You can choose between
– Domestic hot water set (temperature)
– Switching time and
– Domestic hot water deactivated, activated and
– Select the days of the week
Settings
Press Settings.
▻ The window will open.
LThe functions in this submenu have to be set by the quali-
ed electrician.
In the settings, language, temperature (comfort, eco (setback),
frost protection), wall compensation, optimisation, etc. can be
set.
1. Set wall compensation
See Page 4 above.
2. Domestic hot water (service water)
You can switch the domestic water control on or off (default:
Off).
LIf you have selected On, the weekly program for domestic
hot water appears as P4 in the menu .
3. Set controller
There are 2 controller types to choose from (when connecting
a modulating heater):
1 – Room thermostat (PI controller), see Page 4
2 – Outside temperature controller, see Page 4

10
4. External input
The external input can be congured for various external sen-
sors, see Page 6.
Error indicator on RAMSES top3
LIf the external input is set to "oor" or "room tempera-
ture", an appropriate temperature sensor has to be con-
nected. If this sensor is missing, an error indicator ashes
in the device. The same error also appears in the Start
menu in the app.
5. Set optimisation
The optimisation function allows you to achieve a certain room
temperature at a desired switching point, see Page 6.
6. Chimney sweeping function
This function serves to carry out the prescribed emission
measurements. For the transmission to the OpenTherm bus
you can choose between full load
100%, partial load 50%, or off) (default off).
7. Set summer/winter time
LThe summer/winter time rule for Central Europe is preset
(see also page Page 7).
You can choose between
0 → Off (no summer-winter time changeover)
1 → Central Europe (default)
2 → Western Europe
3 → Eastern Europe
8. Set window detection
Here you can choose between On and Off, for more informa-
tion see Page 4.

11
9. Set pump protection
You can switch the pump protection on or off, see Page 7.
10. Set TSP (Transparent Slave Parameters)
Depending on the OpenTherm heating system connected,
various TSP parameters can be set (see the corresponding
instructions for the OpenTherm heating system).
11. PIN
This function allows you to assign or change a new four-digit
PIN.
12. Factory settings
Here you can reset all functions to the factory settings.
13. Set display
You can adjust the appearance of your display, see also Page
4.
Device management
Edit name
Device list
Delete
Search for new devices ...

12
In the menu Device management, the name can be changed,
deleted, etc.
Use + to search for other RAMSES top3 devices.
Info
In the Info menu you will nd all the information about your
RAMSES top3 device (device type, serial number, etc.).
10. Troubleshooting
Fault Rectication
Four-digit PIN (pass-
word) forgotten
You can force a reset of the device (press + for
approx. 30 s). Afterwards, the device PIN is set
to 0000 for 5 minutes. During this time you can
change the password. After the 5 minutes, the old
password or the newly set password is active.
No Bluetooth connec-
tion to the device
Make sure that the device is in pairing mode
(only when connecting for the rst time, see Page
7), is within range and that your terminal
device has Bluetooth enabled. If the problem
persists, switch Bluetooth off and on again on your
terminal device. If you have problems again,
restart your terminal device.
Heating does not occur
at the desired time.
Check your active program (P1, P2 or P3) (time
and date of the device, switch-on and switch-off
times entered correctly, see Page 8).
Check the setting of your controller (room ther-
mostat, outside temperature controller, see Page
9). Or check the optimisation function (see
Page 6).
Log recording does not
work.
If you use an iPad, the
log recording can no
longer be displayed
when swiping from
the left.
Deactivate the "Stage Manager" function in the
settings. The log recording is displayed again by
swiping.
11. Technical data
Supply voltage OT bus (approx. 18 V)
Standby power approx. 50 mW
Controller type modulating controller, works with Open-
Therm protocol (OpenTherm V4.0 with
SmartPower)
Power reserve 4 hours
Mode of operation Type 1 in accordance with EN 60730-1
Operating temperature + 0 °C ... + 50 °C
Temperature setting range + 2 °C ... + 30 °C in increments of 0.2 °C
Memory locations 42
Protection rating IP 40 in accordance with EN 60529
Protection class III in accordance with EN 60730-1
Rated impulse voltage 0.8 kV
Pollution degree 2
Software class A
Radio frequency/transmis-
sion power
BLE 2.4 ... 2.48 GHz; max. 2 dBm
Range in free eld: approx. 40 m
Theben AG herewith declares that this type of radio installation com-
plies with Directive 2014/53/EU. The complete text of the EU Decla-
ration of Conformity is available at the following Internet address:
www.theben.de/red-konformitaet
Cleaning and service
Only use a dry, soft cloth to clean the device surface.
Do not use any cleaning agents or solvents.
Disposal
Dispose of the device separately from
domestic waste at an ofcial collection
point.
12. Dimensions diagrams
107 27,5
13. Contact
Theben AG
Hohenbergstr. 32
72401 Haigerloch
GERMANY
Phone +49 7474 692-0
Fax +49 7474 692-150
Hotline
Phone +49 7474 692-369
Addresses, telephone numbers, etc.
www.theben.de
/