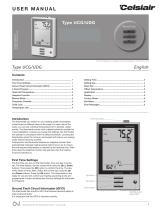
Page is loading ...


2
Instruction
The CB Basic thermostat controls a floor heating system based on a built-in weekly program. You can set
individual temperatures for 4 events or 2 events on different days of the week. The default weekly program
parameters can satisfy most installations. If your living habits are different, you can update the weekly
program parameters in the thermostat or APP. Lowering the temperature when the home is
unoccupied will reduce your energy costs without reducing comfort. Furthermore, the thermostat features
an adaptive function that automatically changes heating period start times to ensure that the required
temperature is reached at the required time. After some days the adaptive function has learned when the
heating must be switched on.
Technical Specification
Supply voltage: 85-265 VAC 50/60 Hz Standby Power Loss: <1W
Load: Max.16 A (resistive load) Cable Diameter: ≤2.5mm²
2. Wire as shown:
L/N lead:
Connect the power cord using the terminal
block.
Use a terminal block to connect the load
line.
L1/N1 lead:
Use a terminal block to connect the load
line.
COM/S1 terminal: Connect the floor sensor.
Note: Disconnect the main power supply before wiring.
1. Loosen the bottom screw with a Phillips screwdriver.
Then open the thermostat from the right corner as
shown.
Note: Screw the nut out of the groove. No need to
unscrew it.
3. Install the back cover into the terminal box and secure
it with the set screw.
4. Install the back cover into the terminal box and
secure it with the set screw.

3
Function and Operation
On/Off
Press button to turn on or turn off.
Temporary Override Temperature
Override temperature is a temporary temperature setting in auto mode and has no effect on schedule 4-event
program.
Mode Selection
Three Modes are available.
Auto Mode: The thermostat automatically runs according to the weekly-program parameters.
Manual Mode: The thermostat runs according to manually select temperature.
Anti-frozen Mode: The thermostat runs at a lower set temperature. The temperature range can be set from 5°C to
15°C in this mode. This mode is intended to be used when the home is unoccupied and keeps the home at a lower
temperature.
Key Lock
To lock the thermostat menus to prevent the settings from being changed.
Note: For emergency, can run.
1. On/Off Button
4. Sensor Selection
7. Day and Time
2. Mode
5. Setpoint
8. Touch Key
3. Temperature
6. Event
To Do So:
With Active Display (backlight on) press OK to activate the menu. MODE flashes.
Press OK to confirm.
Press ▲ or ▼ to choose mode you need.
Press OK to confirm.
If you select Manual mode or Anti-frozen mode, you also need to press ▲ or ▼ to set the temperature.
Press OK to confirm and return to Active Display.
To Do So:
1.With Active Display (backlight on) press |◄ until lock symbol appears.
2.With Active Display, press OK button until MODE flashes.
Press ▲or▼ until the Key lock option flashes.
Press OK to set.
Press OK to confirm.
Press OK to get back to return to Active Display.
To unlock the Key lock:
With Active Display, press and hold |◄ simultaneously for three seconds.
To Do So:
With Active Display press ▲ or ▼ to set temperature.
Press OK to confirm and return to Active Display.

4
Weekly Program Parameter Setting
In the auto mode, the thermostat runs automatically according to the setting parameters of the weekly program.
The weekly program parameters contain two major parameters: Schedule and Event.
Schedule: Two schedules for a week.
5+1+1: Event parameter is the same Monday to Friday, with separate Event parameters on Saturday and Sunday.
7: Separate Event parameters every day.
Event: Home
• when I wake up in the morning
• when I am away at work
• when I come home
• and at night
Event: Work
• When I am at work
• When I get off work
Temperature in each event can be set.
Note: Press |◄ several times to get back to active display.
Event: Factory Settings for Event
Schedule Setting:
With Active Display, press OK until MODE flashes.
Press ▲or▼ to choose Schedule.
Press OK to enter.
Press ▲or▼ to set.
Press OK to confirm.
Press OK to return to Active Display.
To Do So:
With Active Display, press OK until MODE flashes.
Press ▲or▼ to choose Event.
Press OK to choose week.
Press ▲or▼ to choose the day.
Press OK to enter event.
Press ▲or▼ to set the parameters in that event.
Press OK to set the temperature for this phase.
Press ▲or▼ button to set the temperature.
Press OK to set the hour that the temperature starts.
Press ▲or▼ to set hour.
Press OK to set the minutes that the temperature starts.
Press ▲or▼ to set minutes.
Press OK to return to this phase.

5
Settings
This thermostat also can be used to other application with different setting. It should be set by professional technicians
to avoid damage caused by abnormal settings.
Setting Parameter:
1.Time
Set date and week
Note: Press |◄ several times to get back to active display.
2.Temp Unit
Change the temperature unit (°C/°F) used in the display.
3.Sensor Type
This thermostat can be connected not only to the provided floor sensor but also to two other commonly used floor
sensors. When replacing an old thermostat, there is no need to replace the floor sensor.
No.
Senor type
Parameters
00
3950 (Provided)
01
3600
R(25°C)=12kΩ R(10°C)=22.2kΩ
02
3700
R(25°C)=10kΩ R(10°C)=19.1kΩ
To Do So:
With Active Display, press OK until MODE flashes.
Press ▲or▼ to choose settings.
Press OK to confirm.
Time Setting:
Choose setting. Press ▲or▼button to set time.
Press OK button to confirm.
Press ▲or▼button to choose hour you need.
Press OK button to set minutes.
Press ▲or▼button to choose minutes you need.
Press OK button to set week.
Press ▲or▼button to choose the day you need.
Press OK button to enter the hour setting of the day
Temp Unit Setting:
Choose settings. Press ▲or▼ to choose °F/°C.
Press OK to enter.
Press ▲ or▼ to choose the unit.
Press OK to confirm.
Press OK to return to Active Display.
Sensor Type Setting:
Choose settings. Press ▲or▼ to choose Sensor type.
Press OK to enter.
Press ▲ or▼ to select Sensor type.
Press OK to confirm.
Press OK to return to Active Display.

6
4.Sensor Selection
This thermostat has floor sensor and built-in air sensors to detect room temperature. Therefore, three sensor
applications are available:
Room: Controls the room temperature based solely on built-in sensors.
Floor: Controls the floor temperature based solely on the floor sensor.
Room.Limit: Controls the room temperature based on built-in sensors while monitoring the floor temperature to
ensure it does not exceed an upper limit. This application can be used in places such as timber floors where maximum
floor temperature is critical.
5.Calibration
This thermostat has built-in probe and floor sensor calibration function in the case of demand for higher precision.
6.Location
This thermostat is suitable for use in both homes and workplaces. For the workplace, a set of weekly program
parameters is built in. See the Weekly Program Parameters section for details.
7.Adaptive
This thermostat features an adaptive function that automatically changes heating period start times to ensure that the
required temperature is reached at the required time.
Sensor Selection Setting:
Enter settings. Press ▲ or▼ to choose sensor selection.
Press OK to enter.
Press ▲ or ▼ to choose required sensor.
Press OK to confirm.
Press OK to return to Active Display.
Calibration Setting:
Enter settings. Press ▲ or ▼ to choose Calibration.
Press OK to choose room or floor.
Press ▲ or ▼ to choose built-in probe or floor sensor.
Press OK to enter calibration.
Press ▲ or ▼ to adjust the real-time temperature to match the displayed temperature value of the
calibration instrument.
Press OK to return to Active Display.
Location Setting:
Enter settings. Press ▲or▼button to choose Location.
Press OK button to choose office or home.
Press ▲or▼button to choose office or home.
Press OK button to confirm.
Press OK to return to Active Display.
Adaptive Setting:
Enter settings. Press ▲ or ▼ to adaptive.
Press OK.
Press ▲ or ▼ to choose Yes or No.
Press OK to confirm.
Press OK to return to Active Display.

7
8.Readout
This thermostat can read the percentage of time that the heating has been turned on within a certain period.
9.Factory Reset
Setting parameters
No.
Name
Default parameter
Setting range
1
Time
/
/
2
°F/°C
°F
°F
°C
3
Sensor Type
00 3950
00 3950
01 3600
02 3700
4
Sensor Selection
Floor
Room
Floor
Room.Limit
5
Calibration
0°C
-5°C -- 5°C
6
Location
Home
Home
Office
7
Adaptive
No
Yes
No
8
Readout
/
/
9
Factory Reset
N
o
No
Yes
Troubleshooting
E1: Built-in probe failure, please contact your dealer or professional technician.
E2: External probe failure, please contact your dealer or professional technician.
Dimensions (mm)
Readout Setting:
Enter settings. Press ▲ or ▼ to Readout.
Press OK.
Press ▲ or ▼ to choose 1Day, 30Days or 365Days.
Press OK to return to Active Display.
Factory Reset Setting:
Enter settings. Press ▲ or ▼ to Factory Reset.
Press OK.
Press ▲ or ▼ to choose Yes or NO.
Press OK to confirm.
Press OK to return to Active Display.
/