Parameters
NoDescription Settings (default in bold)
1:LA Language 1 = EN, 2 = NL, 3 = FR
2:CR Cycle Rate 6
4:LL Lower Temperature Limit 5 - 21 (°C)
5:UL Upper Temperature Limit 21 - 35 (°C)
6:SO Schedule options 1 = 7 day
(different schedule each day of the week)
2 = 5 + 2 day (weekday + weekend schedule)
3 = 1 day (same schedule every day)
7:NP Number of periods per day 4 or 6
8:SS Wired Remote Sensor 0 = No Remote Sensor, 1 = Wired Remote Sensor
9:LC Fail Safe mode 0 = Boiler off, 1 = Boiler 20% on / 80% off
10:BL Backlight 0 = Off, 1 = On (only on demand)
11:CL Clock Format 0 = 24 hr, 1 = AM/PM
12:DS Daylight Saving time change 0 = Off, 1 = Auto
13:TO Temperature Display Offset +/1.5°C
15:SD Restore Schedule Defaults 0, 1 = reset
16:FS Restore Factory Settings 0, 1 = reset
17 OP Optimisation 0=Disabled, 1=Enabled
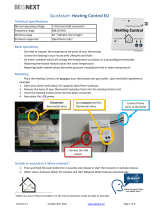
Configure the System
3
Specific settings for the thermostat
and heating system can be
configured in the advanced menu.
Press and hold and then
buttons together until the display
changes (approx. 3 seconds).
A) Press and buttons to navigate
through the parameter list.
B) Press and buttons to
change a parameter.
C) Press button to save the change
(or press to cancel the change).
D) Press button to exit advanced
menu and save any changes.
Parameter
Number
Parameter
Setting
OpenTherm Data ID's
NoDescription Settings (default in bold)
O T1 Low load control 0 = Off, 1 = On
OT2 Control setpoint 5 - 99°C
OT3 Supply water temperature 5 - 99°C
OT4 Return water temperature 5 - 99°C
OT5 Max. supply water temperature 5 - 99°C
OT6 Hot water temperature 5 - 99°C
OT7 Hot water setpoint 5 - 99°C
OT8 Actual power 0 - 99%
OT9 Water pressure 0.0 - 9.9
O T1 0 OTC control 0 = Off, 1 = On
O T11 OTC curve 4 - 40 (16)
O T1 2 Room compensation 0 = Off, 1 = On
Conforms to protection requirements of the following directives:
EMC: 2014/30/EU and LVD: 2014/35/EU
The full text of the EU declaration of conformity is available at the
following internet address: https://hwllhome.co/DoC
ErP: Class V (+3%), (EU) 811/2013
WEEE Directive 2012/19/EU - Waste Electrical and Electronic Equipment directive
At the end of the product life dispose of the packaging and product in a corresponding recycling
centre. Do not dispose of the unit with the usual domestic refuse. Do not burn the product.
Troubleshooting
What’s happening? What it could mean... How to fix it...
Thermostat
display is blank
No power to
heating system
Check heating system is powered
Faulty wiring connection Check wiring at thermostat
and boiler terminals
Display = Faulty temperature
sensor
Replace thermostat or check wiring to
remote temperature sensor if fitted
Thermostat shows
heat demand
but boiler doesn't
respond
Boiler (water) already
at temperature
Normal behaviour - wait for
water temperature to drop
Faulty wiring connection Check wiring at thermostat
and boiler terminals
An OpenTherm boiler can report alerts back to the Thermostat.
You can view these in the ‘OpenTherm® boiler alerts’ menu.
The OpenTherm Data ID’s appear after the installer parameters (see the table above).
© 2020 Resideo Technologies, Inc. All rights reserved.
The Honeywell Home trademark is used under license from Honeywell International Inc.
This product is manufactured by Resideo Technologies, Inc. and its affiliates.
Pittway Sarl, Z.A. La Pièce 4,
1180 Rolle, Switzerland
Country of origin : UK