Page is loading ...

Hive Active Thermostat
Install uide
Guía de
instalación

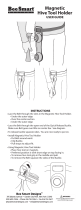
Installation order
To remotely control your heatin and coolin with Hive Active Thermostat,
the thermostat needs to be installed and paired to a Hive Hub.
For quick and efficient set up, install Hive Active Thermostat in the
order shown below.
Hot tip: If you already have a Hive Hub you can start from step 2!
Check your system is compatible with
Hive Active Thermostat at hivehome.com
Install the thermostat
It will show ‘Search’
and then connect
2
Install hub
Wait until the hub
flashes yellow
1
Pair
Pair the thermostat
and hub
3
Complete
online setup
On the Hive
website or
mobile app
4

2
Contents
Installin your hub pae 3
Installin your thermostat pae 5
Pairin your hub and thermostat pae 11
Controllin your thermostat remotely pae 13
Meet your new Hive thermostat pae 14
Multizone installations pae 15
Troubleshootin pae 16

3
Connect the hub to your Internet
router usin the Ethernet cable
provided. Hot tip: Position your
hub on a shelf or table rather than
on the floor to help it talk to your
other Hive devices.
Fit the power cable into the hub and
plu it into a power outlet.
Installin your hub
If you have already installed your hub, please skip this section.
To install the hub you will need an Internet connection a spare Ethernet
port on your router and an electrical outlet nearby.
Install the hub as follows:
2
1

4
Durin start-up the reen liht will flash.
When the hub is ready to pair the reen liht
will be solid and the middle liht will flash
amber. This usually takes 5-10 minutes.
If no lihts are displayed
immediately after installin the hub
check all cables are connected, the
power outlet is workin, and that
you have an internet connection.
If the problem still persists please
contact Hive Technical Support
on +1-866-470-9133 or visit
hivehome.com/support
3

5
Installin your thermostat
1
Switch off the power
Before installin, switch the power off to the heatin and/or coolin
system at your electrical breaker box. Confirm it is powered off and
secured in the OFF position for the duration of the installation. You can
test your fan to see if the system will turn on, if not the power is off.
Remember to always follow appropriate safe electrical isolation
procedures and test to confirm that the supply is off before touchin
any electrical connections.
Hot tip: If your existin thermostat is battery powered it may remain on
once the power is turned o.

6
2
Remove your existing thermostat from the wall and
take a picture of the wires for reference
Your Hive thermostat needs a permanent connection to the ‘C’ or ‘Common’
terminal. If there is no wire connected to the C terminal on your existin
thermostat you should request a professional install. Label the wires to your
existin thermostat usin the stickers below.
Caution: Hive Active Thermostat is desined for systems of 24VAC with
1A maximum current, and should not be used on hih voltae systems.
Wire sticker here

7
Optional decoration plate
If there are holes and marks that will not be covered by your new
Hive thermostat, use the optional decoration plate provided.
Fix the decoration plate to the wall then attach the thermostat backplate
usin the small screws provided.
3
Disconnect the wires from the old thermostat backplate
and remove it from the wall
4
Removing the terminal protectors
Remove the terminal protectors by pressin down the terminal release
tabs and pullin the plastic out of the terminals.

8
6
Connect the wires to the Hive thermostat backplate
Hive is compatible with wire thicknesses AWG 16-22. If your existin
thermostat had a jumper between the RC and RH terminals this is no
loner required. An R wire can o into either RC or RH.
5
Screw on the Hive thermostat backplate using the screws
(and wall anchors) provided
Hot tip: Use the level on the backplate to help et your thermostat
straiht on the wall.
Y1
RC
Y2
O/B
G
C
RH
W1
W2
W3/AUX
ACC
Wirin diaram as an example only

9
Terminal descriptions
G – Fan
C – Common wire
W – 1st, 2nd and 3rd stae heatin for conventional systems.
W3/AUX is used for auxiliary or emerency heat for heat pump systems.
Y – 1st and 2nd stae coolin or 1st and 2nd stae of heat pump compressor
RC – Cool transformer
RH – Heat transformer
O/B – Heat pump reversin valve
ACC – Accessory terminal for dehumidifiers or humidifiers
(also sometimes called DHUM or HUM)

10
7
Attach the thermostat body to the thermostat backplate
Y1
RC
Y2
O/B
G
C
RH
W1
W2
W3/AUX
ACC
Clip thermostat
front plate onto
the wall mounted
back plate.

11
Pairin your hub and thermostat
If you already have other Hive devices connected, you can follow the
‘install devices’ section of your app or online dashboard to pair the hub
and thermostat. If not, follow the steps below.
1
Check the hub is flashing amber –
this means it’s ready to connect
If the hub is showin a solid amber liht, unplu the
power and reconnect it. The hub will bein to reboot,
this may take a few minutes. When the hub is ready
to pair, the top liht will be solid reen and the middle
liht will flash amber.
2
Turn the power back on to your heating
and/or cooling system
The thermostat display will show ‘Search’ – meanin
it’s searchin for the hub. A timer will show how lon
the thermostat has been searchin.
If this lasts for loner than ten minutes, contact
Hive Technical Support and they will dianose
any problems.

12
3
Once paired your thermostat will
take you through guided set-up
The first time you connect your Hive
thermostat, it will walk you throuh the
set-up process.
• Firstly, you’ll need to confirm the wires
shown in reen are the ones you want
to connect. The Hive thermostat will
automatically detect when a wire is
connected to a terminal.
• You’ll then need to tell us whether your system is a as furnace or an
electric air handler. Don’t worry if you’re not sure, we’ve ot that covered too.
• If you have connected wires to other terminals, like O/B and ACC,
we'll ask you a couple more questions.
• You'll then see a quick welcome tour where you’ll learn the common
interactions on the thermostat itself.
Once we know these thins about your system, you can continue to set up
your schedules on the thermostat or switch to the app or website to do this.
Hot tip: If you need to rewire at this point make sure the power is off at the
electrical breaker box.
Welcome to Hive.
Let's take a tour.
(Press back button to skip tour)

13
Controllin your thermostat remotely
Hive Active Thermostat is now installed, there is one final step to link your
thermostat to your Hive account.
1
Download the Hive app
2
Loin usin the email address and password you reistered with
OR If you haven’t already ot a Hive account, tap ‘Create Account’ on the
app Loin screen or create one at hivehome.com/register. Once you’ve
created your account then you’ll need to lo in.
3
Enter the hub ID - this is the ABC-123 formatted number on the
underside of the hub
4
Once the hub ID has been entered, setup is complete and you’ll
land on your Hive dashboard
5
Tap on your thermostat to control it remotely
Hot tip: You can also control your thermostat and other Hive devices
throuh our website, just o to hivehome.com

14
Meet your new Hive thermostat
Quick Cool
Day/Time System
Mode
Humidity
Taret
Temperature
Actual
Temperature
Back
Quick Heat
Dial
Save
Menu
MON 3.25pm
ON
HOLD
55%
72
°
TARGE T
68
°
ACTUAL

15
Multizone installation
Hive Multizone can support up to five zones for heatin and/or coolin.
Hot tip: We recommend that you install the thermostat closest to the hub
first and then install each additional thermostat one at a time.
1
When installin each thermostat, repeat steps 1-6 from the
Installing your thermostat sections on paes 5-9.
2
Lo in online at hivehome.com or throuh your Hive app.
3
If usin your app, select menu and ‘Install Devices’ and
follow the on-screen instructions in the app.
4
If you are loed in via the web, select settins and
‘Install devices’ and follow the onscreen instructions.
5
If you have more zones to install, repeat the steps until all
thermostats have been connected.

16
Troubleshootin
To remotely control your heatin and/or coolin with Hive, both the
thermostat and hub need to be connected. When this service isn’t
available, the thermostat can also be installed without a hub. This is
known as ‘stand-alone’ mode. In ‘stand-alone’ mode the thermostat
acts as a standard prorammable thermostat without the remote
control features and functionality of Hive.
Using stand-alone mode
1
Upon powerin up the thermostat for the first
time, the thermostat display will show ‘Search’.
2
Push and hold the back and check
buttons until the 10 second timer runs down.
3
To switch back to ‘connected’ mode:
Remove thermostat from the backplate, wait 5 seconds and
then connect the thermostat to the backplate. It will power
back up and display ‘Search’ while lookin for your hub.
Search...0:23

17
FCC Compliance Notice
This device complies with Part 15 of the FCC Rules, operation is subject to the followin
two conditions:
(1) This device may not cause interference.
(2) This device must accept any interference received, includin interference that
may cause undesired operation.
This Class B diital apparatus complies with Canadian ICES-003. CAN ICES-3(B)/
NMB- 3(B). This equipment has been tested and found to comply with the limits for a Class
B diital device, pursuant to Part 15 of the FCC Rules. These limits are desined to provide
reasonable protection aainst harmful interference in a residential installation.
This equipment enerates uses and can radiate radio frequency enery and, if not installed
and used in accordance with the instructions, may cause harmful interference to radio
communications. However, there is no uarantee that interference will not occur in a particular
installation. If this equipment does cause harmful interference to radio or television reception,
which can be determined by turnin the equipment off and on, the user is encouraed to try to
correct the interference by one or more of the followin measures:
• Reorient or relocate the receivin antenna.
• Increase the separation between the equipment and receiver.
• Connect the equipment into an outlet on a circuit different from
that to which the receiver is connected.
• Consult the dealer or an experienced radio/TV technician for help.
FCC Radiation Exposure Statement
This equipment complies with FCC and IC RF radiation exposure limits set forth for an
uncontrolled environment. This equipment must be installed to provide a separation distance of
at least 20cm from all persons. Chanes or modifications not expressly approved by the party
responsible for compliance could void the user’s authority to operate the equipment.

18
Orden de instalación
Para controlar de manera remota tu calefacción y aire acondicionado con
Hive Active Thermostat, hay que instlar el termostato y enlazarlo con un
hub Hive.
Para confiurarlo de modo rápido y eficiente, instala Hive Active Thermostat
en el orden que se muestra a continuación.
Consejo útil: si ya tienes un hub Hive, puedes empezar desde el paso 2.
Comprueba si tu sistema es compatible con Hive Active Thermostat
en hivehome.com
Instala el hub
Espera hasta que
la luz del hub
parpadee de
color amarillo
Enlázalos
Enlaza el termostato
y el hub
Instala el
termostato
Mostrará “Search”
(buscar) y procederá
a conectarse
Completa la
configuración
en línea
En la páina web
de Hive o en la
aplicación móvil
1
2
3
4

19
Contenido
Cómo instalar tu hub Páina 20
Cómo instalar tu termostato Páina 22
Cómo enlazar tu hub y tu termostato Páina 28
Cómo controlar tu termostato de forma remota Páina 30
Conoce tu nuevo termostato Hive Páina 31
Instalaciones multizona Páina 32
Solución de problemas Páina 33
/