Page is loading ...

FormNo.3438-292RevA
Aerator686and687
ModelNo.44856—SerialNo.402900001andUp
ModelNo.44867—SerialNo.402900001andUp
Registeratwww.Toro.com.
OriginalInstructions(EN)
*3438-292*A

ThisproductcomplieswithallrelevantEuropean
directiveswhenCEKitPartNo.95-3350isinstalled;
fordetails,pleaseseetheseparateproductspecic
DeclarationofConformity(DOC)sheet.
TheDOTtireinformationislocatedonthesideof
eachtire.Thisinformationgivesloadandspeed
ratings.Replacementtiresshouldhavethesameor
betterratings.RefertoSpecicationstoensurethat
thetiresmeetorexceedtheweightrequirementsof
yourmachine.
WARNING
CALIFORNIA
Proposition65Warning
Useofthisproductmaycauseexposure
tochemicalsknowntotheStateof
Californiatocausecancer,birthdefects,
orotherreproductiveharm.
Introduction
Thisaeratorisintendedtobeusedbytrained
operators.Itisprimarilydesignedforaeratingareasof
well-maintainedlawnsonresidentialgrounds,parks,
sportselds,andoncommercialgrounds.
Readthisinformationcarefullytolearnhowtooperate
andmaintainyourproductproperlyandtoavoid
injuryandproductdamage.Youareresponsiblefor
operatingtheproductproperlyandsafely.
Visitwww.Toro.comforproductsafetyandoperation
trainingmaterials,accessoryinformation,helpnding
adealer,ortoregisteryourproduct.
Wheneveryouneedservice,genuineToroparts,or
additionalinformation,contactanAuthorizedService
DealerorT oroCustomerServiceandhavethemodel
andserialnumbersofyourproductready.Figure1
identiesthelocationofthemodelandserialnumbers
ontheproduct.Writethenumbersinthespace
provided.
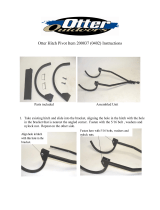
Important:Withyourmobiledevice,youcan
scantheQRcode(ifequipped)ontheserial
numberplatetoaccesswarranty,parts,andother
productinformation.
g265026
Figure1
1.Modelandserialnumberlocation
ModelNo.
SerialNo.
Thismanualidentiespotentialhazardsandhas
safetymessagesidentiedbythesafety-alertsymbol
(Figure2),whichsignalsahazardthatmaycause
seriousinjuryordeathifyoudonotfollowthe
recommendedprecautions.
g000502
Figure2
Safety-alertsymbol
Thismanualuses2wordstohighlightinformation.
Importantcallsattentiontospecialmechanical
informationandNoteemphasizesgeneralinformation
worthyofspecialattention.
©2020—TheToro®Company
8111LyndaleAvenueSouth
Bloomington,MN55420
2
Contactusatwww.Toro.com.
PrintedintheUSA
AllRightsReserved

Contents
Safety.......................................................................3
GeneralSafety...................................................3
SafetyandInstructionalDecals..........................4
Setup........................................................................5
1InstallingtheWheels........................................6
2InstallingtheWeights.......................................6
3MountingtheT ongueAssembly.......................6
4AttachingthePumpandCylinder
Assembly........................................................8
ProductOverview.....................................................9
Specications....................................................9
Attachments/Accessories...................................9
Operation................................................................10
AssemblingtheAeratortotheTraction
Unit...............................................................10
InstallingtheTines............................................12
UsingtheAerator..............................................12
Maintenance...........................................................14
RecommendedMaintenanceSchedule(s)...........14
Lubrication..........................................................14
LubricatingtheBearings...................................14
ChassisMaintenance...........................................15
CheckingTireAirPressure...............................15
CheckingtheMainArmsBushings....................15
AdjustingtheSprings........................................16
CheckingtheTines...........................................16
Storage...................................................................17
Safety
GeneralSafety
•Readandunderstandthecontentsofthe
Operator’sManualforboththeaeratorandthe
tractionunit.
•Trainalloperatorsandservicepersonnelonthe
aerator.
•Raisethetines,slowdown,andusecautionwhen
crossingsurfacesotherthangrassandwhen
transportingthemachine.
•Donotoperatethemachinewhenill,tired,or
undertheinuenceofalcoholordrugs.
•Useextremecarewhenloadingorunloadingthe
aeratorintoatrailerortruck.
•Operatetheaeratoratalowerspeedwhenyou
areonaslope.
•Donotusetheaeratorneardrop-offs,ditches,
embankments,orbodiesofwater.Theaerator
couldsuddenlyrolloverifawheelgoesoffthe
edge.
•Stopthetractionunit,raisethetines(aerator
model44867),shutofftheengine,engagethe
parkingbrake,removethekey,andwaitforall
movementtostopbeforeadjusting,cleaning,or
repairingtheaerator.
•Alwaysweargloveswhenservicingthetines.
Replacedamagedtines.
•Donotputhandsorfeetnearmovingcomponents
ofthemachine.
Improperlyusingormaintainingthismachinecan
resultininjury.Toreducethepotentialforinjury,
complywiththesesafetyinstructionsandalways
payattentiontothesafety-alertsymbol
,which
meansCaution,Warning,orDanger—personalsafety
instruction.Failuretocomplywiththeseinstructions
mayresultinpersonalinjuryordeath.
3

SafetyandInstructionalDecals
Safetydecalsandinstructionsare
easilyvisibletotheoperatorandare
locatednearanyareaofpotential
danger.Replaceanydecalthatis
damagedormissing.
decal106-0229
106-0229
1.Warning—removethe
keyfromtheignition
andreadtheOperator's
Manualbeforeperforming
maintenance.
2.Cutting/severinghazard
ofhand;cutting/severing
hazardoffoot.
decal58-6520
58-6520
1.Grease
decal133-8061
133-8061
4

Setup
LooseParts
Usethechartbelowtoverifythatallpartshavebeenshipped.
ProcedureDescription
Qty.
Use
Wheelassembly2
Spacer
4
Axle2
Slottednut
2
1
Cotterpin
2
Installthewheels.
Weight12
Bolt(1/2x2-3/4inch)
6
2
Flangedlocknut(1/2inch)
6
Installtheweights.
Tongueassembly1
Bracket2
Bolt(1/2x2-1/2inch)
6
Nut(1/2inch)
6
Washer(1/2inch)
6
Lockwasher(1/2inch)
6
Lockpin1
3
Hairpincotterpin(small)
1
Mountthetongueassembly.
Pumpandcylinderassembly1
Screw(3/8x1-1/4inch)
2
Washer(3/8inch)
2
Locknut(3/8inch)
2
Screw(1/2x1-1/4inch)
1
Nut(1/2inch)
1
Lockwasher(1/2inch)
1
Vibrationstrap1
Cylinderpin
2
4
Hairpincotterpin(large)
2
Attachthepumpandcylinderassembly.
MediaandAdditionalParts
Description
Qty.
Use
Operator'sManual
1
Readbeforeoperatingthemachine.
Determinetheleftandrightsidesofthemachinefromthenormaloperatingposition.
5

1
InstallingtheWheels
Model44856
Partsneededforthisprocedure:
2Wheelassembly
4
Spacer
2Axle
2
Slottednut
2
Cotterpin
Procedure
1.Positionthewheelassemblyand2spacers(1
oneachsideofthewheelhub)betweenthe
frameasshowninFigure3.
g029051
Figure3
1.Axle4.Wheelspacer
2.Cotterpin
5.Wheelassembly
3.Slottednut
2.Inserttheaxlethroughtheframe,spacers,and
wheel(Figure3).
3.Threadtheslottednutontotheaxle(Figure3)
andtightenitwithahandwrenchto8to20N∙m
(75to180in-lb).
4.Rotatethewheeltoseatthebearingsand
removeendplay.
5.Loosenthecastlenutuntilitseparatesfromthe
frame,andthewheelhubhasendplay.
6.Tightentheslottednutto1.5to2N∙m(15to20
in-lb)whilerotatingthewheel.
Note:Ifthecotterpinholeintheaxleshaftis
misalignedwithaslotinthenut,loosenthenut
untiltheholeandslotaligns.
7.Installthecotterpin(Figure3).
8.Greasethewheelbearingsuntilthewheelhub
cavityiscompletelyfullandyouseeslight
leakageattheseals.
2
InstallingtheWeights
Partsneededforthisprocedure:
12Weight
6
Bolt(1/2x2-3/4inch)
6
Flangedlocknut(1/2inch)
Procedure
InstalltheweightsasshowninFigure4.
g214817
Figure4
1.Flangedlocknut(1/2inch)3.Bolt(1/2x2-3/4inch)
2.Weight
6

3
MountingtheTongue
Assembly
Model44856
Partsneededforthisprocedure:
1Tongueassembly
2Bracket
6
Bolt(1/2x2-1/2inch)
6
Nut(1/2inch)
6
Washer(1/2inch)
6
Lockwasher(1/2inch)
1Lockpin
1
Hairpincotterpin(small)
Procedure
1.Removethebrackets,lockpin,andhardware
fromthetongueattachmentpointsoftheaerator.
2.Alignthetongueassemblywiththeaeratoras
showninFigure5.
g216322
Figure5
3.Alignthebracketsontheaeratorasshownin
Figure6.
g216319
Figure6
4.Securethetongueassemblyandthebrackets
withthehardwareasshowninFigure7and
torquethenutsto54to74N∙m(67-83ft-lb).
g216320
Figure7
1.Nut(1/2inch)3.Washer(1/2inch)
2.Lockwasher(1/2inch)4.Bolt(1/2x2-1/2inch)
5.Installthelockpinandsecureitwiththesmall
hairpincotterasshowninFigure8.
7

g216321
Figure8
4
AttachingthePumpand
CylinderAssembly
Model44856
Partsneededforthisprocedure:
1Pumpandcylinderassembly
2
Screw(3/8x1-1/4inch)
2
Washer(3/8inch)
2
Locknut(3/8inch)
1
Screw(1/2x1-1/4inch)
1
Nut(1/2inch)
1
Lockwasher(1/2inch)
1Vibrationstrap
2
Cylinderpin
2
Hairpincotterpin(large)
Procedure
Note:Donotkinkorpinchthehydraulichose.
Alignthepumpandcylinderassemblyandsecure
themasshowninFigure9.
g216317
g216318
Figure9
1.Washer(3/8inch)6.Nut(1/2inch)
2.Screw(3/8x1-1/4inch)7.Lockwasher(1/2inch)
3.Hairpincotter(large)
8.Vibrationstrap
4.Cylinderpin9.Locknut(3/8inch)
5.Screw(1/2x1-1/4inch)
8

ProductOverview
Specications
FrameWeldedtubularsteel;divided
into3sections,eachsection
moveshorizontallyand
diagonallytofollowcontour,
springloaded
Aeratingwheels12castings,70lb,4per
section,withpermanentroll
pineveryotherhole
Shaft1-1/4inch,machinedto1inch
Tines96,8perwheel,securedwith
1bolt,rollpininwheelsecures
secondholeintine;1/2or3/4
inchopenorclosed,4inch
slicingbladesareavailable
Bearings
Selfsealed,selfaligned
Transporttires(Model44856
only)
4.80x8—2ply
Hitch
Droppin(Model44856)
3point—Category1tractor
type(Model44867)
Liftmechanism(Model44856
only)
Handhydraulicpumptoa10
inchstrokecylinder.Hydraulic
uidrequiredisMobilDTE15
Morequivalent
Springs
6toassistdownpressureon
tines
Aeratingswath
2m(78inches)
Pattern
15cm(6inches)oncenter
Operatingspeed1to16km/h(1to10mph),
dependingonconditions
2.2m(90inches)(Model
44856)
Overallwidth
2m(82inches)(Model44867)
674kg(1,485lb)(Model
44856)
Weight
569kg(1,255lb)(Model
44867)
Attachments/Accessories
AselectionofT oroapprovedattachmentsand
accessoriesisavailableforusewiththemachine
toenhanceandexpanditscapabilities.Contact
yourAuthorizedServiceDealerorauthorizedToro
distributororgotowww.T oro.comforalistofall
approvedattachmentsandaccessories.
Toensureoptimumperformanceandcontinuedsafety
certicationofthemachine,useonlygenuineT oro
replacementpartsandaccessories.Replacement
partsandaccessoriesmadebyothermanufacturers
couldbedangerous,andsuchusecouldvoidthe
productwarranty.
9

Operation
Note:Determinetheleftandrightsidesofthetraction
unitfromthenormaloperatingposition.
AssemblingtheAeratorto
theTractionUnit
PreparingtheTractionUnit
1.Parkthetractionunitonalevelsurface,shutoff
theengine,engagetheparkingbrake,remove
thekey,andwaitforallmovementtostopbefore
leavingthemachine.
2.Visuallyinspectthetractionunitforanyloose
hardwareoranyotherpossibleproblems.
Tightenloosehardwareandcorrectany
problemsbeforeoperating.
AttachingAerator
Model44856
Attachthehitchoftheaeratortothetongueofthe
tractionunitusingthehardwareofthetractionunit.
Important:Donotliftthetonguebyhand.Use
thetonguejackorpoweredlifttoalignthehitch
tothetractionunit.
1.Checkthetireairpressure;refertoChecking
TireAirPressure(page15).
2.Lowerthe3-pointhitch;refertotheoperator’s
manualforyourtractionunit.
3.Ifinstalled,removethelynchpin,clevispin,and
upper3-pointlinkfromtheupper-linkbracket
(Figure10).
g250419
Figure10
1.Upper3-pointlink3.Upper-linkbracket
2.Lynchpin
4.Clevispin
4.Fullyraisethelowerlinksofthe3-pointhitch
(Figure11).
g264991
Figure11
5.Usethehydraulichandpump,movetheliftarm
(Figure12)justrearwardoftheforwardholesin
thelock-barbracket(transportposition).
Note:Theliftarmisinthetransportposition
whenthebarispositionedrearwardofthe
forwardlock-barbrackethole.
g265013
Figure12
1.Lock-barbracket
3.Liftarm(transportposition)
2.Lock-barpin4.Hairpin
6.Insertthelock-barpinintotheforwardholesin
thelock-barbracketandsecurethelock-barpin
tothebracketwiththehairpin(Figure12).
7.Alignthetongueoftheaeratortothedrawbar
ofthetractionunitandusethehitchhardwareof
thevehicletosecuretheaerator(Figure13).
10

g265012
Figure13
1.Hitchhardware(traction
unit)
3.Tongue(aerator)
2.Drawbar(tractionunit)
AttachingAerator
Model44867
1.Lowerthelower-linkarmsofthetractionunit
(Figure14).
g265078
Figure14
2.Adjustthelower-linkarms(Figure15)outward
fully;refertotheoperator’smanualforthe
tractionunit.
g264148
Figure15
3.Ifremoved,installtheupper3-pointlink(Figure
16)tothetractionunit.
g265074
Figure16
1.Upper3-pointlink3.Upper-linkbracket
2.Lynchpin
4.Clevispin
4.Positiontheaeratorsothatthelower-linkarms
ofthetractionunitlineupwiththelift-armpinsof
theaerator(Figure17).
g265123
Figure17
1.Lift-armpins(aerator)3.Lower-linkarm(traction
unit)
2.Lynchpin
5.Assemblethelower-linkarmstothelift-armpins
andsecurethearmswiththelynchpins(Figure
17).
6.Assembletheotherendoftheupper3-pointlink
totheliftarmsoftheaerator(Figure18)with
thebolt(3/4x4inches),nut(3/4inch),andjam
nut(3/4inch).
11

g265124
Figure18
1.Nut(3/4inch)4.Liftarms(aerator)
2.Jamnut(3/4inch)5.Bolt(3/4x4inches)
3.Upper3-pointlink
7.Adjustthelinksofthe3-pointhitchtolevelthe
aeratorlefttorightandfronttoback(Figure19);
refertotheoperator’smanualforyourtraction
unit.
g265125
Figure19
InstallingtheTines
Important:Installthetinesonlyafterattaching
theaeratortothetractionunit.
1.Startattheoutsidecastingandinstallthetines
asshowninFigure20.
g029052
Figure20
1.Hitch3.Rollpin
2.Tine4.Bolt
2.Installall8tinesonthecasting,usingarollpin
andbolts(1/2inchx1-3/4inches)andensuring
thattherollpinisinthefrontposition(Figure20).
Note:Ensurethattherollpinisinthefronthole
andtheboltisinthesecondhole.
UsingtheAerator
UsingModel44856
1.Closethevalveatthebaseofthehydraulic
hand-pump(Figure21)andstrokethepump
handleuntilthelockpinrotatesinthelock-bar
bracket.
g265130
Figure21
1.Valveknob(hydraulichand-pump)
2.Removethehairpinandmovethelockpinto
therearholes(stow/aeratingposition)inthe
12

lock-barbracket,andsecurethelockpintothe
bracketwiththehairpin(Figure22).
Note:Movingthelockpintostow/aerating
positionallowsyoutoraiseandlowertheaerator
whileworkingatthejobsite.
g265163
Figure22
1.Lockpin—stow/aerating
position(rearholeofthe
lock-barbracket)
3.Lockpin—transport
position(rearholeofthe
lock-barbracket)
2.Hairpin
3.Openthevalveatthebaseofthehydraulic
hand-pumptolowertheaeratortotheground.
4.Returntotheoperator’sseatandfollowthe
proceduresfortowinganimplement;refertothe
operator’smanualforthetractionunit.
5.Attheendofthedesiredaeratingregion,stop
thetractionunit,engagetheparkingbrake,
shutofftheengine,andremovethekeybefore
gettingoutoftheoperator’sseat.
6.Closethevalveofthehydraulichand-pump
(Figure21)andstrokethepumphandletoraise
theaeratortothetransportposition.
7.Removethehairpinandmovethelockpinto
theforwardholes(transportposition)inthe
lock-barbracket,andsecurethelockpintothe
bracketwiththehairpin(Figure22).
UsingModel44867
1.Startthetractionunitengineandrunitatalow
speed.
2.With3-pointorremote-hydraulicscontrolofthe
tractionunit,slowlylowertheaeratorwhilethe
tractionunitisslowlymovingforward(Figure
23).
g265323
Figure23
3.Asaeratingbegins,increasethespeedofthe
tractionunit.
4.Raisetheaeratorattheendofthepassbefore
turning(Figure24).
g265324
Figure24
13

Maintenance
CAUTION
Ifyouleavethekeyintheswitch,someonecouldaccidentlystarttheengineandseriously
injureyouorotherbystanders.
Removethekeyfromtheswitchbeforeyouperformanymaintenance.
RecommendedMaintenanceSchedule(s)
MaintenanceService
Interval
MaintenanceProcedure
Beforeeachuseordaily
•Checkthetireairpressure.
•Checkthetinesforwear.
Every40hours
•Greasethettings.
Every100hours
•Checkthemainarmbushings.
Lubrication
LubricatingtheBearings
ServiceInterval:Every40hours
GreaseSpecication:No.2lithiumgrease
LubricatetheaeratorwiththespeciedgreaseasshowninFigure25orFigure26.
g265329
Figure25
Model44856
14

g265328
Figure26
Model44867
ChassisMaintenance
CheckingTireAirPressure
Model44856
ServiceInterval:Beforeeachuseordaily
1.Checkthetirepressure(Figure27).
Youshouldmeasure413kPa(60psi).
g265014
Figure27
2.Ifneeded,addorremoveairtoorairfromthe
tiresuntilyoumeasure413kPa(60psi).
CheckingtheMainArms
Bushings
ServiceInterval:Every100hours
The6mainarmspivotfreelyhorizontallyandvertically
toallowtheunittofollowthecontouroftheground.
Abronzebushingispressedinsidethepivotholes
betweenthemainarmsandframemountingbrackets
(Figure28).
15

g265377
g265376
Figure28
1.Mainarm6.Framemountingbracket
2.Bolt(5/8x2inches)7.Washer(5/8x1-3/4
inches)
3.Washer(5/8x3inches)
8.Lockwasher
4.Washer(11/16x3inches)9.Nut(5/8inch)
5.Bronzebushing
1.Movetheaeratortothetransportposition;refer
toUsingtheAerator(page12).
2.Checkthatthe6mainarmspivotfreely(Figure
28).
3.Ifamainarmbinds,performthefollowingsteps:
A.Loosenthespringtension;refertoAdjusting
theSprings(page16).
B.Removethebolt,nut,washers,and
bushing,thatsecurethemainarmtothe
framemountingbracket(Figure28)and
checkthehardwareforwear.
Note:Replaceallwornordamaged
hardware.Thebronzebushingis3mm(1/8
inch)longerthanthecombinedmainarm
andmountingbracketplatethickness.
C.Assemblethemainarmtotheframe
mountingbracketwiththebolt,nut,
washers,andbushing(Figure28).
D.Tightenthebolt(5/8x2inch)andnut(5/8
inch)againstthebushings,notthearms,to
allowittopivotfreely.
E.Adjustthespringtension;refertoAdjusting
theSprings(page16).
AdjustingtheSprings
Thepurposeofthespringsistodistributetheweight
evenlyandreducetheshockloadonthepivotpoints.
Adjustthespringsevenlyacrosstolevelthemachine.
Usethenutsattopofthespringrodtoadjustthe
springtension(Figure29).
Important:Whenadjustingthespringtension,do
notcompletelycompressthecoils.Allowatleast
1.6mm(1/16inch)ofspacebetweencoils.
g265341
Figure29
1.Springrodnuts3.1.6mm(1/16inch)
minimumspace\between
coils
2.Spring
CheckingtheTines
ServiceInterval:Beforeeachuseordaily
Toobtainmaximumaeratingperformance,always
checkthetinesforwearanddamagebeforeevery
use.Severelyworntinesareeasytobendorbreak
andleavethecoresintheground.SeeFigure30for
examplesoftinewear.
16

g029056
Figure30
1.New3.Wornand
unusable—replace
2.Badlywornbutusable
Alwayscleancoresoutofthetinesbeforestorage.
Coresleftintinesforextendedperiodscancause
pittingontheinsideofthetinewhichkeepthecore
fromejecting.
Storage
1.Raisethetines.
2.Stopthetractionunit,shutofftheengine,
engagetheparkingbrake,andremovethekey.
3.Removedirtanddebrisfromtheentireaerator.
Cleanthecoresoutofthetines.
Important:Youcanwashtheaeratorwith
milddetergentandwater.Donotpressure
washtheaerator.
4.Lubricatetheaerator;refertoLubrication(page
14).
5.Checktheconditionofthetines.Replaceany
brokenorworntines.
6.Checkandtightenallbolts,nuts,andscrews.
Repairorreplaceanypartthatisdamaged.
7.Paintallscratchedorbaremetalsurfaces.Paint
isavailablefromyourAuthorizedServiceDealer.
8.Storetheaeratorinaclean,drygarageor
storagearea.
9.Covertheaeratortoprotectitandkeepitclean.
17

EEA/UKPrivacyNotice
Toro’sUseofYourPersonalInformation
TheT oroCompany(“T oro”)respectsyourprivacy.Whenyoupurchaseourproducts,wemaycollectcertainpersonalinformationaboutyou,eitherdirectly
fromyouorthroughyourlocalTorocompanyordealer.T orousesthisinformationtofullcontractualobligations-suchastoregisteryourwarranty,
processyourwarrantyclaimortocontactyouintheeventofaproductrecall-andforlegitimatebusinesspurposes-suchastogaugecustomer
satisfaction,improveourproductsorprovideyouwithproductinformationwhichmaybeofinterest.Toromayshareyourinformationwithoursubsidiaries,
afliates,dealersorotherbusinesspartnersinconnectiontheseactivities.Wemayalsodisclosepersonalinformationwhenrequiredbylaworin
connectionwiththesale,purchaseormergerofabusiness.Wewillneversellyourpersonalinformationtoanyothercompanyformarketingpurposes.
RetentionofyourPersonalInformation
Torowillkeepyourpersonalinformationaslongasitisrelevantfortheabovepurposesandinaccordancewithlegalrequirements.Formoreinformation
aboutapplicableretentionperiodspleasecontact[email protected].
Toro’sCommitmenttoSecurity
YourpersonalinformationmaybeprocessedintheUSoranothercountrywhichmayhavelessstrictdataprotectionlawsthanyourcountryofresidence.
Wheneverwetransferyourinformationoutsideofyourcountryofresidence,wewilltakelegallyrequiredstepstoensurethatappropriatesafeguardsare
inplacetoprotectyourinformationandtomakesureitistreatedsecurely.
AccessandCorrection
Youmayhavetherighttocorrectorreviewyourpersonaldata,orobjecttoorrestricttheprocessingofyourdata.T odoso,pleasecontactusbyemail
at[email protected].IfyouhaveconcernsaboutthewayinwhichTorohashandledyourinformation,weencourageyoutoraisethisdirectlywithus.
PleasenotethatEuropeanresidentshavetherighttocomplaintoyourDataProtectionAuthority.
374-0282RevC

CaliforniaProposition65WarningInformation
Whatisthiswarning?
Youmayseeaproductforsalethathasawarninglabellikethefollowing:
WARNING:CancerandReproductiveHarm—www.p65Warnings.ca.gov.
WhatisProp65?
Prop65appliestoanycompanyoperatinginCalifornia,sellingproductsinCalifornia,ormanufacturingproductsthatmaybesoldinorbroughtinto
California.ItmandatesthattheGovernorofCaliforniamaintainandpublishalistofchemicalsknowntocausecancer,birthdefects,and/orother
reproductiveharm.Thelist,whichisupdatedannually,includeshundredsofchemicalsfoundinmanyeverydayitems.ThepurposeofProp65isto
informthepublicaboutexposuretothesechemicals.
Prop65doesnotbanthesaleofproductscontainingthesechemicalsbutinsteadrequireswarningsonanyproduct,productpackaging,orliteraturewith
theproduct.Moreover,aProp65warningdoesnotmeanthataproductisinviolationofanyproductsafetystandardsorrequirements.Infact,the
CaliforniagovernmenthasclariedthataProp65warning“isnotthesameasaregulatorydecisionthataproductis‘safe’or‘unsafe.’”Manyofthese
chemicalshavebeenusedineverydayproductsforyearswithoutdocumentedharm.Formoreinformation,gotohttps://oag.ca.gov/prop65/faqs-view-all
.
AProp65warningmeansthatacompanyhaseither(1)evaluatedtheexposureandhasconcludedthatitexceedsthe“nosignicantrisklevel”;or(2)
haschosentoprovideawarningbasedonitsunderstandingaboutthepresenceofalistedchemicalwithoutattemptingtoevaluatetheexposure.
Doesthislawapplyeverywhere?
Prop65warningsarerequiredunderCalifornialawonly.ThesewarningsareseenthroughoutCaliforniainawiderangeofsettings,includingbutnot
limitedtorestaurants,grocerystores,hotels,schools,andhospitals,andonawidevarietyofproducts.Additionally,someonlineandmailorder
retailersprovideProp65warningsontheirwebsitesorincatalogs.
HowdotheCaliforniawarningscomparetofederallimits?
Prop65standardsareoftenmorestringentthanfederalandinternationalstandards.TherearevarioussubstancesthatrequireaProp65warning
atlevelsthatarefarlowerthanfederalactionlimits.Forexample,theProp65standardforwarningsforleadis0.5μg/day,whichiswellbelow
thefederalandinternationalstandards.
Whydon’tallsimilarproductscarrythewarning?
•ProductssoldinCaliforniarequireProp65labellingwhilesimilarproductssoldelsewheredonot.
•AcompanyinvolvedinaProp65lawsuitreachingasettlementmayberequiredtouseProp65warningsforitsproducts,butothercompanies
makingsimilarproductsmayhavenosuchrequirement.
•TheenforcementofProp65isinconsistent.
•CompaniesmayelectnottoprovidewarningsbecausetheyconcludethattheyarenotrequiredtodosounderProp65;alackofwarningsfora
productdoesnotmeanthattheproductisfreeoflistedchemicalsatsimilarlevels.
WhydoesToroincludethiswarning?
Torohaschosentoprovideconsumerswithasmuchinformationaspossiblesothattheycanmakeinformeddecisionsabouttheproductstheybuyand
use.T oroprovideswarningsincertaincasesbasedonitsknowledgeofthepresenceofoneormorelistedchemicalswithoutevaluatingthelevelof
exposure,asnotallthelistedchemicalsprovideexposurelimitrequirements.WhiletheexposurefromToroproductsmaybenegligibleorwellwithinthe
“nosignicantrisk”range,outofanabundanceofcaution,T orohaselectedtoprovidetheProp65warnings.Moreover,ifT orodoesnotprovidethese
warnings,itcouldbesuedbytheStateofCaliforniaorbyprivatepartiesseekingtoenforceProp65andsubjecttosubstantialpenalties.
RevA

TheToroWarranty
Atwo-YearLimitedWarranty
ConditionsandProductsCovered
TheToroCompanyanditsafliate,T oroWarrantyCompany,pursuant
toanagreementbetweenthem,jointlywarrantyourToroHydroject
orProCoreAerator(“Product”)tobefreefromdefectsinmaterials
orworkmanshipfortwoyearsor500operationalhours*,whichever
occursrst.Thiswarrantyisapplicabletoallproducts(referto
separatewarrantystatementsfortheseproducts).Whereawarrantable
conditionexists,wewillrepairtheProductatnocosttoyouincluding
diagnostics,labor,parts,andtransportation.Thiswarrantybegins
onthedatetheProductisdeliveredtotheoriginalretailpurchaser.
*Productequippedwithanhourmeter.
InstructionsforObtainingWarrantyService
YouareresponsiblefornotifyingtheCommercialProductsDistributoror
AuthorizedCommercialProductsDealerfromwhomyoupurchasedthe
Productassoonasyoubelieveawarrantableconditionexists.Ifyouneed
helplocatingaCommercialProductsDistributororAuthorizedDealer,or
ifyouhavequestionsregardingyourwarrantyrightsorresponsibilities,
youmaycontactusat:
CommercialProductsServiceDepartment
ToroWarrantyCompany
8111LyndaleAvenueSouth
Bloomington,MN55420-1196
952–888–8801or800–952–2740
E-mail:[email protected]
OwnerResponsibilities
AstheProductowner,youareresponsibleforrequiredmaintenanceand
adjustmentsstatedinyourOperator’sManual.Failuretoperformrequired
maintenanceandadjustmentscanbegroundsfordisallowingawarranty
claim.
ItemsandConditionsNotCovered
Notallproductfailuresormalfunctionsthatoccurduringthewarranty
periodaredefectsinmaterialsorworkmanship.Thiswarrantydoesnot
coverthefollowing:
•Productfailureswhichresultfromtheuseofnon-T ororeplacement
parts,orfrominstallationanduseofadd-on,ormodiednon-Toro
brandedaccessoriesandproducts.Aseparatewarrantymaybe
providedbythemanufactureroftheseitems.
•Productfailureswhichresultfromfailuretoperformrecommended
maintenanceand/oradjustments.Failuretoproperlymaintain
yourToroproductpertherecommendedmaintenancelistedinthe
Operator’sManualcanresultinclaimsforwarrantybeingdenied.
•ProductfailureswhichresultfromoperatingtheProductinanabusive,
negligentorrecklessmanner.
•Partssubjecttoconsumptionthroughuseunlessfoundtobedefective.
Examplesofpartswhichareconsumed,orusedup,duringnormal
Productoperationinclude,butarenotlimitedto,brakespadsand
linings,clutchlinings,blades,reels,bedknives,tines,sparkplugs,
castorwheels,tires,lters,belts,andcertainsprayercomponents
suchasdiaphragms,nozzles,andcheckvalves,etc.
•Failurescausedbyoutsideinuence.Itemsconsideredtobeoutside
inuenceinclude,butarenotlimitedto,weather,storagepractices,
contamination,useofunapprovedcoolants,lubricants,additives,
fertilizers,water,orchemicals,etc.
•Normalnoise,vibration,wearandtear,anddeterioration.
•Normal“wearandtear”includes,butisnotlimitedto,damagetoseats
duetowearorabrasion,wornpaintedsurfaces,scratcheddecalsor
windows,etc.
Parts
Partsscheduledforreplacementasrequiredmaintenancearewarranted
fortheperiodoftimeuptothescheduledreplacementtimeforthatpart.
Partsreplacedunderthiswarrantyarecoveredforthedurationofthe
originalproductwarrantyandbecomethepropertyofToro.Torowillmake
thenaldecisionwhethertorepairanyexistingpartorassemblyorreplace
it.Toromayuseremanufacturedpartsforwarrantyrepairs.
MaintenanceisatOwner’sExpense
Enginetune-up,lubricationcleaningandpolishing,replacementofItems
andConditionsNotCovered,lters,coolant,andcompletingrecommended
maintenancearesomeofthenormalservicesToroproductsrequirethat
areattheowner’sexpense.
GeneralConditions
RepairbyanAuthorizedToroDistributororDealerisyoursoleremedy
underthiswarranty.
NeitherTheToroCompanynorToroWarrantyCompanyisliablefor
indirect,incidentalorconsequentialdamagesinconnectionwiththe
useoftheToroProductscoveredbythiswarranty,includingany
costorexpenseofprovidingsubstituteequipmentorserviceduring
reasonableperiodsofmalfunctionornon-usependingcompletion
ofrepairsunderthiswarranty.ExceptfortheEmissionswarranty
referencedbelow,ifapplicable,thereisnootherexpresswarranty.
Allimpliedwarrantiesofmerchantabilityandtnessforusearelimitedtothe
durationofthisexpresswarranty.Somestatesdonotallowexclusionsof
incidentalorconsequentialdamages,orlimitationsonhowlonganimplied
warrantylasts,sotheaboveexclusionsandlimitationsmaynotapplytoyou.
Thiswarrantygivesyouspeciclegalrights,andyoumayalsohaveother
rightswhichvaryfromstatetostate.
Noteregardingenginewarranty:
TheEmissionsControlSystemonyourProductmaybecoveredby
aseparatewarrantymeetingrequirementsestablishedbytheU.S.
EnvironmentalProtectionAgency(EPA)and/ortheCaliforniaAirResources
Board(CARB).Thehourlimitationssetforthabovedonotapplytothe
EmissionsControlSystemWarranty.RefertotheEngineEmissionControl
WarrantyStatementprintedinyourOperator’sManualorcontainedinthe
enginemanufacturer’sdocumentationfordetails
CountriesOtherthantheUnitedStatesorCanada
CustomerswhohavepurchasedT oroproductsexportedfromtheUnitedStatesorCanadashouldcontacttheirT oroDistributor(Dealer)toobtain
guaranteepoliciesforyourcountry,province,orstate.IfforanyreasonyouaredissatisedwithyourDistributor'sserviceorhavedifcultyobtaining
guaranteeinformation,contacttheToroimporter.Ifallotherremediesfail,youmaycontactusatT oroWarrantyCompany.
374-0270RevB
/