3
ABOUT THE IQ DRIVE THERMOSTAT
•TheiQDriveThermostatisawallmountedcontroller
that accurately maintains room temperature by
controlling conventional or iQ Drive compatible
components in a heating and air conditioning
system. Easy-to-use operating modes activate
coolingequipment(heatpumporairconditioner)
duringwarmseasonsandheatingequipment(heat
pump,electricheater,gasfurnaceorheatpump/
electricheatcombination)whenthetemperature
getscolder.Foroperatingmodesetupinstructions,
Seepage6.
•TheiQDriveThermostatservesastheprimary
controllerforhomesequippedwiththeiQZone
system.Insuchsystemstherewillbeaseparate
zonethermostatineachofthezonessetup,in
additiontothiscontroller.SeetheiQZoneSystem
ZoneThermostatUser’sManualforinformationon
howtooperatethelocalzonethermostats.Seethe
ZoneControlsection(page13)foradescription
ofoperationandfeatureswhichonlyapplytoiQ
Zonesystems.
•Dehumidicationmodequicklyremovesmoisture
from the air and regulates humidity levels
throughoutthehome.Controloutputforoptional
humidierisalsoprovided.Seepage12.
•The blue backlight feature makes viewing the
screeneasieratnightorinpoorlylitrooms.The
backlight turns on for a certain amount of time
when any one of the five buttonsis pressed.
Thedurationthatthebacklightstaysoncanbe
programmedfor30,60,90,120seconds,orON.
Seepage5.
•Completesystemmonitoringalertsthehomeowner
whenserviceisneeded.
Navigation
•Navigationbetweendisplayscreensorchanging
operatingcommandscaneasilybemadebyusing
thevekeystotherightofthescreen(seepage2).
NOTE: Selectinganitemmeansthat itsnameor
valueappearsinahighlightedbandonthescreen.
Anotherbuttonwillneedtobepressedafterwards
toaccessanothermenuortoselectorchangea
value.
•The
buttonsnavigateupordowninascreen,
withinalistofchoices,ortoincrease/decreasea
number.NOTE: Onsomescreensholdingthese
buttonsdownforseveralsecondswilladjustthe
valueinlargerincrements.
*Outdoortemperaturecanonlybedisplayedifaheatpump
oriQDriveACisinstalledoutside.
•The buttonsnavigaterightorleftinascreen,
ormovetothepreviousornextscreenwithina
screensequence.
•The buttonselectsanoptioncategoryorvalue
so that it can change or save a modied entry.
NOTE: Whenavalueisselected,thedarkband
willblinkinmostscreens.
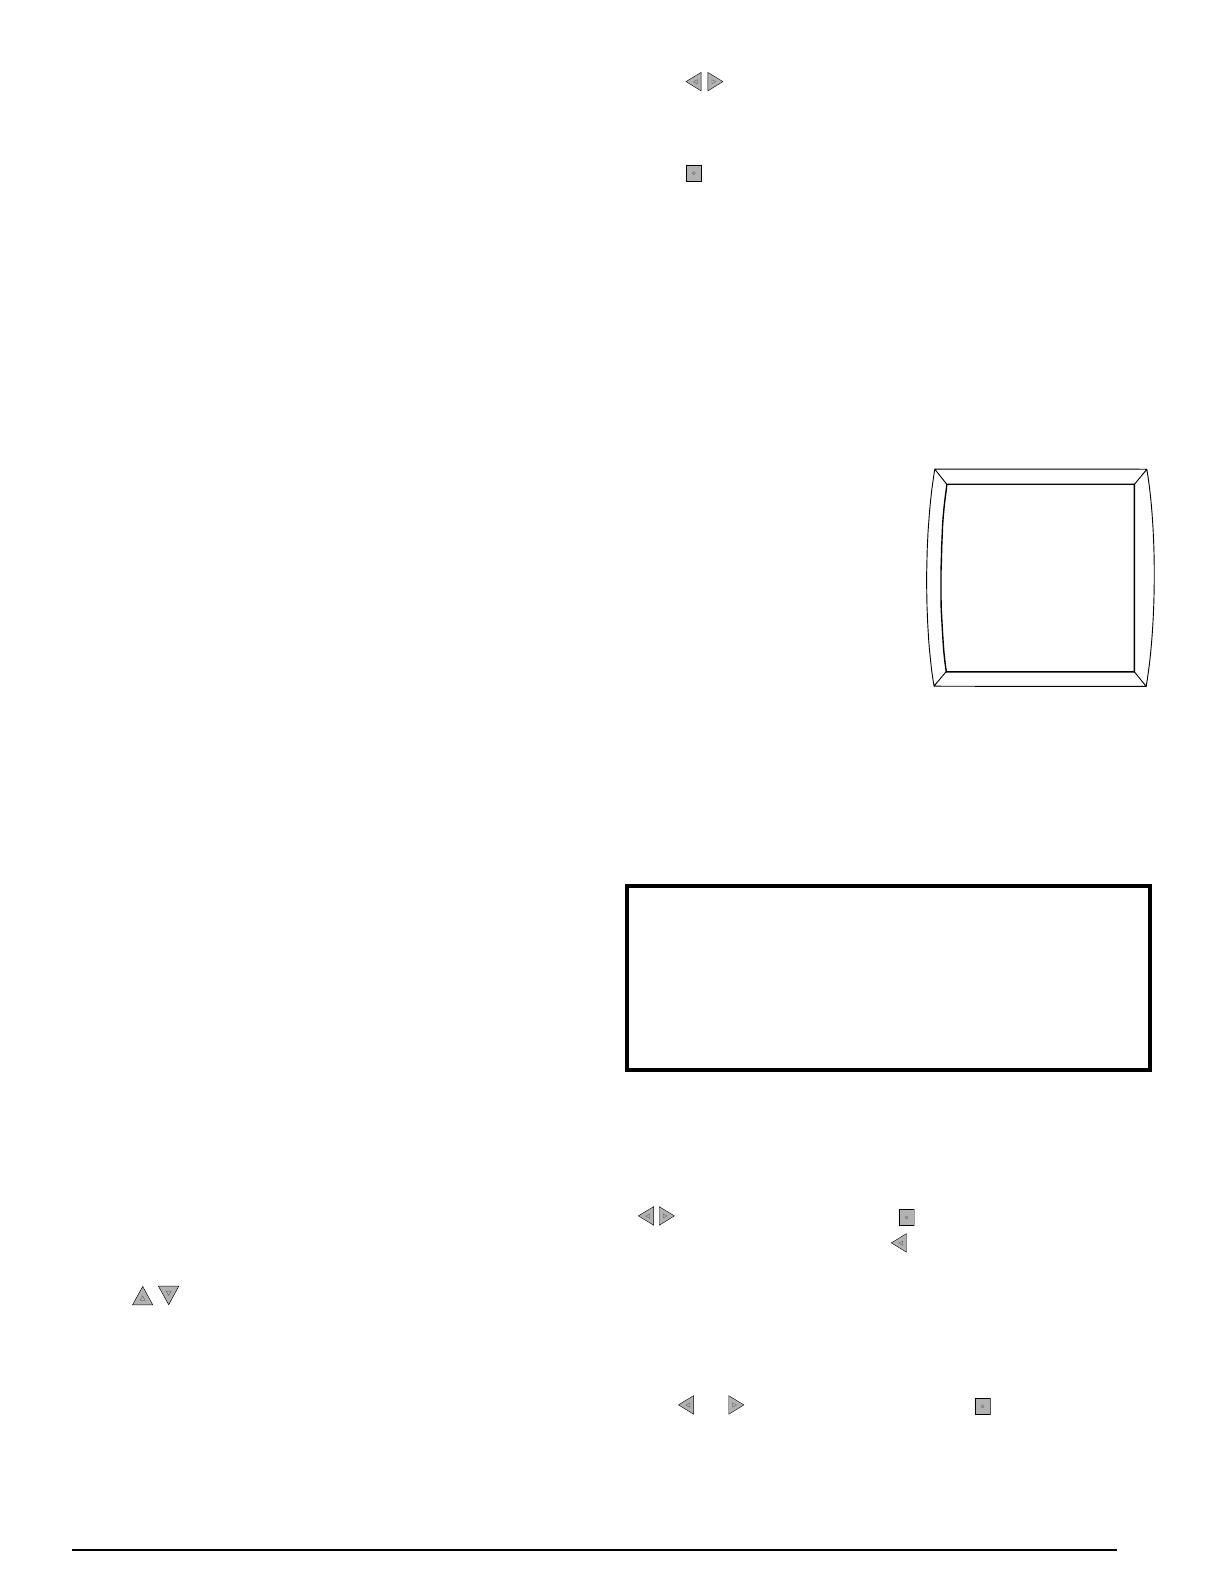
Main Screen
•The main screen of the iQ DriveThermostat
displays normal system information including:
indoor temperature, outdoor air temperature*,
heating and cooling setpoints, fan setting, relative
humidity,andthesystem’scurrentoperatingmode
(Seepage2).
•The top line of the Main
Screenalternatesbetween
showing: date and time,
day of the week, service
alerts such as: change
air filter, change UV lamp,
service air cleaner, or
service humidifier,Status
infosuchas:hold until, perm hold, smart recovery
on, intermittent fan on,andlocked.Intheeventof
anequipmentissue,aone-linedescriptionofthe
issuewillalsodisplay.Inresponsetoanextended
or repeated problem, the screen will ash red
indicatingserviceisneeded.Seepage2.
70°
HUMIDITY
12
HEAT
FAN AUTO
MODE MENU
FAN
RH TEMP
1/19/09
10:00 AM
OUTDOOR
46
HEAT 70
COOL 80
IMPORTANT! If the Main Screen ashes red
or displays CONFIGURATION NEEDED with
amessageatthetopofthescreen,contactan
authorizedinstallerimmediatelywithadetailed
descriptionofthemessage.OnlyiQDrivecertied
technicianscancorrecttheseconditions.
•ThebottomlineoftheMainScreendisplaysve
menus[RH,TEMP,MODE,FANandMENU]that
areentrypointstoothersubmenus(seepage2).
Toaccessthesescreens,selectthemenuwiththe
buttonsandthenthe button.Toreturntothe
MainScreen,pressthe buttonrepeatedlyfrom
anyscreen.Ifnobuttonsarepressedfor3minutes,
thethermostatwillautomaticallyrevertbacktothe
MainScreen.Ifaservicealertappearsatthetop
oftheMainScreen,CANCELALERTwillalsobe
displayedatthebottom.Tocancelthealert,use
the or buttonsandthenthe button.
•TheMainScreenwillappeardifferentforiQZone
systemswhenZoneControlisenabled(normal
operation).ForZoneControl,seepage13.


