Page is loading ...

Fusion Console
Installation & User’s Guide Includes StudioEngine and PowerStation
Manual Rev 4 (3.2) - Nov 2017
p/n 1490-00109-005

Notices and Cautions • ii
© 2017 Axia Audio - Rev 3.2
Notices and Cautions
CAUTION:
The installation and service instructions in this manual are for use by qualied personnel only. To avoid electric
shock, do not perform any servicing other than that contained in the operating instructions unless you are qualied to
do so. Refer all servicing to qualied personnel.
This instrument has an autoranging line voltage input. Ensure the power voltage is within the specied range of
100-240v. The ~ symbol, if used, indicates an alternating current supply.
This symbol, wherever it appears, alerts you to the presence of uninsulated, dangerous voltage
inside the enclosure – voltage which may be sufcient to constitute a risk of shock.
This symbol, wherever it appears, alerts you to important operating and maintenance instructions.
Read the manual.
CAUTION: DOUBLE POLE/NEUTRAL FUSING
The instrument power supply incorporates an internal fuse. Hazardous voltages may still be present on some of
the primary parts even when the fuse has blown. If fuse replacement is required, replace fuse only with same type
and value for continued protection against re.
WARNING:
The product’s power cord is the primary disconnect device. The socket outlet should be located near the device
and easily accessible. The unit should not be located such that access to the power cord is impaired. If the unit is
incorporated into an equipment rack, an easily accessible safety disconnect device should be included in the rack
design.
To reduce the risk of electrical shock, do not expose this product to rain or moisture. This unit is for indoor use only.
This equipment requires the free ow of air for adequate cooling. Do not block the ventilation openings in the
top and sides of the unit. Failure to allow proper ventilation could damage the unit or create a re hazard. Do not
place the units on a carpet, bedding, or other materials that could interfere with any panel ventilation openings.
If the equipment is used in a manner not specied by the manufacturer, the protection provided by the equipment
may be impaired.

Notices and Cautions • iii
© 2017 Axia Audio - Rev 3.2
WARNUNG:
Die Installations-und Serviceanleitung in diesem Handbuch ist für die Benutzung durch qualiziertes
Fachpersonal. Um Stromschläge zu vermeiden führen Sie keine andere Wartung durch als in dieser
Betriebsanleitung aufgeführt, es sei denn Sie sind dafür qualiziert. Überlassen Sie alle Reparaturarbeiten
qualiziertem Fachpersonal.
Dieses Gerät hat eine automatische Bereichseinstellung der Netzspannung.
Stellen sie sicher, dass die verwendete Netzspannung im Bereich von 100-240V liegt.
Das Symbol ~, falls verwendet, bezeichnet eine Wechselstromversorgung.
Dieses Symbol, wo immer es auftaucht, macht Sie auf nicht isolierte, gefährliche elektrische
Spannung (ausreichend um einen Stromschlag hervorzurufen) innerhalb des Gehäuses
aufmerksam. Spannungen.
Dieses Symbol, wo immer es auftaucht, weist Sie auf wichtige Bedienungs-und
Wartungsanleitung hin. Lesen Sie die Bedienungsanleitung.
ACHTUNG: ZWEIPOLIGE ABSICHERUNG / NULLEITER ABSICHERUNG
Das Netzteil des Gerätes hat eine interne Sicherung eingebaut. Auch wenn die Sicherung durchgebrannt ist,
können auf einigen primären Bauteilen noch gefährliche Spannungen vorhanden sein. Wenn ein Austausch der
Sicherung erforderlich ist, ersetzen Sie die Sicherung nur mit gleicher Art und Wert für den kontinuierlichen Schutz
gegen Feuer.
WARNUNG:
Das Gerätenetzkabel ist die Haupttrennvorrichtung. Die Steckdose sollte sich in der Nähe des Gerätes benden
und leicht zugänglich sein. Das Gerät sollte nicht so angeordnet sein, dass der Zugang zum Netzkabel beeinträchtigt
ist. Wird das Gerät in ein Rack eingebaut, sollte eine leicht zugängliche Sicherheitstrennvorrichtung in den Rack-
Aufbau mit einbezogen werden.
Um die Gefahr von Stromschlägen zu verringern, darf dieses Produkt nicht Regen oder Feuchtigkeit ausgesetzt
werden. Dieses Gerät ist nur für die Benützung im Innenbereich. Dieses Gerät erfordert freie Luftzirkulation für
eine ausreichende Kühlung. Blockieren sie nicht die Lüftungsschlitze auf der Geräteoberseite und den Seiten des
Gerätes. Unzureichende Belüftung kann das Gerät beschädigen oder Brandgefahr verursachen. Platzieren Sie
das Gerät nicht auf einem Teppich, Poster oder andere Materialien welche die Lüftungsöffnungen beeinträchtigen
könnten.
Wird das Gerät anders als in der, vom Hersteller angegebenen Weise verwendet, kann der, durch das Gerät
gegebene Schutz beeinträchtigt werden.

Notices and Cautions • iv
© 2017 Axia Audio - Rev 3.2
USA CLASS A COMPUTING DEVICE INFORMATION TO USER. WARNING:
This equipment generates, uses, and can radiate radio-frequency energy. If it is not installed and used as directed
by this manual, it may cause interference to radio communication. This equipment complies with the limits for a
class a computing device, as specied by fcc rules, part 15, subpart j, which are designed to provide reasonable
protection against such interference when this type of equipment is operated in a commercial environment.
Operation of this equipment in a residential area is likely to cause interference. If it does, the user will be required to
eliminate the interference at the user’s expense. Note: objectionable interference to tv or radio reception can occur if
other devices are connected to this device without the use of shielded interconnect cables. Fcc rules require the use
of shielded cables.
CANADA WARNING:
“This digital apparatus does not exceed the class a limits for radio noise emissions set out in the radio interference
regulations of the Canadian department of communications.”
“Le présent appareil numérique n’émet pas de bruits radioélectriques dépassant les limites applicables aux
appareils numériques (de class a) prescrites dans le règlement sur le brouillage radioélectrique édicté par le
ministère des communications du Canada.”
CE CONFORMANCE INFORMATION:
This device complies with the requirements of the EEC council directives:
• 93/68/EEC (CE MARKING)
• 73/23/EEC (SAFETY – LOW VOLTAGE DIRECTIVE)
• 89/336/EEC (ELECTROMAGNETIC COMPATIBILITY)
Conformity is declared to those standards: EN50081-1, EN50082-1.

Notices and Cautions • v
© 2017 Axia Audio - Rev 3.2
Fusion Manual
© 2014-2017 TLS Corp. Published by Axia Audio/TLS Corp. All rights reserved.
TRADEMARKS
Axia Audio and the Axia and Fusion logos are trademarks of TLS Corp. All other trademarks are the property of
their respective holders.
NOTICE
All versions, claims of compatibility, trademarks, etc. of hardware and software products not made by Axia
Audio which are mentioned in this manual or accompanying material are informational only. Axia makes no
endorsement of any particular product for any purpose, nor claims any responsibility for operation or accuracy. We
reserve the right to make improvements or changes in the products described in this manual which may affect the
product specications, or to revise the manual without notice.
WARRANTY
This product is covered by a ve year limited warranty, the full text of which is included in this manual.
UPDATES
The operation of Fusion is determined largely by software. We routinely release new versions to add features
and x bugs. Check the Axia Audio web site for the latest. We encourage you to sign-up for the email notication
service offered on the site.
FEEDBACK
We welcome feedback on any aspect of Fusion, or this manual. In the past, many good ideas from users have
made their way into software revisions or new products. Please contact us with your comments.
SERVICE
You must contact Axia before returning any equipment for factory service. We will need your unit’s serial
number, located on the back of the unit. Axia will issue a return authorization number, which must be written on the
exterior of your shipping container. Please do not include cables or accessories unless specically requested by the
Technical Support Engineer. Be sure to adequately insure your shipment for its replacement value. Packages without
proper authorization may be refused. US customers, please contact Axia Technical Support at +1-216-622-0247. All
other customers should contact local representative to make arrangements for service.

We Support You • vi
© 2017 Axia Audio - Rev 3.2
We Support You...
BY PHONE / FAX:
• You may reach our 24/7 Support team anytime around the clock by calling +1-216-622-0247.
• For billing questions or other non-emergency technical questions, call +1-216-241-7225 between 9:30 am
to 6:00 PM, USA Eastern time, Monday through Friday.
• Our Fax number is +1-216-241-4103.
BY E-MAIL:
• Technical support is available at support@telosalliance.com.
• All other questions, please email inquiry@telosalliance.com.
VIA WORLD WIDE WEB:
The Axia Audio web site has a variety of information which may be useful for product selection and support.
The url is telosalliance.com.
REGISTER YOUR PRODUCT
Did you know that all Telos Alliance products come with a 5-Year Warranty? Take a moment to activate your
coverage online at http://telosalliance.com/product-registration/ .
THE TELOS ALLIANCE
1241 Superior Avenue E.
Cleveland, OH., 44114 USA
+1-216-241-7225 (phone)
+1-216-241-4103 (fax)
+1-216-622-0247 (24/7 technical support)
support@telosalliance.com
inquiry@telosalliance.com

Table of Contents • vii
© 2017 Axia Audio - Rev 3.2
Table of Contents
Notices and Cautions . . . . . . . . . . . . . . . . . . ii
Fusion Manual . . . . . . . . . . . . . . . . . . . . .v
We Support You... . . . . . . . . . . . . . . . . . . . . vi
War of the Waves . . . . . . . . . . . . . . . . . . . . ix
Quickstart #1
Fast Setup – with Axia StudioEngine . . . . . . . . . . 1
Creating Your First Source . . . . . . . . . . . . . . .5
Setting Up And Testing Control Room
Monitor Channels . . . . . . . . . . . . . . . . . . . . 7
Quickstart #2
Fast Setup – with Axia PowerStation . . . . . . . . . . 9
Creating Your First Source . . . . . . . . . . . . . . .13
Setting Up And Testing Control Room
Monitor Channels . . . . . . . . . . . . . . . . . . . . 14
Chapter 1: Fusion Anatomy . . . . . . . . . . . . . . . 17
StudioEngine and PowerStation Mixing Engines. . . . 17
CAN4ETH . . . . . . . . . . . . . . . . . . . . . . .21
Fusion Power Supply . . . . . . . . . . . . . . . . . . 22
Console Modules . . . . . . . . . . . . . . . . . . . . 22
What’s Next . . . . . . . . . . . . . . . . . . . . . . . 22
Chapter 2: Conguration Basics . . . . . . . . . . . . 23
Working With Proles. . . . . . . . . . . . . . . . . . 23
Source Proles . . . . . . . . . . . . . . . . . . . . .23
Create the Operator’s Mic Source Prole . . . . . .25
Create a Guest Mic Source Prole . . . . . . . . . . 27
Other Helpful Options: Knob Function . . . . .28
Other Helpful Options: Default Backfeed . . . . 28
Other Mic Prole Types . . . . . . . . . . . . . . .28
Create a CD Player Source (Line Source Type) . . . 29
Create a Telephone Source (Phone Source Type) . .31
Advanced Stuff: A Codec Source With
Custom Backfeed. . . . . . . . . . . . . . . . . . . 33
Show Proles . . . . . . . . . . . . . . . . . . . . . . 37
How to Create A Show Prole . . . . . . . . . . 37
Other Conguration Options . . . . . . . . . . . . . .38
User Logo: . . . . . . . . . . . . . . . . . . . . . . 38
Clock:. . . . . . . . . . . . . . . . . . . . . . . . . 38
GUI Settings: . . . . . . . . . . . . . . . . . . . 38
Loudness Meter Options:. . . . . . . . . . . . . 38
Enable Loudness Meter. . . . . . . . . . . . . . . . 39
Target Loudness, Loudness Tolerance . . . . . . . . 39
Relative Loudness . . . . . . . . . . . . . . . . . .39
Color Indication . . . . . . . . . . . . . . . . . . .40
Loudness Range . . . . . . . . . . . . . . . . . . .40
Control . . . . . . . . . . . . . . . . . . . . . . . . 40
Fader Options: . . . . . . . . . . . . . . . . . . . .40
Indication Style: . . . . . . . . . . . . . . . . .40
Sound4 Remote Control: . . . . . . . . . . . . . 41
What’s Next . . . . . . . . . . . . . . . . . . . . . . . 41
Chapter 3: Operation. . . . . . . . . . . . . . . . . . .43
Main Display . . . . . . . . . . . . . . . . . . . . . .44
Basic Channel Controls . . . . . . . . . . . . . . . . . 46
Expert Monitor Module Controls . . . . . . . . . . . . 47
Standard Monitor Module Controls. . . . . . . . . . . 49
Call Controller + 2-Fader Phone Module . . . . . . . . 51
IP Intercom Module – 20-Station . . . . . . . . . . . . 52
IP Intercom Module – 10-Station Filmcap . . . . . . . 53
Switch Modules (not shown) . . . . . . . . . . . . . . 53
What’s Next . . . . . . . . . . . . . . . . . . . . . . . 53
Chapter 4:VMix and VMode . . . . . . . . . . . . . . 55
Virtual Mixing with VMix . . . . . . . . . . . . . . .55
What’s it all about? . . . . . . . . . . . . . . . . . . 55
VMix Main Controls . . . . . . . . . . . . . . . . . 56
VMix Submixer Controls. . . . . . . . . . . . . . . 56
VMix Submixer Advanced Options . . . . . . .57
Some VMix Examples . . . . . . . . . . . . . . . . 58
A Mix of Sources to Monitor. . . . . . . . . . . 58
Virtual VMix Control. . . . . . . . . . . . . . . . . 58
Combining VMix with Pathnder Routing Control .58
GPIO control of your VMIX with Pathnder . .59
Manipulating Streams With VMode . . . . . . . . . .60
Input: . . . . . . . . . . . . . . . . . . . . . . . . . 61
Mode: . . . . . . . . . . . . . . . . . . . . . . . . . 61
Output: . . . . . . . . . . . . . . . . . . . . . . . . 62
Some VMode examples . . . . . . . . . . . . . . . . . 63
Create a Mono Stream From One Side of a
Stereo Channel . . . . . . . . . . . . . . . . . . . . 63
Create a Split Record Feed from Multiple Sources .64
Create a stereo Livewire stream from a 2-channel
AES67 stream. . . . . . . . . . . . . . . . . . . .65
What’s Next . . . . . . . . . . . . . . . . . . . . . . . 65

Chapter 5 Working With Phones . . . . . . . . . . . . 67
Phone Setup Choices . . . . . . . . . . . . . . . . . .67
Setting Up for EU Phone Operation . . . . . . . . . .68
Setting Up for US Phone Operation. . . . . . . . . . . 69
Show Prole Settings For US Phone Operation . . . 69
Source Prole Settings for US Phone Operation – VX &
Nx Systems . . . . . . . . . . . . . . . . . . . . . . 70
Source Prole Settings for US Phone Operation – Hx6 &
iQ6 Systems . . . . . . . . . . . . . . . . . . . . .72
Operating Options . . . . . . . . . . . . . . . .73
Setting up for GPIO control (“No Phone Control”). . . 74
Additional Phone Type Source Prole Options . . .75
Appendix A: Advanced Conguration Reference . . . 77
Part 1 – Magic Key Sequences . . . . . . . . . . . . . 77
Part 2 – Show Proles Options . . . . . . . . . . . . . 78
Channel Screen Options . . . . . . . . . . . . . . .78
General Controls Section . . . . . . . . . . . . . 78
Individual Headphones Section . . . . . . . . .83
Record Mode Section. . . . . . . . . . . . . . . 83
Auxiliary Send & Return Screen Options . . . .84
Monitor Section Screen Options . . . . . . . . . . . 85
General Monitor Settings Section . . . . . . . .85
Additional Meters Section . . . . . . . . . . . . 87
Sources For External 1 & 2 Section . . . . . . .88
Control Room Monitor Options Section . . . . . 88
Control Room Headphones Options Section . . . 89
Studio Monitor Options Section . . . . . . . . . 90
Master Module Control Lock Map Section . . .91
Record Mode Screen Options . . . . . . . . . . . .91
Record Mode Conguration Section . . . . . . . 91
Flexible Record Mode Options Section . . . . .92
Group Start Screen Options . . . . . . . . . . .93
Automix Screen Options . . . . . . . . . . . . . 93
Phone Screen Options . . . . . . . . . . . . . .93
Source Prole. . . . . . . . . . . . . . . . . . . . . 94
Line and Computer Player . . . . . . . . . . . . 94
Operator and CR Producer Microphone . . . . . 100
CR Guest, Studio Guest, External microphone .101
Codec . . . . . . . . . . . . . . . . . . . . . . . 103
Phone . . . . . . . . . . . . . . . . . . . . . . . 105
Appendix B: Conguring GPIO. . . . . . . . . . . . .107
GPIO Port Denitions. . . . . . . . . . . . . . . . . . 107
GPIO Operator’s Microphone Logic . . . . . . . . . 108
GPIO Control Room Guest Microphone Logic . . .109
GPIO Producer’s Microphone Logic . . . . . . . . . 110
GPIO Line Input Logic . . . . . . . . . . . . . . . . 111
GPIO Codec Logic . . . . . . . . . . . . . . . . . . 112
GPIO Telephone Hybrid Logic . . . . . . . . . . . . 113
GPIO Control Room Monitor Logic . . . . . . . . . 114
GPIO Computer Playback Device Logic. . . . . . . 115
About GPIO Connections . . . . . . . . . . . . . . . . 116
Appendix C: Specications . . . . . . . . . . . . . . . 119
Microphone Preampliers. . . . . . . . . . . . . . . . 119
Analog Line Inputs . . . . . . . . . . . . . . . . . . . 119
Analog Line Outputs . . . . . . . . . . . . . . . . . .119
Digital Audio Inputs and Outputs . . . . . . . . . . . . 120
Frequency Response . . . . . . . . . . . . . . . . . .120
Dynamic Range . . . . . . . . . . . . . . . . . . . . . 120
Equivalent Input Noise . . . . . . . . . . . . . . . . . 121
Total Harmonic Distortion + Noise . . . . . . . . . . . 121
Crosstalk Isolation, Stereo Separation and CMRR . . . 121
Audio Processing . . . . . . . . . . . . . . . . . . . . 121
Equalizer . . . . . . . . . . . . . . . . . . . . . . . 121
Compressor . . . . . . . . . . . . . . . . . . . . . . 121
Expander/Noise Gate . . . . . . . . . . . . . . . . . 122
De-esser. . . . . . . . . . . . . . . . . . . . . . . . 122
Power Supply AC Input, StudioEngine . . . . . . . . . 122
Power Supply AC Input, Element Power Supply/GPIO 122
Power Supply AC Input, PowerStation Aux & Main . . 122
Operating Temperatures. . . . . . . . . . . . . . . . . 122
Appendix D: CE Declaration of Conformity . . . . . . 123
Appendix E: Warranty . . . . . . . . . . . . . . . . . .125
Telos Alliance Limited Warranty . . . . . . . . . . . . 125
Shipping Costs and Warranty Service: . . . . . . . . 126
Appendix F: New Features. . . . . . . . . . . . . . . .127
Automix . . . . . . . . . . . . . . . . . . . . . . .127
Fader Accessory Panel . . . . . . . . . . . . . . . . 129
AES67/SIP-Unicast. . . . . . . . . . . . . . . . . . 129
Source “unload” . . . . . . . . . . . . . . . . . . .130
AES67 support . . . . . . . . . . . . . . . . . . . . 130

© 2017 Axia Audio - Rev 3.2
A Note From Frank Foti • ix
War of the Waves
Dear Valued Customer,
It’s with great pride and a tip of the hat to an incredible team that I congratulate you on your new Telos Alliance
product. Everything we do here at the radio division of the Telos Alliance is with one end goal in mind: To help
broadcasters declare victory in extremely competitive environments. By purchasing this product from us, in essence,
you have declared war on your competition.
After all, the majority of Telos Alliance employees were broadcasters themselves once, and the products we’ve
developed over the years have been designed as solutions to specic issues faced on the front lines of our industry.
We’re right there in the trenches with you and have the weapons you need in your arsenal.
Telos Systems is a catalyst to out-of-this-world sound, with the most powerful and popular broadcast telephone
systems in the industry; IP/ISDN codecs and transceivers; plus processing/encoding for streaming audio. We built an
industry on the back of these amazing telephony systems, and they are still going strong.
While we at the Telos Alliance never forget our roots, we are also blazing trails in terms of new technologies like
stream-encoding and AoIP, so that all types of broadcasters can excel in this ever-evolving digital world.
Omnia Audio not only lets you stand out on the dial with your unique signature sound via legendary audio
processors, audio codecs, and microphone processing, it lets you give your listeners a better streaming experience
across devices with innovative stream encoding/processing software and hardware.
Axia Audio is a driving force behind the AES67 AoIP standard, and its networked AoIP radio consoles, audio
interfaces, networked intercom, and software products continue to move AoIP adoption forward and help
broadcasters streamline operations with cohesive, smart, and feature-rich AoIP ecosystems.
Last, but certainly not least, 25-Seven has traditionally been known for its audio delays, but its Voltair watermark
monitor/processor has made a name for itself more recently as the disruptive product that helped broadcasters take
back their ratings and harness the true power of their listening audiences.
You work so hard on your programming day-in and day-out, it deserves technology that will optimize sound and
performance at every point in the airchain and online. Armed with Telos products, you have what you need to set
your competition squarely in your crosshairs.
With that, I’ll leave you to prep your armaments. I hope that you will enjoy your Telos Alliance products for many
years to come!
Sincerely,
Frank Foti
CEO, The Telos Alliance

Intentionally Left Blank

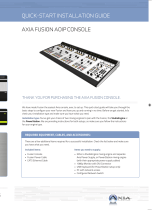
Quickstart - StudioEngine • 1
© 2017 Axia Audio - Rev 3.2
Quickstart #1
Fast Setup – with Axia StudioEngine
Setup of a networked audio mixing console, though we have made it as easy as possible, is challenging to
condense into a few pages. The following material is intended to help the busy engineer get up and running in a few
minutes.
This Quickstart section setup assumes a few things:
• That the reader has some knowledge of network basics and network terminology,
• That the reader is familiar with other Axia Livewire products,
• That the reader is familiar with the anatomy of the Fusion system,
• And that the reader has a correctly congured network switch
Once you’re up and running, please peruse the remainder of this manual to gain in-depth knowledge of more
advanced options.
AC Mains connections for redundant power supplies
DVI Monitor connector
Livewire NIC
To begin, connect a 1080p widescreen computer monitor to the DVI port on the Axia StudioEngine’s rear panel.
Also connect the RJ-45 port marked with the Livewire logo to a port on your AoIP network’s local switch using a
CAT-6 Ethernet cable.
Using the IEC cables supplied, connect the StudioEngine’s power supply input to AC mains.

Quickstart - StudioEngine • 2
© 2017 Axia Audio - Rev 3.2
Tilt overbridge forward (toward faders)
to gain access to connection panel.
Next, connect the Power cable supplied with your Fusion Power Supply to the Power connection on the board
located beneath the overbridge of the Fusion surface.
Also connect your Fusion to your AoIP network’s local switch, using a CAT-5e Ethernet cable.
AC Mains connection
Console power connection
Connect the Power cable from your Fusion console to the marked power supply port on the rear of your Fusion
Power Supply, and then connect the Fusion Power Supply to AC mains using the IEC cable supplied.

Quickstart - StudioEngine • 3
© 2017 Axia Audio - Rev 3.2
When the StudioEngine has booted, its display will indicate an error state. Don’t panic! An IP address needs to
be entered. To do this:
1. Tap the rotary encoder on the front panel, once. A menu view will appear.
2. Rotate the encoder to highlight “Engine IP settings”, and tap the encoder again to select it. A new menu
will appear.
3. Rotate the encoder to select “Net Address” and tap to select.
4. Rotate the encoder to move the onscreen cursor. A tap on any of the cursor position allows you to edit its
numeric value; rotate the encoder to increment or decrement the value and tap to accept the change. Repeat
this until the IP address you desire is entered.
5. Select the check mark to the right of the IP address to accept.
6. Repeat this process for the Netmask and Gateway elds, as needed.
7. Select “Console” and change the option to “Fusion”.
8. Select “OK.” After selecting OK, respond afrmative to the following notice to reboot the engine with its
new settings.
The next step requires a Web browser on a PC connected to your AoIP network. Open your browser and enter the IP
you assigned to your StudioEngine in the URL bar; an authentication window will appear. Enter the following values:
• Username = user
• Password = <leave blank>

Quickstart - StudioEngine • 4
© 2017 Axia Audio - Rev 3.2
Select “OK” and your Fusion console’s control center will be loaded.
1. From the links under the Mix Engine heading, select Network.
2. Click the Install button displayed at the bottom of the Network page. A new page will load.
3. Enter the value 1 into the Console count eld and click the Apply Console Count button.
4. The software will display a list of the consoles found on your network. Select your Fusion from the drop-down list.
5. Click the Apply IP button to set the IP address of your Fusion, and to link it with the StudioEngine.

Quickstart - StudioEngine • 5
© 2017 Axia Audio - Rev 3.2
Your Fusion console is now connected! Notice that the displays above each fader strip read INACTIVE. One
more fast step will complete the setup process.
Press the (star) and 2 keys on the numeric keypad of your console’s Monitor module. Hold them until the
displays change to read CAPTURE.
Release the and 2 keys, then press the Enter key (Expert monitor module) or # key (Standard monitor module).
Congratulations! Your Fusion console is now congured and ready to load sources. The displays above each
fader strip will now contain a number indicating the fader position.
Creating Your First Source And Assigning It To A Fader
You’ll use your Web browser and the Fusion interface to create your rst audio source in just a few fast steps.
1. In the side menu under the Console heading, select Sources, then click the Create new source prole button.
2. Enter a name for your new audio source in the Source name eld.

Quickstart - StudioEngine • 6
© 2017 Axia Audio - Rev 3.2
3. Press the browse button to the right of the Primary source eld; a pop-up window will appear with a list of
sources available on your Axia network. Select the desired source from the list, and click the OK button.
4. Your Source Prole has been created! Your screen should show an entry similar to that shown below.

Quickstart - StudioEngine • 7
© 2017 Axia Audio - Rev 3.2
Setting Up And Testing Control Room Monitor Channels
1. In the side menu, under the Mix Engine heading, select the Prog and mon out option.
2. Enter the planned Channel Numbers for the StudioEngine outputs (Livewire Sources).
Click the Apply button.
3. On your Fusion console, press the Options knob found at the top of any fader strip. Your video monitor’s
center section will change, showing the Channel Options display.

Quickstart - StudioEngine • 8
© 2017 Axia Audio - Rev 3.2
4. Rotate the Options encoder to highlight the Current Source window. (Highlighted options are bordered in
yellow), and then press the Encoder.
5. You’ll now see a list of your available Sources (in this case, just one: the one we just congured.)
6. Rotate the Options encoder to highlight the source you just created. Press the encoder to select the high-
lighted source.
7. Press the Program 1 key on the fader strip; it will illuminate to show you’ve assigned that fader to PGM-1.
Press the ON key at the bottom of the fader strip and move the fader up. Congratulations: you’ve got audio!
The meters on your display should be active, as shown below.
To hear the audio, make sure you have selected Program 1 as your CR Monitor source, using the controls on
your Monitor module, and that the volume is at an appropriate level (the level meters onscreen will show the relative
volume you’ve set). Also, make sure the xNode feeding your speaker has been congured to the CR Monitor source
you assigned a channel number to.
Now, sit back and enjoy some music as you read the remainder of this manual, or continue to explore the
Conguration pages of your StudioEngine; the details of these options can be found in the Conguration section of
this manual.

Quickstart - PowerStation • 9
© 2017 Axia Audio - Rev 3.2
Quickstart #2
Fast Setup – with Axia PowerStation
Setup of a networked audio mixing console, though we have made it as easy as possible, is challenging to
condense into a few pages. The following material is intended to help the busy engineer get up and running in a few
minutes.
This Quickstart section setup assumes a few things:
• That the reader has some knowledge of network basics and network terminology,
• That the reader is familiar with other Axia Livewire products,
• That the reader is familiar with the anatomy of the Fusion system,
• And that the reader has a correctly congured network switch
Once you’re up and running, please peruse the remainder of this manual to gain in-depth knowledge of more
advanced options.
USB Port
DVI Monitor connector
AC Mains connection
Livewire NIC
To begin, connect a 1080p widescreen computer monitor to the DVI port on the Axia PowerStation Main rear panel.
Connect a USB keyboard to the USB port on the rear of your PowerStation Main.

Quickstart - PowerStation • 10
© 2017 Axia Audio - Rev 3.2
Using the IEC cable supplied, connect the PowerStation’s power supply input to AC mains. Allow PowerStation
to boot; a Setup screen will appear on your monitor.
To set up your PowerStation:
1. Press your keyboard’s up-arrow key until the Cong IP addr line is highlighted in yellow text.
2. Press the Backspace key to clear values, and use the number keys to enter new values and assign an IP ad-
dress to the PowerStation.
3. Use the arrow keys to move to the Cong NetMask and Cong Gateway elds, repeat the process to set
the needed values.
4. Use the down-arrow key to move to the Save & Reboot selection. Press the Enter key and the system will
reboot, with the IP address you’ve entered.
5. Remove the USB keyboard.
Tilt overbridge forward (toward faders)
to gain access to connection panel.
Next, connect one end of the 6-pin Molex power cable supplied with your PowerStation to the Power connection
on the board located beneath the overbridge of the Fusion surface.
1/144