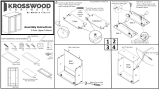
Assembly Instructions
2 Door Base with Drawer
Wood
Dowel
Cam-Lock
Screw
Cam-Lock
Nut
¾” Screw
Bumpers
2 Piece
Hinge X 4
Back Panel
1
2
3
4
Tools needed but not provided:
Rubber Mallet
Wood Glue
½” Screw
*Do not put glue directly on the dowel
*Place 2-3 drops of glue in the hole
before inserting each dowel
Shelf Clips
X 4
Insert dowels
after glue drops
Back Panel
Drawer Front
Drawer Back
Drawer Side
X 2
Front Cross
Brace X 2
Back Cross
Brace
4 ½” Toe Kick
Phillips
Screwdriver
Drawer Slides
X 2
Right Panel
*Place 2-3 drops of glue in side
panel holes before attaching Cross
Braces, Toe Kick, Cabinet Bottom
and Back Panel
*Do not Fully tighten ½”
hinge screws until step 8
Left Panel
X 14
Backset 1/8”
Cabinet
Bottom
*If you would like a Left Hinge door: apply hinge base to
Left Panel. Drawing shows Right Hinge
Left
Panel
Right
Panel
*Push all the way in until less
than 3/8” of dowel is exposed
Left Panel
Right Panel
Cabinet Bottom
Shelf
Door X 2
Drawer Bottom
4-1/2” Toe Kick
Front Cross Brace
Front Cross Brace
Back Cross Brace
Cabinet
Bottom
C A B I N E T S
B y M o d e r n C l a s s i c
X 14
*Screw in Cam-Lock Screw until
threads are no longer visible