Page is loading ...

Assembly Instructions
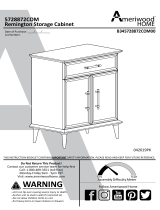
LENIA
Console
VERSION 1.0

ASSEMBLY INSTRUCTIONS
Read these instructions carefully and keep for future
reference. Refer to parts inventory for guidance, and
ensure you have all pieces before starting.
When assembling, place all parts on a soft, clean, and flat
surface such as a carpet to prevent scratches.
If you’re having diculty, our friendly Customer Care
team is always here to help. Call us at 1.888.746.3455
during business hours, email [email protected] or chat
live at article.com.
LENIA Console Page 2 of 8
30 min
3
PARTS INVENTORY
ID DESCRIPTION QTY
LEFT LEG 1
RIGHT LEG 1
CROSSBAR 1
FELT PAD 4
COMPRESSION FITTING
ANCHOR 2
M8 × 8MM SCREW 2
M8 × 15MM BOLT 8
ALLEN KEY 1
TIME # OF PEOPLE DIFFICULTY
REQUIRED TOOL
ANTI-TIP
Installation Required

Page 3 of 8
1
× 4× 4
LENIA Console
2
×2

Page 4 of 8
3
× 2
Crossbar is situated at the
back side of the console table.
!
LENIA Console
4
×8

Lift the unit upright after completing assembly
!
LENIA Console
5
To unlock.
!
6
Page 5 of 8

LENIA Console
7
8
Page 6 of 8

LENIA Console
9
10
Page 7 of 8

To lock.
!
11
12
+ 2.5
- 2.5
LENIA Console Page 8 of 8

Children have died from furniture tipover.
To reduce the risk of furniture tipover:
• ALWAYS install tipover restraint provided.
• NEVER put a TV on this product.
• NEVER allow children to stand, climb or hang
on drawers, doors, or shelves.
• NEVER open more than one drawer at a time.
• Place heaviest items in the lower drawers.
20 min
3
TIME
REQUIRED TOOL
REQUIRED TOOL
8MM / 5/16" DRILL BIT
# OF PEOPLE DIFFICULTY
PARTS INVENTORY
ID DESCRIPTION QTY
BRACKET 4
M4 × 17MM SCREW 4
M8 × 51MM PLUG 4
M6 × 70MM SCREW 4
STRAP 2
ANTI-TIP RESTRAINT INSTALLATION
Page 1 of 3
ANTI-TIP Installation
WARNING!
Hardware (C/D) to attach brackets to wall is
designed for drywall. To attach this unit to another
type of wall, consult with your local hardware store.
1010 Raymur Ave.
Vancouver, BC V6A 3T2
VERSION 1.4

Page 2 of 3
12
3
Attach pair of brackets to top corners of
the back of the unit. Note there are no
existing pilot holes on the product.
ANTI-TIP Installation
× 4
Mark on wall where second pair
of brackets should be placed.
× 2
× 4× 4 × 4
Drill holes in wall using
8mm / 5/16" drill bit.

Page 3 of 3
4A
4B
Align brackets on unit
with brackets on wall.
Pull strap down until it snap-locks.
ANTI-TIP Installation
× 2 × 2
/