Page is loading ...

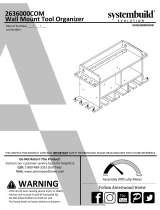
5362222COM
5DrawerDresser
‐Unitcantipovercausingsevereinjuryordeath.
‐Anchorunittostudinwall(ifinstructedto).
‐DoNotallowchildrentoclimbonunit.
‐Putheavyitemsonlowershelvesordrawers.
B345362222COM0
THISINSTRUCTIONBO OKLETCONTAINS
IMPORTANT
SAFETYINFORMATION.PLEASEREADANDKEEPFORFUTUREREFERENCE.
WARNING
FollowAmeriwoodHome
Tube
You
DateofPurchase___/___/___
LotNumber:
DoNotReturnThisProduct!
Contactourcustomerserviceteamforhelpfirst.
Call:1‐800‐489‐3351(tollfree)
Monday‐Friday9am‐5pmCST
Visit:www.ameriwoodhome.com
AssemblyDifficultyMeter
Easy
Tough

ContactUs!
HelpfulHints
2
ameriwoodhome.com
DoNOTreturnthisproduct!
Contactourfriendlycustomerserviceteamfirstforhelp.
Callus!
1‐800‐489‐3351
Monday‐Friday
9am‐5pmCST
Visitameriwoodhome.comtoviewthe
limitedwarrantyvalidintheU.S.andCanada.
AssemblyTips
‐Openyouritemintheareayouplantokeepittoavoidexcessiveheav ylifting.
‐Identify,sortandcountthe partsbeforeattemptingassembly.
‐Compressiondowelsarelightlytappedinwithahammer.
‐Slidesarelabeledwitha
R
(right)and
L
(left)forproperplacement.
‐MakesuretoalwaysfacethepointonthetopoftheCamLock towar d sthe
outeredge.
‐Useallthenailsprovidedforthebackpanelandspreadthemou tequally.
‐Backpanelmustbeusedtomakesureyourunitissturdy.
‐Do
NOTuseharshchemicalsorabrasivecleanersonthisitem.
‐Neverpush,pull,ordragyourfurniture.
Tube
You
Tube
You
PEOPLENEEDEDFORASSEMBLY:1‐2
ESTIMATEDASSEMBLYTIME:2HOURS

3
ameriwoodhome.com
BeforeYouStart
Q
u
i
c
k
T
i
p
A
s
s
e
m
b
l
y
CamLockFasteningSystem
ThisCamLockFasteningSystem willbeusedthroughouttheassemblyprocess.
1
3
2
4
Tube
You
Readthrougheachstepcarefullyandfollowtheproperorder
Separateandcountallyourpartsandhardware
Giveyourselfenoughroomfortheassemblyprocess
Havethefollowingtools:FlatHeadScrewdriver,#2PhillipsHead
ScrewdriverandHammer
Caution:Ifusingapowerdrillorpowerscrewdriverforscr ewing,
pleasebeawaretoslowdownandstopwhenscrewistight.
Failuretodosomayresultinstrippingthescrew.

4
ameriwoodhome.com
BoardIdentification
Notactualsize
LeftPanel
35362222010
RightPanel
35362222020
Bottom
35362000040
BottomRail
35362222060
Top
35362222030
TopRail
35362222050
UpperSupport
35362222070
LowerSupport
35362000080
UpperDrawerFront
35362222090
x4
DrawerFront
35362222100
x5
DrawerBot tom
39991340063910D
x5
DrawerBrace
35538000121
LeftFrontLeg
35362222130
RightFrontLeg
35362222140
LeftRearLeg
35362222150
RightRearLeg
35362222160
A
B
C
D
E
F
G
H
I
J
K
L
M
N
O
P

5
ameriwoodhome.com
BoardIdentification
Notactualsize
x8
DrawerSide(large)
39991167346200C
x2
DrawerSide(small)
39991120346200C
x1
DrawerBack(small)
39991120062950B
x4
DrawerBack(large)
39991167062950B
BackPanel
K536200000
This piece is paperboard
construction. It is not made
from wood, but is required for
the assembly of your unit.
upper drawer
DWR
SIDE
DWR
BACK
DWR
SIDE
DWR
SIDE
DWR
SIDE
DWR
SIDE
DWR
SIDE
DWR
BACK
DWR
BACK
K
L
L
K
I
J
DWR
BACK
A
B
C
D
E
F
G
H
M
N
O
Q
This piece is paperboard
construction. It is not made
from wood, but is required for
the assembly of your unit.
Q

6
ameriwoodhome.com
PartList
ActualSize
(x17)
#A22570
camlock
2
1
9
10
11
12
(x17)
#A22510
cambolt
(x12)
#A21660
wooddowel
(x50)
#A11080
#6x7/16"flathead
(x12)
#A22910
connectorbolt
(x68)
#A12120
#8x7/16"panhead
3
4
5
(x12)
#A22920
connector
(x6)
#A53600
anglebracket
(x12)
#A21110
nail
(x5)
#A21520
compressiondowel
6
7
8
(x10)
#A17400
8‐32x7/8"truss
(x30)
#A21970
drivefastener

7
ameriwoodhome.com
PartList
NotActualSize
14d
14c
14b
14a
LeftCabinetMember
RightCabinetMember
LeftDrawerMember
RightDrawerMember
(x5)
#A56750
drawer slide pkg.
13a
13b
13c
13d
#A84050
safetybracketkit
(x2)
#A54510
drawerbracket(small)
(x8)
#A54520
drawerbracket(large)
(x5)
#52925
handle
16
17
15

8
ameriwoodhome.com
STEP
1
Proper orientation of CAM LOCK
Tip
Assembly
Quick
(x2)
#A22570
Youwillneedtotaptheconnector(7)
withahammertofullyinsert.Besure
theconnectorispositionedasshown
beforetappingintohole.
3
7
(x4)
#A22510
(x2)
#A21660
(x6)
#A22920
1
2
7
7
1
3
2
2
2
2
7
7
7
7
3
1
A
Note: Cam bolts (2) screw into the outside hole of each pair.
finished edge

9
ameriwoodhome.com
STEP2
Proper orientation of CAM LOCK
Tip
Assembly
Quick
7
3
2
1
(x2)
#A22570
(x4)
#A22510
(x2)
#A21660
(x6)
#A22920
Note: Cam bolts (2) screw into the
outside hole of each pair.
Youwillneedtotaptheconnector(7)
withahammertofullyinsert .Besure
theconnectorispositionedasshown
beforetappingintohole.
1
3
7
7
2
1
3
7
7
7
7
7
2
2
2
B
finishededge

10
ameriwoodhome.com
STEP3
6
(x12)
#A22910
6
6
6
6
6
6
6
6
6
6
6
6
M
N
O
P
Note: The rear legs (O&P) have small pilot holes on the back surface.

11
ameriwoodhome.com
STEP
4
A
M
O
endview
O
M
A
Turnscrewclockwiseto
lockinplace.
Withthehelpofanotherperson,presslegs(M&O)againsttheleftpanel(A)as
shownsotheconnectorbolt(6)engagestheconnector(7).Turnthescrewin
thecenteroftheconnector(7)clockwisetolockinplace.
6
7
Packaging foam
from carton.
Note: For ease of leg attachment, place a piece of end
foam (packaging material) under both ends of the left
panel (A).

12
ameriwoodhome.com
STEP
5
13a
4
marked with a "L"
LeftCabinetMember
(x5)
#A56750
(x15)
#A11080
13a
13a
13a
13a
13a
13a
4
A
M
O

13
ameriwoodhome.com
STEP
6
Withthehelpofanotherperson,presslegs(N&P)againsttherightpanel(B)as
shownsotheconnectorbolt(6)engagestheconnector(7).Turnthescrewin
thecenteroftheconnector(7)clockwisetolockinplace.
6
7
N
P
P
B
N
B
endview
Turnscrewclockwiseto
lockinplace.
Note: For ease of leg attachment, place a piece of end
foam (packaging material) under both ends of the right
panel (B).
Packaging foam
from carton.

14
ameriwoodhome.com
STEP
7
13b
4
marked with a "R"
RightCabinetMember
(x5)
#A56750
(x15)
#A11080
13b
13b
13b
13b
13b
13b
4
B
N
P

15
ameriwoodhome.com
STEP8
5
8
14a
14b
(x4)
#A22510
(x6)
#A12120
(x3)
#A53600
#A84050
safetybracketkit
2
2
14a
14b
5
5
8
2
2
2
C
E
finishededge
*rawedgesareshaded

16
ameriwoodhome.com
STEP9
3
1
(x4)
#A22570
(x4)
#A21660
1
1
3
1
1
3
3
3
D
Proper orientation of CAM LOCK
Tip
Assembly
Quick

17
ameriwoodhome.com
STEP10
8
5
(x3)
#A53600
(x6)
#A12120
5
5
8
D
F
finishededge
Cam locks (1) in bottom surface.
Donotfullytightenthescrews(5)goingintothebottomrail(F)
atthistime.
F
Turnthepartoverfromthepreviousstepsothetopsurfacefacesup.Note,thebottomsurface
hasthecamlocks(1)init.

18
ameriwoodhome.com
STEP
11
1
3
1
1
3
1
1
3
3
3
G
H
Proper orientation of CAM LOCK
Tip
Assembly
Quick
(x4)
#A22570
(x4)
#A21660

19
ameriwoodhome.com
STEP12
U
N
L
O
C
K
L
O
C
K
A
D
G
H

20
ameriwoodhome.com
STEP13
U
N
L
O
C
K
L
O
C
K
D
H
G
A
B
F
Afterrightpanel(B)isattached,makesurethebottomedge
ofthebottomrail(F)isevenwiththebottomedgesof
panelsA&B.Nowtightenthescrewsthatwereleftloosein
step10.
F
B
/