Page is loading ...

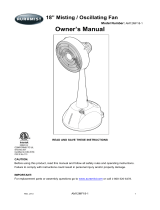
Self-Contained Power Mister
USER'S MANUAL
WARNING
IMPORTANT SAFETY INFORMATION INSIDE
PVM18
• Read, understand and follow all safety information
and instructions in this manual before using or
servicing this product.
• Serious injury or death is possible.
• Retain these instructions for future reference.
PVM18C

SPECIFICATIONS ......................................................................................................................2, 3
SET-UP / OPERATION ..............................................................................................................4, 5
MAINTENANCE ............................................................................................................................6
REPLACEMENT PARTS................................................................................................................6
WARRANTY ..................................................................................................................................7
Index
Thank You!
2
Thank you for selecting our self-contained power misting equipment for your comfort conditioning needs. These products
have been engineered with the most reliable components and materials available, are are equipped with features to assure
ease of mobility, use and maintenance.
The cool air you will now enjoy when using this misting equipment is created through the process of evaporation. Heat is
required to change water from a liquid to a gas or "water vapor". Our self-contained power misting equipment creates a
"fog" by pumping water at a very low flow rate through small nozzles. When combined with the air added by a fan, this
fog is rapidly evaporated. The heat required to evaporate the fog is extracted from the air causing a reduced air temperature.
This cooler air is then distributed to people or animals creating a direct cooling effect.
The performance of your misting system can be affected by local conditions. For best results, it may be necessary to
experiment with the number of nozzles operating to achieve the cooling performance you desire.
Thank you again and stay cool!
Specifications
Our self-contained power misting equipment is configured into three separate models:
• One 18" fan head and pump assembly PVM18LC
• One 18" fan head, pump assembly and 10 gallon tank PVM18
• One 18" fan head, pump assembly and 14 gallon tank PVM18C
with integrated wheels and handle
FAN SPECIFICATIONS
Voltage (VAC) 120
Frequency (Hz) 60
Amps 1.45
HP 168 watts
Speeds 3
ALL MODELS
Voltage (VAC) 120
Frequency (Hz) 60
Total amps 2.15
Pump output 1 GPM
Mist hub 4 nozzles installed
Water supply POTABLE ONLY

3
Specifications (continued)
PVM18LC
• One 18" fan head with powder-coated guard
mounted on a yoke attached to the pump enclosure.
• An integral ground fault circuit interruptor (GFCI) is
attached to the power cord.
• Equipped with a power cutoff tip switch.
• Includes one extra nozzle and two plugs.
• Shipped in a single carton, ready to assemble on your
existing 10 gallon Igloo cooler.
PVM18
• One 18" fan head with powder-coated guard
mounted on a yoke attached to the pump enclosure.
• An integral ground fault circuit interruptor (GFCI) is
attached to the power cord.
• Equipped with a power cutoff tip switch.
• Includes one extra nozzle and two plugs.
• A 10 gallon tank is included for use as water reservoir.
• Shipped in two cartons, ready to assemble.
PVM18C
• One 18" fan head with powder-coated guard
mounted on a yoke attached to the pump enclosure.
• An integral ground fault circuit interruptor (GFCI) is
attached to the power cord.
• Equipped with a power cutoff tip switch.
• Includes one extra nozzle and two plugs.
• A 14 gallon tank is included for use as water reservoir.
• The tank includes an integrated handle and 6" wheels.
• Shipped in two cartons, ready to assemble.

4
Set-Up / Operation
1. Always operate the power mister on a level surface. In the
event the unit is tipped over or tilted more than 35 degrees, a
built-in tip switch will shut off power to the pump and fan.
Power will be restored when unit is returned to the upright
position.
2. Fill cooler or tank with clean, fresh water (ice may be added)
each time the mister is used. Drain remaining water after
each use.
3. Aim the mister downwind for best results. If more than one
mister is used, arrange them in an arc around the area to be
misted.
4. To energize, plug the GFCI safety plug into any 120 VAC
60 Hz grounded outlet. Test GFCI per instructions below.
Turn the mister on using the toggle switch located on the top
of the pump enclosure. Place the switch in the FAN position
for air movement only, or FAN/MIST for air and mist.
5. Use the pull chain located on the back of the fan to choose
fan speed (OFF, LOW, MEDIUM, HIGH). If fan does not
operate when rocker switch is in the FAN or FAN/MIST
position, the pull chain may be OFF.
6. The mist hub located in the center of the fan is equipped with
four nozzles. The output volume of water vapor can be reduced
by replacing one or two of the nozzles with the plugs provided.
7. The unit will mist for approximately five hours on 10 gallons
of water.
GFCI TEST
The ground fault circuit interruptor (GFCI) mentioned above
provides protection from electric shock by examining the product's
electrical circuit for current leakage. It must be tested before each
use to assure safe operation. Follow these steps:
1. Plug into outlet - the indicator will show if power is available.
2. Press the TEST button - indicator will turn off.
3. Press the RESET button. Use product only if GFCI resets.
** DO NOT USE IF TEST FAILS. **
WARNING
ELECTRICAL SHOCK
HAZARD
PINCH HAZARD
TRIP HAZARD
• Serious injury or death is possible.
• Plug these units into properly
grounded receptacles only.
• Disconnect from electric supply
before filling, servicing, or
moving this equipment.
• Test GFCI before using. See
instructions at left.
• Do not carry the unit by the motor,
electric cords, hose line, fan guard
or bracket.
• Do not touch fan motor during use
or directly after; it may be hot.
• Do not operate fan without
guards in place.
• Do not insert anything into fan
guard while fan is operating.
• Unplug unit and dry any wet areas
before resetting a unit that has
tipped over.
• Position all electric cords to lie
flat on the ground or floor.
• Never use during rain, sleet, hail,
snow or any other inclement
weather conditions.
TEST
Fan
ON
RESET
OFF
Fan &
Mist
ON
Pull chain
Nozzle (spare)
Plugs

5
Set-Up / Operation (continued)
To prepare for operation:
1. Remove all items from cartons, remove packing
material and place on a level surface. The fan is
mounted on the bracket and the pump assembly is
contained in the lid, so please remove carefully.
2. Place empty cooler/tank in approximate location to be
misted. Carrying a full cooler/tank will be difficult as
it will weigh approximately 80 pounds.and is likely to
spill out if tank is tilted back. This can also make the
unit unstable and hazardous to move.
3. Fill cooler/tank with water (and ice, if desired).
DO NOT FILL ABOVE HANDLE RECESS!
4. Place the fan/pump enclosure on the cooler/tank. Be
sure the intake line and filter are in the bottom of
the cooler/tank.
5. Twist the fan/pump enclosure to engage slots in tank.
* Model PVM18LC does not include a tank. Since the
pump enclosure is specifically made to fit a 10 gallon Igloo
cooler, it must be used only with this type of cooler,
supplied by the user. DO NOT USE THE PVM18LC
WITH ANY OTHER WATER RESERVOIR!
WARNING
TIP HAZARD
• Serious injury is possible.
• Support weight of fan with free hand when moving
tank with wheels.
• Do not fill tank before moving.
• Never operate pump without water supply.
• If leaks are observed, turn pump off and tighten fittings by hand.
• Excessively hard water (high solids) can plug nozzles.
• A plugged filter caused by poor water quality can restrict flow to pump and cause permanent damage.
• Never allow "fog" from the nozzles to come in contact with surfaces. This can cause condensation and water will form
on those surfaces; redirect the fan to prevent this circumstance.
CAUTION
Intake line
(filter lays in
bottom of tank)

6
Maintenance
WARNING
ELECTRICAL SHOCK
HAZARD
• Serious injury or death is possible.
• Disconnect from electrical supply
before performing any maintenance
operations.
NOZZLES
The fog or spray pattern exiting from the nozzles should
have an even cone shape. If this is not the case, the nozzle
should be cleaned or replaced. Nozzle function should be
checked regularly to assure best misting and evaporation
performance.
To clean or replace a nozzle:
1. Disconnect the unit from electrical supply.
2. Unscrew and remove the nozzle.
3. Soak in vinegar, rinse in water OR replace with new
nozzle.
4. Flush the water line to the mist hub before replacing
nozzle.
5. Screw the nozzle into the mist hub by hand.
NO TOOLS SHOULD BE USED TO TIGHTEN
THE NOZZLE.
FILTER
Filter maintenance requirements will vary with changing
water conditions. The filter should be inspected frequently
and changed as needed. A dirty filter will restrict water
flow to the pump and can cause permanent damage.
SYSTEM DRAIN / STORAGE
When it is time to store the VersaMist® or take it out of
use for more than a few days, it is strongly recommended
that the water be drained from the system to prevent
calcification problems and the formation of algae. Be sure
to empty the cooler or tank and allow it to air dry.
Clean the unit with a mild anti-bacterial solution regularly.
Replacement Parts
REPLACEMENT PARTS
P/N DESCRIPTION
TG18-3WX 18" circulation fan
MK-BRASSPLUG Misting plug
BN12 Brass replacement nozzle 0.012
TS3P Three-position toggle switch
PVM-PUMP Shurflo pump
PVM-TIPSWITCH Tip switch
PVM18-KNOB Knob, metric
MISTHUB2 Mist disk
C2500GFCI 25 ft power cord with GFCI
0WHEEL6X134R Rubber wheel, 6" x 1-3/4" (for mobile tank)

All information, illustrations and specifications provided here are based on the latest product information
available at the time of printing. Product specifications subject to change.
Warranty
Schaefer Ventilation Equipment, LLC
Schaefer Limited Warranty Policy
Schaefer Ventilation Equipment, LLC (SVE) provides the following limited warranty from the date of invoice to
the initial purchaser of our products or to its customer with a dated proof of purchase:
I. Two-year coverage (unless otherwise indicated below) applies to all products, components and
assemblies provided by SVE that prove to be defective in material or workmanship. Any such defective
product will be repaired or replaced at SVE’s option, with the defective product or component returned,
upon approval, to SVE, F.O.B Sauk Rapids, Minnesota.
II. This warranty does not cover:
a. Failure, damage or malfunction as a result of:
i. Improper installation or installation not in accordance with installation instructions.
ii. Operating conditions that vary from SVE’s operating instructions.
iii. Misuse, abuse, negligence, alteration, or accident.
iv. Transporting the product.
v. Improper operation or lack of appropriate or regular maintenance of the product.
b. Loss of time, inconvenience, loss of use of the product or other consequential or incidental damages.
c. Parts that need replacement due to normal wear and tear.
d. Superficial or cosmetic rust or corrosion.
e. Any product whose name plate has been removed.
Products with warranty periods that differ from the standard 2-year warranty are as follows:
• Poly Housings 25 years
• Fiberglass Housings 15 years
• Low-intensity Tube Heater Exchange Tubes 5 years
• Heavy-Duty Industrial Wash-Down Fans (with VWD motors) 3 years
• K-Series, 2-Stage, Compact and Stainless Steel Tube Heaters 1 year
• Quartz and Zubri Heaters 1 year
• Big Dog™ Fans 1 year
• Shutter Motors and Aluminum Riveted Fan Blades 1 year
• Epoxy Line Wash down fans (with EWD motors) 1 year
• Evaporative Cooling Pads 180 days
• HotZone® Electric Elements 120 days
• Quartz Bulbs 90 days
• Tuff & Gusty Fans 90 days
• Any product or part as noted as an exception to the standard
2-year warranty in the product’s operating manual.
SVE reserves the right to add or delete products from this exception list at any time.
THERE ARE NO WARRANTIES OF MERCHANTABILITY OR FITNESS OF USE.
SVE reserves the right to change product design and specification without prior notice or liability.
The above constitutes the sole warranty offered by Schaefer Ventilation Equipment, LLC.
Effective March 1, 2010.
7

800-779-3267
www.schaeferfan.com
©2011 Schaefer Ventilation Equipment
2-11-11 / M-VMISTBLUE
/