Page is loading ...

Cover
Plate
Sensor
Light Control
Cover Plate
Gasket
© 2013 HeathCo LLC 206442-01A
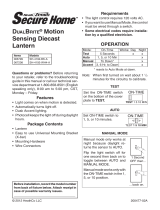
Requirements
• Thelightcontrolrequires120-voltsAC.
• Thisxtureisdesignedforwallmountingonly.
• IfyouwanttouseManualOverride,thecontrolmust
bewiredthroughaswitch.
• Some codes require installation by a qualified
electrician.
• Thisproductisintendedforusewiththeenclosed
gasketandwithajunctionboxmarkedforuseinwet
locations.
• Thebackplatehasknockoutssothesensorcanbe
mountedonmostjunctionboxes.
• Insomeapplicationsauniversaladaptorplatemay
beneeded.AdaptorsareavailableatHomeCenters
andElectricalSupplyStores.
S-hook
1 Halogen
Lamp
Model5311
3 Wire
Connectors
6Screws
(3sizesincluded)
Thispackageincludes:
OPERATION
*resetstoAutoModeatdawn.
TEST
MANUAL MODE
...backon.
AUTO
1SecondOFF
then...
Note:Whenrstturnedonwaitabout1
1
/
2
minutesfor
thecircuitrytocalibrate.
Manual mode only works at night
becausedaylightreturnsthe sensor
toAUTO.
Flipthelightswitchoffforonesecond
thenbackontotogglebetweenAUTO
andMANUALMODE.
Manual mode works only with the
ON-TIME switch in the 1, 5, or 20
position.
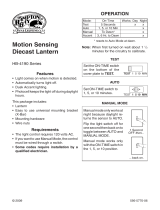
Features
• Turnsonlightingwhenmotionisdetected.
• Automaticallyturnslightingoff.
• DualBrite
®
Timer.
• Photocellkeepsthelightingoffduringdaylighthours.
• LEDindicatesmotionwassensed(dayornight).
Professional Motion Sensor
Quartz Security Light
TEST1520
ON-TIME
Off36Duskto
DualBrite
®
Put ON-TIME switch
on the sensor bottom
toTESTandtheDual-
Brite
®
switchOFF.
ON-TIME
TEST1 5 20
PuttheON-TIMEswitchinthe
1,5,or20minuteposition.
Dawn
Mode: On-Time: Works: Day Night
Test
5Seconds x x
Normal
1,5,20minutes x
Manual
UntilDawn* x
Accent
3,6Hr.toDawn
x

2
206442-01
2. Drillouttheholesifneeded
tomountthebackplateto
thejunctionbox.
1. Attachthelamparmto
thebackplatearmand
secure with the long
bolt.
Note: When tightening the arm
screw,pullonthewirestomake
surethewiresarenotpinched
bythejoint.
INSTALLATION
Move ON-TIME Switch
to 1, 5, or 20 minutes
Mode Switching Summary
Flip light switch
off for one second
then back on*
MANUAL MODE
AUTO
TEST
CAUTION: Risk of fire. This fixture is designed
for wall mounting only. DO NOT install on a ceiling
or soffit.
Foreasyinstallation,selectanexistinglightoperated
byawallswitchforreplacement.IMPORTANT:DoNOT
usewithdimmersortimers.
Forbestperformance,mountthextureabout8feet
(2.4m)abovetheground.NOTE:Ifxtureismounted
higherthan8feet(2.4m),aimingthesensordownwill
reducecoveragedistance.
CAUTION: To Avoid Fire Or Burn Hazards:
•Allowxturetocoolbeforetouching.Thebulband
thextureoperateathightemperatures.
•Keepxtureatleast2"(51mm)fromcombustiblema-
terials.Donotaimatobjectscloserthan3feet(1m).
•UseonlyT3,500W(maximum)tungstenhalogen
120VAClamps.
CAUTION: Keep the sensor at least 1" (25 mm)
away from the bulbs.
* Ifyougetconfusedwhileswitchingmodes,turnthe
poweroffforoneminute,thenbackon.Afterthecali-
brationtimethecontrolwillbeintheAUTOmode.
DualBrite
®
TIMER
Lightcomesonhalfbrightforselectedtimeafterdusk
(Off,3hr.,6hr.,dusktodawn).Ifmotionissensed,the
lightturnsonfullbrightfortheON-TIME(1,5,or20
minutes)thenreturnstodimmode.

3
206442-01
+/- 4°
Mount the Light Control
1. Alignthelightcontrolcoverplateandcoverplate
gasketandthejunctionbox.Insertandtightenthe
mountingscrews.
2. Ifnotinstalledonaweatherproofboxorifanadaptor
plateisused,caulk the wall plate and mounting
surfacewithsiliconeweathersealant.
Cover Plate
Gasket
Thehalogenlightmustbe
mountedhorizontally(+/-4°).
MOUNT HORIZONTALLY
White to White
1. Remove the existing light fixture.
2. TheS-hookcanbeusedtoholdthexturewhile
wiring.Thesmallendofthehookcanbeinserted
intoaholeinthejunctionbox.Thelargeendgoes
aroundthe“neck”ofthexture.
3. Route the light control’swiresthroughthelarge
holeinthegasket.
4. Twistthejunctionboxwiresandxturewirestogether
asshown.Securewithawireconnector.
Black to Black
Junction box ground wire to
green ground wire on fixture.
NOTE: The bulb is included, but needs to be installed.
The bulb is located behind the glass cover of the
lamp head.
1. Removeglasscoverandremovetheoldbulbby
pushingthebulbtowardstherightuntiltheleftside
ofthebulbisclearoftheleftsocket.
2. Toinstallthebulb,placeoneendofthebulbonthe
contactintherightsocket.Whilepushingthebulb
againsttherightcontact,lowertheotherendofthe
bulbontothecontactintheleftsocket.
3. Spinthebulbtoverifyitisseatedproperly.
4. Re-installtheglasscover.
For proper operation and safety, the light fixture must
be above the sensor and the sensor head must be
rotated so that the controls are on the bottom.
Wire the Light Control
WARNING: Turn power off at circuit breaker
or fuse.
1
2
Left
Socket
Right
Socket
Contact
Bulb LampHead
CAUTION: When replacing the bulb, turn power
off and let the fixture cool.
Important:Useacleangloveorclothwhenhandling
thenewbulb.Useisopropyl(rubbing)alcoholtoclean
thebulbifitistouchedwithyourbarehands.
Bulb Installation and Replacement

4
206442-01
Avoid aiming the control at:
•Objects that change temperature rapidly, such as
heating vents and air conditioners.These heat
sourcescouldcausefalsetriggering.
•Areaswherepets or trafficmaytriggerthecontrol.
•Nearby large, light-colored objectsreectinglight
maytriggertheshut-offfeature.Donotpointother
lightsatthesensor.
Bottom of Sensor
Maximum Range Maximum
Coverage Angle
Least Sensitive Most Sensitive
NOTE:
Ifxtureismountedhigherthan8ft.(2.4m),aiming
thesensordownwillreducecoveragedistance.
Thedetectorismostsensitivetomotionacrossitseld
ofview.
3. Loosentheclampscrewinthe
sensorballjoint and gently
rotatethesensor.
4. Walk through the coverage
area noting where you are
whenthelightsturnon(also,
the LED will ash several
timeswhenmotionisdetect-
ed).Movethesensorheadup,
down,orsidewaystochange
thecoveragearea. Keep the
sensor at least 1" (25 mm)
away from the lamps.
5. AdjusttheRANGEasneeded.
RANGE set too high may
increasefalsetriggering.
6. Secure the sensor head
by tightening the clamp
screw. Do not overtighten
thescrew.
7. SettheamountofTIMEyouwantthelightstostay
onaftermotionisdetected(1,5,or20minutes).
8. SettheDualBrite
®
switchtothe amountoftime
afterduskyouwantthelightsonatlowlevel(Off,
3,6Hrs.,Dusk-to-Dawn).
Clamp
Screw
Ball
Joint
Aim Sensor
Down for Short
Coverage
Aim Sensor
Higher for Long
Coverage
SPECIFICATIONS
Range............. Up to 70 ft. (21 m); 100 ft.
(30.5 m) with Range Boost.
[varies with surrounding
temperature]
SensingAngle....... Upto240°
ElectricalLoad....... Up to 500 Watt Maximum
Incandescent
PowerRequirements.. 120VAC,60Hz
OperatingModes..... TEST, AUTO and MANUAL
MODE
TimeDelay ......... 1,5,20minutes
Replacementlamp.... T3, 500W (or less) halogen
120 VAC
DualBrite
®
Timer..... 3,6hours,Dusk-to-Dawn
HeathCoLLCreservestherighttodiscontinueprod-
uctsandtochangespecicationsatanytimewithout
incurringanyobligationtoincorporatenewfeaturesin
productspreviouslysold.
Motion
8ft.
(2.4m)
70ft. 100ft.
(21m) (30.5m)
Boosted
Sensor
240°
B
O
O
S
T
MAX
MIN
RANGE
ON - TIME DUAL BRITE
TEST 1 5 20
MINUTES
OFF 3 6 DUSK TO
HOUR DAWN
Motion
TEST AND ADJUSTMENT
1. Turn on the circuit breaker and light switch.
NOTE: Sensor has a 1
1
/
2
minute warm up period
beforeitwilldetectmotion.Whenrstturned
on,wait1
1
/
2
minutes.
2. TurntheRANGEcontroltotheminimumposition
(MIN),DualBrite
®
toOFF,andtheON-TIMEcontrol
totheTESTposition.

5
206442-01
TROUBLESHOOTING GUIDE
SYMPTOM POSSIBLE CAUSE SOLUTION
Lightwillnotcomeon. 1. Lightswitchisturnedoff.
2. Lampislooseorburnedout.
3. Fuseisblownorcircuitbreakeristurnedoff.
4. Daylightturn-offisineffect.
5. Incorrectcircuitwiring,ifthisisanewinstallation.
6. Lightcontrolaimedinwrongdirection.
1. Turnlightswitchon.
2. Checklampandreplaceifburnedout.
3. Replacefuseorturncircuitbreakeron.
4. Recheckafterdark.
5. Verifywiringiscorrect.
6. Re-aimlightcontroltocoverdesiredarea.
Lightcomesoninday-
light.
1. Light controlmaybe installed in arelativelydark
location.
2. LightcontrolisinTEST.
1. Thextureisoperatingnormallyunderthesecondi-
tions.
2. Setcontrolswitchto1,5,or20minutes.
Light comes on for no
apparentreason.
1. Lightcontrolmaybesensingsmallanimalsorauto-
mobiletrafc.
2. Rangeissettoohigh.
1. Re-aimlightcontrol.
2. Reducerange.
Lightstaysoncontinu-
ously.
1. Alampispositionedtooclosetothelightcontrolor
pointedatnearbyobjectsthatcauseheattotrigger
thelightcontrol.
2. Thelightcontrolmaybepickingupaheatsource
likeanairvent,dryervent,orbrightlypainted,heat-
reectivesurface.
3. Lightcontrolisinmanualmode.
1. Repositionthelampawayfromthelightcontrolor
nearbyobjects.
2. Re-aimlightcontrol.Reducerange.
3. SwitchlightcontroltoAUTO.
Light flashes on and
off.
1. Heatorlightfromthelampsmaybeturningthelight
controlonandoff.
2. Heatbeingreectedfromotherobjectsmaybeturn-
ingthelightcontrolonandoff.
3. LightcontrolisintheTESTmodeandwarmingup.
1. Repositionthelampawayfromthelightcontrol.
2. Repositionlightcontrol.
3. Flashingisnormalundertheseconditions.
Lightashesonce,then
stays off in manual
mode.
Lightcontrolisdetectingitsownlights. Repositionlamptokeepareabelowthelightcontrol
relativelydark.
TECHNICAL SERVICE
Please call 1-800-858-8501 (English speaking only) for assistance before returning
product to store.
Ifyouexperienceaproblem,followthisguide.YoumayalsowanttovisitourWebsiteat:www.hzsupport.com.
Iftheproblempersists,call*forassistanceat1-800-858-8501(Englishspeakingonly),8:00AMto5:00PMCST
(M-F).Youmayalsowrite*to:
HeathCo LLC
P.O.Box90045
BowlingGreen,KY42102-9045
ATTN:TechnicalService
*IfcontactingTechnicalService,pleasehavethefollowinginformationavailable:ModelNumber,DateofPur-
chase,andPlaceofPurchase.
No Service Parts Available for this Product
Please keep your dated sales receipt, it is required for all warranty requests.

6
206442-01
TWO YEAR LIMITED WARRANTY
Thisisa“LimitedWarranty”whichgivesyouspeciclegalrights.Youmayalsohaveotherrightswhichvaryfrom
statetostateorprovincetoprovince.
Foraperiodoftwoyearsfromthedateofpurchase,anymalfunctioncausedbyfactorydefectivepartsor
workmanshipwillbecorrectedatnochargetoyou.
Not Covered -Repairservice,adjustmentandcalibrationduetomisuse,abuseornegligence,lightbulbs,
batteries,andotherexpendableitemsarenotcoveredbythiswarranty.Unauthorizedserviceormodica-
tionoftheproductorofanyfurnishedcomponentwillvoidthiswarrantyinitsentirety.Thiswarrantydoes
notincludereimbursementforinconvenience,installation,setuptime,lossofuse,unauthorizedservice,or
returnshippingcharges.
ThiswarrantycoversonlyHeathCoLLCassembledproductsandisnotextendedtootherequipmentand
componentsthatacustomerusesinconjunctionwithourproducts.
THIS WARRANTY IS EXPRESSLY IN LIEU OF ALL OTHER WARRANTIES, EXPRESS OR IMPLIED,
INCLUDINGANYWARRANTY,REPRESENTATIONORCONDITIONOFMERCHANTABILITYORTHAT
THEPRODUCTSAREFITFORANYPARTICULARPURPOSEORUSE,ANDSPECIFICALLYINLIEUOF
ALLSPECIAL,INDIRECT,INCIDENTAL,ORCONSEQUENTIALDAMAGES.
REPAIRORREPLACEMENTSHALLBETHESOLEREMEDYOFTHECUSTOMERANDTHERESHALL
BENOLIABILITYONTHEPARTOFHEATHCOLLCFORANYSPECIAL,INDIRECT,INCIDENTAL,OR
CONSEQUENTIALDAMAGES,INCLUDINGBUTNOTLIMITEDTOANYLOSSOFBUSINESSORPROF-
ITS,WHETHERORNOTFORESEEABLE.Somestatesorprovincesdonotallowtheexclusionorlimitation
ofincidentalorconsequentialdamages,sotheabovelimitationorexclusionmaynotapplytoyou.Please
keep your dated sales receipt, it is required for all warranty requests.

19
206442-01
Notes / Notas _________________
_____________________________
_____________________________
_____________________________
_____________________________
_____________________________
_____________________________
_____________________________
_____________________________
_____________________________
_____________________________
_____________________________
_____________________________
_____________________________
_____________________________
_____________________________
_____________________________
_____________________________
_____________________________

20
206442-01
Staple Purchase Receipt Here
Engrape aquí el recibo de compra
Agrafez le reçu d’achat ici
PLEASE KEEP YOUR DATED SALES RECEIPT,
IT IS REQUIRED FOR ALL WARRANTY REQUESTS.
POR FAVOR GUARDE SU RECIBO DE VENTA FECHADO; SE LO
REQUIERE PARA CUALQUIER SOLICITUD DE GARANTÍA.
VEUILLEZ CONSERVER LE REÇU PORTANT LA DATE D'ACHAT;
VOUS EN AUREZ BESOIN POUR TOUTES VOS DEMANDES
LIÉES À LA GARANTIE.
Purchase Information
Información de la compra
Renseignements d’achat
Model #: _________________ Date of Purchase: _____________
Nº de modelo / N° de modèle Fecha de compra / Date d’achat
/