Page is loading ...

39354SH0
39414SH0
18801SH0
GROHE GERMANY
www.grohe.com
Sensia
®
ARENA
99.0537.231/ÄM 239494/01.17
DESIGN + ENGINEERING
INSTALLATIONSANLEITUNG
......2
INSTALLATION MANUAL
......8
MANUEL D’INSTALLATION
....14
MANUAL DE INSTALACIÓN
....20
MANUALE DI INSTALLAZIONE
....26
INSTALLATIEHANDLEIDING
....32
INSTALLATIONSHANDBOK
....38
MONTERINGSVEJLEDNING
....44
INSTALLASJONSHÅNDBOK
....50
ASENNUSOPAS
....56
INSTRUKCJA MONTAŻU
....62
ﺏﻳﻛﺭﺗﻟﺍ ﻝﻳﻟﺩ
....73
ΕΓΧΕΙΡΙΔΙΟ ΕΓΚΑΤΑΣΤΑΣΗΣ
....74
INSTALAČNÍ PŘÍRUČKA
....80
FELSZERELÉSI ÚTMUTATÓ
....86
MANUAL DE INSTALAÇÃO
....92
KURULUM KILAVUZU
....98
NÁVOD NA INŠTALÁCIU
..104
NAVODILO ZA NAMESTITEV
..110
PRIRUČNIK ZA POSTAVLJANJE
..116
РЪКОВОДСТВО ЗА МОНТАЖ
..122
PAIGALDUSJUHEND
..128
UZSTĀDĪŠANAS INSTRUKCIJA
..134
MONTAVIMO VADOVAS
..140
MANUAL DE INSTALARE
..146
安装手册
..152
ІНСТРУКЦІЯ З МОНТАЖУ
..158
РУКОВОДСТВО ПО УСТАНОВКЕ
..164
..170
0.00
230
116
330
459
180
375
465
68
600
2016/09/28
www.grohe.com
D
&
+49 571 3989 333
A
&
+43 1 68060
AUS
&
+(61) 1300 54945
B
&
+32 16 230660
BG
&
+359 2 9719959
grohe-bulgaria@grohe.com
BR
&
0800 770 1222
CAU
&
+99 412 497 09 74
CDN
&
+1 888 6447643
CH
&
+41 44 877 73 00
CN
&
+86 4008811698
CY
&
+357 22 465200
CZ
&
+358 942 451 390
DK
&
+45 44 656800
E
&
+34 93 3368850
EST
&
+372 6616354
F
&
+33 1 49972900
FIN
&
+358 942 451 390
GB
&
+44 871 200 3414
GR
&
+30 210 2712908
H
&
+36 1 2388045
HK
&
+852 2969 7067
I
&
+39 2 959401
info-it@grohe.com
IND
&
+91 1800 102 4475
customercare[email protected]
IS
&
+354 515 4000
J
&
+81 3 32989730
KZ
&
+7 727 311 07 39
LT
&
+372 6616354
LV
&
+372 6616354
MAL
MX
&
01800 8391200
pregunta@grohe.com
N
&
+47 22 072070
grohe@grohe.no
NL
&
+31 79 3680133
NZ
technicalenquiries@
patersontrading.co.nz
P
&
+351 234 529620
commercial-pt@grohe.com
PL
&
+48 22 5432640
RI
&
0-800-1-046743
customercare-
RO
&
+40 21 2125050
ROK
&
+82 2 1588 5903
info-singapore@grohe.com
RP
&
+63 2 8938681
RUS
&
+7 495 9819510
S
&
+46 771 141314
grohe@grohe.se
SGP
&
+65 6311 3611
info-singapore@grohe.com
SK
&
+420 277 004 190
grohe-cz@grohe.com
T
&
+66 21681368
(Haco Group)
TR
&
+90 216 441 23 70
GroheTurke[email protected]
UA
&
+38 44 5375273
USA
&
+1 800 4447643
VN
&
+84 90 9694768
&
+84 90 9375068
BiH
AL
HR
KS
ME
MK
SLO
SRB
&
+385 1 2911470
adria-hr@grohe.com
Eastern Mediterranean,
Middle East - Africa
Area Sales Office:
&
+357 22 465200
IR
OM
UAE YEM
&
+971 4 3318070
grohedubai@grome.com
Far East Area Sales Office:
&
+65 6311 3600
Latin America:
&
+52 818 3050626
pregunta@grohe.com
PCW-1335C(17010)

8 GB
GB
Safety Precautions
For safe installation and use of the product,
please read the precautions thoroughly
before installing the product.
DANGER
Denotes an immediately hazardous
situation, which may result in death or
severe injury if not prevented.
WARNING
Denotes a potentially hazardous situation,
which may result in death or severe injury if
not prevented.
CAUTION
Denotes a potentially hazardous situation,
that may result in mild to moderate injuries
and/or damages to the product and/or other
items and property if not prevented.
DANGER
Improper connection of the power
socket can result in a risk of electric
shock.
All electrical installation work must
be carried out by a qualified
electrician.
There is a danger of short circuit
and/or electric shock.
The protective zones must be
assured in bathrooms.
If a power supply connection is made
in zone 2, then the power supply to
the Shower Toilet can be established
by a direct connection, using a
connector socket IPX4 as permanent
connection.
WARNING
Follow the instructions described in
this manual, and install the product
properly.
Failure to do so may cause electric
shock, fire, injury, water leakage,
and/or flooding.
Do not allow anyone except an
authorized service technician to
disassemble, repair, or modify the
product.
There is danger of electric shock or
fire, and the product could
malfunction, causing injury.
Do not connect or disconnect the
power socket or power cord with wet
hands.
There is a danger of electric shock.
Hold the socket when connecting or
disconnecting the power socket.
If the socket is connected or
disconnected by holding the cord,
there is a danger of fire or electric
shock due to the socket or cord
becoming damaged.
Do not pour water or the cleanser
inside or onto the toilet seat unit,
remote control, or power socket.
It may cause electric shock or fire.
Do not use any power supply other
than AC 220 V - 240 V. Also, do not
use any other method to connect the
socket to an improperly configured
receptacle.
Exceeding the rated voltage for use
may cause an electric shock or fire.
Electrical installation work must only
be performed by a qualified
electrician. This work must be carried
out in accordance with the
regulations according to IEC 60364-
7-701 (corresponding to VDE 0100
Part 701) as well as all national and
local regulations.
Be sure to insert the tip of the wires
of the power cords securely into the
inlets of the power socket.
Failure to do so may cause fire.
Connect the power socket
completely.
There is a danger of fire or electric
shock due to the cord becoming
damaged.

9 GB
Do not damage, bend, modify,
excessively twist, bind, sandwich, or
place heavy objects on the power
cord.
There is a danger of fire or electric
shock due to the cord becoming
damaged.
Do not install this product in a wet or
damp location, such as inside a
shower room or steam room, as this
may lead to electric shock or fire.
Do not attach the product to any
water source other than potable
water.
It may cause electric shock, fire and
skin inflammation due corrosion of
electronic parts inside the seat unit.
In regions where the carbonate
hardness exceeds 14° dH (KH), a
water filtration system with water
softener must be used. You can
inquire about your carbonate
hardness with your local utilities
provider.
–
In order to ensure a long service
life, a service technician must
perform the first descaling within 3
years. After the first descaling, it is
recommended to descale the
product every year. (see technical
product information 99.0758.xxx)
(decalcifier No. 46 978 000)
–
In order to ensure the lifetime of
nozzle, it is recommended that the
client descales the nozzle every
year.
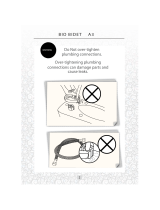
CAUTION
Install a high-sensitivity, high-speed
ground fault circuit interrupter (with
rated current value of 15 mA or
below) on the primary side of the
power supply.
There is a danger of electric shock.
The toilet bowl is made of ceramics,
and ceramics are fragile. Note the
following when handling the toilet
bowl:
–
Prior to installation, make sure that
the toilet bowl is in a good condition
and not damaged.
–
After installation, check the toilet
bowl for any damages.
Failure to do so may cause injury, or
water leakage and/or flooding.
Wash out foreign materials or rust
inside the pipes before connecting
the product.
Failure to do so could damage the
internal parts of the product, which
may cause water leakage and/or
flooding.
Note the following when using the
strainer:
–
Close the water shutoff valve when
removing the strainer.
–
When installing the strainer, tighten
it fully so there is no gap.
–
Check that the O-ring is free from
foreign materials when attaching it.
If foreign materials are attached to
the O-ring, it may cause flooding
due to water leakage.
Adjust the water shutoff valve and
check for water leakage after the
installation.
It may cause water leakage and/or
flooding.

10 GB
Power Supply
• Use an AC 220 – 240 V power supply with a
consumption rating of 850 W. Max. 1300 W.
• The length of the power cord is 1.0 m.
The power cord must be connected to the 3+PE
(Pre-earth) plug and far away from the water area.
• Electrical installation work must only be performed
by a qualified electrician. This work must be carried
out in accordance with the regulations according to
IEC 60364-7-701 (corresponding to VDE 0100 Part
701) as well as all national and local regulations.
• The device must be connected to properly grounded
outlet.
Water Supply
• Only use potable water as the water supply.
Using a different water supply (industrial water, well
water, etc.) may cause the durability of the electrical and
mechanical components to deteriorate, resulting in an
accident or malfunction.
• Please firmly fix the water supply pipe.
• In regions where the carbonate hardness exceeds
14° dH (KH), a water filtration system with water
softener must be used. You can inquire about your
carbonate hardness with your local utilities provider.
• In order to ensure a long service life, a service
technician must perform the first descaling within 3
years. After the first descaling, it is recommended to
descale the product every year. (see technical
product information 99.0758.xxx)(decalcifier No. 46
978 000)
Water Pressure
The minimum water pressure must be 0.05 MPa (0.5
bar) [flow pressure]. The maximum water pressure is
1.0 MPa (10.0 bar) [hydrostatic pressure].
Please observe this pressure range in your installation.
Minimum Installation Clearance
For the required minimum installation clearance, refer
to Figure 1.
A space of 70 mm or more on each side of the product is
recommended.
70 (min.)
Figure 1
375
70 (min.)
700 (min.)
1050 (min.)
Unit: mm
Confirmation on Construction
• If a toilet from another manufacturer is already fitted,
concealed water connection fitting may be possible.
However, the connection dimensions need to be
identical. The products are sometimes fitted with an
information sticker with the dimensions on the protective
plate underneath the actuator plate.
• The 46944000 fittings can only be installed for Grohe
flush systems with GD2 cisterns.
Technical Data
Rated voltage
220 - 240 V (AC), 50/60 Hz
Rated power consumption
850 W (environment 20°C, water 15°C)
Maximum power consumption
1300 W
Length of the power cord
1 m
Waterproof grade
IPX4
Standby
0.9 Watt
Protection class 1
EN13077-type AB,
EN997-CL1-5A+CL2
Water pressure range
0.05 MPa (0.5 bar) [flow pressure] - 1.0 MPa (10.0 bar)
[hydrostatic pressure]
Water connection cross section
3/8 in
Operating temperature range
0°C - 40°C
Units
V = volt, Hz = hertz, W = watt, m = metre, MPa =
megapascal, in = inch, °C = degrees Celsius
Flushing water volume
Europe: full 5 L, light 3 L
China: full 4.5 L, light 3 L

11 GB
Supplied Items
E-bidet (Seat Unit)
Water Supply Hose and Clip (Standard
39354SH0/39414SH0 model only)
Corporation Cock (Standard 39354SH0/39414SH0
model only)
Remote Control
Screws, Anchors, and AA Batteries (For Remote
Control)
Anti-theft Nut, Screw, and Washer (For Remote
Control)
Power Socket
Ceramic Bowl
Protection Sheet, Mounting Bases and Washers (For
Ceramic Bowl)
Spray Hood
Banderole
Strainer (Display [18801SH0] model only)
Installation kit for automatic flush (Item No. 46 944)
Adaptor Valve for 4.5 L cistern (Item No. 42 333)
•
Flushing Cable is an optional item that is sold separately.
Necessary Tools
Spanner (19 mm)
Monkey Wrench
Crosshead Screwdriver
Flat-blade Screwdriver
Flat-blade Precision Screwdriver (2.5 mm)
Crosshead Precision Screwdriver (No. 0)
Ratchet (19 mm)
Grinder
Pipe Cutter
Level
File
Tape
Ruler
Pen
Hammer
Utility knife
Adhesive
Preparations
Turn off the power breaker.
For the GROHE water supply tank
Remove the pipe cover.
For other water supply tanks
Cut out the wall.
Adjust the length of the bolts protruding from the wall.
Pull the power cord out from the wall.
Thread the power cord into the power socket parts,
and connect the wires.
Note
•
Make sure to attach the wires into the corresponding
inlets.
Fasten the parts of the power sockets together.
Note
•
Tighten the pieces securely.
Remove the inspection chamber cover.
Preparing the Water Supply Hose
Detach the cap and two components from the water
supply hose.
Thread the water supply hose up to the water shutoff
valve.
Attaching the Corporation Cock
Close the water shutoff valve, and detach the water
supply hose.
Attach the corporation cock to the water supply hose
on the filling valve side, and attach the other end of
the corporation cock to the water shutoff valve.
Reattach the two components of the water supply
hose, then attach the water supply hose to the bottom
of the corporation cock.
Place a water receptacle beneath the water supply
hose.
Open the water shutoff valve, and rinse out any trash
within the water supply hose.
Check for water leaks around the water shutoff valve
areas.
Note
•
If there is a leak, tighten the leaking area securely.
Close the water shutoff valve.

12 GB
Installing the Ceramic Bowl
Remove the packaging on the ceramic bowl.
Note
•
Keep the packaging until installation is finished.
Prepare and cut the water supply pipe and drain pipe
(supplied with the tank) to the necessary length.
Attach the protection sheet to the wall.
Insert the water supply pipe and drain pipe.
Place the ceramic bowl to approximately 100 mm from
the wall. Then pull the power cord and the water
supply hose into the ceramic bowl.
Secure the ceramic bowl onto the wall.
Note
•
Secure the ceramic bowl together with the
hexagonal nuts supplied with the tank.
Check whether the ceramic bowl is horizontally flat.
Note
•
If necessary, adjust the flatness of the bowl by
loosening the hexagonal nuts in step
.
Remove the packaging under the ceramic bowl.
Cut the protection sheet sticking out around the
ceramic bowl.
Seal the edges where the protection sheet, toilet, and
wall meet.
Installing the E-bidet (Seat Unit)
Thread the power cord and water supply hose.
Place the packaging sheet kept in step of and
hook the power cord and water supply hose into the
slit.
Connect the power cord.
For the Standard (39354SH0/39414SH0) model
Connect the water supply hose, and secure it with the
clip. Check if the water supply hose is properly
secured with the clip.
Note
•
If the clip has not attached properly, remove it and
attach it again. To open the clip, insert a flat-blade
screwdriver and then press it downward and push it.
For the Display (18801SH0) model
Attach the strainer.
For the Standard (39354SH0/39414SH0) model
Twist the lever of the water supply hose vertically.
For the Display (18801SH0) model
Thread the tube and place the E-bidet (seat unit) on
top of the ceramic bowl.
Slightly tilt the back of the E-bidet (seat unit) and
insert it into the ceramic bowl.
Note
•
Make sure that the hooks under the E-bidet (seat
unit) are secured into the mounting base of the
ceramic bowl.
•
When the E-bidet (seat unit) is locked, you will hear
a “click” sound.
•
You can detach the E-bidet (seat unit) by following
the steps below.
Remove the side lid of the E-bidet (seat unit).
Press the lever. Use a screwdriver if you cannot
reach it by hand.
Pull the E-bidet (seat unit) out upward while
pressing the back part.
Store the power cord in the groove on the underside
of the bowl.
Open the water shutoff valve.
For GROHE tank, adjust the amount of flushing water.
Then reattach the actuation plate.
Turn on the power breaker.

13 GB
Installing the Remote Control
Remove the remote control from the holder.
Insert the batteries.
Note
•
Vertical lines may appear on the screen when the
batteries are removed. This is not a malfunction.
These vertical lines will disappear when batteries are
inserted into the remote control.
Insert the small nut into the groove on the back of the
remote control.
Decide the installation position of the remote control.
Note
•
Leave a space above the remote control’s mounting
position.
Mount the remote control holder onto the wall.
For plasterboard or plywood that is thinner than 5 mm
For concrete
Attach the remote control in the holder.
Secure the remote control to the holder with the small
washer and screw.
Testing
Cover the seat sensor with a piece of rag or paper
and place the spray hood under the toilet seat.
Switch the POWER of the E-bidet (seat unit) to on (|).
Then press the SETTING button (
) of the remote
control to register it to the E-bidet (seat unit).
Confirm that water sprays for rear and front washing.
Remove the spray hood.
Confirm warm air. Attach the banderole to the seat lid.
/