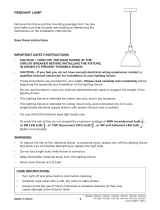
PLAFONNIER À MONTAGE SEMI-FLUSH
Conservez ces instructions
INSTRUCTIONS D’ENTRETIEN :
• Éteindrelalumièreetlaisserl’ampoulerefroidiravantdenettoyer.
• Essuyeravecprécautionavecunchiondouxsecouunplumeauantistatique.
• Éviteztoujoursd’utiliserdesproduitschimiquesfortsouagentsnettoyantsabrasifs,
carilspourrontendommagerlanitionduluminaire.
3
FabriquéenChine
CONSIGNES DE SÉCURITÉ ESSENTIELLES :
• ATTENTION – SECTIONNER L’ALIMENTATION AU NIVEAU
DU DISJONCTEUR AVANT D’INSTALLER LE LUMINAIRE,
AFIN D’ÉCARTER LE RISQUE DE CHOC ÉLECTRIQUE.
• ATTENTION–Sivouspenseznepasavoirsusammentdecompétences
decâblageélectrique,faitesinstallerleluminaireparunélectricienagréé.
• Cesconsignessontfourniesauxnsdevotresécurité.Veuillezleslireattentivementet
aucompletavantdecommencerl’assemblageetlamiseenplacedeceluminaire.
• Nepasutiliserlecordonélectriqueseul(sanscâblederenfortenacier)poursoutenirle
poidsduluminaire.
• Celuminaireestconçuexclusivementpouruneutilisationàl’intérieuretdansdesendroits
secs.
• Celuminaireestconçupourêtremontéauplafondseulementetraccordéàuncircuit
électriquemonophaséà3conducteursaveccircuitouconducteurdeterrecorrect.
• PourutilisationuniquementaveclesampoulesavecbasedeE26(moyenne).
• Pouréliminertoutrisqued’incendie,évitezdedépasserlapuissancemaximaleprescrited’une
ampouleàincandescencede40W,oud’uneampouleDÉLde9W,oud’uneampoule
uorescente(CFL)de13W,oud’uneampouleDÉLàballastintégréde9W.
(Ampoulesnonincluses)
AVERTISSEMENTS :
• Pourréduirelerisqued’incendie,dechocélectriqueoudeblessurecorporelle,toujours
éteindreceluminaireetlelaisserrefroidiravantdetenterdechangerl’ampoule.
• Évitezdetoucherl’ampoulependantqueleluminaireestsoustension.
• Gardeztoutematièreinammableéloignéedeceluminaire.
• Éviteztoujoursderegarderdirectementuneampouleallumée.
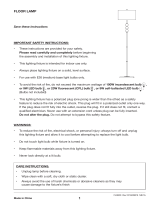
Sortirleluminaireetlenécessairedexationdel’emballage
etconsulterlesillustrationsdanslesinstructionsd’installation
pourvérierqu’ilnemanqueaucunepièce.