MARINE
GRADE
POLYMER
WON’T
FADE !
WEATHERSTRONG.COM
Installation
Guide
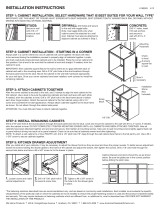
REQUIRED TOOLS:
• Level
• Plastic Shims (for leveling if necessary)
• Drill
• Tapcon 3/16" x 2¾" Stainless Steel Screws
• 1/4" Stainless Steel Washers
• Tapcon 3/16" Drill Bit (pilot holes in concrete - typically sold with screws)
• 3/16" Drill Bit (pilot holes in cabinet installation rails)
• 1/8" Drill Bit (pilot holes to screw cabinets together)
• Clamps (with rubber pads)
• Saw (either circular or table - to trim fillers if necessary)
• Carpenter’s Square
• Tape Measure
• Extension Cord
• Step Ladder (at least 6' if installing wall cabinets)
BEFORE YOU BEGIN:
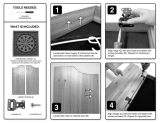
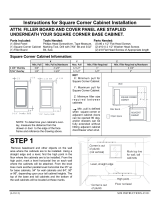
Check your new cabinetry against your design plan to ensure that you have all required
cabinets, moldings, fillers, and accessories to complete the installation.
SAFETY FIRST:
To avoid injury, explosion or shock, make sure that all water supplies, gas supplies and
pertinent circuit breakers are shut off. Double check electrical using circuit tester to con-
firm power is off. If you are uncertain that utilities have been properly shut off, consult
your utility company or service professional.
CAUTION:
It is essential that you use the recommended screws for your cabinetry installation. Under
no circumstances, should you use nails or drywall screws as they do not have the strength
or holding power to ensure that cabinets stay on the wall. Failure to use specified screws
will render warranty null and void.
Installation detailed in this manual is for concrete block construction only. Attachment to
any other wall types, will require locating the wood or steel studs behind the wall.
Consult with your local home center, hardware store or installation specialist for
recommended fasteners.
• Phillips Head Screwdriver