第 1页 第 2页
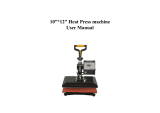
New Combo Heat press machine
Digital,double-display, self-clocking
Instruction
Thank you for purchasing T18 digital multi-functional heat press machine. It is most
unique combo heat press with perfect slide rail in the world. It is a patented
technology for protection.
This machine adopts microprocessor program control, featuring high precision in
parameter memory and control and unique touch button control panel. The
advanced design philosophy and independent control unit structure provides
convenience for combination and upgrading of machines and after-sale service.
With the slide rail design , it is faster and more convenient to replace thermal
transfer components.Some important components use imported material, so it is more
stable and durable .In addition,the design of the machine is very nice and luxurious,and
machine takes up very little room.
I. Features
1. Brand new slide rail design for easier part replacement.
2. Automatic count down button and alarm clock.
3. The controller uses microprocessor program and parameter memory, to increase
accuracy.
4. Uses the new degree Celsius heating chip, to increase stability..
5. Heating thermocouple: adopting new generation “K” updated version heating
thermocouple. With double merged lines, it is safer and not easily broken down.
(The glass tube is adopted for traditional ordinary machinery to pack thermistor.
Once in case of unstable voltage, it will be easily broken down, burn out or
crashed into pieces due to the uneven pressure!)
6. The aluminum plates are a upgraded and thickened. The quality became more
secure and the phenomena of uneven base board and carrying capacity are
avoided.
7. Can be lifted, lowered and rotated by 360 degrees and convenient to retrieve articles
and transfers.
8. Adding one heat-resisting foaming silicon on the baseboard that can withstand 249
Celsius degree, it eliminates potential deformity of the image.

第 3页 第 4页
II.Technical parameters
· Voltage:220V / 110V Frequency:50HZ / 60 HZ
· Power:1000W
· Main Heating plate size:290*380mm / 800W
· Packing Size:520mm x 500mm x 480mm
·8 inch plate heating mat: Diameter 11~12CM (Ф122/200W, Ф155/260W)
·10 inch plate heating mat:Diameter 15CM (Ф122/200W, Ф155/260W)
·Mug heating pad: 11oz, heating band dimension: 105X235(unfolded)/350W
·Cap pad :print on the edge of cap printing area: 14*8.5 CM
· Weight:24Kg
· Time Range:0-999 sec.
· Temperature range:0-200℃ /0-399F
Temperature rise time: About 5-15 mins
· Real-time display of temperature state: Automatic alarm.
Other expanded functions: 10oz min mug pad,12oz cone mug pad,17oz cone mug
pad,7.1 long mug pad,8 inch plate pad ,10 inch plate pad .
III. Operation guide
1. Introduction of control panel and buttons
OUT: Heating Indicator Light
WORK: Countdown Time Indicator light
SET: Function setting key
: Reducing Key / Manual timing Start & clear key
: Increase Key
(H1): LED Temperature Display screen
(H2): LED Time Display screen
2. Guide of setting parameter
I. Working temperature setting (temperature of heating & press object)

第 5页 第 6页
Press the “SET” Key first time, the H1 LDE screen will show “SP”, it indicates the
current temperature. Temperature can be adjusted by pressing ▼ or ▲ . Note:
before setting temperature pleasure check your controller setting for C or
F degree reading.(For Example 330 F Degree)
3. Time setting (time of heating & press object)
Press the “SET” Key 2nd time, the H1 LDE window will show “ ” it indicates the
setting time. Timer can be adjusted by pressing ▼ or ▲.
IV. Secondary Manual setting. (Regarding Second Menu
(Non-professionals, please do not use this menu; When necessary
please use it very carefully!)
1. How to change Fahrenheit degree or Celsius degree reading?
Press SET Key at the same time for 5 Sec. TheH1 LED window will show “C-F”,
Press ▼ or ▲ Key, to select Fahrenheit degree OR Celsius degree reading. Press
SET 5 Sec. again to save setting.
V. The process for Printing customized gifts
Step 1. Print the designed photo on the sublimation paper or color inkjet
paper in sublimation ink ,While printing ,choose mirror image .When the
ink is dry on the paper, transfer the image to your item .
Step 2. Turn power switch on; Press SET first time to set the desired
temperature, the LED will show SP, indicating that you can select by press
▼ or ▲
Step 3. To set the heating time, press SET second time, LED light will
show , then press
▼
or
▲
key to adjust heating time.
The temperature rising time within 5-15 minutes;
Step 4, Adjust the right pressure (turn the pressure adjust regulator for
adjust the pressure);

第 7页 第 8页
After the temperature reach the desire setting, Place the
picture-wrapped mug in to the machine, close the handle.
THE TIMER WILL START WORKING AFTER PRESSING
▼
Step 5. The machine will start the timer.
Step 6. When the timer shows “0”, the machine will alert you by making a buzzer
sound. That indicates your transfer is finished. Release the handle and take out the
printed object; Press ▼ Key to cancel the alarm prompt, and then retrieve
the object and finish DIY gift printing.
Get rid of the picture paper after the printed objects to be taken out
from the machine.
VI. Replacement of accessories
The counterdie of the heat press equipment is slide rail design. It is only necessary to
plug it out and replace accessories easily and conveniently.
1. Parts replacement instruction
2. Adjustable Mat
Uneven work surface, adjust the height and direction of the mat will be OK
1. Adjust the height of the mat roughly, in order to achieve the basic flat
2. Adjust the direction of the mat finely, in order to achieve the completely flat.
3. Installation for each heating accessories:
A. Flat press (for t shirt): Plug out other heating pad, and put this flat into the sliding
rails and fix it.
B. Plate press parts installation: Maintain the bottom flat-panel, and push the plate
part into the hole and fixed with a screwdriver.
C. Mug press parts installation: Put foaming rubber pad fixed in mug shelves
(push the long screws into the both side holes of the steel mug shelves
directly, without disassembly of the screws).
D. Cap Press Parts installation: Push one part along the slide rails, and push the
other part into the hole and fixed with a screwdriver.
3. Adjust pressure
Step 1, Loosen the screw with
a screwdriver.
Step 2, Hold the handle and
gently pull it forward, and then
remove the parts

第 9页 第 10页
Adjust the right pressure before printing or after replace different accessories.
Turn the pressure regulator to adjust appropriate pressure,
then turn the back side to lock the screw cap .
Different Combo heat press accessories For your choice
Name
Flat Press
Mug press pad
Cap press
Plate
press
4 in 1
One piece
29*38cm
One piece
1set
8’ or 10
‘
5 in 1
One piece
29*38cm
One piece
1set
8’ & 10’
6 in 1
One piece
29*38cm
Two pieces
1set
8’ & 10’
7 in 1
One piece
29*38cm
3 PCS (different sizes)
1set
8’ & 10’
8 in 1
One piece
29*38cm
4 PCS (different sizes)
1set
8’ & 10’
Mug & Cap Heat press accessories
Turn the pressure regulator to
adjust appropriate pressure
Please lock the screw cap after
adjusting the pressure well .

第 11页 第 12页
VI. Kindly prompts:
To print and make individualized DIY products, it is also necessary for you to
prepare the following equipment and materials.
1. Ink jet printer/ six colors printer (For example: Epson R-330 / R270 / R290 /
T50)
2. CISS (Continuous ink supply system)
Different models of Ink jet Printer will need different CISS.
3. Sublimation ink / Heat transfer ink;
4. High-temperature resistant tape;
5. Sublimation paper / Heat transfer paper (for Ceramic and fabric)
6. Paper cutter
7. Press mug / cup and plate: Normal mug and plate will can not use for press,
Only sublimation mug and plate can be use.
VII. WARRANTY SERVICE REGULATIONS
All machines comes with a one year warranty from the date of purchase.
Please contact us or the dealers if you encounter quality problems.
.
In accepting the warranty service, please provide all of information as follow:
(You can send us those information, through the scans or express way.
Address:
Repair date:
Repair fault:
Repair reason:
Fault handing:
Customer name & address:
Email:
Products Model:
Purchase date:
VIII.ATTENTION

第 13页 第 14页
1.Be sure to connect safe and correct ground wire !
2.Be cautious when operating the heat press. Parts will be hot and may cause
serious burn. Keep surrounding clear of the machine.
3.The steel of mug frame is sharp, handle with care..
4.Object may still be hot after the transfer.
5.Please keep children and senior citizens away from the machine .
/