Page is loading ...

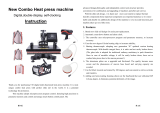
Thank you for purchasing this heat press .The following are important things you need to
know before you begin:
• Intended usage of this Heat Press: This heat press is designed to press heat transfer vinyl
(HTV), sublimation and transfer papers onto soft garments.
Do not attempt to set the temperature on this device at higher than 400 degrees Fahrenheit as it
will burn out the heating element.
Also avoid use of this heat press for other activities such as food preparation or extraction of oils
from plant materials and other alternative uses.
Use of this heat press in a manner other than intended will void the warranty, will damage the
machine.
• Follow manufacturer instructions on materials you press: Always use recommended settings
from the manufacturer for any material used in this press. Those instructions are usually always
available on-line from the material maker.
Instructions on the most common and recommended materials are enclosed within this
documentation.
• Test before you press: We encourage you to always do a test of your fabric and HTV or transfer
paper together using a small sample of the materials before you do volume production.
• Use extreme care during operation: Please also be careful as you operate the heat press.
During operation the platens will get hot enough to do serious injury to you should you touch them,
and surrounding metal parts will also reach high temperatures.
When you take out the machine from the carton,please be careful of the handle bounce.
The handle of the machine should remain on the opening state after using machine.
When you move the machine,please open the pressure handle and hold the heating plate in case
that the handle bounce hurt yourself.Please do not put your hands or other objects into the
machine joints and screws and other parts in case of injuring.
Please Keep children and senior citizens away from the machine.
• Electrical Source: This heat press is designed to plug into a standard household 3 prong outlet.
(110-120V/60Hz.) Do not attempt to use this press with a two prong electrical cord or otherwise
use it without proper grounding.Be sure to connect safe and correct ground wire !

Overview of Your Heat Press
1.
Pressure Adjustment Knob
4
Heating plate
2.
Time/Temperature Control
5
Power cord
3.
Handle
6
On/Off Switch
The Pressure Adjustment Knob controls the amount of force that will be used to push the
transferred image into the fibers of the garment. Clockwise increases pressure. Counter clockwise
decreases it.
When you press the handle ,if you feel the pressure is too tight , please adjust the Pressure
Adjustment Knob.
The Time/Temperature Control Panel on the right upper face of the casing is where you will set
temperature and time requirements of your project. These will vary depending on the vinyl or transfer
paper used.
The Control Arm opens & closes the heating plate
The Power switch must be set to the on position and the Cord must be plugged in before pressing.
1
5
2
3
4
6

Brief introduction
This machine could transfer photos,words on cotton,fiber,metal,ceramic,glass and so on,suitable for producing
gift,advertisement and so on.Easy to using.
Detailed Product Description
Printing Size
Voltage
Power
Weight
Temperature Rise Time
(Reach at 360F)
38cm*38cm
110V
1200W
23KG
About 20min
40cm*50cm
110V
1700W
32KG
About 30min
40cm*60cm
110V
1800W
35KG
About 35min
Time Rage:0-999sec
Temperature Rage :0-399F(A reasonable difference in temperature is±5F)
Product Characteristics
1. Fully digital temperature and time control panel with memory function, LED displays show the temperature
and time,Automatic countdown and alarm
2. The working surface is covered by imported heat-resistant cloth, so it has a long working life and is easily
cleaned.
3. The pressure can be adjust easily
4. Heating pipeline is connected with heating plate, so the working surface can be heated evenly in shot period,
so the machine is safe and durable.
5. Aluminum heat plate, heating uniformity on the surface.
6 The silicon pad can endure maximum 350 degree without any distortion

How to calibrate your new Heat Press:
Instructions from manufacturers of heat transfer vinyls and transfer papers will instruct you to use
Low, Medium or High Pressure during the application process. Here’s how to calibrate your
machine and identify those settings. (Do this while the platens are cold.)
1. Turn the pressure knob counterclockwise a few times to lower pressure on the platens.
2. Place a piece of paper onto bottom of the platen
3. Close the heat press using the handle.
4. Pull on the paper.
5. If the paper moves at all, turn the knob clockwise and try again.
6. Try again and repeat until the paper doesn’t move at all. This is your “Medium” pressure.
From the “Medium” setting, High pressure will be clockwise turns. Low pressure will be
counterclockwise turns. (The pressure will depend the thickness of the garment.
Note that using Medium and High pressure will make it just a bit difficult to close the heat press.
During the pressing process, the goal is to press the heated material into the fibers of the garment.
How to set the temperature Unit
Press SET Key at the same time for 5 Sec. Then the LED Temperature Display
screen will show C-F”, then you can press ▼ or ▲ Key, for change Fahrenheit
degree OR Celsius degree reading. After it,turn off the switch and open it again.

How to set the temperature and time of your new Heat Press
(The temperature shows F degrees)
On a new heat press,we have set it to 360F,30S.
To set this,follow simple steps:
The function of the controller is complex,pls don’t press any button for other operation unless you
set up the temp and time ,otherwise the process of the controller will be damaged !!!
It may take long time to finish this process. Do not turn off or unplug the press during this time.
1.Turn Power
switch on,open
heating plate.
2.Setting temperature, Press
“SET ”key first time to setting
working temperature, the
temperature parameters can
be adjusted by pressing ▼ or
▲.
3.Setting time,Press
“SET” key 2
nd
time, the
timer parameters can be
adjusted by pressing ▼
or ▲.
4.Press the “SET”key 3
rd
time,then the screen show the current temperature,the machine heat up.
5.Flatly place the cloth on the lower printing plate when the machine reaching the temp you
set , cover the printing paper (please note the working surface of the paper) and press the
heating plate down, then the time count down began. When the buzzer sound you could lift
the handle up,then take out the cloth.

How to press Heat Transfer Vinyl (HTV)?
1. Use a vinyl cutter to cut your heat transfer vinyl material. Remember that unless otherwise
instructed by the manufacturer, you will want to MIRROR the design so that when it cuts,
it appears backwards.
2.
• Using Sure Cuts A Lot, this option will appear on your Cut Setting menu as a click
box.
• With Vinyl Master, when you send your design to the cutter, you will find the
selection for the “Mirror” option in the Send to be Cut window.
3. Use a pair of scissors or cutting tool to trim around the image to make it a manageable
size.
3. Weed your design, removing the excess material. Remember to remove any material
inside cavity such as the inside of the letters O and A.
4. Find the appropriate heating instructions for the material you are using either on-line or in
the chart in this manual, and set your heat press time and temperature using manufacturer
recommended settings. (See info in this manual about setting your heat press temperature
and time.)
5. Use the Pressure Adjustment knob on the top of the press to adjust the pressure as
recommended. (See info on this manual about how to adjust pressure on your heat press.)
6. When the heat press heats to the target temperature, place your garment on the bottom
platen so that it is flat and there are no wrinkles in the material .
7. Pre-press the garment for 2 to 3 seconds to remove wrinkles and moisture.
8. Position the heat transfer vinyl on the shirt so that the colored vinyl on the liner is touching
the shirt. (Your design should appear through the liner un-mirrored.)
9. Press the material at the time/temperature recommended by the manufacturer.
10.Open the press ,Set it aside as it can be re-used a limited number of times.
11.Next peel the liner sheet off the top of the garment based on manufacturer instructions.
Note: After removing the garment, resist the urge to stretch, crumple or otherwise manipulate
the pressed garment until the material has had a chance to rest for 24 hours or so. (The
chemical composition of the vinyl and adhesive are still reforming as the material cools.)
How to print a T shirt
A. Take a digital photo Print it out on sublimation paper with sublimation ink in your printer
(mirror image printing). Cut the picture size to be large as you want, then put it on your tee
shirt and fix by adhesive tape.
B. Put a T-shirt in the machine. (put the printed sublimation paper on the t-shirt properly.)
1. Get ready on the power, press the power button , the indicator is lighted!

2. Adjust the temperature ( 340F ~ 360F) and time ( about 15~20 seconds) .(The Real
temperature & time can be set according to the effect you print first time.)
3. Put the heating flat down ( please note the right surface of the paper) . Please note that the
pressure should be no too much, or too little!
4. When the time gets to the set time, the buzzer rings ( please raise the control arm up.)
Your customized T shirt is done!
If the paper is cold peel,then you need to wait 15-20 sec and peel off paper.If it is hot
peel,then you need to peel off paper at once after printing. (had better peel paper in
diagonal line)
Successful printing needs right time,temp and pressure,You need to test printing to get
right time and temp first
Using your Heat Press to press Transfer Paper:
As with all media you’ll use on your heat press, we encourage you to look for the pressing
recommendations from the manufacturer of the transfer material on-line if possible. If you can’t
find specific instructions, the following are general guidelines for your consideration.
TRANSFERS
PRINTER
GARMENT
TEMP.
TIME
PRESSURE
Sublimation
Ricoh,
Cotton
400°F
25~30sec.
Medium
Paper
Sawgrass
Light Color
365°F
15sec.
Medium
Ink Tran. Paper
Ink jet Printer
Dark Color
330°F
25sec.
Medium
Light Color
365°F
15sec.
Medium
Laser Transfer
Laser Printer
Paper
Dark Color
330°F
25sec.
Medium
Transfer Vinyls
Cutting
/
300~320°F
8~10sec.
Medium
Plotter
Attention
The actual printing parameters can be adjusted according to the test results, until the effect is the best!

Troubleshooting:
When I pressed my HTV, the material would not stick to the garment and/or fell off
during washing. How do I fix this?
First double check manufacturer instructions – especially on heat and pressure settings. If you
are following them to the letter, increase your pressure. Remember: Pressing isn’t just about
heating the vinyl – it’s about pushing the vinyl into the materials so that the adhesive finds a
grip. Increasing the pressure is often the solution.
You might also need to increase your temperature a bit, but try this after you’ve increased the
pressure, and don’t up the temperature by more than about 5% over manufacturer instructions.
When I peeled the carrier sheet from my HTV, the color vinyl came up off the garment
but the adhesive below it stayed in place. What happened?
You are most likely peeling the material too hot. HTV’s like metallic, printed/fashion, and many
others are usually recommended for cold peel.
If that’s not it, double check the garment you are pressing and make sure it’s appropriate for
the HTV you are using. If the material has a coating of any kind, you might need to use a
special HTV specifically designed for sticking to coated materials. A common example of this
is someone trying to heat press HTV onto a water resistant fabric. Using an HTV like Siser
Extra will solve the problem.
When I transfer, my colors look faded.
You need to increase the amount of time you’re pressing and/or increase the heat by 20
degrees.
Time/Temperature control panel shows “---”
If you see this, turn the machine off and back on. If that doesn’t fix it, please contact our
support group as a replacement part might be necessary.
/