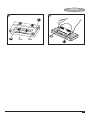
Black & Decker KTW750 Owner's manual
- Category
- Power tools
- Type
- Owner's manual

TRADESMAN SERIES
KTW750
English 5
11
15

2
ENGLISH
A
1
B
C
D
E
F
G
1c
J
1d
K
1e
L
M N
1a
H
1b
I

3
ENGLISH
7
H
I
H
4
C
D
E
5
6
3
C
C
2
A
B

4
ENGLISH
10
F
J
G
12
O
13
8
9
F
I
G
11
L
K
11a
11b
11c
11d
L
11e

5
ENGLISH
14
L
M
11c
11d
15
L
N

6
ENGLISH
KTW750 Electric Planer
Technical Data
Specification KTW750
Power input W 750
No-load speed min 16,500
Planing width mm 82
Planing depth mm 1.6
Rebating depth mm 12
Weight kg 2.7
Intended use
Your Black & Decker planer has been designed for planing wood,
wood products and plastics. The tool is intended for hand-held
use.
Safety instructions
General power tool safety warnings
@
Warning! Read all safety warnings and all
instructions. Failure to follow the warnings and
instructions listed below may result in electric shock,
fire and/or serious injury.
Save all warnings and instructions for future reference.
The term "power tool" in all of the warnings listed below refers
to your mains operated (corded) power tool or battery operated
(cordless) power tool.
1. Work area safety
a. Keep work area clean and well lit. Cluttered or dark areas
invite accidents.
b. Do not operate power tools in explosive atmospheres,
such as in the presence of flammable liquids, gases
or dust. Power tools create sparks which may ignite the
dust or fumes.
c. Keep children and bystanders away while operating
a power tool. Distractions can cause you to lose control.
2. Electrical safety
a. Power tool plugs must match the outlet. Never modify
the plug in any way. Do not use any adapter plugs
with earthed (grounded) power tools. Unmodified plugs
and matching outlets will reduce risk of electric shock.
b. Avoid body contact with earthed or grounded surfaces
such as pipes, radiators, ranges and refrigerators.
There is an increased risk of electric shock if your body is
earthed or grounded.
c. Do not expose power tools to rain or wet conditions.
Water entering a power tool will increase the risk of electric
shock.
d. Do not abuse the cord. Never use the cord for carrying,
pulling or unplugging the power tool. Keep cord away
from heat, oil, sharp edges or moving parts. Damaged
or entangled cords increase the risk of electric shock.
e. When operating a power tool outdoors, use an
extension cord suitable for outdoor use. Use of a cord
suitable for outdoor use reduces the risk of electric shock.
f. If operating a power tool in a damp location is
unavoidable, use a residual current device (RCD)
protected supply. Use of an RCD reduces the risk of
electric shock.
3. Personal safety
a. Stay alert, watch what you are doing and use common
sense when operating a power tool. Do not use a power
tool while you are tired or under the influence of drugs,
alcohol or medication. A moment of inattention while
operating power tools may result in serious personal injury.
b. Use personal protective equipment. Always wear eye
protection. Protective equipment such as dust mask,
non-skid safety shoes, hard hat, or hearing protection used
for appropriate conditions will reduce personal injuries.
c. Prevent unintentional starting. Ensure the switch is in
the off-position before connecting to power source
and/or battery pack, picking up or carrying the tool.
Carrying power tools with your finger on the switch or
energising power tools that have the switch on invites
accidents.
d. Remove any adjusting key or wrench before turning
the power tool on. A wrench or a key left attached to
a rotating part of the power tool may result in personal injury.
e. Do not overreach. Keep proper footing and balance at
all times. This enables better control of the power tool in
unexpected situations.
f. Dress properly. Do not wear loose clothing or jewellery.
Keep your hair, clothing and gloves away from moving
parts. Loose clothes, jewellery or long hair can be caught
in moving parts.
g. If devices are provided for the connection of dust
extraction and collection facilities, ensure these are
connected and properly used. Use of dust collection can
reduce dust-related hazards.
4. Power tool use and care
a. Do not force the power tool. Use the correct power tool
for your application. The correct power tool will do the
job better and safer at the rate for which it was designed.

7
ENGLISH
b. Do not use the power tool if the switch does not turn it
on and off. Any power tool that cannot be controlled with
the switch is dangerous and must be repaired.
c. Disconnect the plug from the power source and/or the
battery pack from the power tool before making any
adjustments, changing accessories, or storing power
tools. Such preventive safety measures reduce the risk of
starting the power tool accidentally.
d. Store idle power tools out of the reach of children and
do not allow persons unfamiliar with the power tool or
these instructions to operate the power tool. Power tools
are dangerous in the hands of untrained users.
e. Maintain power tools. Check for misalignment or binding
of moving parts, breakage of parts and any other
condition that may affect the power tools operation.
If damaged, have the power tool repaired before use.
Many accidents are caused by poorly maintained power tools.
f. Keep cutting tools sharp and clean. Properly maintained
cutting tools with sharp cutting edges are less likely to bind
and are easier to control.
g. Use the power tool, accessories and tool bits etc., in
accordance with these instructions, taking into account
the working conditions and the work to be performed.
Use of the power tool for operations different from those
intended could result in a hazardous situation.
5. Service
a. Have your power tool serviced by a qualified repair
person using only identical replacement parts. This will
ensure that the safety of the power tool is maintained.
Additional power tool safety warnings
@
Warning! Additional safety warnings for planers
u Hold the tool by the insulated gripping surfaces when
performing an operation where the cutting tool may
contact hidden wiring or its own cord. Cutting accessory
contacting a "live" wire may make exposed metal parts of
the power tool "live" and shock the operator.
u Use clamps or another practical way to secure and
support the workpiece to a stable platform. Holding the
work by hand or against your body leaves it unstable and
may lead to loss of control.
u Wait for the cutter to stop before setting the tool down.
An exposed cutter may engage the surface leading to
possible loss of control and serious injury.
u Keep the cutter sharp. Dull or damaged cutters may cause
the planer to swerve or stall under pressure. Always use
the appropriate type of cutter for the power tool.
u Do not touch the workpiece or the cutter immediately after
operating the tool. They can become very hot.
u Remove all nails and metal objects from the workpiece
before planning.
u Always hold the tool with both hands and by the handles
provided.
u Immediately disconnect the cable from the mains if it is
damaged or cut.
Warning! Contact with, or inhalation of dusts arising from
planing applications may endanger the health of the operator
and possible bystanders. Wear a dust mask specifically
designed for protection against dust and fumes and ensure
that persons within or entering the work area are also protected.
u This tool is not intended for use by persons (including
children) with reduced physical, sensory or mental
capabilities, or lack of experience and knowledge, unless
they have been given supervision or instruction concerning
use of the appliance by a person responsible for their safety.
Children should be supervised to ensure that they do not
play with the appliance.
u The intended use is described in this instruction manual.
The use of any accessory or attachment or performance of
any operation with this tool other than those recommended
in this instruction manual may present a risk of personal
injury and/or damage to property.
Safety of others
u This appliance is not intended for use by persons
(including children) with reduced physical, sensory or
mental capabilities, or lack of experience and knowledge,
unless they have been given supervision or instruction
concerning use of the appliance by a person responsible
for their safety.
u Children should be supervised to ensure that they do not
play with the appliance.
Labels on tool
The following pictograms are shown on the tool.
:
Warning! To reduce the risk of injury, the user must
read the instruction manual.
Electrical safety
#
This tool is double insulated; therefore no earth wire
is required. Always check that the power supply
corresponds to the voltage on the rating plate.
u If the supply cord is damaged, it must be replaced by the
manufacturer or an authorised Black & Decker Service
Centre in order to avoid a hazard.

8
ENGLISH
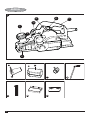
Features
A. Trigger switch
B. Lock-on button
C. Depth adjustment knob/front handle
D. Switch Handle
E. Shoe
F. Chip discharge chute
G. Chip deflector lever
H. parallel fence
I. Collection bag(Not included)
J. Vac adaptor (Not included)
K. Wrench
L. Blades
M. Adjust plate
N. Sharpening holder
Operation
Switch (Figure 2)
@
CAUTION: Check that the tool is not locked ON before
connecting it to a power supply. If the trigger switch is locked
ON when the tool is connected to the power supply, it will start
immediately. Damage to your tool or personal injury may
result.
@
CAUTION: Allow the tool to reach full speed before
touching tool to the work surface. Lift the tool from the work
surface before turning the tool off. To start the planer, depress
the trigger switch (A) in figure 2. To turn the planer off, release
the trigger switch.
Lock-On Button (Figure 2)
The tool can be locked on for continuous use. To lock the tool
ON depress the trigger switch (A) and push in the lock-on
button (B). Hold the lock-on button in as you gently release
the trigger switch. The tool will continue to run. To turn the tool
OFF from a locked-on position, squeeze and release the
trigger once.
Adjusting Planing Depth (Figure 3)
@
WARNING: Turn off and unplug the tool before making any
adjustments or removing or installing accessories. Planing
depth is infinitely variable from 0 to 1.6 mm. To adjust the
cutting depth, rotate the depth adjustment knob/front handle
(C) clockwise from the “P” position. The cutting depth will
increase from 0 to as much as 1.6mm. It is recommended that
test cuts be made in scrap wood after each re-adjustment to
make sure that the desired amount of wood is being removed
by the planer. Several shallow passes (rather than one deep
one) will produce a smoother finish.
Planing (Figures 4, 5, 6)
@
CAUTION: Allow the tool to reach full speed before
touching tool to the work surface. Lift the tool from the work
surface. Lift the tool from the work surface before turning the
tool off.
Hold the planer in the correct position with one hand on the
front handle (C) and the other hand on the switch handle (D)
as shown in figure 4. Place the front of the shoe (E) on the
surface to be planed, making certain that the cutting blades
are not touching the surface. Push down firmly on the front
handle of the planer so that the front shoe is ABSOLUTELY
FLAT on the work surface. Squeeze the trigger switch and
allow the motor to reach full speed before touching the planer
blades to the work surface. Move the tool slowly into the work
and maintain downward pressure to keep the planer flat. Be
particularly careful to keep the tool flat at the beginning and
the end of the work surface (Figures 4, 5, 6 ).
Planing Tip: For a smoother appearance, fasten a piece of
scrap wood to the end of the piece you are planing. Don t stop
planing until the cutting blades of the planer are past your
work piece and into the scrap material.
Parallel Fence (Figures 7, 8)
@
WARNING: Turn off and unplug the tool before making any
adjustments or removing or installing accessories.
@
CAUTION: Allow the tool to reach full speed before
touching tool to the work surface. Lift the tool from the work
surface before turn ing the tool off.
The rabbet fence can be installed on either side of your
planer. The planer can make rabbet cuts up to 12mm.
Fitting and removing the parallel fence(fig.7)
The parallel fence is used to for optimum control on narrow
workpieces.
u loosen the locking knob(9).
u insert the parallel fence(H)through the opening(10).
u slide the parallel fence into the desired position.
Rebating(fig.8)
u Fit and adjust the parallel fence.
u proceed as for planing.
Collection Bag (Figure 9)
@
WARNING: Turn off and unplug the tool before
making any adjustments or removing or installing
accessories (Bag not included in all models).
a. Attach bag (I) to either side of chip discharge chute (F).
Empty bag often to prevent clogging. b.To prevent chips
from coming out opposite side of chip discharge chute,
move chip deflector lever (G) to the opposite side of the
bag.

9
ENGLISH
Vacuum Adaptor (Figure 10)
@
WARNING: Turn off and unplug the tool before making
any adjustments or removing or installing accessories.
a. Slide the vac adaptor (J) over the chip discharge chute
(F).
b. Connect a vacuum cleaner hose (not included) to the
adaptor.
c. To prevent chips from coming out opposite side of chip
discharge chute, move chip deflector lever (G) to the
opposite side of the adaptor.
To Change Blades (Figure11)
@
WARNING: Turn off and unplug the tool before making
any adjustments or removing or installing accessories.
@
WARNING: Cut Hazard. Planer blades are sharp and
must be handled with care.
NOTE: The KTW750 has two blades, one on each side of the
blade drum. Any operation or adjustment should be made to
both blades.
To Remove Blade (Figure 11)
a. Remove the three bolts (11a) with the wrench (K) supplied.
b. Remove drum cover (11b) and remove the blade (L) out of
its holder.
c. Place the blade or replaced it.
To Reinstall Blade
a. Replace the drum cover (11b). Make sure that the blade is
flush with the planing shoe.
b. Tighten the three bolts (11a) .
@
Always replace both blade.
Parking Foot (Figure 12)
Your planer is equipped with a parking foot (O) that
automatically lowers into place when the tool is lifted from the
work surface. When planing, the parking foot raises as the tool
is pushed forward. When the parking foot is lowered, the
planer can set on the work surface without the blade touching.
@
CAUTION: Do not lock the trigger switch on and engage
the parking foot. The vibration of the running motor will cause
the planer to move, possibly falling from the work piece.
Drive Belt (Figure 13)
WARNING: Turn off and unplug the tool before making
any adjustments or removing or installing accessories.
To Replace Belt
a. Loosen the three screws shown in figure 13 and remove
the belt cover.
b. Remove old belt.
c. Place new belt over front pulley then rotate belt clockwise
while pushing belt onto back pulley.
d. Attach belt cover and securely tighten screws.
Adjusting cutters (Figure 14)
a. Place the blade (L) on the adjust plate (M),and make the
blade edge perfectly flush with the inside edge of the
adjust plate (M).
b. Place the bracket (11d) on the blade and make the flange
of bracket flush with the back side of the adjust plate.
c. Tighten the two screws (11c) on the bracket.
d. Slip the flange of the bracket into the groove of drum
(11e).place the drum cover (11b) and tighten the three
bolts (11a).
Sharpening blades (Figure 15)
a. Fasten the blades to sharpening holder (N). Be sure both
blades edges face in the same direction.
b. Place the blades edges so that they rest flat on the
grinding stone.
c. Firmly grip the sharpening holder and move back and
forward to sharpen the blades (L).
Residual risks
Additional residual risks may arise when using the tool which
may not be included in the enclosed safety warnings. These
risks can arise from misuse, prolonged use etc.
Even with the application of the relevant safety regulations
and the implementation of safety devices, certain residual
risks can not be avoided. These include:
u Injuries caused by touching any rotating/moving
parts.
u Injuries caused when changing any parts, blades or
accessories.
u Injuries caused by prolonged use of a tool. When
using any tool for prolonged periods ensure you take
regular breaks.
u Impairment of hearing.
u Health hazards caused by breathing dust developed
when using your tool (example:- working with wood,
especially oak, beech and MDF.)
Use
Warning! Let the tool work at its own pace. Do not overload.
u Adjust the depth of cut.
u If necessary, fit and adjust the parallel fence.
Hints for optimum use
u Move the tool along the grain of the wood.
u If the grain is cross or curly, or if the workpiece material is
a hard type of wood, adjust the depth of cut to take only
a very thin shaving at each pass and take several passes
to achieve the desired result.
u To keep the tool in a straight line, press down the front of

10
ENGLISH
the tool at the start, and press down the back of the tool at
the end of the cutting stroke.
Accessories
The performance of your tool depends on the accessory used.
Black & Decker accessories are engineered to high quality
standards and designed to enhance the performance of your
tool. By using these accessories you will get the verybest from
your tool.
Maintenance
Your tool has been designed to operate over a long period of
time with a minimum of maintenance. Continuous satisfactory
operation depends upon proper tool care and regular cleaning.
Warning! Before performing any maintenance, switch off and
unplug the tool.
u Regularly clean the ventilation slots in your tool using a soft
brush or dry cloth.
u Regularly clean the motor housing using a damp cloth. Do
not use any abrasive or solvent-based cleaner.
Replacing the drive belt (fig. 13)
u Loosen the screws and remove the cover .
u Remove the old drive belt.
u Place the new belt over the pulleys. Place the belt over
the large pulley first, then over the small pulley, whilst
manually rotating the belt steadily.
u Put the cover back in place and tighten the screws.
Protecting the environment
Z
Separate collection. This product must not be
disposed of with normal household waste.
Should you find one day that your Black & Decker product
needs replacement, or if it is of no further use to you, do not
dispose of it with household waste. Make this product available
for separate collection.
z
Separate collection of used products and packaging
allows materials to be recycled and used again.
Re-use of recycled materials helps prevent
environmental pollution and reduces the demand for
raw materials.
Local regulations may provide for separate collection of
electrical products from the household, at municipal waste
sites or by the retailer when you purchase a new product.

11
Ё᭛
䀁㿜⫼䗨
ᴀⱒᕫ䳏䠟″䀁㿜⫼ᮐܝᴤǃ㻑કล᭭DŽ
ᴀᎹՓ⫼ᮍᓣ⚎ᦤᓣDŽ
ᅝܼ㌄ࠛ
䳏ࢩᎹϔ㠀ᅝܼ䄺ਞ
䄺ਞʽ䂟䮅䅔᠔᳝ᅝܼ䄺ਞᅜࠛDŽϡ䙉ᕾ
ϟ߫ⱘ䄺ਞᅜࠛৃ㛑ᇢ㟈㿌䳏ǃ☿♑ಈ䞡
ڋᆇDŽ
ᴀ䄺ਞЁⱘ㸧䁲Ā䳏ࢩᎹāᣛՓ⫼䳏㎮䳏⑤կ䳏
ⱘ˄᳝䳏㎮˅䳏ࢩᎹܙ䳏ᓣ˄⛵䳏㎮˅䳏ࢩᎹ
DŽ
䂟ֱᄬ᠔᳝ⱘ䄺ਞ䁾ᯢҹ٭গ㗗
1˅Ꮉจഄ
a˅ ֱᣕᎹจഄ⏙┨ᯢ҂DŽ⏋і咥ᱫⱘจഄ
᳗ᓩⱐџᬙDŽ
b˅ 䂟࣓ᯧ⟚⪄๗ˈབ᳝ᯧ➗⎆储ǃ⇷储㉝้
ⱘ⪄๗ϟ᪡䳏ࢩᎹDŽ䳏ࢩᎹ⫶⫳ⱘ☿㢅
᳗咲➗㉝้⇷储DŽ
c˅ ᪡䳏ࢩᎹᰖ䂟䘴䲶ܦスᮕ㾔㗙DŽ
⊼ᛣ
ϡ䲚Ё᳗ᇢ㟈Ꮉ༅DŽ
2
˅䳏⇷ᅝܼ
a˅ 䳏ࢩᎹᦦ丁ᖙ䷜㟛ᦦᑻⳌ䜡DŽ䂟࣓ҹӏԩᮍ
ᓣᬍ㺱ᦦ丁DŽ䳔ഄⱘ䳏ࢩᎹϡ㛑Փ⫼ӏԩ
䔝ᦦ丁DŽॳ㺱ⱘᦦ丁Ⳍ䜡ⱘᦦᑻᇛ⏯ᇥ㿌
䳏ॅ䱾DŽ
b˅ 䙓ܡҎ储㿌ഄ㸼䴶ˈབㅵ䘧ǃᬷ➅⠛ބ
ㆅDŽ䑿储ഄ᳗ࡴ㿌䳏ॅ䱾DŽ
c˅ 䂟࣓ᇛ䳏ࢩᎹᲈ䴆䲼Ё╂▩⪄๗ЁDŽ
䳏
ࢩᎹ㿌∈ᇛࡴ㿌䳏ॅ䱾DŽ
d˅ 䂟࣓▿⫼䳏⑤㎮DŽ㌩ϡ㛑⫼䳏⑤㎮ᨀ䘟ǃᢝࢩ
䳏ࢩᎹᢨߎ݊ᦦ丁DŽ䅧䳏⑤㎮䘴䲶➅ǃ⊍ǃ
䢇䙞䘟ࢩ䚼ӊDŽফ᧡㑣㐲ⱘ䳏⑤㎮᳗ࡴ
㿌䳏ॅ䱾DŽ
e˅ ⭊᠊Փ⫼䳏ࢩᎹᰖˈ䂟Փ⫼䘽ড়᠊Փ
⫼ⱘᓊ䭋䳏㎮DŽ䘽ড়᠊Փ⫼ⱘ䳏㎮ᇛ⏯ᇥ㿌
䳏ॅ䱾
f˅ བᵰ╂▩ⱘ⪄๗ЁՓ⫼䳏ࢩᎹˈ䂟Փ⫼ⓣ
䳏ֱ䅋㺱㕂˄RCD˅ˈՓ⫼ℸ㺱㕂ৃ䰡Ԣ㿌䳏
ॅ䱾DŽ
3
˅Ҏ䑿ᅝܼ
a˅ ֱᣕ䄺㾎ˈ⭊᪡䳏ࢩᎹᰖ䮰⊼᠔ᕲџⱘ᪡
Ϻֱᣕ⏙䝦DŽߛ࣓᳝⮆ǃ㮹⠽ǃ䜦㊒
⊏Ⱆডឝϟ᪡䳏ࢩᎹDŽ᪡䳏ࢩᎹᳳ
䭧㊒ߚᬷ᳗ᇢ㟈ಈ䞡Ҏ䑿ڋᆇDŽ
b˅ Փ⫼ᅝܼ㺱㕂ˈྟ㌖䜡᠈䅋Ⳃ䦵DŽ
䘽⭊ṱӊ
ϟՓ⫼䰆้䴶ǃ䰆⒥ᅝܼ䵟ǃᅝܼᐑǃ㙑
䰆䅋ㄝ㺱㕂㛑⏯ᇥҎ䑿ڋᆇDŽ
c˅ 䙓ܡᛣ䘟ࢩDŽ⺎ֱᎹܹ䳏⑤䳏∴ǃ
ᐊᰖ䭟䮰㰩ᮐ䮰䭝⢔ᜟDŽᣛᬒᏆ䗮䳏⑤
ⱘ䭟䮰Ϟ☿䭟䮰㰩ᮐ䗮ᰖᦦܹ䳏⑤ৃ㛑᳗ᇢ
㟈ॅ䱾DŽ
d˅ 䳏ࢩᎹ䍋ࢩПࠡˈপᥝ᠔᳝䂓㆔䩄࣭ᡇ
DŽ䙎⬭䳏ࢩᎹᮟ䔝䳊ӊϞⱘᡇ䩄࣭
᳗ᇢ㟈Ҏ䑿ڋᆇDŽ
e˅ ϡ㽕䍙䍞᪡䎱䲶DŽ
ᰖࠏ⊼ᛣ䑿储ᑇ㸵ˈ䗭ῷ
ᛣᚙ⊕ϟ㛑དഄࠊ䳏ࢩᎹDŽ
f˅ ড়⧚㨫㺱ˈ᪡Ꮉᰖϡ㽕こᇀ僚㸷᳡Խᐊ
仒કDŽ䅧Դⱘ丁僂ǃ㸷᳡㹪ᄤ䘴䲶䘟ࢩ䚼ӊDŽ
ᇀ僚᳡㺱ǃԽ仒䭋ⱐৃ㛑᳗᥆ܹ䘟ࢩ䚼ӊDŽ
g˅ བᵰ䳏ࢩᎹᦤկњ㟛ᥦሥ㺱㕂ǃ䲚้䀁٭䗷
⫼ⱘ㺱㕂ˈࠛ⺎ֱҪץ䗷ᅠདϨՓ⫼ᕫ⭊DŽ
Փ⫼䗭ѯ㺱㕂ৃ⏯ᇥሥᓩ䍋ⱘॅ䱾DŽ
4
˅䳏ࢩᎹՓ⫼⊼ᛣџ䷙
a˅ ϡ㽕▿⫼䳏ࢩᎹˈḍ⫼䗨䙌⫼䘽⭊ⱘ䳏ࢩ
ᎹDŽড়䘽ⱘ䳏ࢩᎹ㛑݊両ᅮⱘগᭌϟ
དᅝܼⱘᅠ៤ὁDŽ
b˅ བᵰ䭟䮰ϡ㛑䗮䮰䭝Ꮉ䳏⑤ˈࠛϡ㛑Փ
⫼䁆䳏ࢩᎹDŽϡ㛑⫼䭟䮰՚ࠊⱘ䳏ࢩᎹ
ᰃॅ䱾ⱘϨᖙ䷜䘆㸠ׂ⧚DŽ
c˅ 䘆㸠ӏԩ䂓㆔ǃ䰘ӊᄬᬒ䳏ࢩᎹП
ࠡˈᖙ䷜ᕲ䳏⑤Ϟᢨᥝᦦ丁ᇛ䳏∴Ⲧ㛿
䭟DŽ䗭。䰆䅋ᗻᮑᇛ⏯ᇥ䳏ࢩᎹᛣ䍋ࢩ
ⱘॅ䱾DŽ
d˅ ᇛ䭦㕂䳏ࢩᎹ䊃ᄬܦス᠔ঞ㆘ೡПˈϺ
Ϩϡ㽕䅧ϡ❳ᙝ䳏ࢩᎹᇡ䗭ѯ䁾ᯢϡњ㾷
ⱘҎ᪡䳏ࢩᎹDŽ䳏ࢩᎹ㍧㿧ⱘ⫼
᠊Ёᰃॅ䱾ⱘDŽ
e˅ ᇡ䳏ࢩᎹ䘆㸠㎁䅋DŽ⁶ᶹ䘟ࢩ䚼ӊⱘᅝ㺱أ
Ꮒǃ䳊ӊ⸈᧡ᚙ⊕ᕅ䷓䳏ࢩᎹ䘟㸠ⱘ݊ᅗ
ṱӊDŽབ᳝᧡າˈ䳏ࢩᎹᖙ䷜Փ⫼ׂࠡ⧚
དDŽ䀅џᬙᰃ⬅ᮐ㎁䅋ϡ㡃㗠ᓩⱐDŽ
f˅ ֱᣕߔ᳝㡃ད䢦߽ⱘߛࠞߗˈ䗭ῷᎹϡᯧ
व⅏ϨᯧࠊDŽ
g˅ ᣝ✻ὁṱӊᎹ⊕ᚙ⊕ˈৠᰖগ✻ᴀ䁾ᯢ
ড়⧚Փ⫼Ꮉˈ䰘ӊঞߔDŽ䳏ࢩᎹ⫼䙷
ѯ㟛㽕∖ϡヺⱘ᪡ৃ㛑᳗ᇢ㟈ॅ䱾ᚙ⊕DŽ
5
˅㎁ׂ
a˅ 䳏ࢩᎹⱘ㎁ׂᖙ䷜⬅ᇜὁ㎁ׂҎવᅠ៤ˈϨ
া㛑ՓⳌৠ㽣Ḑⱘ䚼ӊDŽ䗭ῷ㛑⺎ֱ᠔㎁
ׂⱘ䳏ࢩᎹⱘᅝܼᗻDŽ
KTW750 ൟ䳏䠟″
ᡔ㸧গᭌ
䕧ܹ ⪺⡍ 650
ぎ䓝䔝䗳 䔝ߚ䧬 16,500
ࠞᇀᑺ ↿㉇ 82
ࠞ⏅ᑺ ↿㉇ 1.6
ῑষ⏅ᑺ ↿㉇ 12
䞡䞣 ݀᭸ 2.7
㽣Ḑ KTW750

བᵰ䳏⑤㎮᧡າˈᖙ䷜⬅ᒴଚⱒᕫᥜ⃞᳡
ࢭЁᖗˈҹᥦ䰸䲅ᙷDŽ
䰸䴲݊ᅝܼ䉴䊀Ҏ䘆㸠ᎹՓ⫼ⱘⲷⴷᣛ
ᇢˈ৺ࠛ储ǃᛳⶹ㛑ᖗᱎϡ䎇ⱘҎ
˄ࣙᣀܦス˅ǃҹঞ㔎УⳌ䮰㍧倫㟛ⶹ䄬ⱘ
ҎϡᕫՓ⫼ᴀᎹDŽᖙ䷜ⳟㅵܦスˈ࣓Փ݊
ᣓᴀᎹ⥽㗡DŽ
ᴀՓ⫼ݞЁ䁾ᯢњᎹⱘ䀁㿜⫼䗨DŽབᵰ
Փ⫼ݞᓎ䅄Пⱘ䜡ӊǃ䰘ӊ䘆㸠ݞ
ᓎ䅄ПⱘᎹ᪡ˈ᳗ᓩ䍋Ҏ䑿ڋᆇ䉵
⫶᧡າⱘ乼䱾DŽ
12
Ё᭛
䳏ࢩᎹ䰘ࡴᅝܼ䄺⼎
䄺ਞʽ䂟䙉ᅜ䳏䠟″ᅝܼ䰘ࠛ
ߛࡆ䜡ӊৃ㛑㿌䲅㮣ⱘᇢ㎮䳏ࢩᎹ
㞾䑿ᇢ㎮ⱘᚙ⊕ϟˈ䂟ڙᦵᣕ㌩㎷ⱘᡞ䤊
䴶DŽབᵰߛࡆ䜡ӊ㿌Āᐊ䳏āᇢ㎮ˈᎹ
ᲈ䴆䞥ቀ䚼ӊⱘ㸼䴶᳗Āᐊ䳏āˈϺϨᇢ㟈
᪡વ㿌䳏DŽ
䂟Փ⫼༒䠫݊ᅗߛᆺৃ㸠ⱘᮍ⊩՚ᅮ
ᬃᩤᎹӊˈᇛ݊ᅮࠄ〽ᅮⱘᎹৄϞDŽ⫼
ᡧԣᎹӊ⫼䑿储ᢉԣᎹӊϺϡ〽ᅮˈৃ
㛑᳗ᇢ㟈Ꮉӊ༅DŽ
ᖙ䷜ㄝߔذ䔝ᕠˈᠡ㛑ᬒϟᎹDŽ
ᲈ䴆ⱘ
ߔ᳗ߛܹ㸼䴶ˈᇢ㟈༅ঞಈ䞡Ҏ䑿ڋᆇDŽ
ֱᣕߗ䢦߽DŽ
བᵰߗ䙆䟡᧡າˈ᳗ᇢ
㟈Ꮉວϟさ✊䔝ذ䔝DŽ䂟ࢭᖙՓ
⫼㟛ᎹⳌ䜡ⱘߗ串ൟDŽ
Փ⫼ᕠˈᎹӊߗ᳗䅞ᕫᕜ➭ˈឝ䙓
ܡゟे㿌DŽ
䭟Ꮉࠡˈឝ⏙䰸ᎹӊЁ᠔᳝䞬ᄤ䞥ቀ⠽储DŽ
ྟ㌖䲭ᦵᣕᎹⱘᶘDŽ
བᵰ䳏⑤㎮㹿᧡າߛˈឝゟे㟛Џ䳏㎆
ᮋ䭟DŽ
䄺ਞʽ
བᵰ㿌ܹᎹὁᰖ⫶⫳ⱘ㉝้ˈ᳗
ॅᆇ᪡㗙ঞจҎવⱘعᒋDŽ䂟Խ᠈䰆้ǃ䰆✭
ᇜ⫼䴶㔽ˈϺ⺎ֱ䘆ܹ㰩ᮐᎹจ᠔ⱘҎવгᕫ
ࠄֱ䅋DŽ
䄺ਞʽ⚎䰡Ԣڋᆇ乼䱾ˈՓ⫼ࠡࢭᖙ䮅䅔
Փ⫼ݞDŽ
䳏⇷ᅝܼ
ᴀᎹ⫼䲭䞡㌩㎷˗ℸϡ䳔㽕ഄ㎮DŽ
䂟ࢭᖙ⁶ᶹ䳏⑤ᰃ৺㟛䡬⠠Ϟⱘ䳏ວϔ㟈DŽ
⡍ᗻ
ᴀᎹ᳝ҹϟ䷙ܼ䚼⡍ᗻ˖
䥪ᅮᣝ䟩˄೪2˅
Ꮉৃҹ䥪ᅮᕠ䗷㑠Փ⫼DŽ㽕䥪ᅮᎹˈᣝϟ㿌ⱐ
䭟䮰˄A˅Ϻᣝϟ䥪ᅮᣝ䟩˄B˅DŽᣝԣ䥪ᅮᣝ䟩ⱘ
ৠᰖˈ䓩䓩䞟ᬒ㿌ⱐ䭟䮰ˈᎹ᳗ᣕ㑠䘟䔝DŽ㽕
䥪ᅮԡ㕂䮰䭝Ꮉˈ䂟᪴ວϺ䞟ᬒ㿌ⱐ䭟䮰ϔDŽ
䭟䮰˄೪2˅
⊼ᛣʽ䗷䳏⑤Пࠡˈ䂟⁶ᶹϺ⺎ֱᎹ≦
᳝䥪ᅮଳࢩԡ㕂DŽབᵰ䗷䳏⑤ᰖᎹⱘ㿌ⱐ
䭟䮰䥪ᅮଳࢩԡ㕂ˈᎹᇛゟेଳࢩˈ㗠ᇢ
㟈Ꮉ᧡າҎ䑿ڋᆇDŽ
⊼ᛣʽ
Ꮉ㿌Ꮉӊ㸼䴶Пࠡˈᖙ䷜䘨ࠄ
ܼ䗳˗Ꮉ䲶䭟Ꮉӊ㸼䴶Пᕠˈݡ䮰䭝ᎹDŽ㽕
ଳࢩ䳏ˈᣝ೪
2᠔⼎ˈᣝϟ㿌ⱐ䭟䮰˄A˅ेৃDŽ
㽕䮰䭝Ꮉˈ䂟䞟ᬒ㿌ⱐ䭟䮰DŽ
⏅ⱘ䂓ᭈ˄೪3˅
䄺ਞ˖䂓ᭈǃᢚौᅝ㺱䜡ӊПࠡˈ䂟䮰䭝
ᎹϺᢨϟ䳏⑤ᦦ丁DŽ⏅ৃ0㟇1.6↿㉇䭧⛵
㋮䂓ᭈDŽ㽕䂓ᭈ⏅ˈᕲĀPāԡ㕂䷚ᰖ䞱䔝ࢩ
⏅ᑺ䂓㆔ᮟ䟩ࠡᶘ˄C˅DŽߛ⏅ᑺᇛᕲ0䭟
ྟࡴˈⳈ㟇1.6↿㉇DŽᓎ䅄↣䂓ᭈᕠˈᒶ
᭭Ϟ䀺ᑒˈ⺎ֱࠞ䞣ヺড়㽕∖DŽ䍳⏎
˄㗠䴲ϔ䍳⏅˅ᕠⱘ㸼䴶᳗⚎ܝ⒥DŽ
ᎹϞⱘ῭䁠
ᴀᎹϞ᳝བϟ೪ᔶ῭䁠˖
A.
B.
C.
D.
E.
F.
G.
H.
I.
J.
K.
L.
M.
N.
㿌ⱐ䭟䮰
䥪ᅮᣝ䟩
⏅ᑺ䂓㆔ᮟ䟩ࠡᶘ
䭟䮰ᶘ
ᑩᵓ
ᥦሥῑ
ሥأᇢṓ
ᑇ㸠ᇢᵓ
〡้㹟˄ϡᦤկ˅
ⳳぎ䘽䜡఼˄ϡᦤկ˅
ᡇ
ߔ
䂓㆔ᵓ
⺼ߔᶊ
᪡

13
ࠞ˄೪4ǃ5ǃ6˅
⊼ᛣʽᎹ㿌Ꮉӊ㸼䴶Пࠡˈᖙ䷜䘨ࠄ
ܼ䗳˗Ꮉ䲶䭟Ꮉӊ㸼䴶Пᕠˈݡ䮰䭝ᎹDŽ
ϔ䲏ᦵԣࠡᶘ˄C˅ⱘℷ⺎ԡ㕂ˈϔ䲏ᦵ
ԣ䭟䮰ᶘ˄D˅ˈབ೪
4᠔⼎DŽᡞᑩᵓ˄E˅ࠡ䚼
㕂ᮐᕙ㸼䴶Ϟˈ⺎ֱߗ㿌㸼䴶DŽ⫼ᣝϟ
ࠡᶘˈՓࠡᑩᵓ㟛Ꮉӊ㸼䴶㌩ᇡᑇ䊐˗᪴ວ㿌ⱐ
䭟䮰ˈᕙ侀䘨䘨ࠄܼ䗳ᕠˈ䅧ߗ㿌Ꮉӊ㸼䴶DŽ
Ꮉӊ㎽᜶⿏ࢩᎹˈֱᣕϟວˈՓ䳏ᑇ䊐
ᎹӊDŽᇸ݊ᰃᎹӊ㸼䴶ⱘ䭟ྟ㌤ᴳ䚼ߚˈឝ⺎
ֱᎹᑇ䊐˄೪
4ǃ5ǃ6˅DŽ
ࠞᦤ⼎˖
㽕⥆ᕫ⚎ܝ⒥ⱘ㸼䴶ˈৃᎹӊッ
ᅮϔพᒶ᭭DŽߔ䗮䘢ᎹӊϺࠞᒶ᭭ࠡˈ
ϡ㽕ذℶDŽ
僚䭟䥪ᅮᮟ䟩˄9˅DŽ
䗮䘢䭟ষ˄10˅ᦦܹᑇ㸠ᇢᵓ˄H˅DŽ
ᡞᑇ㸠ᇢᵓ⒥ࢩࠄ᠔䳔ԡ㕂DŽ
ᑇ㸠ᇢᵓⱘᅝ㺱㟛ᢚौ˄೪7˅
ᑇ㸠ᇢᵓৃᆺ⧒じᎹӊⱘ᳔ՇࠊDŽ
ᑇ㸠ᇢᵓ˄೪7ǃ8˅
䄺ਞ˖䂓ᭈǃᢚौᅝ㺱䜡ӊПࠡˈ䂟䮰䭝
ᎹϺᢨϟ䳏⑤ᦦ丁DŽ
⊼ᛣʽ
Ꮉ㿌Ꮉӊ㸼䴶Пࠡˈᖙ䷜䘨ࠄ
ܼ䗳˗Ꮉ䲶䭟Ꮉӊ㸼䴶Пᕠˈݡ䮰䭝ᎹDŽ
ῑষᇢᵓৃᅝ㺱䳏ⱘӏϔوDŽῑষ᳔⏅ᑺ12
↿㉇DŽ
ᅝ㺱ᑇ㸠ᇢᵓϺ䘆㸠䂓ᭈDŽ
a.ᡞ〡้㹟˄I˅䗷ࠄᥦሥῑ˄F˅ⱘӏϔوDŽ
䲚้㹟ឝϡᰖ⏙ぎˈ䰆ℶฉาDŽ
b.⚎䰆ℶሥᕲᥦሥῑⱘϔوైߎˈ䂟ᡞ
ሥأᇢṓ˄G˅⿏㟛㹟ᄤⳌᇡⱘϔوDŽ
ᣝ✻ࠞᑣ᪡DŽ
ᓔῑষ˄8˅
䲚้㹟˄೪9˅
䄺ਞ˖䂓ᭈǃᢚौᅝ㺱䜡ӊПࠡˈ䂟䮰䭝
ᎹϺᢨϟ䳏⑤ᦦ丁DŽ
ⳳぎ䘽䜡఼˄೪10˅
䄺ਞ˖䂓ᭈǃᢚौᅝ㺱䜡ӊПࠡˈ䂟䮰䭝
ᎹϺᢨϟ䳏⑤ᦦ丁DŽ
a.ᡞⳳぎ䘽䜡఼˄J˅⒥ࢩᅝ㺱ࠄᥦሥῑ˄F
˅ϞDŽ
b.ᡞⳳぎ఼้䒳ㅵ˄ᦤկ˅䗷ࠄ䘽䜡
఼ϞDŽ
C.
ߔ˄೪11˅
䄺ਞ˖䂓ᭈǃᢚौᅝ㺱䜡ӊПࠡˈ䂟䮰䭝
ᎹϺᢨϟ䳏⑤ᦦ丁DŽ
䄺ਞ˖ߛࡆڋᆇDŽߗ䢦߽ˈᖙ䷜ᇣᖗ㰩⧚DŽ
䁾ᯢ˖KTW750᳝ܽ⠛ߔˈߚ߹ԡᮐ哧ⱘܽو
DŽ᪡㟛䂓ᭈߔᰖˈᖙ䷜ܽ⠛ৠᰖ䘆㸠DŽ
ذ″ᶊ˄೪12˅
ᴀ䳏䀁㿜᳝ذ″ᶊ˄O˅DŽᎹӊϞᦤ䍋Ꮉᰖ
ˈذ″ᶊ᳗㞾ࢩϟ䰡ࠄԡDŽࠞὁᰖˈࠡᎹ
᳗Փذ″ᶊछ䍋DŽذ″ᶊϟ䰡ᕠˈৃᇛᎹᬒᎹ
ӊ㸼䴶ˈ㗠ߗϡ᳗㿌ᎹӊDŽ
䄺ਞ˖
䂓ᭈǃᢚौᅝ㺱䜡ӊПࠡˈ䂟䮰䭝
ᎹϺᢨϟ䳏⑤ᦦ丁DŽ
ڇࢩᐊ˄೪
13˅
䄺ਞ˖䂓ᭈǃᢚौᅝ㺱䜡ӊПࠡˈ䂟䮰䭝ᎹϺ
ᢨϟ䳏⑤ᦦ丁DŽ
⚎䰆ℶሥᕲᥦሥῑⱘϔوైߎˈ䂟ᡞ
ሥأᇢṓ˄G˅⿏㟛䘽䜡఼Ⳍᇡⱘϔ
وDŽ
a.Փ⫼䱼″ᦤկⱘᡇ˄K˅ˈপϟϝן㶎
ᷧ˄11a˅DŽ
b.পϟ哧ᵓ˄11b˅ˈ✊ᕠᡞߔ˄L˅
ᕲߔῑЁপߎDŽ
C.
ᅝ㺱ߔDŽ
䞡ᮄᅝ㺱ߔ
a.ᡞ哧ᵓ˄11b˅ಲԡˈ⺎ֱߔ㟛
ᑩᵓᑇ唞DŽ
b.㎞ϝן㶎ᷧ˄11a˅DŽ
ܽןߔࢭᖙৠᰖDŽ
Ё᭛
ᢚौߔ
˄೪11˅

14
Ё᭛
Ⲃᐊ
㿌ᮟ䔝⌏ࢩ䚼ӊ䗴៤ⱘҎ䑿ڋᆇDŽ
䚼ӊǃߗ䜡ӊ䗴៤ⱘҎ䑿ڋᆇDŽ
Փ⫼ᰖ䭧䘢䭋ᰖᇢ㟈ⱘڋᆇDŽՓ⫼ӏԩᎹ
ᰖ䭧䘢䭋ᰖˈ䂟⺎ֱᅮᳳӥᙃDŽ
㙑᧡ڋDŽ
ܹՓ⫼ᰖ⫶⫳ⱘ㉝้᠔ᐊ՚ⱘعᒋ䲅ᙷ˄
՟བ˖Ꮉᇡ䈵⚎ᴤ⡍߹ᰃ‵ǃቅ↯
Ёᆚᑺ㑪㎁ᵓᰖ˅DŽ
Ⅼ们乼䱾
⭊ᎹⱘՓ⫼䍙ߎᴀᅝܼ䄺⼎㆘ೡᰖˈ᳗ᐊ՚両
ⱘⅬ们乼䱾DŽ䗭ѯ乼䱾ৃ㛑՚㞾Փ⫼ϡ⭊ǃՓ⫼ᰖ
䭧䘢䭋ㄝDŽ
ेՓ㨑ᆺњⳌ䮰ⱘᅝܼ⊩㽣ǃ⫼ᅝܼ㺱㕂ˈᶤѯ
Ⅼ们乼䱾ᰃϡৃ䙓ܡⱘˈᅗץᰃ˖
a.僚䭟೪
13Ёⱘϝן㶎䞬ˈপϟⲂᐊ㔽DŽ
b.পϟ㟞ⲂᐊDŽ
C.
d.ᅝ㺱Ⲃᐊ㔽ˈ᫄㎞㶎䞬DŽ
ᡞᮄⲂᐊ㕂ᮐࠡᐊ䓾ϞˈᡞⲂᐊϞᕠᐊ䓾
ⱘৠᰖ䷚ᰖ䞱䔝ࢩⲂᐊDŽ
⊓㨫ᴤⱘ㋟䏃⿏ࢩᎹDŽ
བᵰᴤ㋟䏃Ѹঝ㼊Ⲏˈ䊾䓗⹀ˈឝ
䂓ᭈ⏅ˈՓ↣䍳ࠞᕜ⏎ˈ䗮䘢䍳ࠞ
䘨ࠄ᠔䳔ᬜᵰDŽ
㽕ՓᎹֱᣕⳈ㎮ˈ䭟ྟᰖᣝϟᎹࠡ䚼ˈ
ϔ䍳㌤ᴳᰖˈᣝϟᎹᕠ䚼DŽ
᳔Շឝ⫼ᦤ⼎
䂓ᭈࠞ⏅ᑺDŽ
ᖙ㽕ᰖˈᅝ㺱Ϻ䂓ᭈᑇ㸠ᇢᵓDŽ
Փ⫼䒳ࠋђᏗᅮᳳ⏙┨Ꮉⱘ䗮乼ষDŽ
Փ⫼▩Ꮧᅮᳳ⏙┨侀䘨←DŽߛ࣓Փ⫼ӏԩ
ⷨ⺼ൟ⒊ࡥൟ⏙┨ࡥDŽ
Փ⫼
䄺ਞʽ
䅧Ꮉ㞾᳝㆔༣ϟᎹˈߛ࣓䘢䓝DŽ
䄺ਞʽ
ֱ仞ӏԩ᳝㐽⛵㐽䳏ࢩᎹПࠡˈ䂟˖
ᙼⱘⱒᕫ䳏ࢩᎹ䀁㿜㊒㡃ˈৃҹ䭋ᳳ䘟ˈ㗠া
䳔㽕Ὁᇥⱘ㎁䅋DŽ㽕পᕫ䗷㑠ⱘҸҎⓓᛣⱘᎹᬜ
ᵰˈ䳔㽕ᙼخড়䘽ⱘֱ仞ᅮᳳⱘ⏙┨DŽ
䜡ӊ
᠔᳝䳏ᎹᎹⱘᗻ㛑ഛপ≎ᮐ᠔⫼ⱘ䜡ӊDŽⱒᕫ䜡
ӊձ催䊾䞣῭ޚ䀁㿜ˈ㛑ᔋ࣪䳏ࢩᎹⱘᗻ㛑DŽ
Փ⫼ⱒᕫ䜡ӊˈৃҹ⺎ֱᙼⱘⱒᕫᎹৃҹⱐᧂ᳔
ߎ㡆ⱘᗻ㛑DŽ
DŽ
DŽ
DŽ
ֱ䅋⪄๗
ߚ串ಲᬊDŽℸ串⫶કϡᕫ᱂䗮ᆊᒁൗഒϔ
䍋㰩⧚DŽ
བᵰᶤϔᙼⱐ⧒ᖙ䷜䎳ᙼⱘⱒᕫ⫶કˈ䂟ϡ㽕
ᡞᅗᆊᒁൗഒϔ䍋㰩⧚ˈ䂟ᡞ䁆⫶કஂ⤼ߚ串ಲ
ᬊDŽ
㟞⫶ક㟞ࣙ㺱ⱘߚ串ಲᬊՓᴤ᭭㛑ᕫҹ
ݡᕾ⪄ݡ߽⫼DŽݡᕾ⪄ᴤ᭭ⱘ䞡ᮄ߽⫼᳝
ࡽᮐ䰆ℶ⪄๗∵ᶧ⏯ᇥॳᴤ᭭䳔∖DŽ
Ꮦᬓൗഒจᙼ䋐䊋ᮄ⫶કⱘ䳊ଂଚ㰩ˈഄᮍ⊩
㽣ৃ㛑㽕∖䳏఼⫶ક㟛⫳⌏ൗഒߚ䭟ಲᬊDŽ
䘆ষଚ⡍㙵ӑ᳝䰤݀ৌ
ഄഔৄ࣫Ꮦܻऔᮄϝ䏃㰳)
䳏䁅
Ё㻑䗴
a.ᡞߔ˄L˅㕂ᮐ䂓㆔ᵓ˄M˅ϞˈՓߔߗ
䙞㎷㟛䂓㆔ᵓ˄M˅ⱘܻễᅠܼᑇ唞DŽ
b.ᡞᠬᶊ˄11d˅㕂ᮐߔϞˈϺՓᠬᶊ䙞㎷
㟛䂓㆔ᵓⱘ㚠وᑇ唞DŽ
C.
d.ᡞᠬᶊ䙞㎷⒥ࢩࠄ哧˄11e˅ϞⱘߍῑܻDŽ
㎞ᠬᶊϞⱘܽן㶎䞬˄11c˅DŽ
ߔ䂓㆔˄೪14˅
C.
㎞ᦵ⺼ߔᶊϺᕔᕽ⿏ࢩˈᠧ⺼ߔ˄L˅DŽ
a.ᡞߔᅮࠄ⺼ߔᶊ˄N˅ϞDŽ⺎ֱܽן
ߔߔߗᮍϔ㟈DŽ
b.ᬒ㕂ߔᰖˈֱᣕߔߗ㟛⺼ᑇ䊐DŽ
⺼ߔ˄೪15˅
㎁䅋
ڇࢩᐊ˄೪13˅
僚䭟㶎䞬ˈপϟⲂᐊ㔽DŽ
পϟ㟞ⲂᐊDŽ
ᡞᮄⲂᐊ㕂ᮐⲂᐊ䓾ϞDŽ佪ܜ㕂ᮐ䓾Ϟˈ
✊ᕠᰃᇣ䓾ˈৠᰖ⫼ᑇ〽䔝ࢩⲂᐊDŽ
ᡞⲂᐊ㔽㺱དϺ᫄㎞㶎䞬DŽ
-
 1
1
-
 2
2
-
 3
3
-
 4
4
-
 5
5
-
 6
6
-
 7
7
-
 8
8
-
 9
9
-
 10
10
-
 11
11
-
 12
12
-
 13
13
-
 14
14


Black & Decker KTW750 Owner's manual
- Category
- Power tools
- Type
- Owner's manual
Ask a question and I''ll find the answer in the document
Finding information in a document is now easier with AI
Related papers
-
Black & Decker 7696 User manual
-
-
BLACK DECKER KW712 T1 Owner's manual
-
-
-
Black & Decker Planer User manual
-
-
-
BLACK DECKER KW750 T4 User manual