StarTech.com IDE2510U2 User manual

Category
HDD/SSD enclosures
Type
User manual

This manual is also suitable for

Manual Revision: 02/27/2012
For the most up-to-date information, please visit: www.startech.com
DE: Bedienungsanleitung - de.startech.com
FR: Guide de l'utilisateur - fr.startech.com
ES: Guía del usuario - es.startech.com
IT: Guida per l'uso - it.startech.com
NL: Gebruiksaanwijzing - nl.startech.com
PT: Guia do usuário - pt.startech.com
IDE2510U2
SAT2510U2
SAT2510BU2
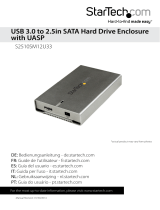
USB 2.0 External Hard Drive Enclosure
*actual product may vary from photo
Instruction Manual
FCC Compliance Statement
This equipment has been tested and found to comply with the limits for a Class B digital
device, pursuant to part 15 of the FCC Rules. These limits are designed to provide reasonable
protection against harmful interference in a residential installation. This equipment generates,
uses and can radiate radio frequency energy and, if not installed and used in accordance with
the instructions, may cause harmful interference to radio communications. However, there
is no guarantee that interference will not occur in a particular installation. If this equipment
does cause harmful interference to radio or television reception, which can be determined by
turning the equipment o and on, the user is encouraged to try to correct the interference by
one or more of the following measures:
• Reorient or relocate the receiving antenna.
• Increase the separation between the equipment and receiver.
• Connect the equipment into an outlet on a circuit dierent from that to which the receiver
is connected.
• Consult the dealer or an experienced radio/TV technician for help.
Use of Trademarks, Registered Trademarks, and other Protected Names and Symbols
This manual may make reference to trademarks, registered trademarks, and other
protected names and/or symbols of third-party companies not related in any way to
StarTech.com. Where they occur these references are for illustrative purposes only and do not
represent an endorsement of a product or service by StarTech.com, or an endorsement of the
product(s) to which this manual applies by the third-party company in question. Regardless
of any direct acknowledgement elsewhere in the body of this document, StarTech.com hereby
acknowledges that all trademarks, registered trademarks, service marks, and other protected
names and/or symbols contained in this manual and related documents are the property of
their respective holders.
Instruction Manual
i
Table of Contents
Introduction ............................................................................................1
Packaging Contents .................................................................................................................................1
System Requirements .............................................................................................................................. 1
Installation ..............................................................................................2
Hardware Installation .............................................................................................................................. 2
How to Use ..............................................................................................3
Connecting the Hard Drive .................................................................................................................... 3
Powering the Drive Enclosure .............................................................................................................. 3
Disconnecting the Hard Drive .............................................................................................................. 4
Specications ..........................................................................................5
Technical Support ..................................................................................6
Warranty Information ............................................................................6
Instruction Manual
1
Introduction
This USB 2.0 to 2.5 in. External Hard Drive Enclosure lets you transform virtually any
9.5mm thick 2.5in IDE (IDE2510U2) or SATA (SAT2510U2/SAT2510BU2) notebook hard
drive into the perfect portable storage solution.
Ideal for storing digital multimedia and other demanding applications, the hard drive
enclosure allows you to get the most out of your hard drive, connecting to a host
computer using USB 2.0 (also backward compatible with USB 1.1), for maximum data
transfer rates of up to 480Mbps.
A truly portable solution, the enclosure features lightweight yet durable aluminum
construction, as well as a small form factor design that ts perfectly into your pocket or
notebook bag when not in use. To eliminate the hassle of having to nd a power outlet
when youre ready to back up your data or load your stored les, the enclosure requires
no external power supply, as it’s powered through USB connection to the host computer.
Packaging Contents
• 1 x 2.5in Aluminum Enclosure
• 1 x USB 2.0 Y-Cable
• 1 x Screw Kit
• 1 x Protective Case
• 1 x Instruction Manual
System Requirements
• USB enabled computer system with an available USB port
• Microsoft® Windows® XP/2003 Server/Vista/Server 2008 R2/7 (32/64-bit), or Apple®
Mac OS® 9/10
Instruction Manual
2
Installation
Hardware Installation
CAUTION: Use caution when installing a hard drive in the enclosure. Excessive shock
or force could damage the drive and/or the enclosure, resulting in data loss.
Always ensure that you are properly grounded when handling a hard drive or the enclosure
tray, since electronic components can be damaged by static electricity. If an anti-static mat
or similar product is not available, ground yourself by touching a computer case or other
metal surface for several seconds before handling any components.
1. For IDE hard drives, set the hard drive to function in Master mode by adjusting the
necessary jumpers, according to the drive manufacturer’s instruction.
2. Using the included screwdriver, remove the two screws fastening the end cap with
the USB connector to the enclosure.
3. Attach the 2.5” hard drive to the interface connector (located on the inside of of
the end cap), ensuring a snug connection. Do not use excessive force, to avoid
damaging the drive and the enclosure.
4. Insert the end cap with attached hard drive into the enclosure housing.
Instruction Manual
3
5. Re-fasten the screws that were removed in step 2.
How to Use
Connecting the Hard Drive
Once the enclosure has been attached to a computer, and the necessary software has
been installed, the drive will be accessible as though it were installed within the system.
Prior to using the drive, it will need to be formatted according to your operating
system requirements. To format your newly attached hard drive, or create partitions,
please consult the documentation that accompanied your operating system at the
time of purchase.
Powering the Drive Enclosure
The hard drive enclosure requires no external power supply,
as it is capable of receiving enough power (5V/500mA) from
the USB Bus to which it is connected.
NOTE: Only the Primary connector is required to be plugged
into the computer system. The Secondary connector may be
required if the hard drive cannot draw enough power from a
single USB port.
LED Indicator
The hard drive enclosure oers an LED indicator, to enable you to monitor drive
activity. When the enclosure is powered, the LED will illuminate and remain green.
While the hard drive is being accessed, however, the LED will change from green to
red. Do not remove the enclosure from the host computer while the LED is red, as it
could damage the drive or the enclosure, resulting in data loss.
Instruction Manual
4
Disconnecting the Hard Drive
Windows XP
1. Right click on the removable storage icon, located in the task bar.
2. When the Safely Remove Hardware message appears, click on it with the left
mouse button.
3. You will be asked to select the device you wish to disconnect. Please highlight the
drive listing, and click on OK.
4. On the screen that follows, click on Stop.
5. Wait for the message indicating that it is now safe to remove the device. Please
note: Removing the connected drive prior to receiving notication that it is safe to
do so, could result in losing or corrupting data stored on the drive. Once the Safe
to Remove Hardware message appears, please disconnect the enclosure from the
computer by removing the USB connection.
Mac OS 9/10
To safely disconnect the attached drive from the host computer, close any windows
listing the contents of the removable drive. Once all windows are closed, click on the
USB storage icon on the desktop, and drag it to the Trash Can icon on the desktop.
Allow 5 seconds before physically removing the enclosure/drive from the computer.
Instruction Manual
5
Specications
IDE2510U2 SAT2510U2/ SAT2510BU2
Host Interface USB 2.0
Chipset ID Initio INIC1511 Sunplus SPIF225A
External Connectors 1 x USB mini-B female
LED Indicators 1 x Power/Activity
Compatible Hard Drives
2.5in IDE ATA-100
up to 9.5mm
height
2.5in SATA 1/2/3 up to
9.5mm height
Maximum Data Transfer Rate 480 Mbps (USB 2.0)
Material Aluminum/ Plastic
Color Silver Silver / Black
Operating Temperature 0°C ~ 60°C (32°F ~ 140°F)
Storage Temperature -20°C ~ 70°C (-4°F ~ 158°F)
Humidity 0% ~ 90% RH
Dimensions 120 x 75 x 10 mm (4.72 x 2.95 x 0.39”)
Weight 62.1g (2.19 oz.)
Compatible Operating Systems
Windows XP/Server 2003/Vista/Server 2008
R2/7 (32/64-bit), Mac OS 9/10
Instruction Manual
6
Technical Support
StarTech.com’s lifetime technical support is an integral part of our commitment to
provide industry-leading solutions. If you ever need help with your product, visit
www.startech.com/support and access our comprehensive selection of online tools,
documentation, and downloads.
For the latest drivers/software, please visit www.startech.com/downloads
Warranty Information
This product is backed by a two year warranty.
In addition, StarTech.com warrants its products against defects in materials
and workmanship for the periods noted, following the initial date of purchase.
During this period, the products may be returned for repair, or replacement with
equivalent products at our discretion. The warranty covers parts and labor costs only.
StarTech.com does not warrant its products from defects or damages arising from
misuse, abuse, alteration, or normal wear and tear.
Limitation of Liability
In no event shall the liability of StarTech.com Ltd. and StarTech.com USA LLP (or their
ocers, directors, employees or agents) for any damages (whether direct or indirect,
special, punitive, incidental, consequential, or otherwise), loss of prots, loss of business,
or any pecuniary loss, arising out of or related to the use of the product exceed the
actual price paid for the product. Some states do not allow the exclusion or limitation
of incidental or consequential damages. If such laws apply, the limitations or exclusions
contained in this statement may not apply to you.
Hard-to-nd made easy. At StarTech.com, that isn’t a slogan. Its a promise.
StarTech.com is your one-stop source for every connectivity part you need. From
the latest technology to legacy products — and all the parts that bridge the old and
new — we can help you nd the parts that connect your solutions.
We make it easy to locate the parts, and we quickly deliver them wherever they need
to go. Just talk to one of our tech advisors or visit our website. You’ll be connected to
the products you need in no time.
Visit www.startech.com for complete information on all StarTech.com products and
to access exclusive resources and time-saving tools.
StarTech.com is an ISO 9001 Registered manufacturer of connectivity and technology
parts. StarTech.com was founded in 1985 and has operations in the United States,
Canada, the United Kingdom and Taiwan servicing a worldwide market.
  • Page 1 1
  • Page 2 2
  • Page 3 3
  • Page 4 4
  • Page 5 5
  • Page 6 6
  • Page 7 7
  • Page 8 8
  • Page 9 9
  • Page 10 10

StarTech.com IDE2510U2 User manual

Category
HDD/SSD enclosures
Type
User manual
This manual is also suitable for

Ask a question and I''ll find the answer in the document

Finding information in a document is now easier with AI