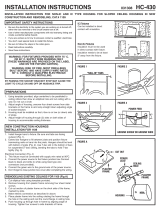
Progress Lighting P821-FBFC Installation guide

Type
Installation guide

Progress Lighting P821-FBFC is a luminaire designed for both residential and commercial use. Its versatility allows for installation in various ceiling types, including wood joists, T-bars, and furring channels. The luminaire is fire-rated and can be used in fire-resistant floor-ceiling and roof-ceiling designs, making it suitable for safety-conscious environments. It supports the use of trims and lamps specified by the manufacturer, ensuring compatibility and compliance with safety standards.

Progress Lighting P821-FBFC is a luminaire designed for both residential and commercial use. Its versatility allows for installation in various ceiling types, including wood joists, T-bars, and furring channels. The luminaire is fire-rated and can be used in fire-resistant floor-ceiling and roof-ceiling designs, making it suitable for safety-conscious environments. It supports the use of trims and lamps specified by the manufacturer, ensuring compatibility and compliance with safety standards.

(Ceiling Opening is to be 6 7/8"Dia.)
INSTALLATION IN WOOD JOISTS
This Instruction sheet is also intended to be used as a Paint Shield.
Follow this Instruction Sheet Carefully. Be sure Electricity is OFF before starting Installation.
1.- Slip Bar Hangers (1) through slots in Plaster Frame (2). Hold Frame in desired position between
Joists (3) and drive Bar Hanger Tabs (4) into Joists. Use a minimum 1" lg. steel Nail or Screw (26)
through holes in Bar Hanger ends for additional support. Tighten bar hanger Locking Screws (5) in
ends of Plaster Frame to prevent lateral movement of Plaster Frame. (See Fig. 1 and 2)
2.- Remove Cover Plate (9) from Junction Box (10). Slip Type NM Cable (Romex) (11) through desired
hole in Junction Box (10) above Retaining Plate (13). Cable (11) is secured by Retaining Plate (13).
(See Fig. 3)
3.- If other than Type NM Cable (Romex) is to be used, remove one Large Knockout (15) at desired
location on top or sides of Junction Box (10). Bring appropriate Electrical Supply Cable into Junction
Box and secure in place with proper UL listed Connector (NOT FURNISHED).
4.- Connect Fixture Wires (27) to Supply Wires (16) as shown in Wiring Diagram. Use UL listed
Wirenuts (NOT FURNISHED).
5.- After ceiling is finished lower Housing (6) until flush with Ceiling.
6.- To gain access to Junction Box (10), after ceiling is finished, remove three Screws (24) that hold
Housing (6) in place. Lower the Housing. Remove Screw (21) and Access Door (22) located inside
Fixture. Junction Box Cover Plate (9) can now be removed for service.
7.- Plaster Frame (2) and Gasket (25) must be in contact with Ceiling (23).
8.- If joists are spaced greater than 16 inches on center, 2x4 (4 inch dimension vertical) or greater
lumber shall be used to span between joists at the plane of the ceiling to create a 16 inch on center
space to mount the fixture as shown in Fig. 4.
When installed according to the instructions provided and as specified in Volume 1 of the UL Fire
Resistance Directory, Progress P821-FBFC luminaires may be used in fire resistant Floor-Ceiling
and Roof-Ceiling designs. See File #R19217 under Fire Classified Directory CDHW.
***************************************************************************************************************************************************************
***************************************************************************************************************************************************************
WARNING: - If any Special Control Devices are used with this fixture, follow the instructions carefully
to assure full compliance with N.E.C. requirements. If there are any questions, contact a Qualified
Electrical Contractor.
W
ARNING: Use only those Trims, Lamps and maximum Wattage's proper for this Fixture, as
indicated on the Label within the Fixture Housing.
W
ARNING: The National Electrical Code, Article 110-3 (b), states that "Listed or Labeled equipment
shall be used or installed in accordance with any Instructions included in the listing or labeling".
Use only with Progress UL listed Trims. Use of other Trims not listed in this Fixture, including
those that are UL classified, is a violation of N.E.C. 110-3 (b) and voids all warranties.
Upon completion of installation, crumple this sheet up and insert it up into
the housing to protect the socket and labels from being spray painted.
SPEC.NO.
Assembly & Installation Instructions
Read instructions carefully and turn electricity off at main
circuit breaker panel before beginning installation.
CAUTION:
PAGE of
(12/12/06)
93009333
Rev. A
P821-FBFC
1 6
1
2
Fig. 8Fig. 7 Fig. 9 Fig. 10
INSTALLATION INSTRUCTIONS FOR FIRE RATED APPLICATIONS USING T-BAR
1. Install No. 12 SWG Galv. Steel Hanger Wire (28) on Main Runners (29) at four corners of grid module containing
Luminaire (30). When Main Runners are spaced greater than 24 in. on center, Cross Tees (31) forming sides of grid
module containing Luminaire to be supported by Steel Hanger Wire at Cross Tee midspan.
2. Place the Luminaire (30) on the ceiling grid with the "T" Bars running through the Hanger Bar Notches (32). Fold the Hanger
Bar ends closed to engage the integral Tabs (33). Secure with pliers if necessary.
3. Install two No. 12 SWG Galv. Steel Hanger Wires (34) secured to each end of Luminaire (30) plaster frame at Lanced
Openings (35) in hanger bar support channels. Steel Hanger Wires to be installed vertically and secured to structural members
of floor or roof assembly.
4. Tighten bar hanger Locking Screws (5) in ends of Plaster
Frame (2) to prevent lateral movement of the Frame.
5. See Steps 2 through 6 on Page 1 to complete
installation.
28
29
30
31
32
33
34
35
INSTALLATION INSTRUCTIONS FOR FIRE RATED APPLICATIONS USING FURRING CHANNELS
1. Attach one Furring Channel Bracket (36) to each Hanger Bar (37) as shown in Fig. 7 and 8.
CAUTION:
Maintain a firm hold on Luminaire until Steps 2 and 3 are complete.
2. Lift Luminaire (30) to position Furring Channel Brackets over Furring Channels (38) and secure in place by bending
Tabs (39) over as shown in Fig. 9.
3. Once all Brackets are in place bend Hanger Bar End (40) around to secure Brackets to the Channels as shown in
Figure 10. NOTE:
Nailer Tab (41) should lodge under edge of Furring Channel.
4. Tighten bar hanger Locking Screws (5) in ends of Plaster Frame (2) to prevent lateral movement of the Frame.
5. Install two No. 12 SWG Galv. Steel Hanger Wires (34) secured to each end of Luminaire (30) plaster frame at Lanced
Openings (35) in hanger bar support channels. Steel Hanger Wires to be installed vertically and secured to structural members
of floor or roof assembly. (See Fig. 6)
6. See Steps 2 through 6 on Page 1 to complete installation.
36
37
36
37
39
40
Fig. 6
41
38
PAGE of
3 6
SPEC.NO.
(12/12/06)
93009333
Rev. A
Fig. 2
Fig. 3
Fig. 4
Fig. 1
WHITE OR IDENTIFIED
FIXTURE GROUND
BARE, OR GREEN
PLAIN OR BLACK
FIXTURE WIRE
FIXTURE WIRE
WIRENUTS
UL LISTED
BARE, OR GREEN
WIRE
FROM SUPPLY
GROUND WIRE
WHITE SUPPLY
BLACK SUPPLY
WIRE
WIRE
1
1
2
3
4
5
10
15
6
24
26
5
1
4
6
21
22
10
3
9
23
4
15
9
25
24
4
9
10
11
13
27
16
GREATER THAN 16"
16"
1
28
PAGE of
6 6
SPEC.NO.
(12/12/06)
93009333
Rev. A
  • Page 1 1
  • Page 2 2
  • Page 3 3
  • Page 4 4
  • Page 5 5
  • Page 6 6

Progress Lighting P821-FBFC Installation guide

Type
Installation guide

Progress Lighting P821-FBFC is a luminaire designed for both residential and commercial use. Its versatility allows for installation in various ceiling types, including wood joists, T-bars, and furring channels. The luminaire is fire-rated and can be used in fire-resistant floor-ceiling and roof-ceiling designs, making it suitable for safety-conscious environments. It supports the use of trims and lamps specified by the manufacturer, ensuring compatibility and compliance with safety standards.

Ask a question and I''ll find the answer in the document

Finding information in a document is now easier with AI