Page is loading ...

1
Revision A 999302
www.teraflex.com
JK Nebo Roof Rack Main Rail Kit
Instructions
Important Notes:
• Patent Pending Design
• CAUTION: 2007-2010 Hardtops: Before beginning installation, contact TeraFlex (801-288-2585) for
different front lower feet, part numbers 722147 & 722148 (replaces 722141 and 722142)
• Prior to beginning this installation, read these instructions to familiarize yourself with the required steps and
evaluate if you are experienced and capable to personally perform these modifications. A factory service and
owners manual should be used in conjunction with these installation instructions.
• Refer to the parts list to ensure that all necessary components and hardware has been included. If any parts
are missing please contact your local TeraFlex dealer for assistance.
• Width between rails: 43” [1090mm]
• Length of rails between caps: 25” [635mm]
• Height added from crown of hardtop 2-3/8” [60.5mm]
• Load Rating: See section 1 for the owners manual for important notes to
help safely load the rack.
• 850 lbs [385 Kg] static
• 200 lbs [90 Kg] dynamic.
• Weights:
• Main rail kit 26 lbs [11.8 Kg]
• 4 Slat kit: 20lbs [9.1 Kg]
KIT# 4722020
KIT# 4722030
Tools needed:
• This installation guide
• 12mm and 13mm Open End Wrench
• 10mm, 12mm and 13mm Sockets and Wrench
• X-ACTO Knife
• Ruler
• Drill
• An Extra Helper
• 1/4” and 11/32” Brad tip drill bits for fiberglass
(A brad tipped bit can be purchased online or at just about any big box hardware
store. A standard drill bit can be used but may cause more chips.)
• 3/4” Drill Bit (May Be Needed) (A step bit that goes up to at least 3/4” will work)
TO WATCH THE INSTALL VIDEO GO TO:
https://teraflex.com/videos

www.teraflex.com
2
Revision A 999302
JK 2 Door Nebo Roof Rack Main Rail Kit # 4722020
Item # Part # Description QTY
1 392 4mm Stubby Hex L-Key Allen Wrench 1
2 393 T40 Torx L-Key Tool 2
- 600198 Warning Sticker Chromium 1
- 722198 JK 2DR Roof Rack Hole Templates 1
See pg. 3 772301 JK 2DR Roof Rack Driver Front Corner 1
See pg. 3 772302 JK 2DR Roof Rack Passenger Front Corner 1
See pg. 3 772303 JK 2DR Roof Rack Driver Rear Corner 1
See pg. 3 772304 JK 2DR Roof Rack Passenger Rear Corner 1
See pg. 5 772352 JK 2DR Roof Rack Bracket Components 1
10 772402-M JK 2DR Roof Rack Extruded Main Rail Driver Side Black 1
11 772410-M JK 2DR Roof Rack Extruded Main Rail Passenger Side Black 1
12 801 JK Roof Rack Badge 2
2 1 12
11
10

www.teraflex.com
3
Revision A 999302
2
2
1
1
3
3
Passenger Front Corner # 772302
ID Part # Description QTY
1 722142 Front Passenger Upper Mount 1
2 722152 F/R - R/L End Cap 1
3 722172 F/R - R/L Lower Mount 1
- 772351 Hardware Pack (see pg. 4) 1
1
1 Driver Side Front Corner # 772301
ID Part # Description QTY
1 722141 Front Driver Upper Mount 1
2 722151 F/L - R/R End Cap 1
3 722171 F/L - R/R Lower Mount 1
- 772351 Hardware Pack (see pg. 4) 1
2
3
2
3
Passenger Rear Corner # 772304
ID Part # Description QTY
1 722158 Rear Driver Upper Mount 1
2 722151 F/L - R/R End Cap 1
3 722171 F/L - R/R Lower Mount 1
- 772353 Hardware Pack (see pg. 4) 1
Driver Rear Corner # 772303
ID Part # Description QTY
1 722157 Rear Driver Upper Mount 1
2 722152 F/R - R/L End Cap 1
3 722172 F/R - R/L Lower Mount 1
- 772353 Hardware Pack (see pg. 4) 1
Hardware
Pack
#772351
Hardware
Pack
#772351
Hardware
Pack
#772353
Hardware
Pack
#772353

www.teraflex.com
4
Revision A 999302
Roof Rack Corners Hardware Pack (4 Total)
Item # Part Number Description QTY per
pack
1 2035 O-Ring 5/16" I.D. x 7/16" OD x 1/16" Cross Section Buna-N AS568-011 2
2 2036 O-Ring 7/32" I.D. x 11/32" OD x 1/16" Cross Section Buna-N AS568-009 4
3 220 Bolt M8 x 1.25 x 55mm Long Torx Head with MAThread Radiused Dog Point 1
4 225 Bolt M6 x 1.0 x 50mm Long Shoulder Button Head Socket Cap Screw 3
5 459 Washer 1/4" Flat SAE Type B Zinc Plated .281" ID x 1.000" OD x 0.051"-0.079" Thick 1
6 651390 M6 x 1.0 P T-Nut for 10 Series Extrusions 3
7 722143 JK Roof Rack Front Foot Rear Gasket 1
8 722145 / 722123 JK Roof Rack Front / Rear Cap Gasket 1
9 722173 JK Roof Rack Front Under Roof Support Gasket 1
10 729 Bolt M6 x 1.0 x 10mm Long Flat Head Socket Cap Screw Stainless 1
11 730 Washer 1/4" SAE Flat Armor Coated 0.281" ID x 0.625" OD x 0.055"-0.065" Thick 4
1 2
3
4
5
6
7
9
10
11
Front Foot Gasket
722145
Rear Foot Gasket
722123
8

www.teraflex.com
5
Revision A 999302
Roof Rack Bracket Components # 772352
Item # Part # Description QTY
1 164 Bolt M8 x 1.25 P x 20mm Long Flanged Hex Head Zinc Plated Grade 10.9 3
2 169 Nut M8 x 1.25 pitch Nylock Hex zinc 1
3 23 Washer 5/16" Flat Black Coated for JK Spare Tire Carrier 4
4 17161 Roof Rack Roll Bar Clamp, 2.25" Exhaust 4
5 256 Lock Washer 5/16" Zinc Plated 8
6 772230 JK Roof Rack Front Passenger Side Bracket 1
7 772231 JK Roof Rack Front Driver Side Bracket 1
8 772218 JK Roof Rack Shim 5
9 772238 JK Satellite Antenna Relocation Bracket for JK Roof Rack 1
10 772272 Roof Rack, JK 2-Door, Rear Passenger Side Bracket, Powder Coated 1
11 772273 Roof Rack, JK 2-Door, Rear Driver Side Bracket, Powder Coated 1
12 851 Push-On Round Cap, Vinyl, 1/4” I.D. x 5/16” O.D. x 1/2” Inside Height 8
2
3
4
5
6
7
8
9
10
11
1
12

6
www.teraflex.com
Revision A 999302
1 2
HARD TOP REMOVAL
Use the factory supplied owners manual to
remove the freedom panels, and then the
hard top from the vehicle
2a
Unzip the sport bar cover at the cross bar behind the pas-
senger seat. Using a 13mm, remove the 4 fasteners to
remove the base plate with the antenna (1) attached.
Using an 10mm wrench, remove the antenna mounting
bolt and standoff spacer. Press in the lock tabs on the
antenna and push the antenna out of the base plate.
2b
Locate the antenna connector along the passenger side
B-pillar, then disconnect the connector
2c 2d
Using a 10mm socket, loosen the two screws on the pas-
senger side of the speaker pod, gently pull down so the
antenna connector can be removed. After the connector is
removed, tighten the two screws to 90 in-lbs (10 Nm).
REMOVE SATELLITE ANTENNA
FOR RELOCATION
NOTE TO INSTALLER:
Please be sure that the end user receives the in-
structions and owners manual after installation.
Loosen if needed
1
PASSENGER
DRIVER

7
www.teraflex.com
Revision A 999302
3a
3c
Align the outside edge of the front passenger template
(722194) to the edge of the zipper tape. The other edges will
align with the base plate under the cover. Slit the cover in the
4 locations marked on the template.
3b
Repeat for the driver side, cutting the cover where indicated.
Unzip the cover and discard the cardboard, leave the cover
unzipped.
3d 4
INSTALLATION OF ANTENNA BRACKET AND
FRONT SUPPORT BRACKETS.
PREP SPORT BAR COVER
FOR BRACKETS
3
SOUND BAR
DRIVER SIDE
FRONT
PASSENGER
FRONT
FRONT BRACKETS
On the driver side unzip the sport bar cover behind the seat (just
as the passenger side was done). For the passenger side tem-
porarily reinstall the passenger side base plate using 2 of the OE
fasteners, as shown. TIP: Place cardboard under the cover and
over the plates to avoid scratching them. Zip up the driver and
passenger side covers completely.
OUTSIDE
(ALIGN EDGE WITH ZIPPER TAPE)
ALIGN WITH
BRACKET EDGE
DRIVER SIDE
(unzip the sport
bar cover)
PASSENGER SIDE
(loosely reinstall
base plate)
REAR BRACKETS
For the rear brackets, locate the seam that is just before the
downward bend of the sport bar. Align the front edge of the rear
driver side template to the seam and the top edge to the zipper
tape seam. Slit the cover in the 4 locations marked on the tem-
plate. NOTE: The foam under this section of cover will be
trimmed out so don’t worry about poking holes into it.
Repeat for the passenger side.

8
www.teraflex.com
Revision A 999302
4b
ANTENNA BRACKET
Remove the base plate again as outlined in step 2a. Install antenna
with the OE bolt onto the new #7722388 satellite
antenna bracket (1).
4a
SUPPORT BRACKETS
Slip the three tabs of the #772230 front passenger support
bracket through the cover. It is easiest to slip the inside tab first
then the two outer tabs one at a time.
Route the antenna connecter through the cover where the front
outer(2) part of the bracket goes through the cover.
4c 4d
4e
Install the #772230 bracket (1) to the OEM base plate
using the OEM M8 hardware (2). (APPLY THREAD
LOCK TO BOLTS) Use a 13mm to tighten bolt (3) under
the antenna bracket to 14 ft-lbs (19 Nm). Leave the other
three M8 bolts (2) loose so the support bracket can be
shifted easily. Cover omitted on drawings for clarity.
Apply thread lock to an OE M8 bolt (1) and install it through the
base plate. Do not tighten bolt. Rotate the satellite bracket
until the second holes line up in the satellite bracket and the
base plate and tighten antenna bracket bolt
to 14 ft-lbs (19 Nm).
4g
On the driver front side remove the three rear most base plate bolts.
Slip the tabs of the #772231 Front Drivers Side Bracket (1) through
the slit in the cover, as shown in 4d, then repeat step 4e for the
support bracket. (APPLY THREAD LOCK TO BOLTS) Leave the
bracket loose so it can be shifted easily.
1
Slip the antenna bracket through the slit in the cover. Mount
the antenna bracket (1) to the base plate with the new #164
8mm bolt (2), #23 washer (3), and #169 nut (4). Snug bolt
but do not tighten.
2
3
1
1
install antenna here
3
4
2
1
ANTENNA CONNECTER
THROUGH HERE

9
www.teraflex.com
Revision A 999302
5b
5a
5c
Position the #772272 Rear Passenger Bracket (1)over
the protruding U-bolt ends and install the provided 5/16”
Slit Washers (2) and Nuts (3) and make nuts finger tight,
as shown. So the U-bolts don’t scratch up your hard-top
install #851 Push-On Caps (4) over each U-bolt end
now. Repeat for the #772273 Rear Driver Side Bracket.
DRILLING THE HARD TOP
CAUTION 2007-2010 hardtops: Obtain the
#722147 and #722148 front feet from
TeraFlex before drilling.
6
INSTALLATION OF REAR SUPPORT BRACKETS
2
1
1
5
Unzip the covers from the driver and passenger side
sport bar at the rear of the Jeep. Seat belt does not
need to be removed.
Position the #17161 U-bolts (1) and clamp brackets (2) around
the sport bar. Pull the cover over the clamp bracket assembly
pushing the U-bolts through the cover. Zip up the cover to hold
the clamp bracket assembly in place.
Remove the driver and passenger foam pads from the sports
bar and make a mark that is 4 1/4” from the back using the
mold seam as a guild. Using a utility knife cut the foam pad.
2
1 2
3
5d 4

10
www.teraflex.com
Revision A 999302
7
Cut out the templates, then slip roof rack foot gasket between
the front hardtop seal and the edge of the hardtop. Use the
gasket as an edge to align the front of the template to the
edge of hard top.
6a
6e
Double check that templates are centered and measurements
are correct. Center punch all 16 holes. Using an 11/32” brad
tip bit and very light pressure, drill the 4 larger holes. Then
drill the smaller holes with 1/4” brad tip bit. Double check all
holes are drilled, then remove template.
Center templates on outside rib as shown. Hold templates
with a small length of painters tape.
6b
6c
Adjust templates so they are both centered on the rib and
measure 43-15/16” [111.6cm] from centerline to centerline.
Measure across hard top at both the front and the rear
11/32” [8.7mm] marked holes on the template. When the
measurement is correct secure template with painters tape.
6d
NOTE: For the cleanest cut in fiberglass we recommend brad
tipped bits. A brad tipped bit can be purchased online or at
just about any big box hardware store. If care is taken, a mul-
ti-purpose bit may be used, be sure to use light pressure to
reduce chipping.
NOTE: The holes will be completely covered with the gaskets
and brackets when the install is complete.
Upper and Lower Mount Installation

11
www.teraflex.com
Revision A 999302
For steps 7a and 7b refer to
exploded view below.
Starting on the front driver side corner, have
ready the #722141 Upper and #722171 Lower
Mounts with accompanying hardware pack.
Prepare two #225 Bolts(4) with a #730 Wash-
er(11) and #2036 O-ring(2). Insert prepared
#225 Bolts into the Lower Mount (see explod-
ed view). Place the #722173 Lower Mount
Hard-top Gasket(9) on top of the Lower Mount
matching up the orientation.
From beneath the hard-top insert the two #225
bolts(9) through the two small holes you drilled
earlier. The round end of the spacer aligns
with the round end of the rib on the hard-top
(see exploded view).
On top install the #722143 Upper Mount Hard-top
Gasket(7) over the #225 bolts with the notch going
towards the center. NOTE: The notch in the gasket
will corresponds to a cutout in the Upper Mount.
This is for the purposes of water drainage. Install
Upper Mount over gasket (see exploded view).
Onto each #225 Bolt install a #2036 O-ring(2) fol-
lowed by a #730 Washer and #651390 T-nut(6)
(see exploded view). NOTE: Only thread the T-nut
on a few threads, just enough to keep the whole
thing together, it will get tightened down later.
Repeat steps for remaining three corners. Remem-
ber to install the gaskets in between the mounts
and the hard-top and that the O-rings get installed
in the right positions. Gaskets and O-rings work
together to create a water tight seal in the hard-top.
7a 7b
(2) #2036 O-Ring 7/32" I.D.
(4) #225 Bolt M6 Button Head Socket Cap
(6) #651390 T-Nut M6
(7) #722143 Upper Mount Hard-top Gasket
(9) #722173 Lower Mount Hard-top Gasket
(11) #730 Washer 1/4” Flat Coated

12
www.teraflex.com
Revision A 999302
On the driver front mount(2) insert a #2035 O-
ring (7) into the cavity. Next insert a M6 t-nut (3)
into the top slot of the main rail. Position the
#772151 cap(1) onto the rear foot and install on
a #729 M6 Flat Head Bolt(4) into the top hole of
the cap and into the T-nut.
TIP: Use a small flat bladed screw driver to
help position the T-nut.
Thread a #225 M6 bolt(6) with a #459 washer(5)
though the rear most hole in the hard top and
into the cap(1), see exploded view in 8a.
Ensure that the rail t-nuts (1) are loose. Install the passenger
side rail by starting at the rear and sliding the rail forward as
the T-nuts slide in the lower track. Stop sliding it forward
when the front rail through hole is centered on the now cap-
tured #220 M8 torx bolts. Repeat for driver side.
Slip the #722145 front upper gasket (1) under the front of the
#722142 front foot (2). Orient the small hole to the center of the
vehicle as shown. Center the larger hole with the front boss. Re-
peat for other side, orient the small hole to the center of the vehicle
8c 8b
INSTALL THE MAIN RAILS
Use the following steps to install the main rail
and front caps.
Slide one of the #2035 O-rings (1) onto each of the four #220
M8 mounting bolts(2). Insert each of the bolts into the
through hole of the rail supports as shown.
8
2
1
8a
8d
(1) 722152 Driver Front Cap
(2) 722142: Upper Mount
(3) 651390: M6 T-nut
(4) 729: M6 Flat Head Bolt
(5) 459: 1/4” Washer
(6) 225: M6 Shoulder Bolt
(7) 2035: 5/16” ID O-ring
8e

13
www.teraflex.com
Revision A 999302
1
1
2
2
1
2
8g
Remove the four 220 M8 mounting bolts and remove the top.
Then remove the #772231 driver side bracket (1) by revers-
ing the steps followed in step 4g.
8f
Insert the two #393 torx tools (1) into the main rail’s
front and rear access holes. Move the rail so that
each wrench is centered in the hole and can be
inserted into the #220 M8 mounting bolts (2) below.
With the #393 torx tool centering the main rail access holes
over the #220 M8 mounting bolts tighten the #729 M6 shoul-
der screw (1) and #225 M6 flat socket head (2) installed in
step 8d & 8e. Repeat steps 8d to 8g for the other side.
9a
2
1
NOTE: If mounting bolt (1) contacts the OEM lower brack-
et (2) the hard top will need to be removed to modify the
OEM bracket. If there is no contact with bolt skip for-
ward to step 9f.
MEASURE FOR SHIMS
Due to assembly variations from the factory, a 1/16” shim
may need to be used between the spacer and the support
bracket. Measure each connection point and make note of
any gap greater than 1/16” [1.5 mm]. Each of the four
connection points greater then 1/16” will need a 1/16”
shim. Shims are stackable if more then one is required.
ALIGNING THE HARD TOP BRACKETS
With a helper, set the hard top back on the vehicle. Take
your time with this step as the correct alignment will
make reinstalling the hard top easier. Brackets may need
to be repositioned to get #220 mountings to start into
brackets. Start each of the four bolts, but do not tighten.
9b
9c 9d

14
www.teraflex.com
Revision A 999302
1
9e 9f
If using shims in the front, trim the back edge of the front
shims with an X-ACTO Knife so it does not overhang.
REMOVE HARD TOP AND INSTALL SHIMS
Carefully remove the hard top so the support brackets
do not shift positions. If there are any gaps greater
than 1/16” [1.5mm], use shims to provide a better fit.
With the measurements from step 8a, determine num-
ber of shims required for each location with a gap.
Center hole in shim with floating nut as shown.
10a 10b
Snug down the 2 rear bracket clamps for both the pas-
senger and driver rear brackets to keep the bracket from
shifting. Remove the four #220 M8 torx bolts installed in
8e. NOTE: Cover omitted on drawings for clarity.
9h
Slide a 13mm open end wrench under the front of the hard
top to lightly snug up the (1) OE M8 inner front bolt for both
the driver and passenger front mounting brackets.
9g
POSITIONING THE MOUNTING BRACKETS
If mounting bolts are clear of OEM lower plate then snug the
bolts using the supplied 393 T-40 torx wrench. This will position
the mounting brackets for tightening. NOTE: Be careful not to
over tighten any support that has a gap measured in step 9b.
Pull the OEM lower plate (1) off the Jeep and drill out the hole
(shown below) to 3/4 in. (19mm). Now reinstall the OEM
bracket and repeat step 4g and steps 9a to 9b.

15
www.teraflex.com
Revision A 999302
14 ft-lbs
44 in-lbs
1
2
11
INSTALL THE SLAT KIT (OPTIONAL ACCESSORY)
IF NOT INSTALLING SLAT KIT SKIP TO STEP 12
11a
Install two of the #729 M6 flat screws (2) and two of the #651390
M6 t-nuts (3) loosely in the locations shown on all eight of the
#772310 mounting brackets (1).
Peel of the backing, then adhere the shim to the bracket. Add
additional shims as required. If Desired, two 1/8” rivets can
be used to provide a more secure connection for the shims.
10c 10d
11c
11b
Press on one of the #772310 brackets (1) from the previous
step on to a #772300 slat (4). Slide two #651390 t-nuts (3)
into each of the two outer tracks, then press another
#772310 bracket (1) on the other end. Repeat for all 4 slats.
Slide a slat assembly from the previous step into the main
rails. Be sure to line up the #651390 t-nut (1) to the upper
slot. The tabs (2) on the #772310 bracket will line up with the
lower slot. Slide slat forward and repeat for each slat.
TORQUE SUPPORT BRACKETS
Tighten the 3 M8 bolts on both front brackets to 14 ft-lbs [19 Nm]
and the four U-bolts on the rear brackets to 44 in-lbs [5Nm].
Also check the bolt under the satellite antenna bracket to be sure it
is tight.

16
www.teraflex.com
Revision A 999302
1
2
INSTALL REAR RAIL CAPS
11d
Position the slats along the main rail as desired, keeping the
slat perpendicular to the rails. When in position, slide a t-nut
(3) under the bracket (1) and thread a M6 flat cap screw (2)
into the nut. Repeat for all lower holes. Tighten all upper/
lower M6 flat cap screws (2) to 105 in-lbs [12 Nm].
12a
On the passenger side insert a M6 t-nut (1) into the top slot of
the main rail. Position the #772151 cap (2) onto the rear foot
and install on a #729 M6 flat socket screw (3) into the top hole
of the cap and into the T-nut. TIP: Use a small flat bladed
screw driver to help position the T-nut.
12b
12
12c 12d
Repeat for driver side using the #722152 cap (1) with
the same hardware.
1
2
Thread the #225 M6 bolt (1) with a #459 washer (2) though
the rear most hole in the hard top and into the cap (3), see
section view below.
Slip the #722123 rear foot gasket (1) under the #722158
passenger rear foot (2). Orient the small hole to the center
of the vehicle as shown. Center the larger hole with the rear
boss. Insert the #2035 O-ring (3) into the cavity
3
3
1
2
1
3

17
www.teraflex.com
Revision A 999302
Use the supplied #393 Torx wrench, completely loosen the
4 M8 bolts in the 4 location shown in step 12 by using the
four access hole in the main rail.
Standard procedure for removing the
hard top with the roof rack installed
Follow the owners manual procedures for the rest of the OEM
hardware. With a helper, pull the top straight up to free the
bolts, then remove the top.
Reinstallation is the reverse, with a helper, replace the top by
setting it straight down. Start threading each of the four M8
bolts using the supplied #393 torx wrench as shown in step
12a. If the bolt is not starting, lift the top straight up and set
back down to center the bolt. Tighten the 4 M8 torx bolts to 14
ft-lbs [19 Nm] , then follow the owners manual for the OEM
hardware.
Load Rating:
Static Load: The design of the rack transfers the loads to the
sport bar, allowing for a evenly distributed static load of 850
lbs [385 kg]. An example of a static load would be a stationary
vehicle with a rooftop tent filled with occupants.
Dynamic Load: We recommend a maximum load of 200 lbs
[90 kg] for the roof rack for safe operation of the vehicle. The
weight should be evenly distributed and secured appropriately.
The customer should experiment with the load at reduced
speeds to determine if it is safe to carry as there are many
different lift heights, spring rates, track width, etc. The roof
rack does not increase the total carrying capacity for the
vehicle, be sure the load inside and out does not
exceed the vehicle load capacity
1
User Manual and Hints
The load carried on the roof rack will make the vehicle’s
center of gravity higher. Avoid high speeds and abrupt ma-
neuvers, including sharp turns or sudden start or stops. If
driving at high speeds, rough road, or long distances, occa-
sionally stop and check that everything is tightly secured.
Long loads like surfboards or wood panels that extend past
windshield will be subjected to strong wind forces. They
should be secured both in the front and the rear.
Use extreme caution when carrying items with a large flat
surface area as wind forces due to natural forces or passing
trucks, can add a sudden upward lift on the load
1a
2a
3
Mounting Accessories
The TeraFlex Slat kits can also be used to carry cargo or
mount existing aftermarket carriers. The slats are available in
the single kits #4722051 or #4722061 (Silver/Black), or can be
purchased in a set of 4 in the kits #4722052 or #4722062
(Silver/Black). There is room for a total of 5 slats to be mount-
ed, but be aware that each slat will add 4.8 lbs (2.2kg).
2
2b

18
www.teraflex.com
Revision A 999302
For convenience in mounting accessories into an assembled
rack, use a #651380 (1) roll in t-nut. It can be rolled in and
out of the smaller t-slot instead of being slide in from an
open end. A 10 pack can be purchased as part #4651380.
The larger center slot is for Thule’s large headed t-nuts.
To determine the length of the M6 x 1.0 pitch screw you need
to mount an accessory, measure the thickness of the mount-
ing foot and add 7.5 mm for thread engagement in the t-nut.
Round up the nearest available screw size and use washers
under the screw head if too long to keep the screw from
bottoming out in the t-slot.
Two slats can be used to mount a cargo box. The slats will
keep the box lower than using load bars, helping to reduce
wind noise. This vehicle has the Thule Sonic Alpine 633s
box mounted with 4 M6 x 1.0 x 30mm long stainless socket
head cap screws. The Thule Xadapt 10 kit replaces the
standard AcuTight clamps allowing the bolted connection.
Internal view of the Thule Xadapt10 being installed in the
sonic box with a M6 x 1.0 x 30mm long screw.
The vehicle below uses two Thule 594XT bike racks mounted
directly to the slats to keep the profile low. The front uses a
spacer (or washer) for bolt head clearance and the rear uses
Thule Xadapt2 with a M6 x 1.0 x10mm long bolt and washer .
3a 3b
3b
3c 3d
3e 3f
This photo shows the front of the Thule 594XT bike rack
mounted with a 1/4” spacer and 4 M6 x 1.0 x 15mm long
stainless cap screws

19
www.teraflex.com
Revision A 999302
3i
The molded in hook holes are meant to secure light loads. Do
not use a ratchet strap as over tightening will cause damage.
If the bolt spacing for an accessory mount does not match the
spacing in the slat, the gap between two slats can be adjusted
for the correct spacing. Below is a Rotopax accessory
mounted between 2 slats.
3j
Many aftermarket crossbars/ load bars will fit around the main
rail, allowing various carriers to be mounted Shown is a Thule
AreroBlade with the 450R Rapid Crossroad Foot Pack. Thule
SquareBars can be mounted with the 450 Crossroad Foot.
3h
This Tepui Roof top tent is set up with tent support bars run-
ning across the vehicle. The tent is laid directly on the roof
rack rails and bolted with the Tepui hardware, except for using
M8 x1.25 x 70mm long hex bolts for the taller rails.
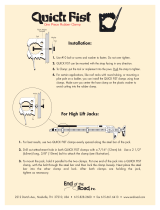
Below is a Quick Fist mount installed with a M6 x1.0 x 22mm
long bolt with a washer under the head to avoid bottoming out.
3g
This photo shows the Thule 594XT bike rack mounted in the
rear with the Thule Xadapt2 mounted between two stats for
correct spacing. Two M16 x 1.0 x 12mm long stainless screws
with a M6 washer are used to fasten it to the slat.
3k 3l

www.teraflex.com
20
Revision A 999302
TERAFLEX
, Inc.
5680 West Dannon Way
West Jordan, Utah 84081
Phone/801.713.3314
Fax/801.713.2313
www.teraex.com
PRODUCT INFORMATION
MAINTENANCE INFORMATION:
It is the buyer’s responsibility to have all suspension, drivetrain, steering, and other components checked for proper tightness and torque after the first 100 miles
and every 3000 miles after that.
NOTICE TO INSTALLER:
The enclosed “Warning to Driver” sticker must be installed in the vehicle in driver’s view. This sticker is to act as a constant safety reminder when operating the
vehicle. It is your responsibility as the equipment installer to install the provided sticker and to forward the product instructions to the vehicle’s owner for review. If a
“Warning to Driver” sticker or product installation guide were not included in the kit, FREE replacement stickers and instructions are available by request. It is the
installer’s duty to ensure a safe and controllable vehicle after the modifications have been performed.
WARNING:
Neither the seller nor the manufacturer will be liable for any loss, damage, or injury directly or indirectly arising from the use of or inability to determine the use of
these products. Before using, the user shall determine the suitability of the products for its intended use, and the user shall assume all responsibility and risk in
connection therewith.
WARNING TO DRIVER:
This vehicle has been modified to enhance off road performance and has unique handling characteristics. Use in harsh environments can cause extreme stress
on the components. Vehicle should be inspected after being off road to make sure that all the components are in working order and safe to travel on the highway.
All fasteners should be checked so that they are at the correct torque specifications as the vibration and stresses from off roading may cause critical fasteners to
work loose. Extra care should be taken to inspect the critical components, steering, and brake systems. During each oil change components such as arms, tie rod
ends, etc should be greased and checked for excessive wear. Any worn components should be replaced. When returning to the pavement always set or restore
tire air pressure to the factory recommendation and connect or engage any disabled sway bar mechanisms. Because of the higher center of gravity and larger
tires, this vehicle handles and reacts differently than many passenger cars, both on and off road. You must drive it safely! Extreme care should be taken to prevent
vehicle rollover or loss of control, which can result in serious injury or death. Avoid sudden sharp turns or abrupt maneuvers. Generally, braking performance and
capabilities are decreased when significantly larger/heavier tires are used, especially when used in combination with transfer case low-range reduction kits. Take
this into consideration while driving. Do not add, alter or fabricate any factory or aftermarket parts to increase vehicle height over the intended height of the Tera-
Flex product purchased. Mixing component brand is not recommended. TeraFlex Inc. will not be responsible for any altered product or any improper installation or
use of our products. We will be happy to answer any questions concerning the design, function, and correct use of our products. It is ultimately the buyer’s respon-
sibility to have all bolts/nuts checked for tightness after the first 100 miles and then every 3000 miles. Wheel alignment, steering system, suspension and drive line
systems must be inspected by a qualified professional mechanic at least every 3000 miles.
TERAFLEX PRODUCT WARRANTY:
TeraFlex Inc. warrants TeraFlex Suspension products to the original retail purchaser to be free of defects in material and workmanship for as long as the original
purchaser owns the vehicle on which products were originally installed.
Failure to complete regular maintenance (grease every 3000 miles) on TeraFlex FlexArms will void this warranty. All other conditions of the standard TeraFlex
product warranty apply.
All TeraLow products are covered by the TeraFlex two (2) year warranty to be free of defects in material and workmanship for two years from date purchased.
TeraFlex axles are covered by a 12-month warranty to be free of defects in materials and workmanship.
This warranty does not cover or include product finish, improperly installed or applied products, improperly maintained products, products or components used for
racing or competition or damage due to abuse or neglect, products that fail due to the use of larger tire and wheel combinations.
All returns must be accompanied by an original invoice. It is the customer’s responsibility to remove the product from the vehicle. Shipping charges are the respon-
sibility of the customer. TeraFlex Inc. will pay the return freight if the product meets the terms of warranty.
This warranty is for the replacement or repair of defective TeraFlex products only and does not include freight charges, labor charges for removal of or installation
of TeraFlex or related products or components, costs incurred due to down time of the vehicle, or lost profits due to vehicle down time.
A returned goods authorization number (RGA#) must accompany any returned products. For more information please contact a TeraFlex customer service repre-
sentative.
COPYRIGHT
©Copyright 2014. All rights reserved, TeraFlex Inc. Reproduction of this catalog and/or any of its contents without written permission is strictly prohibited.
TeraFlex® is a registered trademark of TeraFlex Inc. All trade names and logos including but not limited to TeraFlex, FlexArms, RockGuard, Monster, and
LCG are protected by law and duplication of trade names and/or logos are strictly prohibited.
TeraFlex Inc. reserves the right to update, discontinue, redesign, modify finish, part number or component build parts if deemed necessary without written notice.
TeraFlex Inc., and any associated dealers are not responsible for misprints or typographical errors that may have inadvertently been made within this instruction
sheet.
Jeep® and the Jeep® grill are registered trademarks of Fiat Chrysler Automobiles N.V., and have no aliaon with TeraFlex Inc.
/