Page is loading ...

!
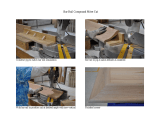
Compact Laminate Worktops
Installation Guidelines & Care Information
Tools & fittings required for installation
CLW001
HD027031
Compact laminate worktops are easy to work with and do not require any specialist equipment for installation.
Follow the section step by step guide in this leaflet for the key areas of installation.
We recommend that worktops are acclimatised to the room temperature before fitting.
Where storage is required, ensure that your worktops are stored flat, face up and
supported using bearers.
Note: These worktops can be stored vertically for short periods of time (no more than
24hrs), during installation if necessary.
If you have more than one worktop that needs storing and wish to stack them, please
ensure that the surfaces are clean and clear from any debris so no damage occurs.
We suggest using several layers of cardboard between boards.
This is a heavy product and we recommend a two person lift.
Worktops should be carried vertically along the length to avoid any damage.
Always use protective eyewear and dust mask (FFP3) when cutting worktops. Ear
protection when using power tools is also recommended.
A 3mm expansion gap around the worktop should be maintained when against a wall.
Before you begin
Installation tips
QR code
Some areas of installation now have a QR code referenced against them. Scan the QR code using your smart
device to access a short animation/video giving an overview of the assembly of that particular stage of
installation.
saw* with
fine tooth TCT blade
(Circular & Track)
Biscuit Router
Cutter
(TLS0089)
Router Straight Cutters
(12.7mm & 6mm)
(TLS0651 - Drainer Grooves
TLS0642 - 2 flute TCT straight Cut
TLS0612 - 2 flute 6mm - Zip bolts)
Biscuits
(No.20) Adhesive
Inserts
Screws &
Nuts
Adhesive Wipes
Sanding
Pads
180 Grit
240 Grit
Scotchbrite Pad
400 Grit
Slim Zip bolts
(GIR0041)
(alternative
fixing method)
Router*
*IMPORTANT: Suitable extraction must be used when cutting. **Never use Auger type drill bits
Clamps
Suction or G-Clamp
(if using Hot Melt Gun)
Compact laminate fitting pack - WHT7200
Drill** Jigsaw &
Cutting Blades
Worktop Jigs &
Straight Edge
Orbital Sander*
OR
Sand Paper & Block
Silicone
Unsupported sections of
worktop must not exceed 600mm.
Overhangs should not be more
than 300mm.
600mm Max
300mm
Max
Support bars required if over 600mm
No joins in the worktops should be over unsupported spans
Make sure worktops
are cut with sharp
blades.
Always router the
adjoining edge of a worktop
to achieve a clean join.
When drilling compact
laminate, ensure a solid
base is used underneath.

HD027031
Cutting to size
Step 1.
Mask, measure and mark for cutting.
IMPORTANT: Check measurements.
Step 1.
=
=
Use measurements or template supplied
with your product for marking onto the worktop.
Note: The distance between the cut-out and adjacent
worktop joint must be a minimum of 150mm and
40mm minimum from the front of the worktop.
Step 1.
Use a router to apply biscuit cut slots
in the edges of the worktops. These should
be positioned 4mm from the top edge
and evenly spaced.
4mm
20mm
A butt joint or masons mitre joint can be used to join the worktops
For a masons mitre joint we recommend a 10mm inset using a jig - Follow the instructions supplied
with the jig for positioning and cutting information.
A butt joint or masons mitre joint can be used to join the worktops
For a masons mitre joint we recommend a 10mm inset using a jig - Follow the instructions supplied
with the jig for positioning and cutting information.
Step 2.
Prepare all tops (including any cut-outs)
before using adhesive. Dry fit to ensure tops align.
Apply two part adhesive to the biscuit grooves
and along the edge. Fit biscuits in position
and join worktops together.
Quick application of the adhesive is essential
as it will set within 5mins. Follow instructions on adhesive.
Ensure edges
are clean before
securing
Once adhesive has set, remove clamps
and tape and wipe joint.
Butt joint
5mins
Step 3.
Fit worktops together and clamp ensuring
they are aligned. Remove excess adhesive
immediately.
Note: Suction clamps or wooden blocks
(hot melt glued to the top & clamped) can be used.
Step 2.
&
Cut option 1 - cut edge not visible.
(for hob or inset sink).
Drill corners of the template then use
circular saw & track to complete straight cuts.
2/3 pass cut recommended.
Use Jigsaw around corners.
Note: Remove any splintered edges with 180 grit sandpaper
Cut option 2 - cut edge visible.
(for undermount sink).
Use a router & jig to complete the cut.
A 2/3 pass cut recommended.
SEE DRILLING FOR INSERTS SECTION.
Cut with track or circular saw.
We recommend a 3 pass cut.
Finish edge with router (final skim).
Step 2. Step 3.
Cut - Outs
Joining
2/3mm
final skim
Dry fit the worktop once all pieces have been prepared, to ensure no chips or gaps can be seen between joints
Once the cut-out has been made, follow the finishing information for visible cut edges.
Instructions supplied with your hob and sink cut-outs should be followed.
IMPORTANT: Remove any excess adhesive from the joint immediately.
Go across the joint with a ruler to ensure a smooth joint. In a run, any joints should be positioned over end panels.
Masons mitre
joint

Joining (alternative fixing method)
HD027031
Finishing
Use a sander or sanding block to finish the edge of the laminate. Use the sanding pads in order shown below to achieve a final finished edge.
Always wipe the surface edge clean with a damp cloth between each pass to remove any surface contamination.
Secure a drainer groove jig (TLS0669) to the worktop using clamps.
Use a router to machine the grooves.
Secure a standard worktop jig to the worktop and router the ends using
a 30mm guide bush & a 6mm Router cutter (depth of 8mm)
IMPORTANT: Pack the jig 30mm from the front of the worktop using
a spacer rail. Secure using clamps.
Use the ultra slim zip bolts (GIR0041) to secure the worktops together.
We recommend x3 bolts and x2 biscuits are used per join.
Note: Apply buiscit cut slots as per step 1 of joining section.
Secure the worktop together using the torx driver bit to tighten.
Note: Move jig line to 140mm to achieve a 300mm drainer groove.
Longer drainer grooves can be achieved by modifying the jig.
Note: Smooth use of the router will
minimise hand sanding when finishing.
Use a drainer groove sanding block
for finishing the grooves (see finishing).
Worktop
30mm spacer
Note: Drainer groves must be finished. Follow the finishing instructions
below. We recommend 1 coat of linceed oil (GAR0127) in the grooves.
A sanding block can be used to achieve a similar finish
using the same grit sand papers. This process will take longer.
Note: This method will be required for finishing drainer grooves.
NOTE: ALL VISIBLE EDGES
REQUIRE FINISHING
First sand
(circular pad)
Second sand
(circular pad)
Final finish*
*A final edge treatment with
linseed oil (GAR0127) or wax (not supplied) will further
enhance the worktop
Note: ‘Ease’ the edge of the worktop using the sanding pad to remove the sharpness of the edge as required.
Clamp worktops
in position.
Securing worktops
Drainer grooves
180
Grit
240
Grit
Solid laminate worktops should be fixed to base cabinets using a silicone sealant
at the front. Screws are not suitable for securing these surfaces in place due to
their thickness.
Note: Apply the silicone 10mm away from the front edge of the cabinet.
Drilling for inserts
Drill for inserts into the underside of the top, ensuring a minimum of 3mm of
the material remains (hole depth of 9mm).
Hole should be 8mm in diameter for the inserts supplied in the fittings pack.
TAKE CARE NOT TO DRILL THROUGH WORKTOP.
Edge Profiling
The illustrations below show examples of profiles that can be achieved using router cutter TLS0671. Other profiles can be achieved using different cutters.
Note: We recommend a trial piece is used to ensure the style/cut is correct.
Use the inserts for undermount sink installation.
Note: Belfast and ceramic sinks will require additional support.
12mm
3mm
8mm
6mm
Max
400 Grit
Pad
140mm
Top chamfer 45°
Top/bottom 2mm
Underside chamfer
!
Always process drainer grooves after a radius profile has
been applied to the inner edge of the sink/hob cut-out.
!

Compact laminate worktops require only a wipe down with a mild detergent and water. Rinse with warm water
and gently buff the surface.
Note: Using linseed oil is a great form of protection for the worktop edge and drainer grooves and only need be
applied at installation. This oil is to seal the core and minimise staining risk.
Staining
• Compact laminate worktops have a solid, non-porous surface resistant to stains, mould, mildew and bacteria
growth.
• Wipe spills immediately using a damp cloth, especially liquids such as tea, coffee, blackcurrent and red wine.
• Should any staining occur, use a mild detergent and water to remove.
• Stubborn stains can be removed using a mix of domestic bleach and warm water.
Note: Ensure gloves are worn when using domestic cleaners.
• Light core (white/Grey) compact laminate drainer grooves are prone to showing
strong household stains.
- Linseed oil should be applied after installation (1 coat) to seal the core.
- Products such as tea, coffee and red wine should be wiped away immediately.
- Should staining occur in the grooves, follow cleaning advice above.
IMPORTANT: Acidic or abrasive cleaners MUST NOT be used.
Avoid excessive scrubbing.
• If staining occurs in the drainer grooves, use a mild detergent (non-abrasive cream cleaner) and water to
remove. For more stubborn marks, a 400 grit scotchbrite pad can be used. Standing water should be wiped off
within 6 hours from drainer grooves to prevent water marks.
Scuffs and scratches
• Darker colours are more susceptible to excessive marking and general wear and tear than lighter colours.
• Cutting should never be done directly onto the worktop surface.
Resistant to heat
• Never place hot items directly onto the worktop. We recommend the use of trivets or heat pads.
HD027031
Compact Laminate Care & Maintenance
!
!
Please leave this information with the end consumer to ensure
the worktop is cared for correctly
/