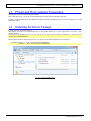
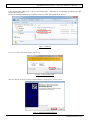
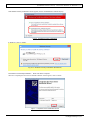
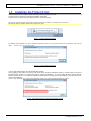
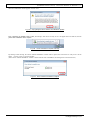
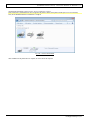
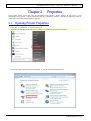
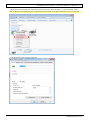
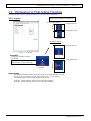
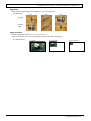
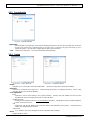
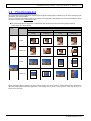
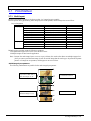
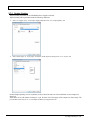
DNP DP-DS80D is a digital photo printer that offers high-quality photo printing with various features to enhance your printing experience. With its compact and stylish design, it seamlessly integrates into any home or office space. The DP-DS80D utilizes advanced printing technology to deliver stunning prints with vibrant colors and sharp details. It supports various paper sizes, including postcards, square prints, and panoramic formats, providing you with the flexibility to print your photos in different dimensions.
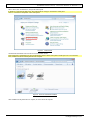
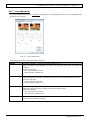
DNP DP-DS80D is a digital photo printer that offers high-quality photo printing with various features to enhance your printing experience. With its compact and stylish design, it seamlessly integrates into any home or office space. The DP-DS80D utilizes advanced printing technology to deliver stunning prints with vibrant colors and sharp details. It supports various paper sizes, including postcards, square prints, and panoramic formats, providing you with the flexibility to print your photos in different dimensions.


-
 1
1
-
 2
2
-
 3
3
-
 4
4
-
 5
5
-
 6
6
-
 7
7
-
 8
8
-
 9
9
-
 10
10
-
 11
11
-
 12
12
-
 13
13
-
 14
14
-
 15
15
-
 16
16
-
 17
17
-
 18
18
-
 19
19
-
 20
20
-
 21
21
-
 22
22
-
 23
23
-
 24
24
-
 25
25
-
 26
26
-
 27
27
-
 28
28
-
 29
29
-
 30
30
-
 31
31
-
 32
32
-
 33
33
-
 34
34
-
 35
35
-
 36
36
-
 37
37
-
 38
38
-
 39
39
-
 40
40
-
 41
41
-
 42
42
-
 43
43


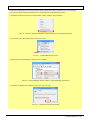
DNP DP-DS80D is a digital photo printer that offers high-quality photo printing with various features to enhance your printing experience. With its compact and stylish design, it seamlessly integrates into any home or office space. The DP-DS80D utilizes advanced printing technology to deliver stunning prints with vibrant colors and sharp details. It supports various paper sizes, including postcards, square prints, and panoramic formats, providing you with the flexibility to print your photos in different dimensions.
Ask a question and I''ll find the answer in the document
Finding information in a document is now easier with AI
Related papers
Other documents
-
Kodak 305 Driver Manual
-
Citizen OP900II User manual
-
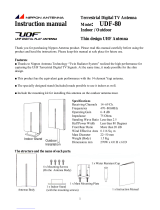 Nippon Antenna UDF-80 User manual
-
Kramer Electronics VP-8X4 User manual
-
Mitsubishi CP9800DW User manual
-
-
Mitsubishi CP9810DW Owner's manual
-
 HiTi Digital P510L User manual
-
Vestil EASY-A-xxxx Owner's manual
-
Pentair 476224 User manual

