Page is loading ...


1

2
�

3
Subject to technical modifications without notice.
CONNECTIONS & INSTALLATION
M-CLASS
Power box
The MC-MP provides for versatile
installation: brackets allow wall
installation and special mounting
foot floor installation. In both case a
special plastic guide plate facilitates
installation.
Standard floor installation
procedure
1- Select most appropriate location
on floor for spa pack and firmly
attach guide plate to wooden
base with 3 standard screws.
2- Slide back side of the unit's
mounting foot into guide plate.
It should slide into place easily.
3- Now firmly attach unit to wooden
base by using two screws to fix
the front side of the foot.

4

5
Subject to technical modifications without notice.
CONNECTIONS & INSTALLATION
M-CLASS
MC-MP Heater design
The standard heater position is front-
bottom-horizontal, but MC-MP can
also be configured for horizontal-rear,
side-vertical, or remote installation of
heater, however this must be
specified when ordering.
The heater cover plate design makes
installation easy and also supports
pressure switch latch cover and
hi-limit probe.
The various heater positions you may
come across are shown here.
Standard front installation
Rear installation
Remote installation of heater
Vertical heater installation

6
Installing K-8* with brackets
The keypad should be installed di-
rectly on the spa (or very close to it)
within easy reach of the user.
1- Select the appropriate location for
the keypad.
2-
Cut out a 2 5/8" x 6 3/8"
(67 mm x 162 mm) rectangle
directly on the edge of the spa.
This will allow the keypad box
to slide into position.
Installation of the K-8 main
keypad is facilitated by 2 self-
positioning lock brackets.
3- Rotate the brackets toward the
inside of the keypad.
4-
Place the keypad in position,
allowing the connecting cable
attached to keypad bottom to
hang below opening.
5- a) If you want to secure the
keypad from above the spa
edge (if the overlay has not
been placed), use a Phillips
screwdriver to tighten the
keypad in position and to
properly seal the unit (avoid
overtightening).
The brackets will follow the
self-guiding edges to lock
themselves into position.
b) If you want to attach keypad
from below spa edge, use a flat
screwdriver to turn bracket screws
counterclockwise so brackets follow
self-guiding edges to lock themselves
into position.
*Note: Follow similar procedure for
optional keypads.
6
3/8
"
162 mm
2
5/8
"
67
m
m
Subject to technical modifications without notice.
Bracket screws
Transfer
buttons
Button
holders
Board
Molded bed
with gel
Gasket or
adhesive tape
Top plate with
display window
Self-locking
brackets
Overlay
3
1/4
"
83 mm
1 9/64"
29 mm
2 5/8"
67 mm
7"
178 mm
MAIN TOP SIDE KEYPAD (K-8) INSTALLATION
M-CLASS

7
Installing K-8* with adhesive
The keypad should be installed
directly on the spa (or very close
to it) within easy reach of the user.
Procedure
1- Select the most appropriate
location for the keypad.
2- Cut out a 2 5/8" x 6 3/8"
(67 mm x162 mm) rectangle
directly on the edge of the spa.
This allows keypad box to slide
easily into position.
3- Clean surface.
4- Peel off the double-sided
tape protective layer.
5- Place the keypad in position,
allowing the connecting cable
attached to keypad bottom to
hang below opening.
6- Secure keypad in place by
pressing firmly on it.
*Note: Follow similar procedure for
optional keypads.
6
3/8
"
162 mm
2
5
/8
"
67
m
m
Subject to technical modifications without notice.
MAIN TOP SIDE KEYPAD (K-8) INSTALLATION
M-CLASS

8
Subject to technical modifications without notice.
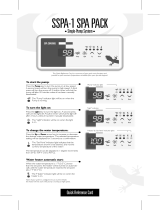
Pump 1 key
Pump
1 key is used to turn Pump 1 on
in the sequence Low, High, then Off.
A built-in timer shuts pump off
20 minutes after turned on, unless
turned off manually first.
The "Pump 1" indicator will light up on
the LCD display when Pump 1 is on and
will flash if in low speed.
Note: Pump can be configured as a
single-speed pump with low level
programming.
Pump 2 key
Pump 2 key is used to turn Pump 2 on
in the sequence Low, High, then Off.
A built-in timer shuts pump off 20 mi-
nutes after turned on, unless turned off
manually first.
The "Pump 2" indicator will light up on
LCD display when Pump 2 is on and
will flash if in low speed.
If a third pump is installed, the indicator
will flash when Pump 2 is in low and
will be a solid light when either Pump 2
is in high speed or Pump 3 is on.
Note: Pump can be configured as a
single-speed pump with low level
programming.
Pump 3 key (only with K-10 keypad
)
Pump 3 key is used to turn Pump 3 on
or off.
A built-in timer shuts pump off 20 mi-
nutes after turned on, unless turned off
manually first.
An indicator will light up above the
Pump 2/3 icon on the display when
pump is on.
Blower key
The Blower key is used to turn blower
on or off and to select blower speeds.
The number of speeds varies depending
on spa model.
One press turns blower on at high
speed. Pressing a second time changes
to low, and a third time off.
A built-in timer shuts blower off
20 minutes after turned on, unless
turned off manually first.
The "Blower" indicator will appear on
the LCD display when at high speed
and will flash when in low
.
Up & Down arrow keys
Up & Down arrow keys are used to set
water temperature.
Pressing and holding keys will increase
or decrease the current temperature
setting.
The new and desired temperature
setting (Set Point value) will remain for
5 seconds on the LCD display as a
confirmation of the new value you have
selected.
The "Set Point" icon on the display
indicates that the temperature shown is
the desired temperature, NOT the
actual water temperature.
Water temperature can be adjusted in
one-degree increments from 59 to
104°F (15 to 40°C).
Economy key (only with K-10 keypad)
Economy key is used to turn the
Economy mode on or off.
Economy mode maintains temperatur
e
20 degrees below set point.
In Economy mode the display will
toggle between the actual water
temperature and "Econo".
On/Off key
The On/Off key is used to activate and
desactivate all spa pack functions.
Following are instructions for main K-8
keypad and K-8.10 keypad (required
with Pump 3 and Economy options).
Also, note that K-4 keypad is manda-
tory when Real Time Clock option is
selected, and functionality of keys is
different.
Light key
The Light key is used to turn the light
on or off and to select light intensity.
Intensity levels may vary depending on
spa model.
Pressing Light key once turns light on
at high intensity. Subsequent presses
will change the intensity until the light is
finally turned off.
A built-in timer will shut the light off
2 hours after turned on, unless turned
off manually first.
The "Light" indicator will appear on
LCD display while light is on.
Note: Functionality different if dual-light
option is selected.
Fiber Box Option: if spa is equipped
with an optional fiber box, pressing
Light key once turns fiber box (motor
and light) on. Pressing a second time
turns fiber box motor off, but leaves
light on. A third time turns both motor
and light off. Thus, user can turn light
on, and then stop fiber box at desired
color output.
A built-in timer shuts fiber box off
2 hours after turned on, unless turned
off manually first. The "Light" indicator
will appear on LCD display when fiber
box light is on. It will flash when fiber
box motor and light are on at same
time.
Keys
Display
Indicators
INSTRUCTIONS
M-CLASS

9
Filter cycles
The system automatically performs
from 1 to 4 filter cycles daily (see filter
cycle frequency). During a filter cycle:
• Pump 2, Pump 3 and blower run for
1 minute to purge piping, then,
• Pump 1 runs at low speed for the
duration of the cycle and ozonator
is turned on.
The "Filter Cycle" indicator will be
displayed while filter cycle is on.
To set filter cycle duration:
• Press Filter key.
• Display will show "Fdxx", with "xx"
representing currently set filter cycle
duration in hours (0 to 12).
• Press Up or Down key to change
the setting:
0 = no filter cycle
12 = continuous filter cycle
• When desired setting is displayed,
press Filter key to confirm setting.
Filter cycle frequency:
• Press Filter key again to set the
number of filter cycles per day.
• Display will show "FFxx", with "xx"
representing current set filter cycle
frequency.
• Press Up or Down key to adjust the
setting from 1 to 4.
An irregularly flashing "Filter Cycle"
indicator means that the system has
stopped filtering after 3 hours because
water temperature exceeds Set Point
by more than
2°F (1°C). This prevents
excessive water temperature build-up
due to overly long filter cycles during
hot weather. If the temperature cools
down to 1°F (0.5°C) above Set Point
before the scheduled end of cycle, the
filter cycle will be resumed for the re-
mainder of the programmed duration.
Keys
Display
Subject to technical modifications without notice.
"Filter Cycle" indicator
FILTER CYCLES & OTHER FEATURES
M-CLASS
Inverted display
A simple key press sequence inverts the
display so that it is readable from inside
or outside the spa.
To invert the display
• Press and hold Filter key for 5 sec. to
toggle between normal and inverted
mode.
Note: At power-up display defaults to
non-inverted mode.
Keypad lockout
• Your spa keypad can be locked. This
feature is especially useful if young
children have access to the keypad.
There are two keypad lock modes:
- Full lock: locks all keypad functions;
- Partial lock: locks only programming
functions; Pump, Blower and Light
keys remain enabled.
To lock/unlock keypad
Press and hold Pump 1 key for 5 sec.
If key is released after initial 5 seconds,
LocP will appear, indicating keypad is in
partial lock.
If Pump
1 key remains pressed for
another 5 seconds, LocF will appear
indicating keypad is now in full lock.
When keypad is locked, all automatic
system functions run as usual. But, if a
locked key is pressed, the attempted
function is rejected and a "LocP" or
"LocF" message will be displayed for
1 second.
Note: A power-up of the system will also
unlock the keypad.

10
Pressure switch
To prevent a "dry fire" in the heater, a
pressure switch is installed in the pipes.
The unit constantly verifies the status of
the pressure switch.
If the pump used to circulate water
through the heater is off and the
pressure switch is closed, the system
will display 3 flashing dots. This
happens when the pressure switch
adjustment is too low and the weight
of the water is sufficient enough to
close the switch.
If circulation pump is on and the
pressure switch is open, the system
will display 3 flashing dots, and the
heater will not be allowed to run.
This happens if the pressure switch
adjust-ment is too high or if there is a
bad connection between the board
and switch.
Note that a dirty filter limiting water
flow may cause a message to appear
even if the system has been working
well.
When the pump is turned on, there is a
5-second delay before the system starts
to auto-check the status of the switch.
Standby mode
Standby mode (Quiet) allows the spa's
filter to be changed (or any other
non-electrical maintenance). Once the
maintenance is completed, the user
simply exits Standby mode.
To activate Standby mode:
Press On/Off key to turn system down
(i.e. to activate Standby mode) for
30 minutes. The message "Off" will
be displayed. All keys will be disabled,
unless On/Off key is pressed before the
expiration of the 30-minute delay to
re
activate the system.
Note: If the system is turned down
using On/Off key while the heater is on,
Pump 1 will continue running for an
additional 3 minutes.
Temperature probe
If the system detects a problem with
the water temperature probe, the
wrong temperature will be displayed.
Check the connection to the board.
Backlight display
The keypad is equipped with a backlite
that illuminates the display and keys in
the dark. The backlight comes on
whenever any key is pressed and
remains on until 30 minutes after the
last spa system (pumps, blower, etc.)
has been turned off.
Power-up detection
If a power failure occurs, the system will
be able to retain the time of day for 48
hours. If the power failure lasts longer,
the clock setting will be lost and must
be reprogrammed. The display will flash
when power is restored. Press any key
to stop flashing.
However, with Real Time Clock option,
the current time is retained even after
power failure (K-4 keypad mandatory
with RTC).
Temperature unit display
Temperature can be displayed in either
Fahrenheit or Celsius.
Simply press and hold Light key for
5 seconds to toggle between °F and °C.
Subject to technical modifications without notice.
OTHER FEATURES
M-CLASS
High limit temperature
The High Limit temperature sensor will
cause the system to shut down the
heater because the water temperature
AT THE HEATER has reached 119°F
(48°C).
3 flashing dots will appear on the
display and a small LED light up on the
board.
Overtemp mode protection
If water temperature IN THE SPA
reaches 112°F (44°C), the display will
start flashing and all pumps and
accessories will be shut down until the
water cools down to109°F (43°C).
During Overtemp Mode only Smart
Winter Mode and keys that don't start
accessories will be functional.
Note: In the case of both Overtemp
and High limit protection , DO NOT
ENTER the water. Allow water to cool
down to109
°F (43°C), then power
down to reset the error.
Automatic water heater start
When water temperature is
1°F (0.5°C)
lower than the Set Point, the heater
automatically comes on until the
temperature reaches Set Point plus 1°F
(0.5°C).
The "Heater" indicator will appear on
the display when the heater is on. It
will flash when more heat has been
requested, but the heater is not
functioning.
Smart Winter Mode
MC-MP packs are equipped with a
special sensor that measures the air
temperature in the spa's plumbing
area. If air cold enough to freeze water
in the pipes is detected, the system
automatically activates Smart Winter
Mode for 24 hours. In this mode, if a
pump or blower is not turned on within
2 hours, the system automatically turns
it on for one minute to prevent
freezing.
When pump is running, "Filter Cycle"
indicator will flash on the display
.

11
Jumper selection
It is possible to change parameters of
the MC-MP pack by configuring
specific jumpers located on the board.
To access jumpers, first unscrew the
5 screws holding on the plastic power
box cover (requires a flat screwdriver).
Jumpers are located in the upper right
of the board. To change a setting,
simply pull jumper cover off pins and
move it to the new desired position.
Jumper 1
Current limiting option
Jumper 1 is used to limit the current
drawn when more than 1 pump (or a
pump and blower) are activated at the
same time.
Position 1 =
HC (High Current) mode
Heater will be turned off if more than
1 pump is on at high speed.
Position 2 =
LC (Low Current) mode
The heater may not be turned on if any
pump (1, 2 or 3) is on at high speed.
The "Heater" indicator will flash to
indicate a request for heat, but the
heater will not be allowed to start.
Jumper
2
Touchpad
Keypad configuration:
Position 1 =
10-key configuration.
Position 2 =
8-key configuration.
Low level programming
Note: Restricted to Gecko factory
or authorized installer.
Certain system operating parameters
can be configured from the keypad.
This is normally done by Gecko or the
spa installer, but may be done any time.
To access low level programming, press
and hold On/Off key for 20 seconds,
after which the first parameter code
should appear on the display.
Use Up/Dow
n keys to modify parameter
values and On/Off key to change from
one parameter to the next. You must
go through all parameters to exit this
mode. If you do not wish to change a
parameter, simply press On/Off key to
advance to the next parameter.
Location of jumpers
Subject to technical modifications without notice.
Position 1 Position 2
List of parameter configurations
1- Pump 1
Display: P1 x
Value of x: 1 = single-speed
2 = two-speed
2- Pump 2
Display: P2 x
Value of x: 0 = not installed
1 = single-speed
2 = two-speed
3- Pump 3
Display: P3 x
Value of x: 0 = not installed
1 = single-speed
4- Blower
Display: bL x
Value of x: 0 = not installed
1 = single-speed
2 = two-speed
3 = three-speed
5-
Light
Display: LI x
Value of x: 0 = not installed
1 = 12 VAC
(single-intensity)
2 = 12 VAC
(triple-intensity)
3 = 120 VAC
(single-intensity on
on auxiliary 1 relay)
4 = Internal fiber box
control mode
(2-aux. relay)
6- Ozone
Display: O3 x
Value of x: 0 = not installed
1 = on only in Filter cycle
2 = always on
3 = on with circ. pump
7- Circulation pump
Display: CP x
Value of x: 0 = not installed
1 = regulated
(with spa temperature)
2 = always on
3 = on, except if 2 deg.
over set point
8- Filter cycle
Display: FC x
Value of x: 0 = filter cycle with
Pump 1
2 = filter cycle with
circ. pump.
1 = Filter cycle replaced
by purge cycle
9- Pressure switch status
Display: PS x
Value of x: 0 = with Pump 1
1 = with circ. pump
(CP cannot be at O)
2 = with circ. pump or
Pump 1 low.
JUMPERS AND LOW LEVEL PROGRAMMING
M-CLASS

12
Subject to technical modifications without notice.
Procedure
To properly install the K-3 second spa
side keypad, drill two 1" (25 mm)
diameter holes at a distance of 2 5/8"
(67 mm) from center to center
.
Cut out the material remaining
between the holes to create the space
necessary to slide the keypad into
position.
Insert the keypad and use the holder
plate and the wing nuts to secure the
keypad in place.
Description
For large spas, a second spa side
keypad may be installed on the spa side
offering access to the basic functions
only
.
The second spa side control performs
the following functions:
• Controls Pump
1
• Controls Pump 2
• Controls blower
• Controls light
4 1/2"
114 mm
2"
51 mm
1" dia
25 mm
1" dia
25 mm
2
5/8
"
67 mm
Spa Side
1" (25 mm) dia. drill
Wing nuts
Holder plate
Keypad
K-3 SECOND SPA SIDE KEYPAD
M-CLASS

13
Subject to technical modifications without notice.
Instructions
The optional K-3 second spa side
keypad shares the same four basic
operational functions (Pumps 1 & 2,
blower and light) as the main keypad.
Cable connections
Plug the opposite end of the cable into
the optional side panel port of the
power box, making sure to follow the
illustrated cable route.
Pump 2 key Light key
Pump 1 key Blower key
MC-MP
Keypad cable
Optional
side panel
control
connector
K-3 SECOND SPA SIDE KEYPAD
M-CLASS

Gecko Alliance
450 des Canetons, Quebec City (QC) G2E 5W6
Canada, 1.800.78.GECKO
9225 Stellar Court, Corona, CA 92883 US
A
951.667.200
0
For more information about our spa packs
and all our other products and services,
visit our web site at
www.geckoalliance.com
Clearly Advanced Spa Systems!
™
Rev. 11/07
/